Finding the right haircut can be a transformative experience, especially when it comes to flattering your face shape. For men with round faces, the goal is to create the illusion of length and definition, adding angles and structure that balance the soft curves of the face. The right haircut can elongate the face, highlight your best features, and give you a more sculpted, defined appearance. The key is to choose styles that add height at the top and keep the sides shorter.
The best haircuts for round faces men are those that create vertical lines and avoid adding width to the sides. Styles with volume on top, such as quiffs and pompadours, are particularly effective at creating the illusion of a longer face. Tapered and faded sides also help to slim the face, creating a clean, sharp silhouette. From classic cuts to modern trends, there is a wide range of styles that work beautifully for round faces.
In this guide, we will explore a variety of haircuts that are specifically designed to flatter and define round faces for men. We will cover everything from short, low-maintenance styles to more polished, statement-making looks. We will also provide styling tips, product recommendations, and advice on how to communicate your desired look to your barber. Get ready to discover a haircut that makes you look and feel your best.
13 Best Haircuts for Round Faces Men
Here are thirteen haircuts that are designed to flatter and define round faces.
1. Classic Pompadour
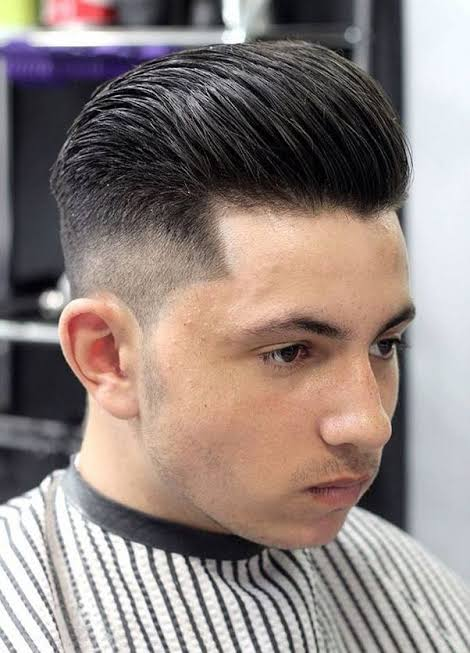
The pompadour is a classic, sophisticated style that adds significant height at the front. The volume on top elongates the face, creating a more balanced, defined silhouette. The sides are kept shorter to avoid adding width. This style is perfect for formal occasions or men who want a polished look.
2. Modern Quiff
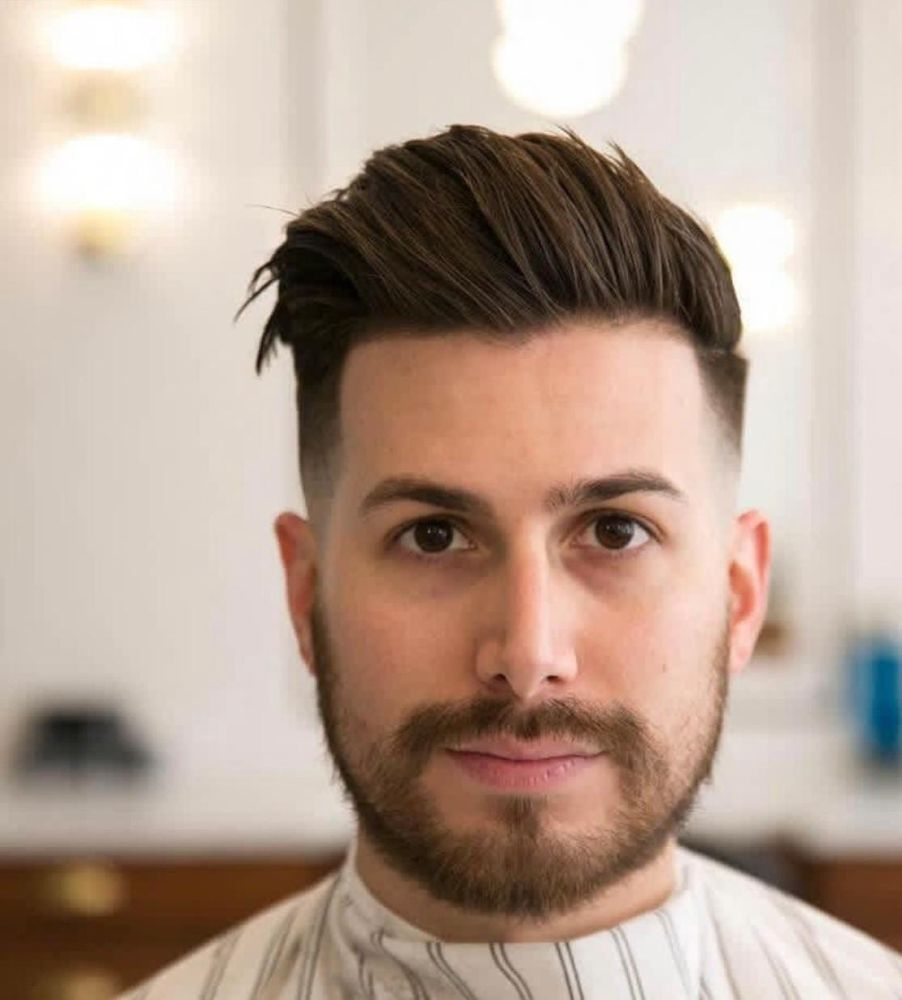
The modern quiff is similar to the pompadour but with a more relaxed, textured feel. The hair is styled upward and slightly back, adding volume and height at the front. The sides are tapered for a clean finish. This style is versatile, stylish, and flattering for round faces.
3. Textured Crop
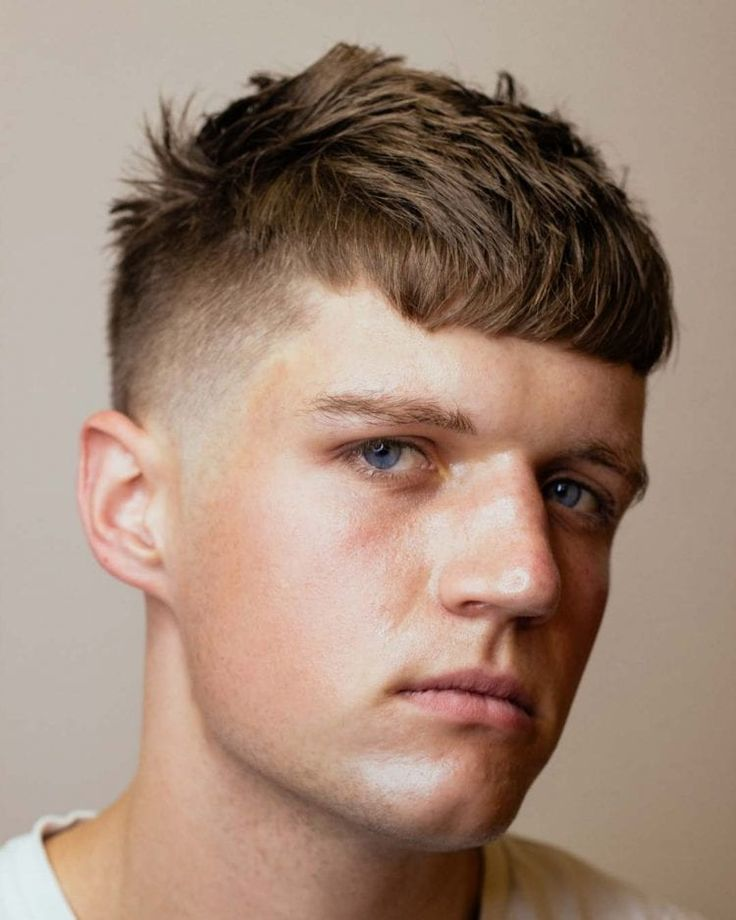
A textured crop features short, textured hair on top with a fringe that falls forward. The texture adds height and dimension, while the short sides keep the look clean. This style is low-maintenance and perfect for men who want a modern, casual look.
4. Side Part with Volume
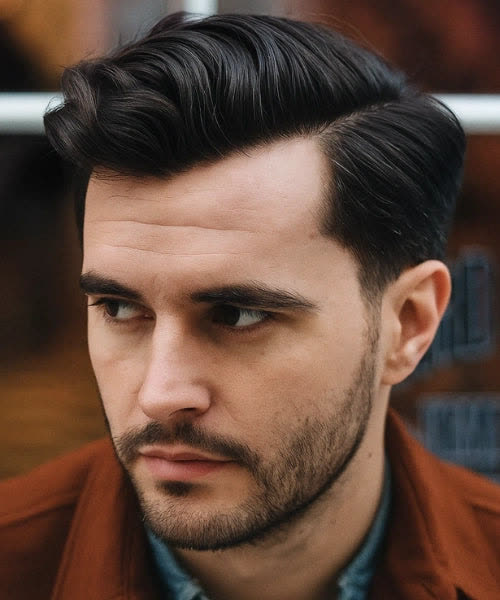
A side part with volume on top is a classic, timeless style. The hair is parted to one side and styled with height at the front. The volume elongates the face, while the side part adds structure and definition. This style is professional, elegant, and versatile.
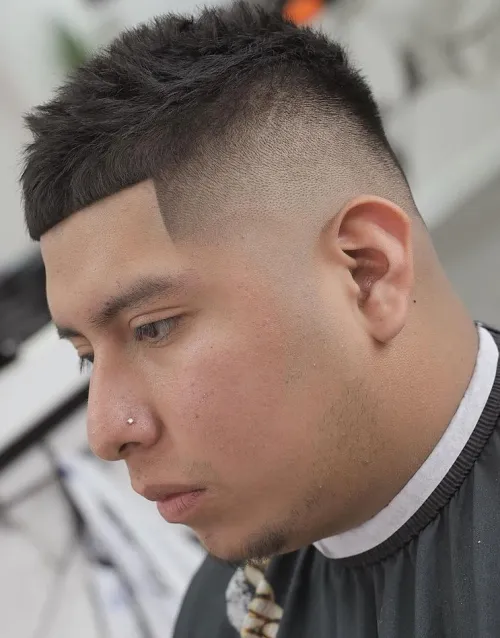
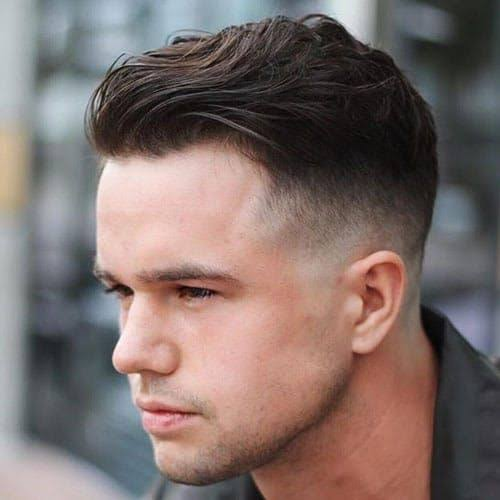
5. Fade with Textured Top

A fade with a textured top is a modern, stylish choice. The sides are faded short, while the top is left longer and textured. The contrast between the short sides and the voluminous top creates a slimming effect, making the face appear longer and more defined.
6.
A comb over fade features longer hair on top that is combed to one side, with faded sides. The height and asymmetry of the comb over add definition to the face, while the fade keeps the sides clean and slim. This style is polished, modern, and very flattering.
7. High Top Fade
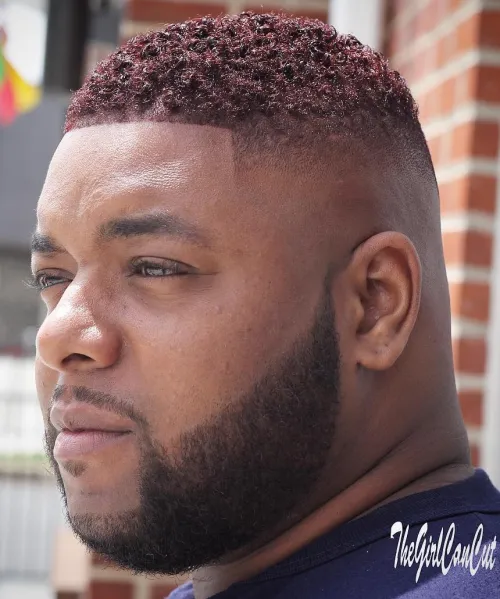
A high top fade features significant volume on top, with the sides faded high up the head. The height on top creates the illusion of a longer face, while the faded sides add sharpness and definition. This style is bold, confident, and perfect for men who want to make a statement.
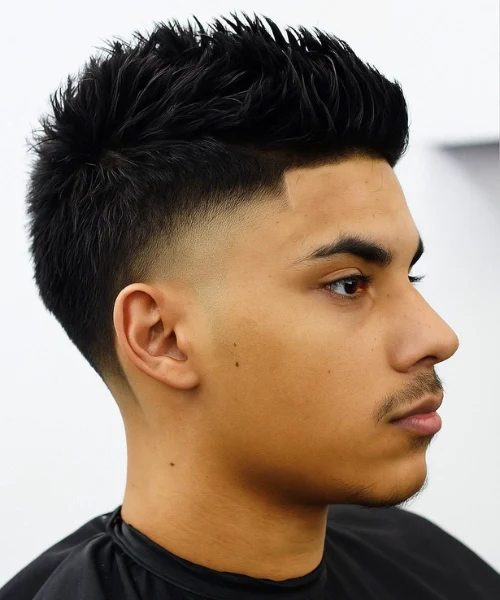
8. Spiky Haircut
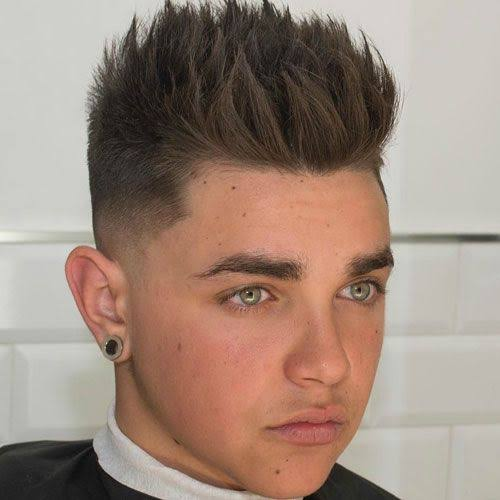
A spiky haircut adds height and texture at the top, creating a vertical line that elongates the face. The spikes can be styled up or slightly to the side. The sides are kept short to avoid adding width. This style is edgy, youthful, and fun.
9. Ivy League Cut
The Ivy League cut is a classic, preppy style that features slightly longer hair on top that can be styled with a side part or brushed back. The top is kept neat and polished, while the sides are tapered. This style is professional, elegant, and flattering for round faces.
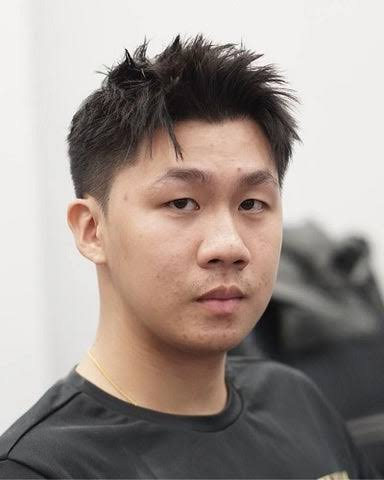
10. Messy Textured Cut
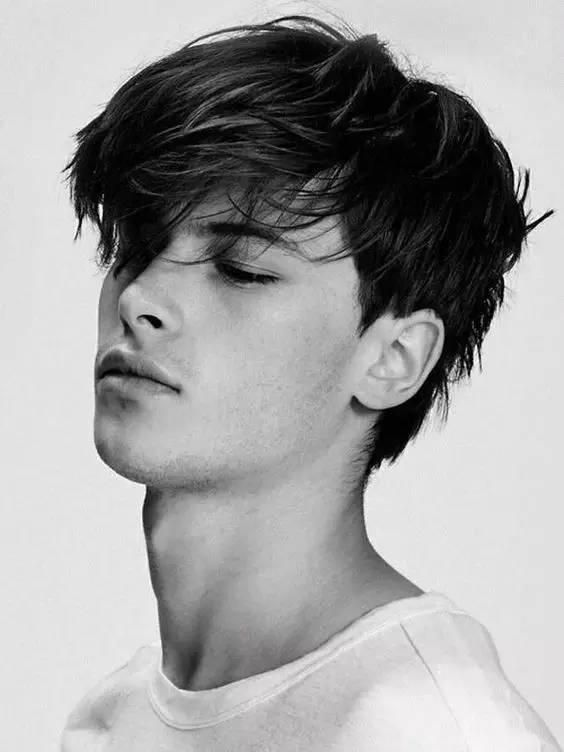
A messy textured cut adds volume and height at the top, creating a relaxed, effortless look. The texture and height elongate the face, while the short sides keep the silhouette clean. This style is perfect for men who want a casual, low-maintenance look.
11. French Crop
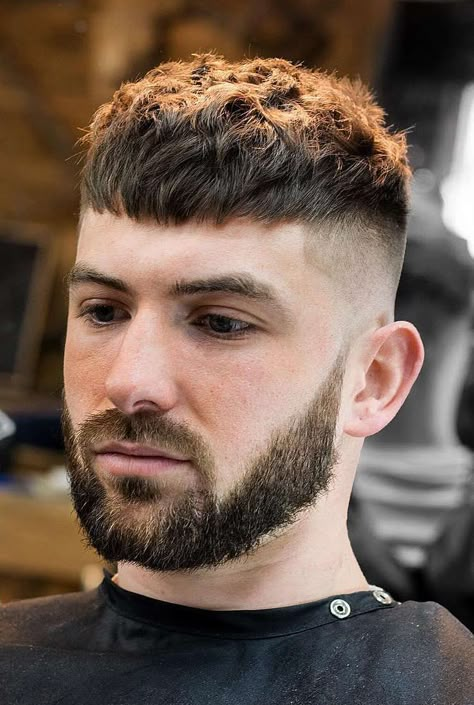
The French crop features short, textured hair on top with a straight fringe. The fringe adds a horizontal line that can soften the face, while the short sides keep the look clean. This style is low-maintenance, stylish, and versatile.
12. Slicked Back Undercut
A slicked back undercut features longer hair on top that is slicked back, with short, faded sides. The height and volume at the top elongate the face, while the slicked-back style adds a polished, sophisticated feel. This style is elegant and modern.
13. Faux Hawk
A faux hawk is a subtle version of a Mohawk, with volume concentrated at the center of the head. The height at the top creates a vertical line, while the short sides keep the look clean. This style is edgy, modern, and perfect for men who want a bold, unique look.
Section: Styling Tips for Round Faces
When styling a haircut for a round face, the goal is to create height and avoid adding width. Use a volumizing product, such as a mousse or thickening spray, to add lift at the roots. Blow-dry your hair upward to create height at the top. Use a styling product, such as a pomade or wax, to define the style and hold it in place.
Keep the sides of your hair short to avoid adding width to your face. A fade or taper is an excellent choice. Avoid styles that add volume to the sides or create a round silhouette. Regular trims are essential to maintain the shape and keep the sides from growing out and adding unnecessary width.
Frequently Asked Questions About Haircuts for Round Faces
What is the best haircut for a round face?
The best haircuts for a round face are those that add height at the top and keep the sides short. Pompadours, quiffs, and fades with textured tops are all excellent choices.
Should men with round faces have long hair?
Men with round faces can have long hair, but it is important to keep it styled with volume at the top and avoid adding width to the sides. Long hair that is all one length can make a round face appear rounder.
Are fades good for round faces?
Yes, fades are excellent for round faces. The short sides create a slimming effect, while the longer hair on top adds height and definition.
How do I make my face look less round with a haircut?
Choose a haircut with volume on top and short sides. This creates vertical lines that elongate the face and make it appear more oval.
What should I tell my barber for a round face?
Tell your barber that you want a haircut with height on top and short sides. Ask for a fade or taper to keep the sides clean and slim.
Conclusion
Choosing the right haircut for a round face is about creating balance, definition, and the illusion of length. The styles outlined in this guide offer a range of options that flatter and define, from classic pompadours to modern fades and textured crops. By adding height at the top and keeping the sides short, these haircuts create a more sculpted, balanced silhouette. Work with a skilled barber, use the right products, and enjoy the confidence that comes with a haircut that makes you look and feel your best.