There’s a beautiful freedom that comes with being a woman over 50. You know what you like, what feels good on your body, and, most importantly, you’ve earned the right to dress for yourself. If you’re drawn to the free-spirited, artistic vibe of bohemian style, there’s no better time to embrace it. Boho is not just for the young—it’s for the free-spirited, and its emphasis on flow, comfort, and natural textures makes it a perfect match for this vibrant stage of life .
The key to mastering boho after 50 is all about intention. It’s about choosing relaxed silhouettes that skim the body, investing in breathable, quality fabrics, and using accessories to tell your unique story . Forget rigid fashion rules; boho style is about creating a look that feels authentic, confident, and wonderfully you .
Ready to infuse your wardrobe with some wanderlust? Here are 15 chic and wearable boho outfit ideas to inspire you.
1. The Everyday Artist: Embroidered Blouse + Wide-Leg Linen Pants
This is your go-to for a day of exploring a new town or meeting friends for lunch. A flowy, embroidered peasant blouse adds a hand-crafted feel and beautiful texture. Pair it with wide-leg linen pants in a neutral hue like sand, cream, or olive. The breathable linen keeps you cool, while the wide leg creates a lovely, elongated silhouette. Tuck in the blouse just slightly at the front for a relaxed, put-together finish .
2. The Urban Explorer: Relaxed Midi Dress + Kimono
Take your favorite solid-colored, relaxed-fit midi dress to the next level by layering a long, patterned kimono over it. The open-front layer adds instant movement, visual interest, and a pop of bohemian print without adding bulk. Finish the look with flat leather sandals or ankle boots and a stack of wooden bangles .
3. Modern Romantic: Soft Knit Top + Pleated Midi Skirt
For a look that’s both comfortable and elegant, pair a soft, drapey knit top with a flowy, pleated midi skirt. The skirt’s movement adds a feminine touch, while the soft knit top provides cozy sophistication. Choose a skirt in a rich jewel tone or a subtle metallic for an elevated feel. A simple belt can help define your waist if desired .
4. The Tailored Nomad: Crisp White Shirt + Printed Maxi Skirt
A classic, well-fitting white button-down shirt is a wardrobe powerhouse. Give it a boho twist by pairing it with a long, printed maxi skirt. The crispness of the shirt balances the skirt’s free-spirited pattern, creating a look that’s both polished and relaxed. Leave the shirt untucked or tie it loosely at the waist for a more casual vibe .
5. Effortless Cool: Printed Tunic + Cropped Pants
A relaxed tunic in a bold, earthy print is a boho staple. Its loose, flowing shape offers comfort and coverage, while the print adds personality. Pair it with solid-colored cropped pants or slim-fit capris to balance the volume on top. This creates a clean, modern proportion that’s incredibly easy to wear .
6. The Wanderer: Long Boho Dress + Textured Layer
A long, flowy boho dress in a soft, breathable fabric is a must-have. It’s an effortless one-piece outfit that feels like a dream. For days when you want a little more dimension, layer a crochet cardigan, a lightweight duster, or even a simple denim jacket over it. This adds texture and makes the outfit feel complete .
7. Weekend Casual: Batwing Top + Skinny Capris
Balance is key in boho style. A top with dramatic batwing or bell sleeves adds a fun, stylish element. Keep the rest of the outfit grounded by pairing it with skinny or straight-leg capris. This combination allows you to enjoy a trendy silhouette while maintaining a balanced and flattering shape .
8. The Luxe Layer: Embroidered Vest + Simple Base
An embroidered or suede vest is a fantastic layering piece that instantly adds bohemian flair. Throw it over a simple white tee and your favorite jeans, or layer it on top of a solid-colored sundress. It adds texture, visual interest, and a touch of southwestern charm without any effort .
Channel a relaxed, sophisticated vibe with this outfit. Choose a slightly oversized linen button-up shirt (sleeves casually rolled) and pair it with comfortable, straight-leg or slightly tapered trousers. This look is polished enough for a casual business meeting or a nice dinner, yet incredibly comfortable. Loafers or stylish sneakers complete the chic, modern feel .
10. The Beach Breeze: Off-Shoulder Tunic + Cropped Pants
An off-the-shoulder tunic is a beautiful way to add a hint of femininity. It feels fresh and summery without showing too much. Pair it with cropped pants or white jeans for a light, airy look that’s perfect for a seaside lunch or a backyard gathering .
The wrap dress is universally flattering, and in a soft, neutral tone like taupe, dusty rose, or olive, it embodies boho elegance. It defines the waist beautifully and creates a lovely V-neckline. Wear it alone with sandals for a simple, stunning look, or layer necklaces for added detail .
Mix a bit of edge with your flow. A worn-in, patchwork denim jacket adds a layer of personality and nostalgia to any outfit. Throw it over a floral maxi dress or a simple tunic and skirt combination. It grounds the softer pieces and adds a cool, collected feel to your look .
13. The Creative Spirit: Tie-Front Blouse + Palazzo Pants
A tie-front blouse is playful and allows for a custom fit. When paired with billowy palazzo pants, you create an outfit that moves beautifully with you. Choose a blouse in a fun print and keep the pants in a solid color to ground the look. This is a fantastic outfit for a gallery opening or a creative workshop .
14. Cozy at Home: Slouchy Knit Sweater + Maxi Skirt
Screenshot
Comfort is queen, especially on cooler days. An oversized, slouchy knit sweater feels wonderfully cozy. Balance its volume by pairing it with a long, flowy maxi skirt. The combination of chunky knit and soft, flowing fabric is texturally rich and effortlessly stylish for a casual day at home or a coffee date .
15. The Statement Piece: Fringe-Hem Dress
If you want to make a subtle statement, a dress with a fringe hem is a perfect choice. The fringe adds movement and a touch of fun without being overwhelming. Keep the rest of the look simple—let the dress shine on its own with minimal accessories and a pair of comfortable wedge sandals or ankle boots .
Final Thoughts: Style on Your Own Terms
Boho style for moms over 50 isn’t about following a strict set of rules; it’s about embracing a feeling of freedom and expressing your authentic self . Start by incorporating one or two of these ideas that resonate with you. Maybe it’s a flowy new top, a layered necklace, or simply the confidence to mix your favorite textures.
The most important accessory you can wear is your confidence. You’ve lived, you’ve loved, and you have a story to tell—let your clothes be a beautiful part of that narrative . Wear what makes you feel radiant, comfortable, and unapologetically you.
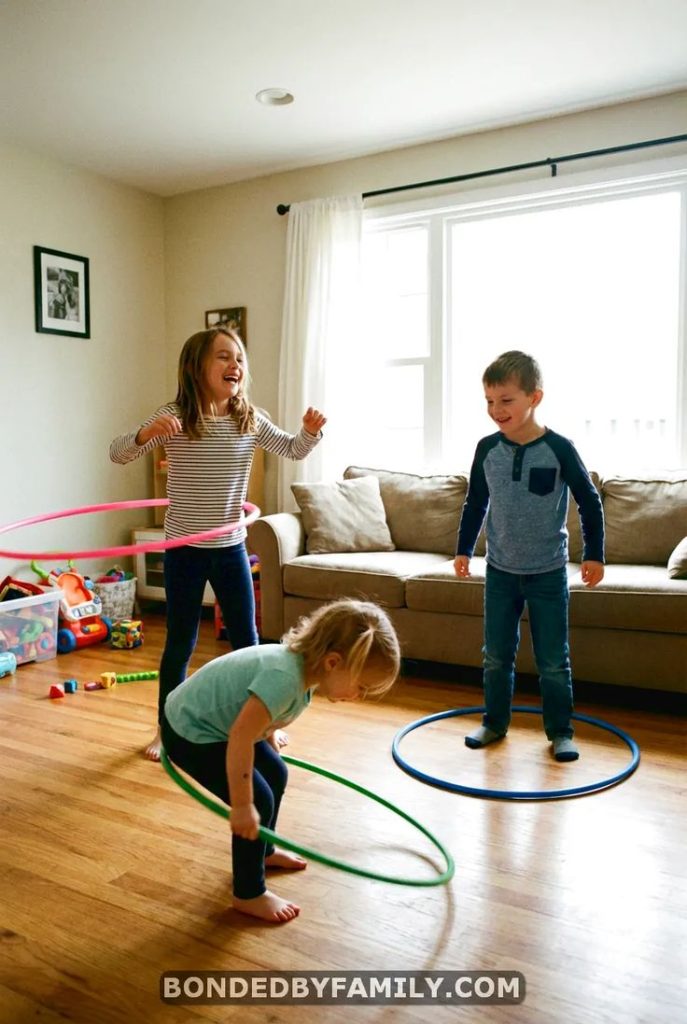
Save your sanity with these high-energy indoor activities that actually tire out active kids—no backyard required.
It’s raining. Again. The windows are streaked with water, the forecast shows no signs of stopping, and your children have officially reached that level of energy that makes furniture start to look like playground equipment.
You need solutions. Not complicated crafts that require specialty supplies. Not quiet activities that work for five minutes. You need movement—the kind that actually tires little bodies and resets everyone’s mood.
Welcome to your rainy day rescue guide. These indoor energy-burning activities for kids are specifically designed for times when outdoor play isn’t possible. They require minimal setup, use items you already have, and most importantly, they work.
Why Indoor Movement Matters
Before we dive into the activities, let’s acknowledge something important: children need to move. Their bodies are designed for it, their brains crave it, and their emotional regulation depends on it.
When kids can’t burn energy outdoors, that energy doesn’t disappear—it builds. It shows up as bouncing off walls, sibling conflict, or that particular brand of chaos that makes parents question every life choice that led to this moment.
The solution isn’t to suppress the energy. It’s to channel it.
These activities are designed to do exactly that: provide safe, structured ways for kids to move vigorously indoors, reset their nervous systems, and emerge ready for calm activities afterward.
Before You Begin: Setting Up for Success
A few simple strategies make indoor active play work for everyone:
Clear the space. Push furniture against walls, move breakables out of reach, and create a designated “active zone.” Knowing the boundaries helps kids feel secure in their movement.
Dress for movement. Remove shoes if that works for your space. Layers help since active play generates heat quickly.
Set clear rules. Before starting, establish non-negotiables: no throwing at faces, no jumping off furniture, stop when someone says “freeze.” Clear expectations prevent most conflicts.
Join in when you can. Your participation signals that movement is valued. Even five minutes of active play alongside your child builds connection and models healthy activity.
Plan a calm follow-up. Active play should be followed by a calming activity: water, a story, quiet drawing. This helps bodies transition back to restful states.
20 Indoor Energy-Burning Activities
Obstacle Course Adventures
1. Living Room Obstacle Course
Transform your living room into an adventure course using everyday furniture and household items. Create stations that require different movements:
Crawl under the dining table
Walk along a line of painter’s tape on the floor (balance beam)
Jump over couch cushions placed in a row
Do three spins in the center of the room
Throw soft balls into a laundry basket
Crab walk from the couch to the door
Time each child through the course, or let them run it repeatedly for fun. The best part? You can change the course daily by rearranging stations.
Skills built: gross motor, planning, following directions Prep time: 10 minutes Space needed: medium to large room
2. Pillow Path Jump
Create a path using pillows, couch cushions, and folded blankets spread across the floor. Children must jump from one “safe spot” to another without touching the floor (the “lava”). Make it harder by spacing pillows further apart or requiring specific landing positions.
Skills built: balance, spatial awareness, risk assessment Prep time: 5 minutes Space needed: medium room
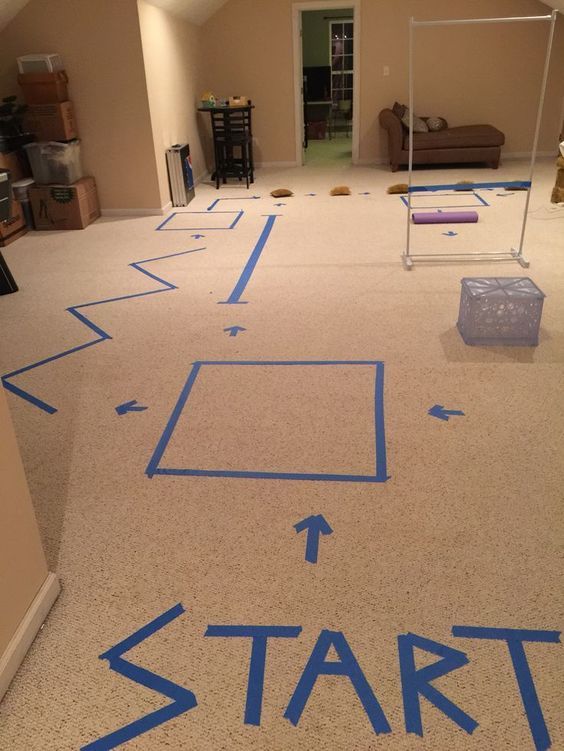
3. Tape Maze
Use painter’s tape to create a maze on the floor. Include straight paths, turns, and loops. Children must follow the tape path—walking, crawling, or moving however you specify. For extra challenge, add “obstacles” they must step over along the way.
Skills built: following pathways, body control, focus Prep time: 10 minutes Space needed: any floor space
4. Balloon Obstacle Course
Add inflated balloons to any obstacle course. Children must navigate the course while keeping a balloon in the air—they can hit it, blow it, or carry it on a paper plate. The unpredictability of balloons adds challenge and laughter.
Skills built: hand-eye coordination, multitasking, persistence Prep time: 5 minutes Space needed: medium room (clear breakables!)
Classic Games with Indoor Twists
5. Indoor Bowling
Set up empty plastic bottles as pins. Use a soft ball (or even a rolled-up sock ball) to bowl. For variation, assign point values to different bottles, or have children crawl to retrieve the ball between turns.
Skills built: aiming, turn-taking, counting Prep time: 2 minutes Space needed: hallway or cleared room
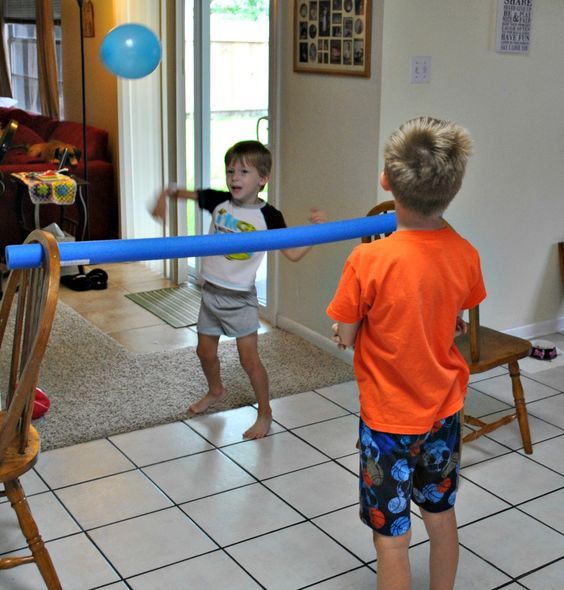
6. Balloon Volleyball
Tie a string or ribbon across the room at a reasonable height. Divide into teams and use a balloon as the ball. The slow speed of balloons makes this accessible for younger children while still providing active movement. No teams? Just keep the balloon off the floor together.
Skills built: hand-eye coordination, teamwork, gross motor Prep time: 3 minutes Space needed: medium room
7. Freeze Dance Marathon
Play high-energy music and dance wildly. When the music stops, everyone must freeze in position. Anyone who moves is out for that round—or not, depending on whether you want elimination. Add challenges: freeze like an animal, freeze in a silly pose, freeze with a partner.
Skills built: listening, body control, self-regulation Prep time: 1 minute Space needed: any cleared space
8. Sock Skating Rink
If you have hard floors, put on socks and go “ice skating.” Add music and challenge children to glide, spin, and move across the “rink.” For extra fun, push small boxes or stuffies across the floor while skating.
Skills built: balance, coordination, creative movement Prep time: 1 minute Space needed: hard floor space
9. Hide and Seek (Indoor Edition)
The classic game works perfectly indoors with clear boundaries. For variety, try “reverse hide and seek”—one person hides while everyone else seeks together. Or try hiding several small objects and timing how long it takes to find them all.
Skills built: patience, spatial awareness, cooperation Prep time: zero Space needed: whole house with boundaries
10. Animal Movements Game
Call out different animals and have children move like them across the room:
Bear crawl (hands and feet, same side movement)
Frog jump (squat and leap)
Crab walk (belly up, walking on hands and feet)
Snake slither (on belly, pulling with arms)
Kangaroo hop (feet together, jumping)
Penguin waddle (feet together, arms at sides)
This builds strength and coordination while burning serious energy.
Skills built: gross motor, strength, listening Prep time: zero Space needed: medium room
Movement Challenges
11. Floor Is Lava (The Classic)
The beloved game works brilliantly indoors. Furniture becomes safe zones. The floor is lava. Children must move from one safe spot to another without touching the floor. Add pillows, cushions, or paper plates as temporary safe islands. Time them, or just let them problem-solve their route.
Skills built: problem-solving, risk assessment, gross motor Prep time: 2 minutes Space needed: any room with furniture
12. Tape Lines
Use painter’s tape to create lines on the floor in different configurations: straight line, zigzag, spiral, hopscotch grid. Children must walk each line—heel-to-toe for balance, hopping on one foot, or jumping with feet together. Time them or have them race against their own best time.
Skills built: balance, coordination, following patterns Prep time: 5 minutes Space needed: any floor space
13. Laundry Basket Toss
Place a laundry basket at varying distances. Children roll or throw soft items into it: socks (rolled into balls), stuffed animals, soft balls. Keep score, or just enjoy the challenge. Move the basket closer or farther to adjust difficulty.
Skills built: aiming, force modulation, persistence Prep time: 2 minutes Space needed: medium room
14. Jump Counting
Mark a starting line with tape. Children jump as far as they can, then measure the distance in “baby steps” (their own feet placed heel-to-toe). Track their jumps on a chart—can they beat their own record? This adds math to movement.
Skills built: gross motor, measuring, number awareness Prep time: 2 minutes Space needed: hallway or cleared room
15. Simon Says… Move!
Play Simon Says with an active twist. Include commands that require big movements: “Simon says do five jumping jacks,” “Simon says crawl to the door,” “Simon says spin three times.” When Simon doesn’t say, children must freeze—even mid-motion.
Skills built: listening, body control, gross motor Prep time: zero Space needed: any cleared space
16. Stuffed Animal Toss and Catch
Children toss stuffed animals in the air and catch them. Progress through challenges: toss and catch with two hands, then one hand, then clap before catching, then spin before catching. For multiple children, toss animals back and forth.
Skills built: hand-eye coordination, progression of challenge Prep time: zero Space needed: medium room
Creative Active Play
17. Blanket Fort Building
This classic activity is surprisingly active. Gather blankets, sheets, and pillows. Children lift, carry, drape, and arrange—all while problem-solving structural challenges. The result is a cozy reward for their physical effort.
Skills built: cooperation, problem-solving, gross motor Prep time: 5 minutes to gather supplies Space needed: medium room with furniture for anchoring
18. Indoor Scavenger Hunt
Create a list of items for children to find around the house. Make it active by requiring movement between finds: “Bring me something red, then do five jumps, then find something soft.” Time them or have them work together as a team.
Skills built: reading/listening, gross motor, problem-solving Prep time: 5 minutes Space needed: whole house
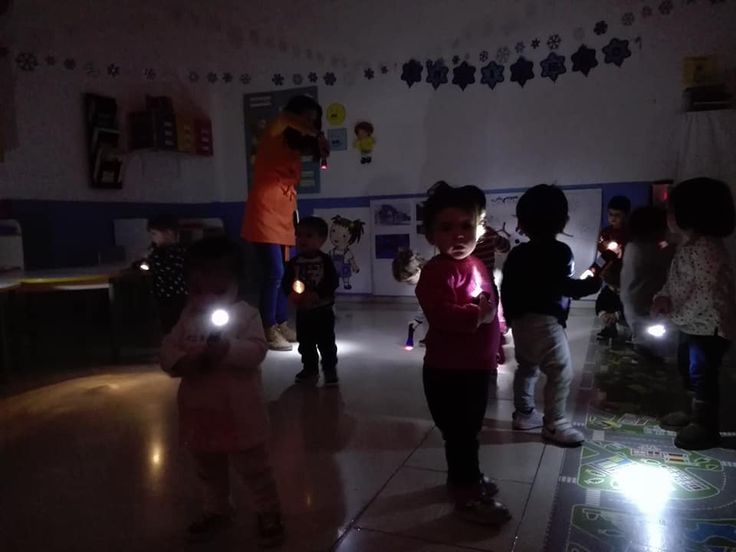
19. Dance Party with Flashlight
Turn off the lights (or dim them) and have a glow-in-the-dark dance party with flashlights. Children can dance, make shadow puppets, or play flashlight tag—shining light on each other without touching. The novelty of flashlights extends engagement.
Skills built: creative movement, spatial awareness Prep time: 1 minute Space needed: any cleared space
20. Balloon Keep-Up Challenge
How long can your child keep a balloon from touching the floor? They can use hands, feet, head, or even blow the balloon. Time each attempt and try to beat the record. Multiple children can work together or compete.
Skills built: hand-eye coordination, persistence, gross motor Prep time: 1 minute Space needed: medium room (clear breakables!)
Quick Reference: Activities by Energy Level
Not all active play is equal. Here’s how these activities stack up:
Highest Energy (Intense Movement)
Animal movements across the room
Balloon volleyball
Freeze dance marathon
Floor is Lava
Jump counting competition
Medium Energy (Sustained Activity)
Obstacle courses
Indoor bowling
Scavenger hunts
Tape maze following
Laundry basket toss
Lower Energy (Gentle Movement)
Blanket fort building
Hide and seek
Sock skating
Flashlight dance party
Simon Says
Mix and match based on your child’s energy level and the space available.
Adapting for Different Ages and Abilities
For Younger Children (Ages 2-4)
Focus on simple, repetitive movements. Keep games short—attention spans at this age are brief. Use lots of praise and participate alongside them. Safety is paramount; supervise closely and keep obstacles low.
Best bets: Animal movements, blanket forts, simple obstacle courses with pillows, balloon keep-up with adult help.
For Older Children (Ages 5-8)
Add rules, competition, and timing. Older children enjoy beating their own records and competing with siblings. They can handle more complex obstacle courses and games with multiple steps.
Best bets: Timed obstacle courses, scavenger hunts with lists, competitive balloon volleyball, jump distance tracking.
For Mixed Age Groups
Choose activities that can be scaled. Obstacle courses work well—younger children can complete simpler versions while older children add challenges. Cooperative games (keeping the balloon up together) prevent older kids from dominating.
When to Stop: Reading Your Child’s Signals
Active play should leave children feeling better, not worse. Watch for these signs that it’s time to transition to calm activities:
Overly rough behavior or loss of control
Frustration or tears
Claiming exhaustion (real or performative)
Loss of interest in the game
Have a calm follow-up activity ready. Water, a snack, and quiet reading or drawing help bodies transition back to restful states.
The Science of Active Indoor Play
When children move vigorously, their brains release neurotransmitters that support focus and emotional regulation. The proprioceptive input from pushing, pulling, and landing helps calm the nervous system. This is why active play isn’t just about burning energy—it’s about resetting the brain for better behavior and learning afterward.
The activities in this guide aren’t just time-fillers. They’re tools for regulation, connection, and development.
Creating Your Indoor Active Play Kit
Keep these items accessible for spontaneous active play:
Painter’s tape (for lines, mazes, markers)
Balloons (always have a pack)
Soft balls or beanbags
Empty plastic bottles (for bowling)
Laundry basket
Flashlights
Playlist of high-energy music
Store everything in one bin or drawer. When rain strikes, you’re ready in seconds.
The Bottom Line
Rainy days don’t have to mean chaos. With these indoor energy-burning activities for kids, you can channel that boundless energy into movement that strengthens bodies, regulates emotions, and saves your furniture.
The best part? These activities cost nothing, require no special skills, and actually work. Your children will sleep better. You’ll feel more peaceful. And when the sun finally returns, you’ll have a toolbox of indoor activities ready for the next inevitable rainy day.
Save this guide. Share it with other parents. And the next time someone says “I’m bored” while rain pounds the windows, you’ll know exactly what to do.
Discover 40+ engaging spring activities for preschoolers that build skills, spark curiosity, and celebrate the season—perfect for home or classroom.
The snow has melted. The sun is lingering just a little longer. And if you have a preschooler, you’ve probably noticed something else: they have energy. The kind of energy that bounces off walls and needs somewhere to go.
Spring is the perfect answer. This season offers a natural curriculum—blooming flowers, returning insects, puddles to jump in, and mud to squish between fingers. For preschoolers, spring isn’t just a change in weather; it’s a sensory invitation to explore, question, and create.
This comprehensive guide is packed with spring activities for preschoolers that are easy to set up, developmentally rich, and genuinely fun. Whether you’re a parent looking for afternoon inspiration or a teacher planning classroom centers, you’ll find ideas here that work with your life—not against it.
Why Spring Activities Matter for Preschoolers
Before we dive into the activities, let’s talk about why spring is such a powerful learning season.
Spring engages all the senses. The smell of wet soil, the sight of new colors, the sound of birds returning—these sensory experiences build neural connections and vocabulary in ways that indoor activities simply can’t match .
It connects learning to real life. When a child plants a seed and watches it grow, they’re not just learning about plants. They’re learning patience, responsibility, and cause-and-effect. These lessons stick because they’re experienced, not just explained .
It meets preschoolers where they are. Three- to five-year-olds are naturally curious, physically active, and eager to help. Spring activities tap into all of these developmental drives. The best part? You don’t need to be a teacher to facilitate them. You just need to be present and willing to get a little messy .
Before You Begin: Simple Tips for Spring Success
A little preparation makes everything smoother. Keep these principles in mind:
Follow their lead. Your child may spend twenty minutes staring at a worm instead of completing your planned craft. That’s not a problem—that’s learning. Let their curiosity guide the pace .
Embrace the mess. Spring is muddy. Clothes will get wet, hands will get dirty. Dress children in clothes that can handle it, and keep a towel by the door. The mess is temporary; the memories aren’t .
Layer for changing weather. Spring weather is famously unpredictable. Dress children in layers so you can add or remove as temperatures shift throughout the day.
Keep supplies simple. You don’t need special equipment. Most of these activities use items you already have: paper, paint, containers from the recycling bin, and natural materials from your yard .
Outdoor Exploration Activities
Spring is nature’s invitation to come outside. These activities help preschoolers observe, question, and connect with the natural world.
1. Nature Walk with Purpose
A simple walk becomes a learning adventure with a little intention. Before heading out, give your preschooler a specific mission: find something yellow, something soft, something that smells good, or something shaped like a heart .
Skills built: observation, vocabulary, color recognition Prep time: zero Mess level: low
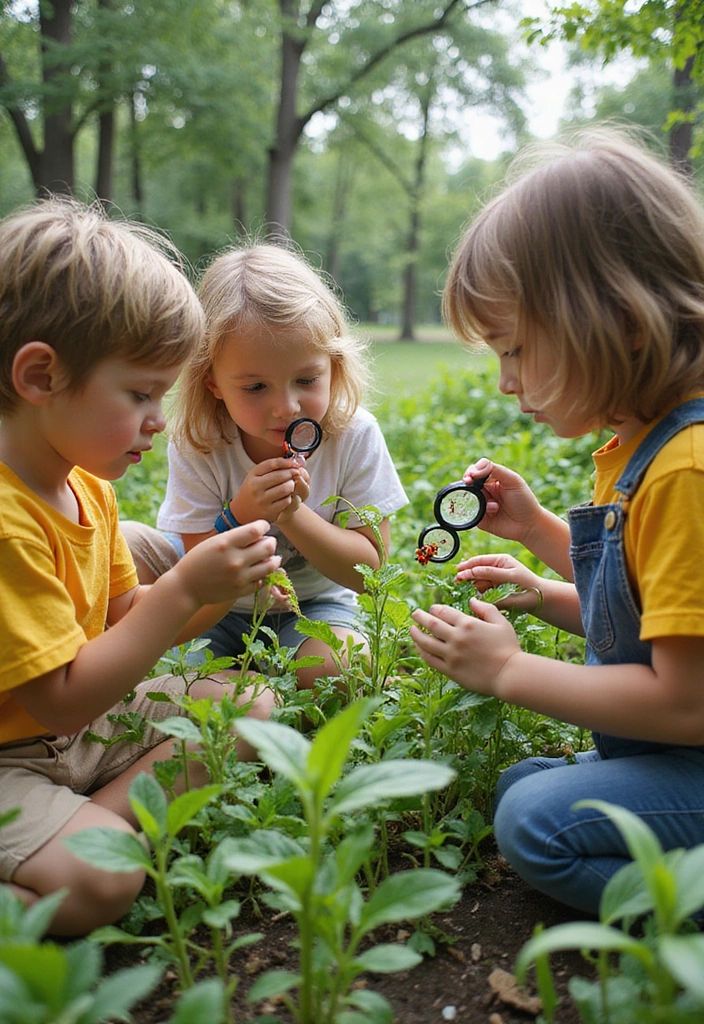
Pro tip: Bring a magnifying glass and let your child examine discoveries up close. A leaf’s veins, a bug’s legs, the texture of bark—all become fascinating under magnification .
2. Bug Hunt Safari
Spring insects are emerging everywhere, and preschoolers find them utterly captivating. Go on a bug hunt in your yard, garden, or local park. Look under leaves, rocks, and logs for ants, ladybugs, worms, or beetles .
Skills built: scientific thinking, patience, respect for living things Prep time: zero Mess level: low
Make it educational: Ask simple questions: “How many legs does it have?” “What color is it?” “Where do you think it’s going?”
3. Rainbow Color Hunt
Create a simple chart with the colors of the rainbow. During your walk, help your child find one natural object for each color: a yellow dandelion, a green leaf, a blue flower, a brown stick. This sharpens observation skills while reinforcing color recognition .
When spring rain leaves puddles behind, don’t avoid them—embrace them! Assign point values to different puddles: small puddle = 1 point, medium puddle = 3 points, big puddle = 5 points .
Skills built: gross motor, counting, risk assessment Prep time: zero Mess level: high (boots recommended!)
5. Cloud Watching Charades
On a sunny spring day, lie on a blanket and watch clouds together. Take turns pointing out shapes you see—a dinosaur, a boat, a butterfly. Then act out what you saw in a game of charades .
Create a simple checklist of spring things to spot: a blooming flower, a buzzing bee, a bird building a nest, a butterfly, a fuzzy caterpillar. Let your child check off each discovery .
Give your child a collection jar and send them on a safari to find small creatures like beetles, snails, and worms. You might even let them temporarily keep discoveries in a terrarium—snails make surprisingly good short-term pets!
Sit quietly together and count how many spring sounds you can hear: birds singing, wind in trees, water dripping, bees buzzing. This builds auditory discrimination and mindfulness .
Nothing teaches patience and wonder like growing something from a tiny seed.
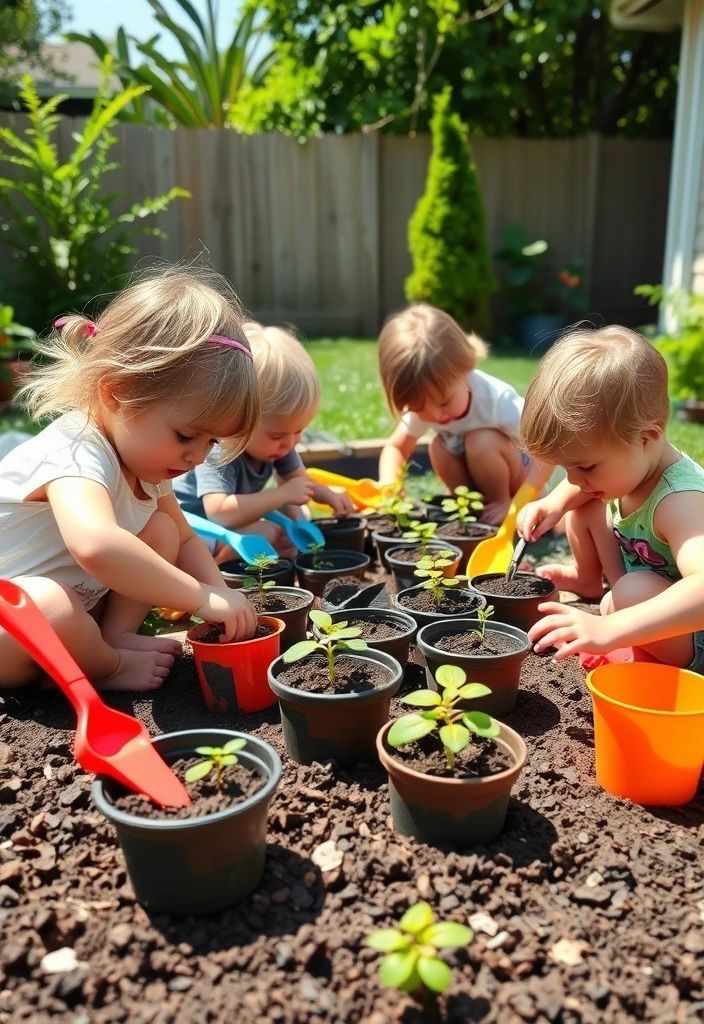
9. Seed Starting Station
Fill small containers with soil—egg cartons or paper cups work perfectly. Let your child press seeds into the soil, water gently, and place near a sunny window. Check growth daily and talk about changes they observe .
Skills built: fine motor, scientific thinking, responsibility Prep time: 10 minutes Mess level: medium
Best seeds for preschoolers: Sunflowers, beans, and peas sprout quickly and grow reliably, which helps maintain interest.
10. Egg Carton Garden
Use a cardboard egg carton as a mini greenhouse. Plant one seed in each cup. The carton can be planted directly in the ground later since it’s biodegradable .
Let your child decorate terracotta pots with acrylic paint or paint pens. Once dry, help them plant flowers or herbs inside. They’ll take extra pride in plants that live in pots they personally beautified.
Skills built: creativity, pride of ownership, following steps Prep time: 5 minutes + drying time Mess level: medium
12. Build a Bug Hotel
Gather sticks, pinecones, hollow stems, and small rocks. Arrange them in a corner of the yard or in a wooden frame to create shelter for beneficial insects. Watch together to see who moves in .
Layer pebbles, charcoal, and soil in a large glass jar. Plant small moisture-loving plants and mist with water. Close the lid and you’ve created a self-contained ecosystem .
Fill paper cups with soil and sprinkle grass seed on top. Keep moist. In about a week, the grass will be long enough for your child to give it a “haircut” with child-safe scissors .
Skills built: responsibility, fine motor (cutting), patience Prep time: 10 minutes Mess level: low
15. Sunflower House
Plant sunflower seeds in a square or circle pattern, leaving an opening for a door. As the sunflowers grow tall, they’ll create an enclosed “house” that preschoolers can play inside .
These creative projects celebrate spring colors and textures while building fine motor skills.
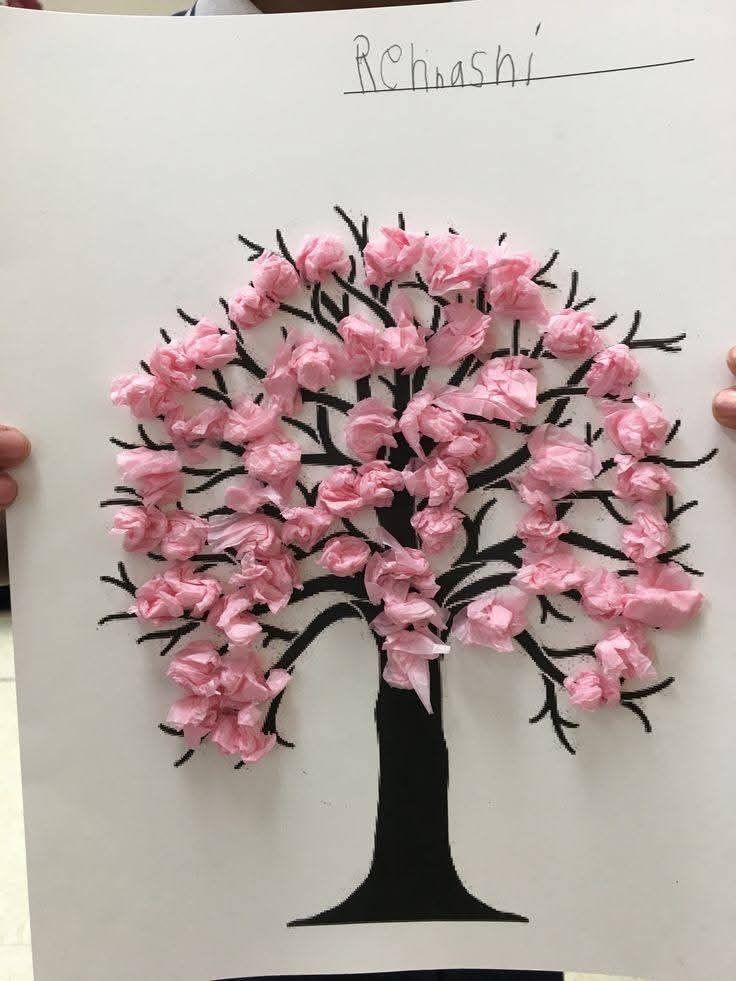
16. Tissue Paper Spring Blossoms
Paint tree branches on paper. While the paint dries, have your child cut or tear pink tissue paper into small pieces. Crinkle each piece and glue onto the branches to create blossoms. The result is a beautiful spring tree that builds fine motor control .
Skills built: fine motor, creativity, following multi-step directions Prep time: 10 minutes Mess level: low
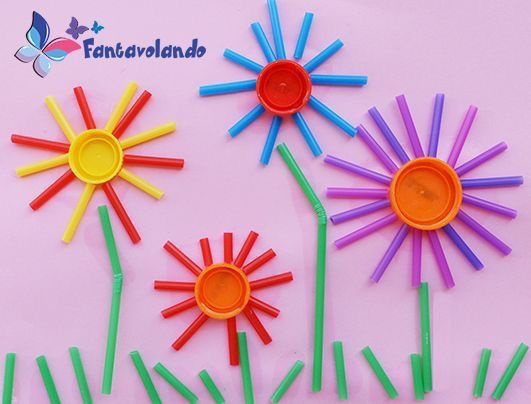
17. Straw Flower Stamping
Cut the end of a plastic straw into fringe, fanning out the strips. Dip in paint and stamp onto paper to create flower shapes. Add a yellow dot in the center and draw stems. This simple technique produces surprisingly lovely results .
Skills built: cause and effect, color exploration, fine motor Prep time: 5 minutes Mess level: medium
18. Mud Painting on Rocks
Instead of paint that can harm the environment, use mud! Find a muddy puddle or mix soil with water until it reaches paint consistency. Let your child “paint” on rocks or sidewalk .
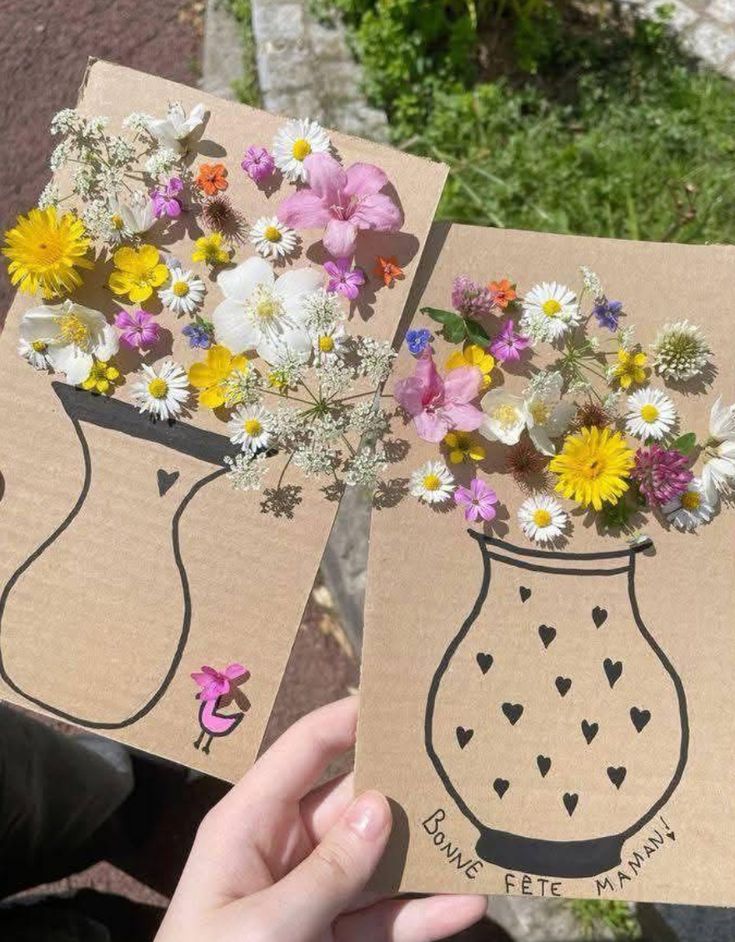
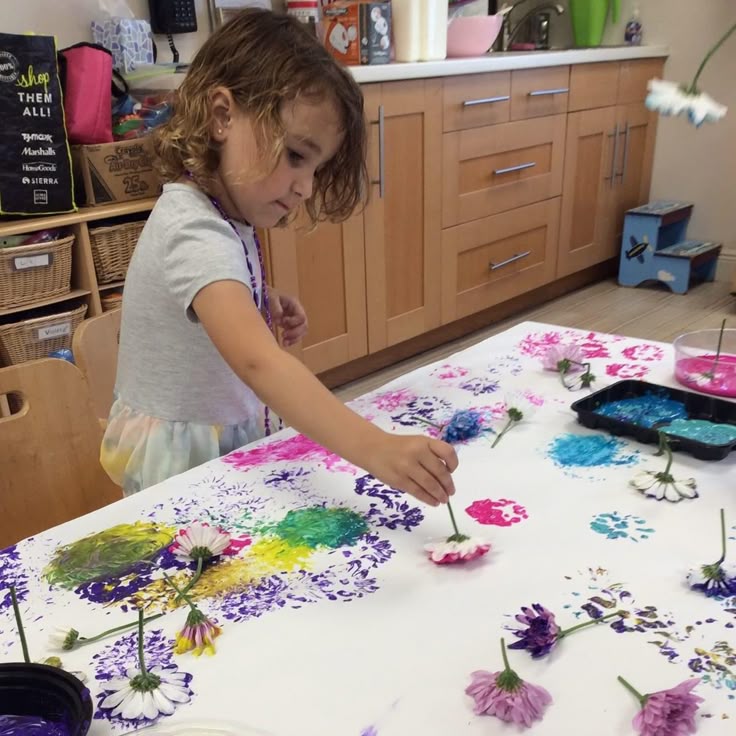
Collect petals, leaves, and small flowers during a nature walk. Arrange and glue them onto paper or cardboard to create natural art. This activity connects outdoor exploration with creative expression .
Skills built: collecting, arranging, fine motor Prep time: 5 minutes Mess level: low
20. Rain Art
On a lightly rainy day, let your child draw on white paper with washable markers. Place the paper outside in the rain for just a moment, or use a spray bottle to simulate rain. Watch the colors run and blend into beautiful patterns .
Skills built: cause and effect, creativity, scientific thinking Prep time: 5 minutes Mess level: low
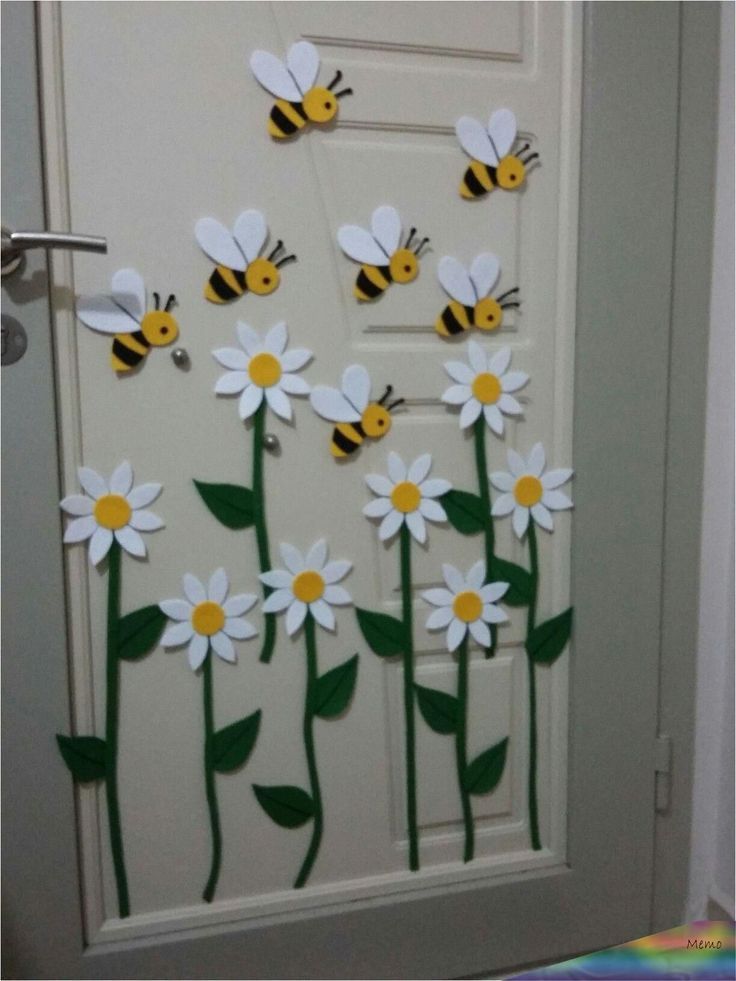
21. Hanging Bee Paper Chain Craft
Using a free printable template, color and cut out bee pieces, chain strips, and a beehive. Assemble into a hanging decoration by connecting paper chains and attaching the hive. This craft is perfect for fine motor practice .
Print a free frog puppet template, color, cut, and assemble. The finished puppet becomes a toy for imaginative play—perfect for spring pond-themed adventures .
Using a simple paper lunch bag and a free template, create an adorable bunny puppet. Add a cotton ball tail for extra texture. Puppets inspire storytelling and dramatic play .
Skills built: creativity, storytelling, fine motor Prep time: 10 minutes Mess level: low
24. Flower Prints
Gather flowers with flat petals. Place them between two pieces of paper and gently hammer or press to transfer color and shape. The results are delicate, nature-made prints .
Skills built: understanding natural pigments, cause and effect Prep time: 5 minutes Mess level: medium
25. Nature Crowns
Collect flexible twigs, long grass, or vines. Weave flowers and leaves through to create a wearable nature crown. This activity connects to imaginative play and fine motor weaving .
Preschoolers need to move. These spring-themed games channel that energy productively.
26. Rainbow Relay
Scatter colored items around the yard: balls, plastic eggs, beanbags, cups. Set baskets labeled by color. Kids race to sort everything into matching baskets. The best part? The yard gets cleaned up as they play .
Draw lily pads with chalk or use paper plates spread around. Children must jump from pad to pad without touching the “water.” Make it cooperative by having them work together to cross the pond .
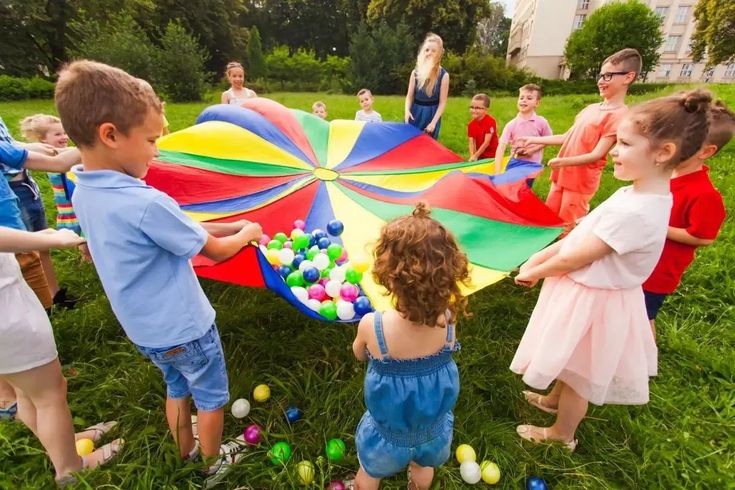
One child is the bee, carrying a cup of pom-poms (pollen). Other children are flowers, holding empty cups. The bee tries to drop one pom-pom into each flower’s cup. This active game teaches about pollination while burning energy .
Kids line up and race while wiggling like worms on the ground. No standing allowed! Add hula hoops as “tunnels” they must wiggle through .
Skills built: core strength, gross motor, following silly directions Prep time: zero Mess level: low
30. Butterfly Breeze Race
Give each child a lightweight “butterfly” made from tissue paper or a feather. They must blow it across a finish line without touching it. This game is surprisingly challenging and builds oral motor strength .
Create two cubes: one with spring movements (bunny hop, frog jump, butterfly flap, flower stretch, duck waddle, rain sprinkle) and one with numbers. Roll both and perform the movement the number of times shown .
Tuck a ribbon or fabric strip into each child’s waistband. Players try to collect others’ “tails” while protecting their own. This high-energy game builds agility and spatial awareness .
Kids roll plastic eggs (or ping pong balls) with spoons through a course marked by cones, chalk lines, or hula hoops. This challenges balance and coordination .
Draw a pretend town on the driveway: roads, ponds, hopscotch flowers, bridges. Add game elements like “deliver the mail” (carry an item to different houses) or “cross the river without stepping in water” .
Kids carry a small pot or plastic garden tool to a marker and back. Add silly tasks: plant a pretend seed (touch the ground), water the flower (mime with a watering can) .
Spring showers happen. These activities keep the spring theme going when you’re stuck inside.
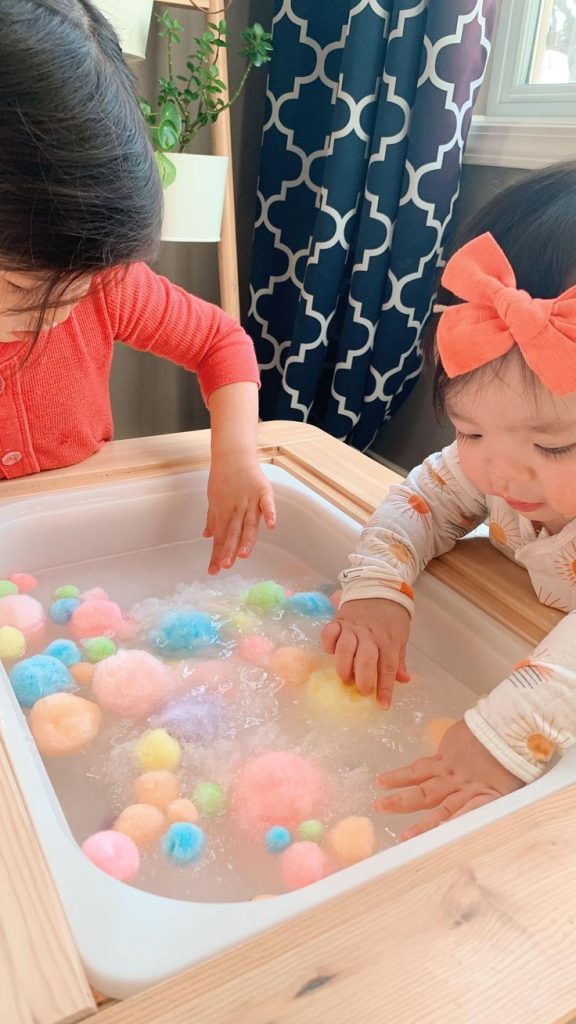
36. Spring Sensory Bin
Fill a bin with rice, dried beans, or shredded paper. Add spring items: silk flowers, plastic bugs, smooth stones, small pots, scoops, and cups. Let your child explore, scoop, pour, and sort .
Skills built: sensory processing, imaginative play, fine motor Prep time: 10 minutes Mess level: medium (use a tablecloth!)
Learning extension: Hide foam letters or numbers in the bin. As children dig, encourage them to identify what they find .
37. Rainy Day Pond Toss
Tape paper lily pads to the floor at different distances. Toss soft “frogs” (rolled socks or beanbags) onto the pads. Assign higher points to smaller or farther pads .
Give your child a pile of mixed objects: pom-poms, buttons, LEGO bricks, or paper scraps. Let them sort by color into cups or bowls. This simple activity is surprisingly calming and builds categorization skills .
Set up a “flower shop” with paper, cups, tape, and artificial flowers or flowers made from craft supplies. Children can take orders, arrange bouquets, and make deliveries to stuffed animal customers .
Use seed packets or printed pictures of flowers and vegetables. Place them face down and play memory match. When a match is found, have your child name a silly “plant” like spaghetti tree or glitter grass .
Make spring sounds yourself or play recordings: rain tapping, birds chirping, bees buzzing, wind blowing, water dripping. Have children guess each sound. Let them take turns making sounds for you to guess .
Create a simple weather chart where your child places a sticker or draws a picture each day: sunny, rainy, cloudy, windy. Talk about what you observe and how the weather changes through spring .
Not sure which activities suit your child’s developmental stage? Here’s a quick guide:
Best for Younger Preschoolers (Ages 2-3)
Nature walks with simple observation
Puddle jumping
Flower petal collecting
Simple sensory bins
Bubble play
Sticker art with spring themes
Water play with cups and scoops
Best for Older Preschoolers (Ages 4-5)
Bug hunts with magnifying glasses
Seed planting and daily care
Craft projects with multiple steps
Simple games with rules (tag variations, relays)
Nature scavenger hunts with checklists
Building projects (bug hotels, fairy gardens)
Weather charting
Connecting Spring Activities to Early Learning
Every spring activity naturally builds skills. Here’s what your preschooler is really learning:
Language and Vocabulary When you talk about what you’re seeing and doing—”Look at the fuzzy caterpillar!” “This flower is magenta”—you’re building vocabulary in context. Words stick when they’re attached to real experiences .
Math Concepts Counting flower petals, comparing rock sizes, sorting leaves by color, and measuring plant growth all introduce math naturally .
Scientific Thinking Observing changes, making predictions (“What will happen to this seed?”), and testing ideas (“Will this stick float?”) are the foundations of scientific reasoning .
Fine Motor Development Pinching seeds, squeezing glue bottles, cutting with scissors, and arranging small items all strengthen the hand muscles needed for writing .
Social-Emotional Growth Caring for plants teaches responsibility. Playing games with others builds turn-taking and cooperation. Overcoming frustration when a craft doesn’t work builds resilience .
Making Spring Activities Part of Your Routine
You don’t need to do everything at once. Here’s how to weave spring activities naturally into your weeks:
Keep supplies visible. A basket by the door with magnifying glasses, collection jars, and a nature guide invites spontaneous exploration.
Follow their interests. If your child becomes obsessed with worms, lean into it. Find worm books, go on worm hunts, build worm habitats. Deep interest drives deep learning.
Take pictures. Document your spring adventures. Make a spring scrapbook together at the end of the season. This builds memory skills and creates a treasured keepsake.
Invite reflection. Ask open-ended questions: “What was the best part of our walk?” “What do you wonder about this caterpillar?” “What should we plant next?”
Lower your expectations. Some activities will flop. Some days, your child will spend five minutes on your carefully planned craft and thirty minutes staring at an ant. That’s not failure—that’s childhood. Follow their lead .
The Bottom Line
Spring with a preschooler is a season of wonder. Every sprouting seed, every returning bird, every muddy puddle is an invitation to learn together. You don’t need elaborate plans or expensive materials. You need curiosity, patience, and willingness to get a little dirty.
The activities in this guide are starting points—not prescriptions. Adapt them to your child, your setting, and your energy level. Some days you’ll do elaborate crafts. Some days you’ll just lie in the grass and watch clouds. Both count. Both matter.
So go outside. Turn over a rock. Plant a seed. Jump in a puddle. Watch your preschooler’s face light up as they discover the magic of spring—and know that you gave them that gift.
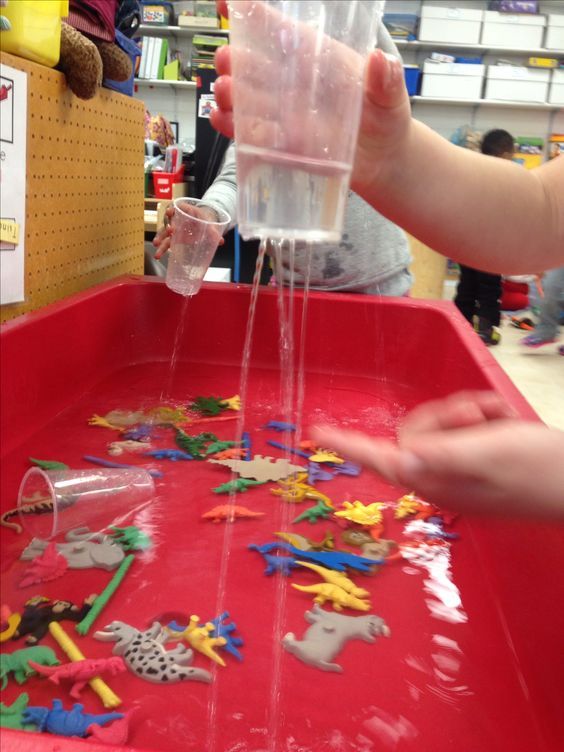
Discover 35+ simple, developmental water play ideas that require minimal setup—and deliver maximum fun.
There’s a moment every parent knows well. It’s 3:00 PM, nap time is over, and suddenly your toddler has more energy than a small nuclear reactor. You need something. Something engaging. Something that doesn’t require a trip to the store or an hour of setup.
Now imagine placing a plastic bin filled with water on the floor. Watch as your toddler’s eyes light up. They approach slowly, dip a hand in, and then—quiet. For the next thirty minutes, they are completely absorbed in the simple act of pouring, splashing, and exploring.
This is the magic of water play.
Water play isn’t just an activity; it’s a parenting lifeline. It’s naturally calming for the nervous system, endlessly engaging for curious minds, and requires almost nothing you don’t already have at home. Whether you’re looking for easy water play activities for toddlers to reset a difficult afternoon or searching for outdoor water activities for toddlers to beat the summer heat, this guide has you covered.
In this comprehensive resource, we’ll explore why water play matters developmentally, share over 35 specific activities organized by type and location, and give you all the tips you need to make water play work for your family—not the other way around.
Why Water Play Deserves a Permanent Spot in Your Parenting Toolkit
Before we dive into the activities, let’s talk about why water play is worth your time. Because when you understand what’s really happening during those splashing moments, you’ll feel even better about setting up the bin.
The Developmental Benefits You’re Actually Seeing
When your toddler is elbow-deep in a water bin, they aren’t just getting wet. They’re building essential skills:
Fine Motor Development Scooping with a cup, squeezing a sponge, and grasping slippery toys strengthen the small muscles in your child’s hands. These are the same muscles they’ll use for writing, buttoning shirts, and using utensils. Every pour and squeeze is preparation for independence.
Hand-Eye Coordination Aiming water from one container into another requires visual focus and physical control. When your toddler misses and tries again, they’re practicing persistence and precision simultaneously.
Cognitive Growth (STEM in Disguise) Water play is early science and math in action. Your child is learning:
Cause and effect: “When I tip this cup, water comes out.”
Volume and capacity: “This bucket holds more than this bottle.”
Sink vs. float: “Rocks go down, but the duck stays up.”
Temperature concepts: “The ice is cold, but the water from the tap is warm.”
Language Development When you play alongside your toddler and narrate their actions—”You’re pouring the blue cup into the big bowl!”—you’re building vocabulary in a natural, meaningful context. Words like full, empty, wet, dry, sink, float, cold, and warm become concepts they understand through experience, not just repetition.
Emotional Regulation Here’s something that surprises many parents: water play is calming. The repetitive motions of pouring and stirring can regulate an overwhelmed toddler. Water play often works better than time-outs for helping children reset because it engages the senses without demanding performance.
Sensory Integration Some children crave sensory input; others avoid it. Water play is a gentle, adjustable way to help all children process sensory information. They control how much water they touch, how fast it moves, and how long they engage.
Why Water Play Works When Nothing Else Does
Toddlers are driven by curiosity and control. Water play offers both. They can manipulate the water completely—pour it, stir it, stop it, start it—which gives them a sense of agency they rarely experience in a world where adults make most decisions.
Plus, water play requires no special skills. There’s no right or wrong way to do it. This open-ended nature means success is guaranteed, which builds confidence and encourages longer attention spans.
Before You Begin: Essential Tips for Stress-Free Water Play
The goal of water play is connection and calm, not stress and cleanup. Follow these tips to keep the experience positive for everyone.
Safety First: Non-Negotiable Rules
Never leave a toddler unattended near water. This includes bins, buckets, sinks, and wading pools. A child can drown in just inches of water in seconds. Stay within arm’s reach at all times.
Use clean, fresh water each time. Stagnant water breeds bacteria, and toddlers will inevitably drink the play water. If you’re playing outdoors, keep the bin in the shade to prevent the water from becoming too warm or developing algae.
Check the temperature. Toddler skin is sensitive. Water should feel neutral or slightly cool to your wrist—never hot.
Setup Strategies That Save Sanity
Contain the mess before it happens. Place your water bin on a large towel, a waterproof changing pad, or a plastic tablecloth. If weather permits, take everything outside where spills don’t matter.
Dress for success. Clothes will get wet. Accept this ahead of time. In warm weather, a swim diaper and nothing else works perfectly. In cooler weather, add a waterproof smock or simply plan to change clothes afterward.
Keep supplies accessible but out of reach. Store your water play materials in a specific bin or shelf where your toddler can’t access them independently. This prevents unsupervised water adventures and keeps the activity feeling special when you bring it out together.
The “Follow the Child” Philosophy
Here’s the secret to successful water play: let your child lead. You don’t need to direct, teach, or correct. Your job is to observe, narrate, and ensure safety.
If your toddler wants to pour water back and forth between the same two cups for twenty minutes, let them. That repetition is learning. If they suddenly become interested in a floating leaf, follow that interest. The best water play follows the child’s curiosity, not a predetermined plan.
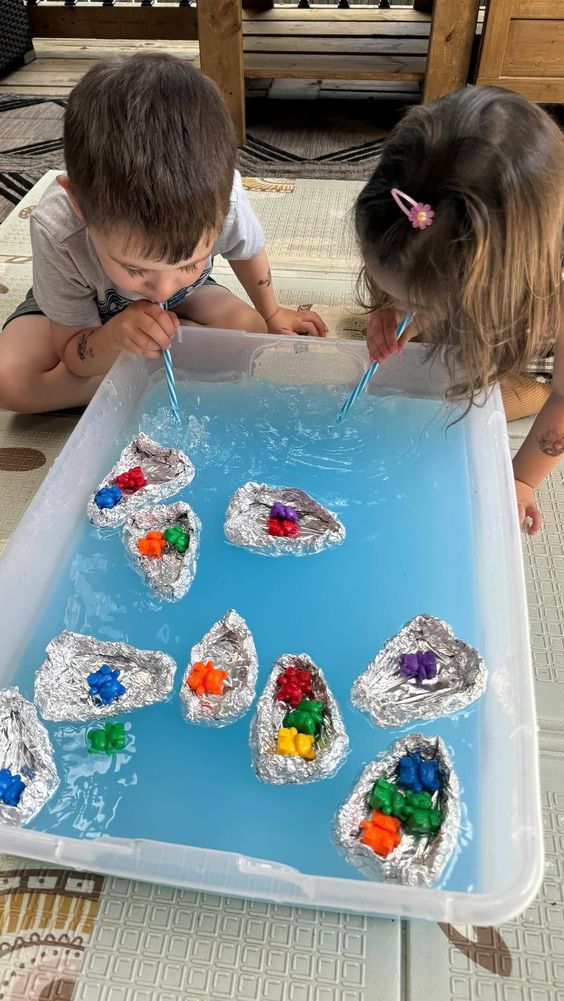
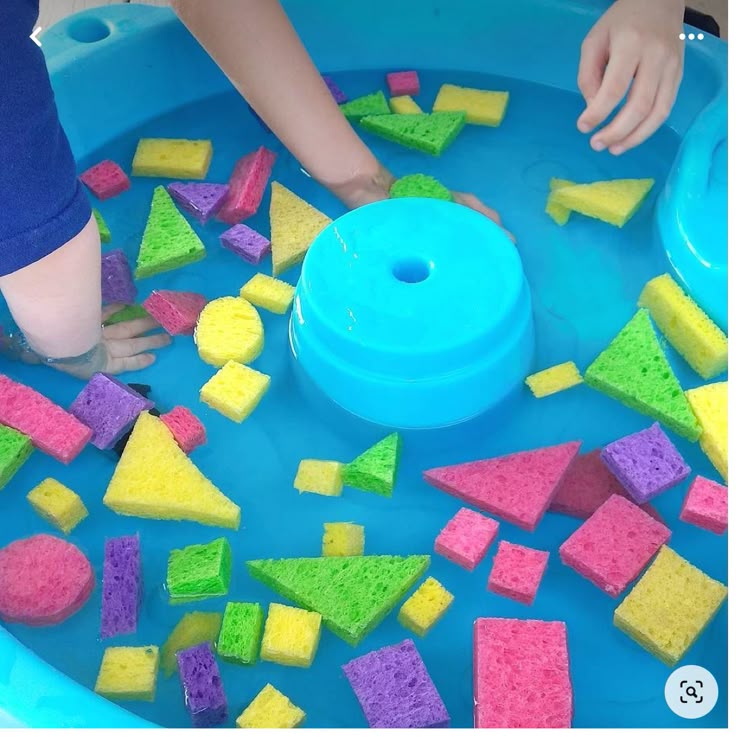
35+ Easy Water Play Activities for Toddlers
Now, let’s get to what you came for: the activities. These are organized by type and location so you can find exactly what you need in any situation.
Classic Bin Activities: The Foundation of Water Play
These are the building blocks. Master these, and you’ll never run out of ideas.
1. The Pouring Station
Fill a large plastic bin with a few inches of water. Add an assortment of containers: measuring cups, plastic bottles, funnels, ladles, and small bowls. Show your toddler how to fill and pour, then step back and watch. This simple setup can occupy a toddler for an astonishingly long time.
Progression tip: Add color to the water with a drop of food coloring and provide clear containers so your toddler can see the liquid level change as they pour.
2. Scoop and Transfer
Place two bowls in the water bin—one empty, one filled. Give your toddler a spoon, small strainer, or scoop and challenge them to move the water from the full bowl to the empty one. This activity builds fine motor control and introduces early math concepts like more and less.
3. The Sponge Squeeze
This activity strengthens hand muscles for future writing. Provide several sponges cut into small, easy-to-grasp pieces. Show your toddler how to dip the sponge in water, then squeeze it out into a separate container. For extra fun, use colored water and watch the sponge release the color.
4. Kitchen Tool Exploration
Raid your kitchen drawers. Whisk, eggbeater, potato masher, slotted spoon, basting brush—all of these become fascinating water tools. Show your toddler how the whisk creates bubbles or how water flows through the slotted spoon differently than a solid ladle.
5. Ice Cube Adventure
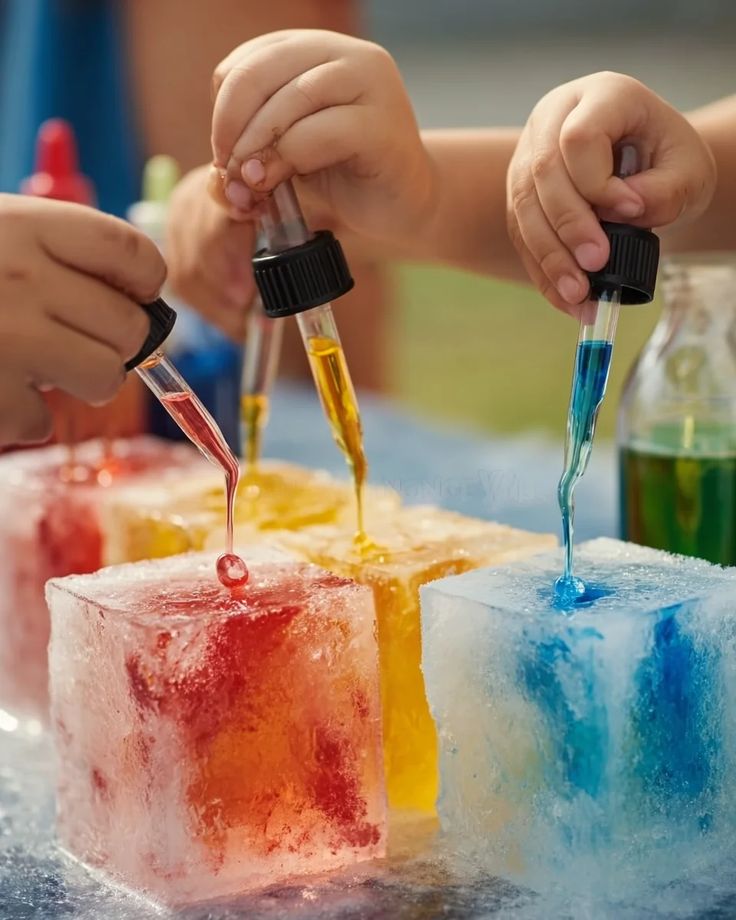
Freeze ice cubes in advance. For extra engagement, add a tiny plastic animal or a drop of food coloring to each cube compartment. Place the ice in a shallow bin of warm water and let your toddler explore the temperature contrast. They’ll watch the ice melt and work to free the trapped treasures.
Outdoor Water Play: Letting Loose
When you can take water play outside, cleanup disappears and possibilities expand.
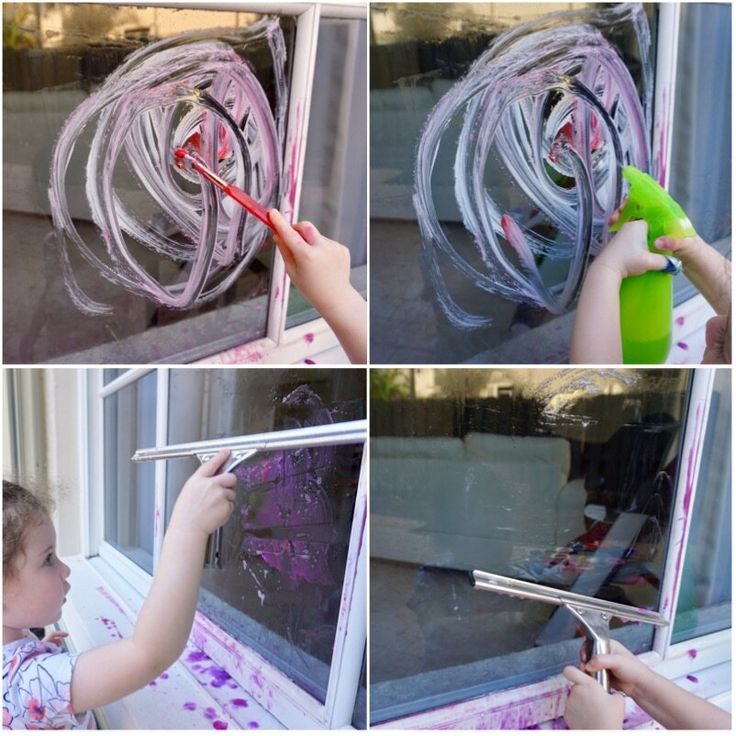
6. Water Painting
Give your toddler a bucket of water and a large paintbrush or household paint roller. Let them “paint” the fence, sidewalk, driveway, or even the side of the house. They’ll be fascinated by how the water changes the color of surfaces and how it slowly disappears in the sun.
Extension idea: On a hot day, let them “paint” each other’s arms and legs with the brush. The sensation is delightful and completely harmless.
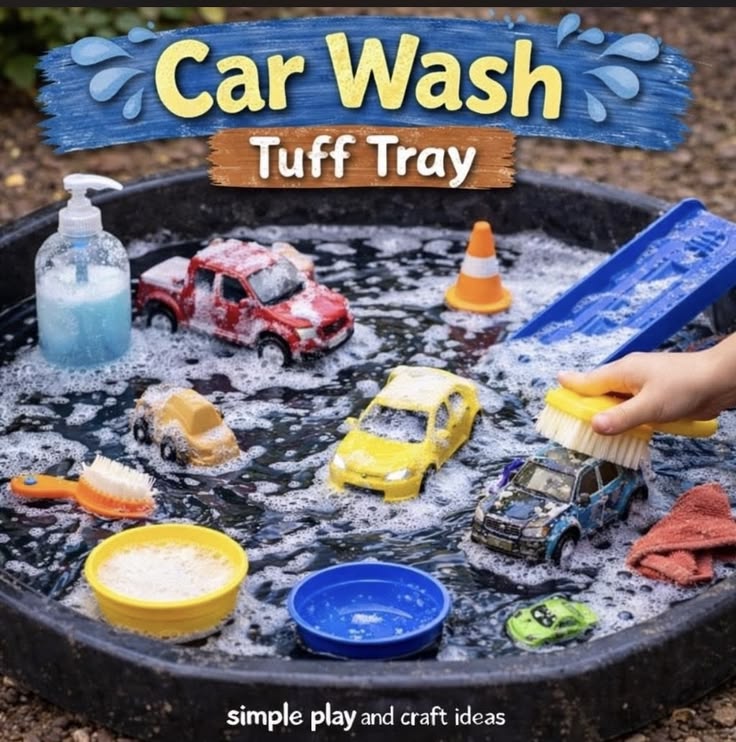
7. The Outdoor Car Wash
Screenshot
Line up tricycles, ride-on toys, and plastic cars. Fill a bin with soapy water, provide sponges and old toothbrushes, and let your toddler give their vehicles a thorough cleaning. This activity combines water play with meaningful work—they’re helping, and they know it.
8. Slip and Slide Alternative
If you have a long strip of plastic sheeting or a dedicated kiddie slide, set it up on a gentle slope. Add a trickle of water from the hose and let your toddler slide down. This is pure joy in activity form.
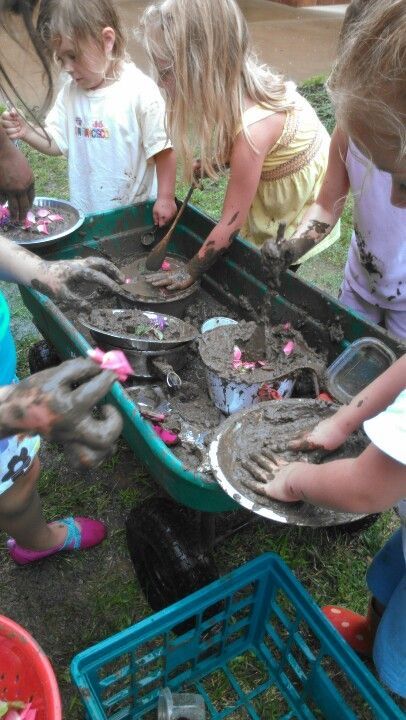
9. Mud Kitchen with Water Station
If you have a dirt patch or sandbox, set up a mud kitchen nearby. Provide pots, pans, and bowls along with a water bin. Your toddler can mix “recipes,” creating mud pies and soups. This is messy, yes, but developmentally golden.
10. Sprinkler Freeze Dance
Turn on a sprinkler and play music. When the music stops, everyone must freeze—even if the water is still spraying. This combines gross motor movement, listening skills, and cooling fun.
11. Water Wall Construction
If you’re feeling ambitious, attach plastic bottles, funnels, and tubes to a fence or piece of plywood to create a water wall. Pour water at the top and watch it cascade through the system. This is physics in action, and toddlers find it mesmerizing.
12. Toy Wash Station
Set up two bins: one with soapy water, one with clean rinse water. Add a scrub brush and let your toddler wash all their plastic outdoor toys—balls, shovels, buckets. They’ll feel proud of their work, and your toys will actually get clean.
Science Experiments Disguised as Play
These activities feel like magic but teach real scientific concepts.
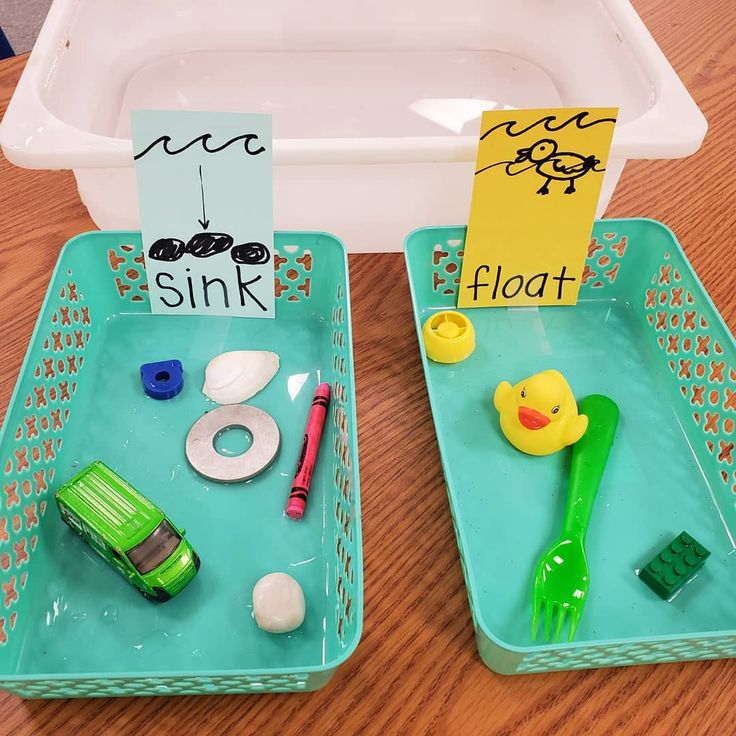
13. Float or Sink?
Gather a collection of household objects: cork, coin, plastic toy, stone, leaf, sponge, crayon. Before dropping each item in the water, ask your toddler, “Will it float or sink?” Let them test each item and sort into two piles. This builds prediction skills and introduces the scientific method.
14. Color Mixing Lab
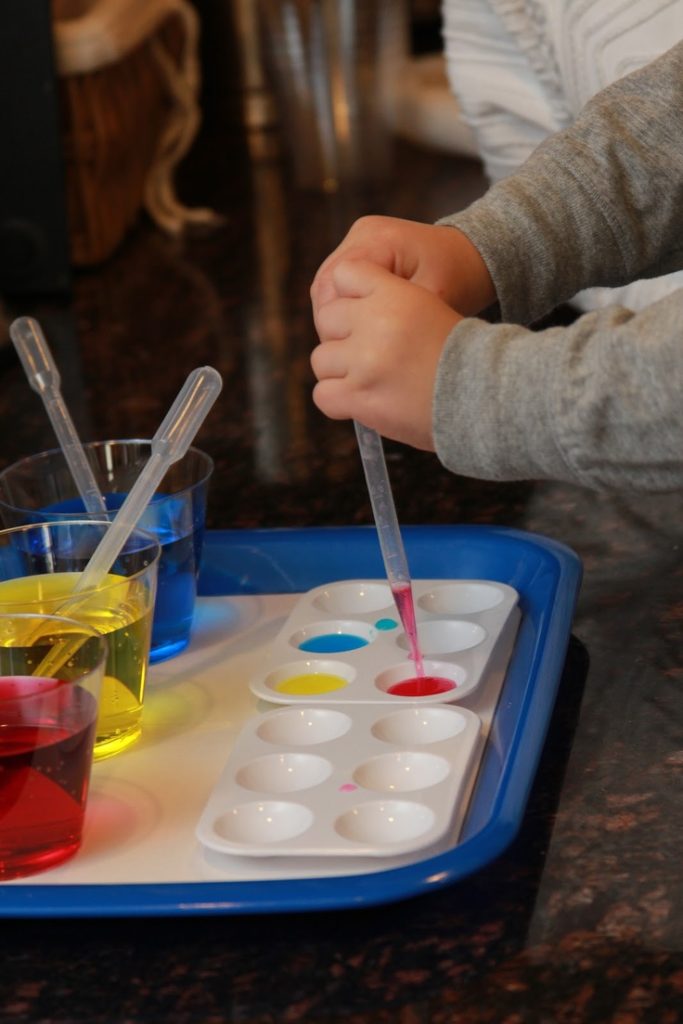
Fill several cups with water. Add red food coloring to one, blue to another, yellow to a third. Provide empty cups, a dropper or spoon, and let your toddler experiment with mixing. Watch their amazement when blue and yellow become green.
Safety note: Use food coloring that washes out easily, or try liquid watercolors from craft stores for brighter results with less staining.
15. Absorption Race
Provide different materials: sponge, paper towel, fabric scrap, wax paper, plastic wrap. Using a dropper or spoon, drop water onto each material and observe what happens. Which one absorbs fastest? Which one repels water? This introduces material properties in a hands-on way.
16. Sink Spray Painting
Line a shallow bin or cookie sheet with paper. Add a few drops of liquid watercolor or food coloring to the bottom. Let your toddler spray water from a squirt bottle onto the paper, watching the colors spread and mix. The result is abstract art created entirely by water.
17. Melting Race
Freeze ice cubes in different sizes—some tiny, some large. Give your toddler various tools: warm water in a dropper, salt, their hands. Which ice melts fastest? Which tool works best? This exploration teaches heat transfer and problem-solving.
18. Water Xylophone
Fill several identical glass jars or cups with different water levels. Tap each with a metal spoon and listen to the different pitches. Show your toddler how more water creates a lower sound, less water creates a higher sound. This is music and science combined.
Fine Motor Water Play
These activities specifically target the small hand muscles needed for future writing and self-care.
19. Dropper Transfer
Fill one small bowl with colored water. Provide an empty bowl and a medicine dropper or pipette. Show your toddler how to squeeze, release to draw water, and squeeze again to transfer. This requires significant fine motor control and concentration.
20. Pom-Pom Water Rescue
Fill a bin with water and add colorful pom-poms. Provide a slotted spoon, small strainer, or tongs. Challenge your toddler to rescue the pom-poms from the water. The floating pom-poms are slippery and require careful scooping.
21. Squirt Bottle Target Practice
Fill squirt bottles with water. Draw simple targets on the sidewalk with chalk or tape paper targets to a fence. Let your toddler aim and squeeze to hit the targets. This strengthens hand muscles and builds visual motor skills.
22. Water Bead Sensory Bin
For older toddlers (3+ with no mouthing risk), water beads offer incredible sensory input. Hydrate the tiny beads overnight and watch them expand into squishy, bouncy orbs. Add scoops, cups, and strainers for hours of exploration.
Caution: Water beads are a choking hazard if swallowed. Supervise closely and store safely after play.
23. Bubble Wrap Stomp
Lay a sheet of bubble wrap on a towel. Pour a small amount of water on top. Let your toddler stomp, jump, and pop the bubbles. The combination of popping sensation and water is irresistible.
24. Squeeze Bottle Painting
Fill squirt bottles with diluted liquid watercolors. Tape large paper to an outdoor fence or lay it on the ground. Let your toddler squeeze to spray paint onto the paper. The result is a beautiful, abstract watercolor creation.
Imaginative Water Play Scenarios
Water play naturally invites pretend play. These setups encourage storytelling and imagination.
25. Animal Rescue Operation
Add plastic animals to the water bin. Provide tools like spoons, nets, and scoops. Announce that the animals need rescuing from the “flood” or “ocean.” Your toddler becomes the hero, saving each animal and returning them to “dry land.”
26. Dinosaur Swamp
Add plastic dinosaurs, small trees or plants (real or fake), and some rocks to your water bin. Create a prehistoric swamp where dinosaurs stomp and splash. Add a few drops of green food coloring for extra swamp effect.
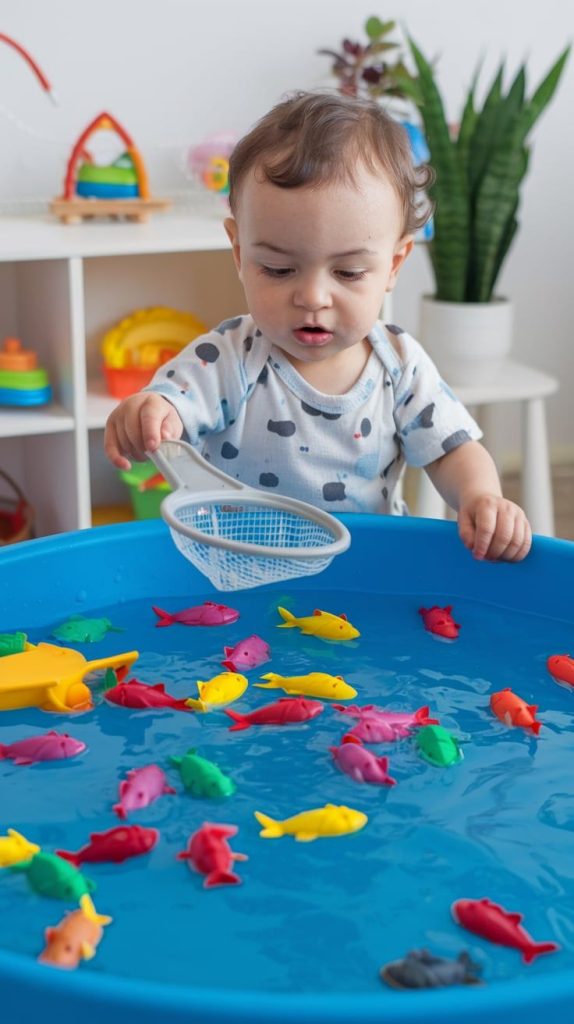
27. Fishing Pond
Cut simple fish shapes from craft foam. Add a paperclip to each. Create a fishing pole by tying a string to a stick and attaching a small magnet to the string’s end. Your toddler can “fish” for the foam fish in the water bin.
28. Boat Races
Make simple boats from recycled materials: milk cartons, foam trays, or even leaves. Add a small sail using a toothpick and paper. Place them in the water and blow to race them across the bin. This introduces air power and competition.
29. Mermaid or Pirate Adventure
If your toddler has small dolls or figures, create an ocean adventure. Add shells, blue food coloring, and maybe some “treasure” (plastic jewels or coins) hidden at the bottom. Let the dolls explore the deep sea.
30. Soup Kitchen
Provide bowls, spoons, and “ingredients” like leaves, flower petals, grass clippings, and small stones. Your toddler can stir and serve “soup” to their stuffed animals. This combines water play with imaginative role-play and caregiving.
Quick Setup Indoor Water Play
When you need something fast, these activities require minimal supplies.
31. Sink Time
Place a step stool at the kitchen sink. Fill one side with a few inches of warm water and add plastic cups and toys. Stand nearby while your toddler plays. The sink contains the mess perfectly, and you can prep dinner while supervising.
32. Tub Before Bath
Before actual bath time, let your toddler play in the empty tub with a small amount of water and some containers. When they’re done, simply pull the plug and start the real bath. This buys you time and makes bath transition easier.
33. Water Table Indoors
If you have a water table, it can come indoors temporarily. Place it on a large plastic tablecloth or several towels. Add an inch of water and let your toddler play. This works especially well on days when outdoor play isn’t possible.
34. Ice Painting
Freeze water in ice cube trays. When frozen, sprinkle a little salt on each cube and offer them to your toddler on a tray with thick paper. As the ice melts, it leaves water marks. The salt creates interesting melting patterns.
35. Spray Bottle Window Fun
On a sunny day, fill a spray bottle with water and let your toddler spray the outside of windows. They’ll watch the water run down the glass and can “wash” the windows while you supervise from inside.
36. Kitchen Tool Wash
After cooking, fill one side of the sink with soapy water and let your toddler “wash” the unbreakable kitchen tools—plastic spatulas, measuring cups, mixing bowls. They feel helpful, and some pre-rinsing actually happens.
Seasonal Water Play: Adapting Through the Year
Water play isn’t just for summer. Here’s how to adapt throughout the year.
Summer Water Play
Focus on cooling: add ice, play in the shade, use spray bottles
Combine with sunscreen breaks
Offer water play before naps—the calm can help with sleep
Use the hose liberally; the novelty never wears off
Spring Water Play
Add rain boots and let puddle jumping be the activity
Collect rainwater in bins for play
Look for worms and bugs after rain; observe them in a temporary water habitat
Wash outdoor furniture and toys together as spring cleaning
Fall Water Play
Add autumn leaves to the water bin for sensory exploration
Use warm water for comfort on cooler days
Add pumpkin seeds or small gourds to the bin
Wash fall vegetables from the garden together
Winter Water Play
Yes, water play works in winter! Use warm water indoors
Add ice cubes made with natural materials (berries, pine needles) frozen inside
Fill spray bottles with warm water for window “painting”
Create a sink or tub station with extra-warm water and cozy towels ready
Troubleshooting Common Water Play Challenges
Even the best activities hit snags. Here’s how to handle common issues.
“My toddler just wants to dump the water on the ground.”
This is developmentally normal. Toddlers are learning about gravity and flow. If this happens:
Outdoors: Let it happen. The ground needs water anyway. Indoors: Set clear limits. “Water stays in the bin. If water goes on the floor, we’ll need to clean up and try again another time.” Follow through calmly if needed.
“They lose interest after five minutes.”
Start with five minutes. That’s actually a long time for some toddlers. Build up duration slowly. Also check:
Is the water the right temperature?
Are there enough interesting tools?
Are you hovering too closely? Sometimes stepping back increases engagement.
“It’s too messy.”
Embrace the prep that prevents stress:
Play outside whenever possible
Use waterproof mats or towels
Dress child in minimal clothing
Keep cleanup supplies ready nearby
Remember that mess is temporary, but development lasts
“They try to drink the water.”
This is common with younger toddlers. Respond by:
Using edible sensory bases occasionally (like yogurt or applesauce) for variety
Redirecting firmly: “Water is for pouring, not drinking. Let’s pour into this cup instead.”
Supervising closely and removing the bin if drinking persists
Knowing that most toddlers outgrow this phase
What Parents Are Asking: FAQs About Water Play
At what age can I start water play?
You can start water play as soon as your baby can sit independently with support. For infants, shallow water in a flat container with close supervision works. Always stay within arm’s reach.
How much supervision does water play need?
Constant, active supervision. This means being close enough to touch your child, not just in the same room. Water play is wonderful, but it requires your full attention.
What if my toddler is afraid of water?
Start smaller. Offer a wet washcloth to squeeze. Provide a shallow tray with barely any water. Let them control the pace completely. Never force. Fear usually passes with gentle, repeated exposure.
How do I store water play supplies?
Use a clear plastic bin with a lid. Store it somewhere accessible to you but not your child. Rotate tools occasionally to keep interest fresh. Wash and dry everything thoroughly between uses to prevent mold.
Can water play help with sensory processing issues?
Many occupational therapists recommend water play for children with sensory processing differences. The water provides consistent, predictable input that children can control. If your child has diagnosed sensory issues, consult with their therapist for specific recommendations.
How do I clean up after water play?
Have a system:
Remove child for changing
Drain water (use it to water plants if clean)
Wipe down toys and bin
Air dry everything before storing
Hang wet towels to dry Total time: about five minutes.
The Bottom Line: You’re Doing Enough
Here’s the truth that sometimes gets lost in parenting articles: you don’t need elaborate setups, expensive equipment, or Pinterest-perfect execution. Your toddler doesn’t care if the water is in a beautiful wooden table or an old plastic bin. They don’t care if the toys are educational or just random kitchen items.
They care about the water. They care about your presence. They care about the freedom to explore.
When you offer water play, you’re offering something deeper than entertainment. You’re offering autonomy—the chance to control their environment. You’re offering sensory input that organizes their nervous system. You’re offering connection through shared wonder.
And sometimes, you’re just offering yourself a moment of peace while your child happily pours water from cup to cup for the hundredth time.
That matters too.
Save this guide. Pin it to your parenting board, bookmark it on your phone, share it with your mom group. The next time you hear “I’m bored” or feel the afternoon drag, you’ll have 35+ ideas ready to go—and the confidence that water play is exactly what your toddler needs.
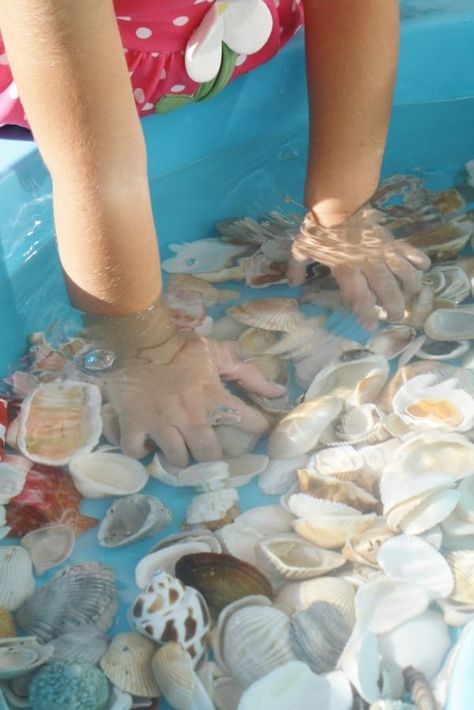
Summer is synonymous with sunshine, warmth, and the irresistible call of water. For children, water isn’t just a way to cool down—it’s a portal to adventure, sensory exploration, and pure, unadulterated joy. Whether you have access to a pool, a lake, the ocean, or just a backyard and a garden hose, the possibilities for aquatic fun are endless.
In a world where screens often dominate leisure time, water activities offer a refreshing way to engage kids physically and creatively. They promote active play, build confidence, and create the kind of childhood memories that last a lifetime. This guide is packed with ideas for summer water activities that kids will love, organized by location and age group, along with essential safety tips to ensure the fun never stops.
Safety First: Essential Rules for Water Fun
Before we dive into the activities, it’s crucial to establish a foundation of safety. Water is wonderful, but it demands respect. These non-negotiable rules will keep everyone safe.
Active Supervision is a Must: This is the most important rule. Never leave children unattended near any body of water, including pools, bathtubs, and even large buckets. An adult should be within arm’s reach, providing constant, undistracted supervision.
Swim Lessons Are a Gift: Enrolling children in age-appropriate swim lessons builds confidence and teaches essential water survival skills. It’s one of the best investments you can make in their safety.
The Life Jacket Rule: Non-swimmers and young children should always wear a properly fitted, U.S. Coast Guard-approved life jacket when in or near natural bodies of water (lakes, rivers, oceans) or on boats. Inflatable toys and floaties are not safety devices.
Sun Protection is Key: Water reflects and intensifies the sun’s rays. Apply a broad-spectrum, water-resistant sunscreen liberally and often. Don’t forget hats, sunglasses, and protective swimwear.
Stay Hydrated: It’s easy to forget to drink water when you’re surrounded by it. Encourage regular water breaks to prevent dehydration and heat exhaustion.
Establish Clear Rules: Teach children to never run near a pool, to always ask permission before getting in the water, and to never pretend to drown.
Backyard and Poolside Fun: Turning Your Home into a Water Park
You don’t need a massive pool to have a water wonderland at home. These activities transform a simple backyard into a hub of aquatic entertainment.
1. The Classic Sprinkler Run
The humble sprinkler is a rite of passage. It’s simple, effective, and endlessly fun. Kids will spend hours running, jumping, and dancing through the cool spray. For a twist, try a “limbo” contest under the sprinkler or set up an obstacle course that requires crawling through the water.
2. DIY Slip ‘N Slide
This classic is easier to make than you think. Unroll a heavy-duty plastic tarp or a long sheet of plastic sheeting on a gentle slope in your yard. Secure the edges with landscape stakes or heavy rocks. Soak it with water from a hose and add a small amount of baby shampoo for extra slipperiness (optional). The result is hours of belly-flopping, giggling fun.
3. Water Balloon Piñata and Games
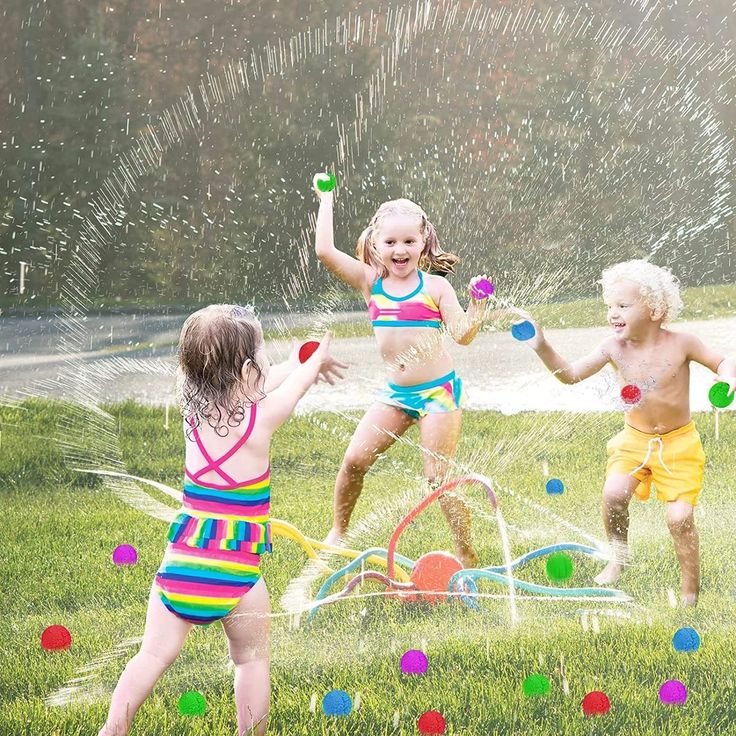
Water balloons are a staple for a reason. Beyond the classic water balloon fight, try a water balloon piñata. Hang a bunch of filled balloons from a tree branch or clothesline and let kids take turns trying to break them with a plastic bat (while blindfolded, of course!). You can also play water balloon toss, where partners stand facing each other and take a step back after each successful catch until one balloon breaks.
4. Sponge Bombs: The Reusable Alternative
Tired of cleaning up popped balloon pieces? Sponge bombs are the eco-friendly answer. Simply cut colorful kitchen sponges into strips, tie them together in the middle with a string or zip tie, and fan out the strips. They soak up tons of water, are soft when they hit, and can be used again and again.
5. Kiddie Pool Adventures
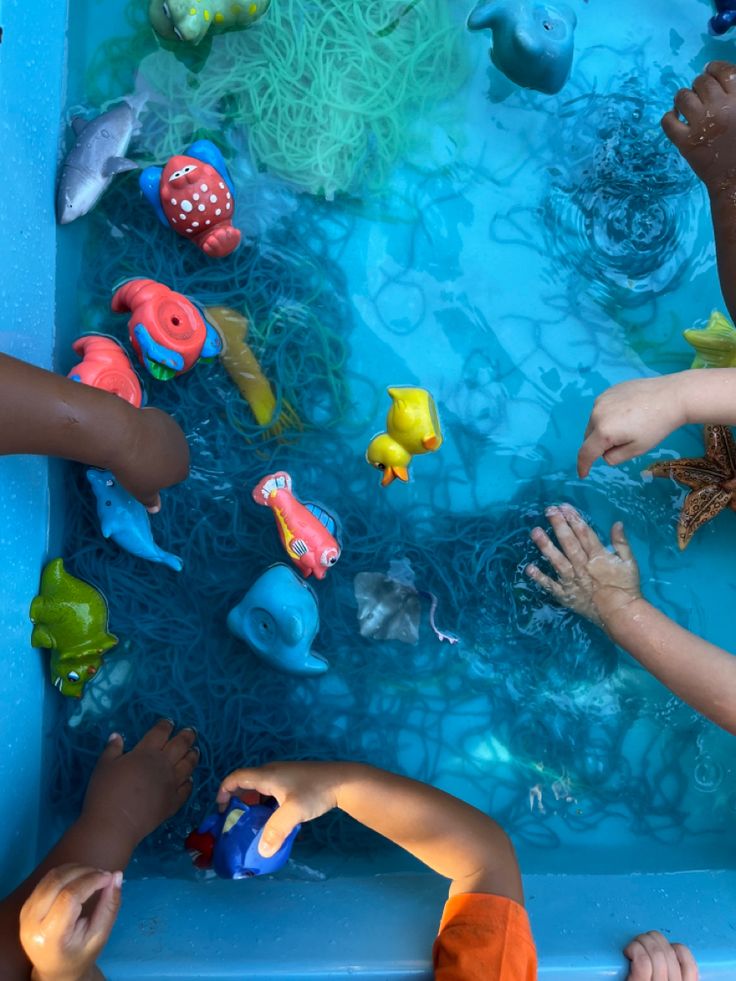
A small, inflatable kiddie pool is a gateway to endless imaginative play. It can be a:
Mini Splash Park: Add cups, spoons, funnels, and small plastic toys.
Fishing Pond: Toss in some magnetic or plastic fish and let the kids “fish” with nets or magnetic poles.
Cooling-Off Station: Simply fill it with a few inches of cool water and let toddlers splash safely while you supervise from a nearby chair.
6. The Great Sponge Relay
A hilarious team game. You’ll need two buckets for each team, one filled with water and one empty, and a large natural sponge. Teams race to soak the sponge, run to their empty bucket, and wring it out. The first team to transfer all the water (or reach a fill line) wins. It’s simple, active, and perfect for parties.
Aquatic Adventures at the Pool
If you have access to a larger swimming pool, the fun multiplies exponentially.
1. Marco Polo
No pool day is complete without this classic game of blind man’s bluff in the water. One person closes their eyes and shouts “Marco,” and the others must respond “Polo,” trying to avoid being caught. It’s a fantastic game for building listening skills and spatial awareness in the water.
2. Pool Noodle Fun
Pool noodles are incredibly versatile. They can be used for:
Jousting: Two kids (or adults) on inflatable rafts try to knock each other off with noodles.
Obstacle Course: Create a weaving course by sticking noodles into the pool’s deck drains or weighting them down.
Noodle Horses: Simply sit and bounce around the pool like they’re riding a majestic steed.
3. Treasure Hunts
Toss a handful of dive rings, coins, or other sinking toys into the shallow or deep end (depending on swimming ability). Kids can compete to see who can collect the most “treasure.” For non-swimmers, use a net to scoop up floating toys.
4. Volleyball and Basketball
Water volleyball and basketball are fantastic for groups. They adapt the rules of the land-based games for a more buoyant, splash-filled environment, encouraging teamwork and friendly competition.
Lakeside and River Adventures
Natural bodies of water offer a different kind of magic, connecting kids with nature in a profound way.
1. Rock Skipping
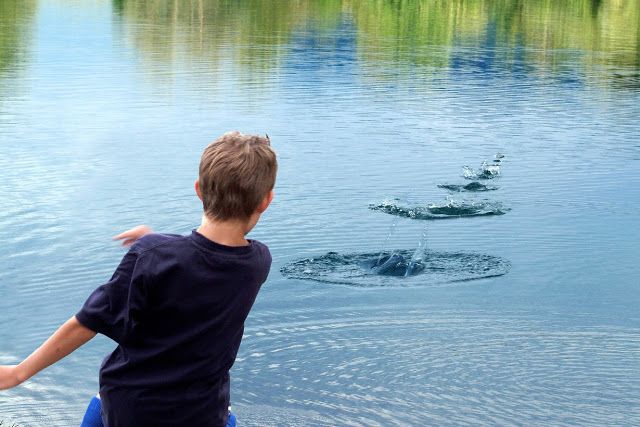
A timeless skill that feels like magic. Show your child how to choose a flat, smooth rock and side-arm it across the water’s surface. The challenge of getting the most skips is surprisingly addictive for all ages.
2. Catch and Release Fishing
Fishing teaches patience, respect for nature, and the thrill of the catch. Focus on the experience rather than the keep. Let kids reel in small sunfish or perch, admire them, and gently release them back into the water.
3. Building a Dam
In a shallow, slow-moving stream or creek, kids can spend hours engineering a dam using rocks, sticks, and mud. It’s a hands-on lesson in physics and hydrology, and the sense of accomplishment when they successfully divert the water is immense.
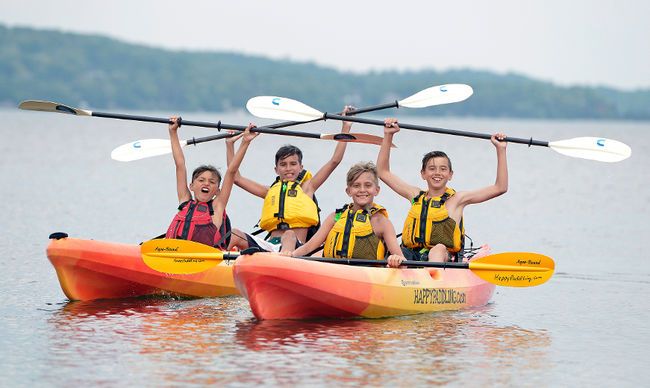
4. Kayaking or Canoeing
Paddling across a calm lake is a peaceful and bonding experience. It gives kids a new perspective of the water and shoreline. With a parent in the boat, even young children can enjoy the ride and feel the thrill of skimming across the water’s surface.
5. Mud Pie Kitchen
Find a safe, muddy spot along the shore. Provide old pots, pans, spoons, and cups. Kids can spend hours concocting “soups,” “mud pies,” and other creations, mixing water, mud, leaves, and pebbles. It’s messy, sensory, and developmentally wonderful.
Oceanfront Escapades
The beach is the ultimate water playground, offering a sensory-rich environment like no other.
1. Wave Jumping
This is pure, primal fun. Hold your child’s hand and jump over incoming waves together, or let older kids try to body surf one in. It’s a thrilling way to connect with the ocean’s energy.
2. Sandcastle Engineering
The beach is a giant sandbox. Go beyond simple buckets and teach kids how to build elaborate sandcastles with moats and walls. Bring spoons for carving, straws for blowing away loose sand, and shells for decoration. The goal isn’t perfection; it’s the creative process.
3. Tide Pooling
If you’re on a rocky coast, exploring tide pools at low tide is like entering a hidden aquarium. Gently observe the fascinating creatures—anemones, hermit crabs, tiny fish—that live in these temporary habitats. Teach kids to look with their eyes and not touch, to protect these delicate ecosystems.
4. Beach Scavenger Hunt
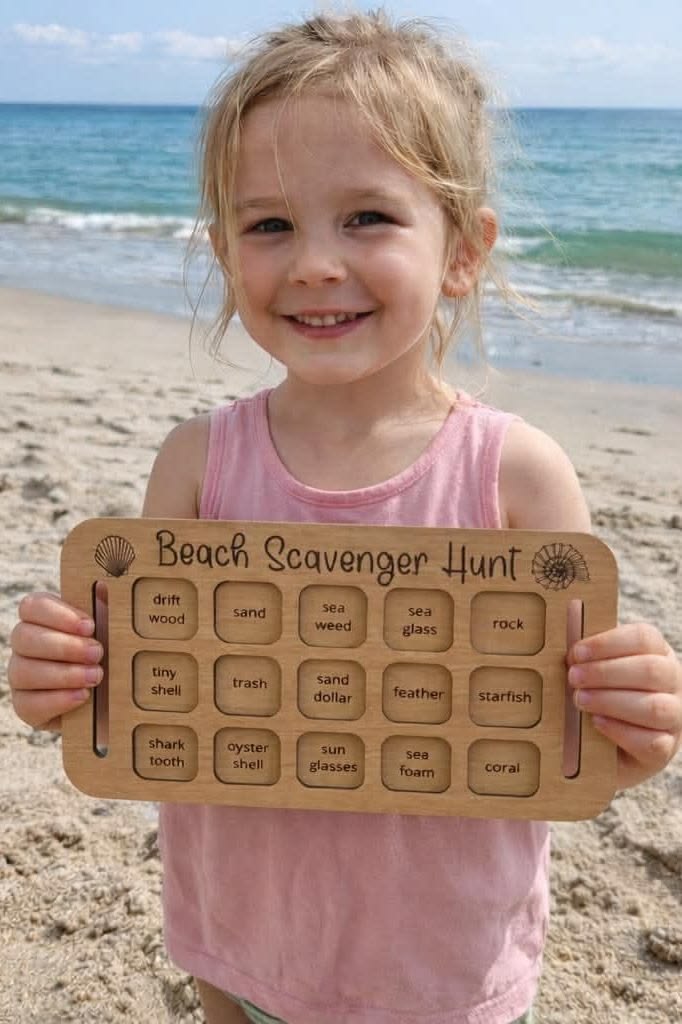
Create a list of items to find: a smooth sea glass, a perfectly spiraled shell, a piece of driftwood, a feather, a crab claw. This activity turns a simple walk on the beach into an exciting quest.
Fun for the Toddler and Preschool Set (Ages 1-4)
For the littlest ones, water play is all about sensory exploration and fine motor skill development. Keep it simple and safe.
Water Table Wonderland: A water table is an investment in hours of entertainment. Fill it with cups, funnels, scoops, and floating toys. Add a few drops of food coloring for a “magic potion” effect.
Toy Washing Station: Fill a bin with soapy water and give toddlers a scrub brush and some of their plastic dinosaurs, cars, or farm animals. They’ll love the “work” of washing them clean.
Pouring Practice: In the kiddie pool or with a large tub on the ground, provide various containers—cups, bottles, watering cans—and let children practice pouring water from one to another. It’s a fantastic pre-math skill.
Splash Pads and Spray Grounds: These public spaces are specifically designed for young children. With no standing water, they offer a safe environment to run through fountains and geysers.
Conclusion: A Summer to Remember
Summer is fleeting, but the joy of water play creates memories that last a lifetime. Whether it’s the simple pleasure of a sprinkler on a hot day, the thrill of catching a wave, or the quiet focus of building a sandcastle, these activities offer more than just fun. They provide opportunities for connection, physical activity, and a deep appreciation for the natural world.
So, slather on that sunscreen, fill up the water balloons, and dive in. The water is waiting, and a summer of splash-filled memories is just a splash away.
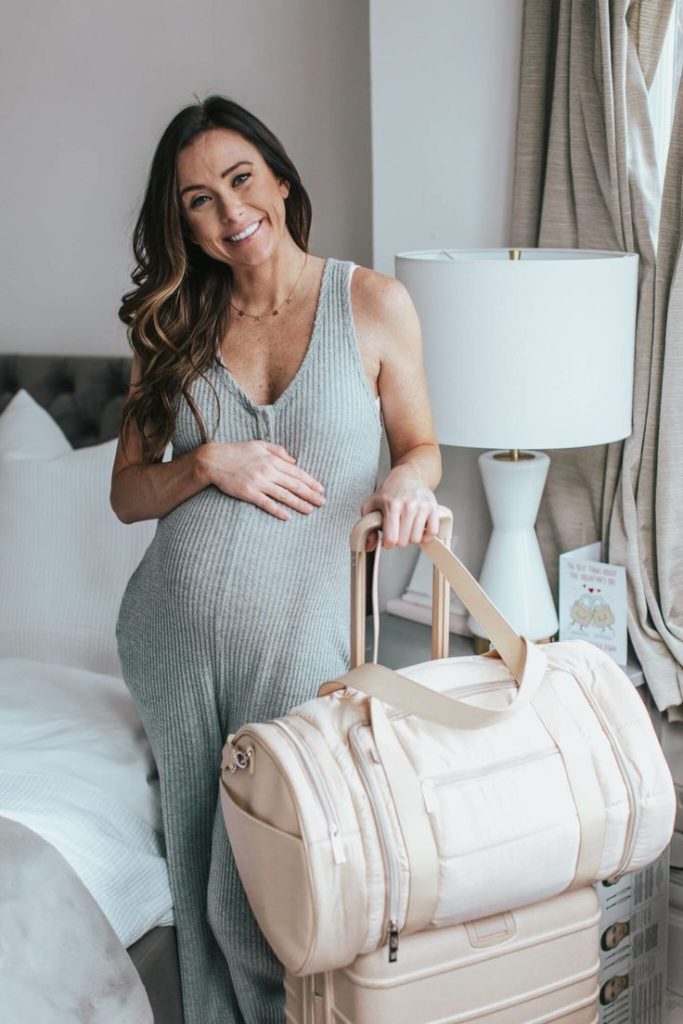
Packing your hospital bag is one of those milestone moments in pregnancy that makes everything feel real. The due date is approaching, the nursery is (mostly) ready, and now it’s time to gather everything you’ll need for the big day. But knowing exactly what to pack in your hospital bag can feel overwhelming—do you really need three different outfits? What about the baby? And what does your partner need?
After consulting with experienced moms and medical professionals, we’ve created the ultimate hospital bag checklist to ensure you’re prepared, comfortable, and ready to focus on what truly matters: meeting your baby . Let’s dive into exactly what you need to pack, clever organization tips, and what to leave at home.
When Should You Pack Your Hospital Bag?
The general rule of thumb is to have your bag packed and ready by 36 weeks pregnant. Why? Because babies born after 37 weeks are considered full-term, and some may decide to make an early entrance. Having your bag ready eliminates last-minute scrambling and stress.
Keep your bag in an easily accessible spot—by the front door or even in your car trunk—and make sure your partner knows exactly where it is . Trust us, when contractions start at 2 AM, you won’t want to be hunting for your toothbrush.
The Smart Packing Strategy: The Three-Bag Method
Before we dive into the items, let’s talk strategy. Many experienced moms swear by the “three-bag” method to stay organized :
Bag #1: Labor and Delivery Essentials – Your immediate-access bag for during active labor
Bag #2: Recovery and Stay Items – Everything you’ll need during your 1-3 day hospital stay
Bag #3: Going-Home Outfits – Discharge day essentials for you and baby
This approach prevents you from digging through newborn diapers to find your phone charger while in early labor .
Essential Documents: The Most Important Items
Before you worry about cute outfits or snacks, gather all necessary paperwork. This is the one thing the hospital absolutely requires .
Keep these documents in a separate, easy-to-access folder:
Photo ID (driver’s license or passport)
Health insurance card and any pre-registration forms
Your birth plan (if you have one)
Any medical records your doctor has given you
Emergency contact list
Hospital paperwork or pre-admission forms
Pro tip: Make copies of everything and keep the originals safe at home. You’ll thank yourself later.
For Mom: Labor and Delivery Comfort Items
This section is all about your comfort during the intensity of labor. These items can make a significant difference in your experience .
Clothing and Comfort Essentials
A lightweight robe – Perfect for walking the halls, skin-to-skin contact, and easy nursing access. Dark colors are smart in case of spills .
Non-slip socks or slippers – Hospital floors are cold, and grippy socks will keep you safe when walking around .
Comfortable nightgown or pajamas – Choose something loose, soft, and front-opening if you plan to breastfeed. Don’t pack your favorite—it might get messy .
Labor gown (optional) – Some moms prefer their own comfortable labor gowns designed for easy access .
Birthing ball or massage tools – A tennis ball or handheld massager can provide counter-pressure relief during back labor .
Comfort During Labor
Lip balm – Hospital air is extremely dry, and lips can get chapped quickly during labor .
Hair ties and headbands – You’ll want to keep hair off your face during active labor .
Massage lotion or oil – Unscented options are best for sensitive situations .
Hard candy or lollipops – These help with dry mouth, especially if you’re not allowed to eat .
Your own pillow – Bring one with a colored pillowcase so it doesn’t get mixed up with hospital linens. The familiar scent can be incredibly comforting .
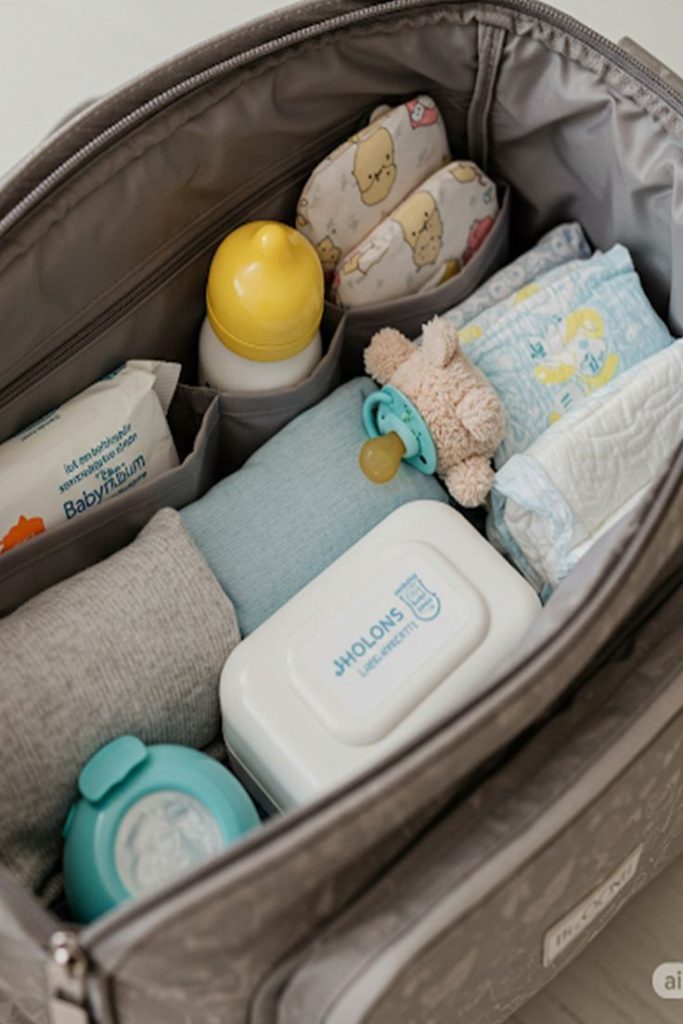
Postpartum Recovery: Essentials for After Birth
Once your baby arrives, your focus shifts to recovery. These items will help you feel more comfortable and human .
Postpartum Must-Haves
Nursing bras – Pack 2-3 well-fitting, wireless nursing bras. Your breasts will be larger than usual, so consider adjustable options .
Nipple cream – Even if you don’t think you’ll need it, having quality nipple cream on hand can prevent small issues from becoming painful problems .
High-waisted underwear – Many moms prefer full-coverage cotton underwear that won’t irritate a C-section incision. The hospital provides mesh underwear, but having your own can feel more comfortable .
Maternity pads – While hospitals provide these, many women prefer the comfort and absorbency of their own brand of heavy-duty overnight pads. Pack about 24 super-absorbent pads .
Peri bottle – The hospital will provide one, but a peri bottle with an angled spout can be more effective for soothing and cleaning .
Toiletries and Personal Care
Travel-sized shampoo, conditioner, and body wash
Toothbrush, toothpaste, and floss
Deodorant
Face wipes and moisturizer – Hospital air dries skin out quickly
Dry shampoo – A new mom’s best friend
Glasses and/or contact lenses with solution
Basic makeup – If it makes you feel more like yourself for photos
Going-Home Outfit for Mom
Pack loose, comfortable clothing in your 6-month pregnancy size, not your pre-pregnancy size. Your body has just performed a miracle and needs time to recover .
Loose-fitting top or nursing-friendly shirt
Comfortable bottoms with elastic waistbands (yoga pants are perfect!)
Cardigan or light jacket for temperature control
Comfortable slip-on shoes (bending over to tie laces may be difficult)
For Baby: Welcoming Your Little One
Your newborn needs very little in the hospital, but a few thoughtful items can make their first days more special .
Clothing and Comfort
Onesies – Pack 2-3 side-snap kimono styles, which are best for avoiding the umbilical cord stump
Footed sleepers – Choose ones with zippers for easier diaper changes
Mittens – To prevent baby from scratching their face
Soft hat – The hospital provides these, but you might want your own special one
Swaddling blankets – Lightweight, breathable options work well for photos and keeping baby cozy
Diapering and Feeding
Hospitals typically provide diapers, wipes, and basic care items during your stay . However, you may want:
Your own preferred brand of diapers if baby has sensitive skin
Burp cloths
Nursing pillow if you plan to breastfeed
Formula starter pack if you’re not breastfeeding (check with your hospital about their policies)
Going-Home Outfit for Baby
This is the photo-op moment! Pack:
A special outfit appropriate for the weather (newborn and 0-3 month sizes—babies can surprise you!)
A warm blanket for the car ride home if it’s cold
Soft socks or booties
Crucial Reminder: The car seat is non-negotiable and required by law. Install it in your car well before your due date and know how to use it correctly .
For Partner: The Support Person’s Survival Kit
Your partner needs sustenance and comfort too! Pack them a separate bag with :
Change of clothes and comfortable layers
Toiletries (toothbrush, deodorant)
Snacks and drinks – Hospital cafeterias have limited hours
Long phone charger
Pillow and blanket – Hospital chairs aren’t the most comfortable
Entertainment – Book, tablet, or downloaded movies
Cash for vending machines and parking
Camera or phone for capturing memories
Electronics and Entertainment
Don’t underestimate how much time you’ll spend waiting. Pack these tech essentials :
Long phone charger (10 feet) – This is the #1 most forgotten item! Outlets are often far from the bed
Portable power bank – For charging when outlets aren’t accessible
Headphones or earbuds – For listening to music, podcasts, or watching videos without disturbing others
Tablet or e-reader – Loaded with books, movies, or shows
Portable speaker – For creating ambiance during labor (be mindful of roommates)
Camera – Designate someone as the official photographer so you can focus on labor
Snacks and Hydration
Hospital food isn’t always available when you need it. Pack :
Reusable water bottle with a straw (easier to drink from while lying down)
Always check with your care team before eating during labor, as policies vary .
Special Considerations for C-Section
If a Cesarean section is planned or possible, add these items :
High-waisted underwear and loose pants that sit above the incision
Slip-on shoes (bending to tie laces will be difficult)
A firm pillow to hold against your incision when coughing or laughing
Stool softeners (confirm with your doctor first)
What to Leave at Home
Hospitals aren’t responsible for personal belongings. Leave these items safely at home :
Expensive jewelry or valuables
Large amounts of cash
Strong perfumes or scented lotions (can bother newborns and other patients)
Multiple suitcases – Space is limited; stick to one or two small bags
Your own breast pump – Hospitals have clinical-grade pumps available
Packing Timeline: When to Have Everything Ready
36 Weeks: Have your bags 90% packed and easily accessible
38 Weeks: Bags completely packed, in the car, and everyone knows where they are
40+ Weeks: Double-check that you haven’t borrowed anything from your hospital bag for daily use
Pro Tips for a Smooth Hospital Stay
Label your items – Put your name and phone number on chargers and personal items in case they get misplaced
Use clear bags – For toiletries so security can see contents easily
Pack snacks in easy-to-reach pockets
Pre-download entertainment – Hospital Wi-Fi can be spotty
Take a hospital bag checklist – Use this article as your guide!
The Bottom Line
Packing your hospital bag is a tangible step toward meeting your baby. The goal isn’t perfection—it’s preparation. As one nurse reassures, “If you forget an item, don’t worry. We have everything you need at the hospital. The items you bring are just to keep you comfortable” .
So take a deep breath, use this hospital bag essentials checklist, and pack with confidence. You’ve got this, mama. Soon you’ll be holding your baby, and none of the packing details will matter—just that beautiful moment when you finally meet face to face.
What’s the one item you can’t imagine birthing without? Share in the comments below!
Let’s be honest: as a mom, your hair routine needs to earn its place in your day.
Between school runs, work deadlines, playdates, and the endless mental load of running a household, spending an hour on your hair is a luxury most of us simply don’t have. But here is the good news: 2026 is the year of haircuts that do the work for you.
Whether you are a working mom racing to meetings, a stay-at-home mom chasing toddlers, or somewhere in between, the right haircut should make you look polished without demanding constant attention. Below, I have curated three standout options for short, medium, and long hair—each chosen specifically for busy moms who refuse to sacrifice style for sanity.
Plus, I will walk you through home care vs. salon priorities, how to choose styles based on your face and body shape, and the quick styling tricks that make these cuts truly wash-and-wear.
Before You Cut: Two Minutes That Save You Months of Regret
Before we dive into specific styles, take two minutes to consider two factors that determine whether a haircut will actually work for your life:
Your face shape matters. The right cut should frame your features and balance proportions, not fight against them . If you have a round face, look for styles with height and angles to create elongation. Square faces benefit from soft, wispy layers that soften strong jawlines. Oval faces can pull off almost anything—lucky you .
Your lifestyle matters more. A cut that requires daily blow-drying is only practical if you actually have time for daily blow-drying. Be honest with yourself about how many minutes you can realistically dedicate to your hair .
Short Hair: The Ultimate Time-Saver
Short hair is having a major moment in 2026, and for moms, it is often the ultimate power move. The key is choosing a cut with enough texture and softness that it never looks severe or dated .
1. Textured Pixie Bob (Pixie Bob)
The Look: This hybrid cut combines the cropped back of a pixie with slightly longer, textured layers on top that blend into bob-length pieces around the face. It is playful, modern, and incredibly chic .
Why Moms Love It:
Drying time: Under five minutes. Towel dry, add a dab of texturizing paste, and go .
Grows out gracefully: Unlike severe crops that look unkempt after two weeks, the layered texture means you can stretch salon visits to 6–8 weeks .
Works for: Fine hair that needs volume, or thick hair that needs taming. The layers remove bulk while maintaining shape .
Face Shape Notes: Particularly flattering for oval and heart-shaped faces. If you have a round face, ask your stylist for extra height at the crown to create elongation .
Styling Shortcut: When you have two minutes, rough-dry with fingers and pinch a pea-sized amount of molding paste through the ends for piece-y definition. When you have zero minutes, it still looks intentionally tousled.
2. Soft Chin-Length Bob with Side Part
The Look: A classic bob that sits right at the chin, softened with subtle internal layers that prevent the “helmet head” effect. The deep side part adds asymmetry and movement .
Why Moms Love It:
One-move styling: A quick run-through with a flat brush while blow-drying is enough. The side part does the heavy lifting .
Professional polish: This cut reads as “put together” in work meetings but never looks overdrawn for the playground.
Versatility: Wear it sleek, tuck it behind ears, or add a quick wave with a straightener for date night .
Face Shape Notes: Ideal for square and round faces. The side part breaks up symmetry, while the chin length draws attention to the jawline .
Styling Shortcut: Sleep with your hair twisted into two loose pin curls at the sides. Morning shake-out gives you soft, undone waves without heat.
Medium Length: The Sweet Spot of Versatility
Medium length (shoulder-grazing to collarbone) remains the most popular choice for moms—and for good reason. It offers styling flexibility without the weight and maintenance of very long hair .
1. Feathered Shoulder-Length Cut with Curtain Bangs
The Look: Soft, feathered layers that curve inward around the face, paired with wispy curtain bangs that part naturally in the middle and blend seamlessly into the rest of the cut. The overall effect is light, airy, and incredibly flattering .
Why Moms Love It:
Air-dry friendly: The layers are cut to work with your natural texture. Whether your hair dries straight or with a slight wave, it lands correctly .
Bangs without commitment: Curtain bangs grow out beautifully and can be pinned back on days you want them off your face.
Hides regrowth: The layered movement distracts the eye, meaning you can stretch color appointments .
Face Shape Notes: A dream for round and square faces—the face-framing pieces soften angular features and create the illusion of length .
Styling Shortcut: Spritz salt spray into damp hair, twist sections around your fingers, and let air dry. The feathered layers do the rest.
2. Textured Lob with Face-Framing Layers
The Look: A long bob (lob) that hits just above the shoulders, with choppy, textured ends and soft layers that start at chin level and blend downward .
Why Moms Love It:
Ponytail compatibility: Unlike shorter cuts, this length can still be pulled back for gym sessions or hectic mornings .
Volume boost: The layers create natural fullness, making it ideal for fine or thinning hair .
Modern edge: The textured ends keep this from looking like a basic mom cut—it feels intentional and current .
Face Shape Notes: Universally flattering, but especially good for heart-shaped faces as the volume around the jaw balances a wider forehead .
Styling Shortcut: On day-two hair, add dry shampoo at the roots, tousle with fingers, and go. The texture actually improves with a little grit.
Long Hair: Keep It, But Keep It Intentional
You don’t have to cut your long hair to be a stylish mom. The key is cutting it with purpose so it looks intentional rather than “I haven’t had time for a haircut since 2019” .
1. Long Layers with Soft Face Frame
The Look: Length is preserved, but long layers are cut throughout to remove weight and add movement. The front pieces are slightly shorter, softly framing the face .
Why Moms Love It:
Maximum versatility: Wear it down, in a high ponytail, in a messy bun, or braided. The layers mean every style looks deliberate .
Healthy appearance: Removing weight prevents the triangle shape that long hair can get, and the face frame draws attention upward .
Low-commitment: If you occasionally miss salon appointments, long layers grow out invisibly—no awkward phases.
Face Shape Notes: Works for everyone, but the face-framing pieces can be customized to soften any face shape. For square faces, keep them wispy; for round faces, take them longer .
Styling Shortcut: Master the 60-second messy bun. Flip head upside down, gather hair loosely, twist, and secure. Pull out face-framing pieces. Instant polish.
2. Soft Layered Cut with Wispy Ends
The Look: Long hair with gentle, invisible layers throughout and ends that are lightly textured rather than blunt. The overall effect is soft, romantic, and intentionally undone .
Why Moms Love It:
Ponytail with purpose: Even in a simple ponytail, the wispy ends add softness and movement that reads as styled .
Heatless waves: Braid damp hair before bed; wake up to effortless waves that the layers enhance beautifully.
Forgiving grow-out: Because the ends are already textured, they never look raggedy between trims .
Face Shape Notes: Best for oval and long face shapes—the softness prevents the face from appearing longer .
Styling Shortcut: Sleep in a loose, high ponytail. Morning shake-out gives you instant volume and a gentle bend.
Home Hair Care vs. Salon Priorities for Busy Moms
The Reality: Most of us see our stylist every 8–12 weeks, but our hair needs attention weekly. Here is how to bridge that gap with minimal effort .
At Home (10 Minutes Total)
Washing (3 minutes): Use sulfate-free shampoo focused on the scalp only. Conditioner from mid-length to ends only—never the roots .
Protecting (2 minutes): Leave-in conditioner with heat protection if you’ll style, or a lightweight hair oil if air-drying. This prevents breakage and keeps hair looking glossy between salon visits .
Styling (5 minutes): Work with your natural texture rather than against it. If your hair is straight, sleek ponytails. If wavy, enhance with scrunching. Fighting your texture costs time you don’t have .
Weekly mask (10 minutes): Once a week, swap conditioner for a deep conditioning mask. Even while you shower, let it sit for a few minutes. Avocado, honey, and olive oil make an excellent DIY version .
Salon Priorities
Communicate your life: Tell your stylist exactly how much time you have daily. A good stylist will cut accordingly .
Ask for grow-out grace: Request cuts that look intentional at week 6, not just week 1. Textured ends and invisible layers are your friends .
Schedule before you leave: Book your next appointment at the current one. Future-you will be grateful .
Quick Styling Toolkit (Products That Earn Their Keep)
For busy moms, every product must justify its place on the shelf. These three earn their keep daily:
Dry shampoo: Not just for oil—adds volume, texture, and extends styles by 24 hours .
Multi-purpose styling cream: Use on damp hair for air-dry definition, or on dry hair for smoothing flyaways.
Texturizing spray: Transforms basic ponytails into intentional styles in seconds .
The Bottom Line
The best mom haircut in 2026 isn’t about following trends blindly—it is about choosing a style that respects your time, enhances your features, and makes you feel like yourself .
Whether you go for the ultra-efficient textured pixie bob, the versatile feathered lob, or intentionally layered long hair, the right cut should make you think, “I look good,” not “I spent hours on this.”
Save this guide for your next salon visit—and bring photos. Your stylist will thank you, and your morning self will thank you even more.
We often think of parenting as a set of rules or a to-do list, but at its heart, parenting is a conversation. It is the invisible script that runs beneath every interaction, from the way we handle a spilled glass of milk to how we react to a teenage heartbreak. This “script” is what psychologists call our communication style.
Most of us fall into specific patterns without even realizing it. These patterns are often inherited from our own upbringing—the way our parents spoke to us—or triggered by our current stress levels. By using the 9 Communication Types grid, we can move away from reactive parenting and toward a style that fosters true emotional safety and long-term resilience.
Understanding the 9 Communication Types
To identify where you lie, it helps to look at the two primary axes of parenting: Warmth/Responsiveness and Control/Demand. Where these two intersect determines how you communicate during moments of tension.
1. The Emotion-Coacher (The Gold Standard)
The Emotion-Coacher views a child’s “big feelings” as an opportunity for intimacy and teaching. You validate the emotion before addressing the behavior.
The Benefit: Children of emotion-coachers develop high “EQ” (Emotional Quotient), better social skills, and the ability to self-regulate because they feel understood.
2. The Supportive Coach
Similar to emotion-coaching, but focused on action. You provide a safe harbor while encouraging independence. You offer tools, not just answers.
The Benefit: Builds a “can-do” attitude. The child feels capable because they were guided, not carried.
3. The Collaborative Partner
You involve the child in the problem-solving process.
The Benefit: This builds critical thinking and agency. When a child helps create the solution, they are statistically more likely to follow through with it.
4. The Empathetic Witness
Sometimes, a child just needs to be heard. You don’t try to “fix” the problem; you sit with them in the discomfort.
The Benefit: Teaches the child that their internal world is valid and that “uncomfortable” feelings are not “bad” feelings.
5. The Overprotective Shield
Driven by anxiety, this parent tries to prevent any “productive struggle.”
The Lack of Benefit: Children may become risk-averse or feel incompetent, as the underlying message is: “I have to do this for you because you can’t.”
6. The Dismissive Fixer
You downplay feelings to move past discomfort quickly. “It’s not a big deal, don’t cry.”
The Lack of Benefit: The child learns to suppress emotions, leading to internalizing behaviors (anxiety) or externalizing “explosions” later on.
7. The Controlling Director
High on rules, low on empathy. “Because I said so” is the mantra.
The Lack of Benefit: While it gets immediate compliance, it often leads to rebellion in the teenage years or “learned helplessness.”
8. The Inconsistent Reactor
Your response depends more on your stress level than the child’s action.
The Lack of Benefit: Creates a “walking on eggshells” environment. The child remains in a state of hyper-vigilance, which is taxing on the nervous system.
9. The Detached Spectator
Physically present but emotionally checked out.
The Lack of Benefit: This can lead to attachment wounds, where the child feels their needs are a burden, often resulting in low self-esteem.
How to Identify Where You Lie
To find your “baseline” style, ask yourself these three diagnostic questions:
The Spilled Milk Test: When your child makes a mess, is your first thought about the floor (Controlling), your own stress (Inconsistent), or the child’s feeling of embarrassment (Supportive)?
The Tantrum Reaction: Do you want to stop the noise at all costs (Dismissive), or do you see it as a “nervous system fire” that needs a calm firefighter (Emotion-Coaching)?
The Decision Process: Who picks the weekend activity? If it’s always you, you might be the Director. If it’s a discussion, you’re the Collaborative Partner.
Psychological Tips for Better Communication (Starting Now)
It is never too late to change the communication culture in your home. Whether you have a baby or a teenager, the brain is “neuroplastic”—it can re-wire for connection at any age.
1. For the Small Baby (0-2): The “Serve and Return”
Communication with babies is about contingent responsiveness. When they “serve” (a babble, a cry, a reach), you “return” the serve with eye contact or words. This builds the foundational architecture of the brain.
Tip: Narrate your day. “I’m picking you up now to change your diaper.” This creates a sense of predictability and safety.
2. For the Toddler/Child (3-11): Name it to Tame it
Coined by Dr. Dan Siegel, this technique involves labeling the emotion. When a child is in a “downstairs brain” (survival/emotional) state, their “upstairs brain” (logic) is offline.
Tip: Connect before you correct. If they hit a sibling, say: “You were feeling so frustrated that you wanted to hit. I hear you. But I won’t let you hurt anyone.”
3. For the Teenager (12+): The “Consultant” Approach
This is the hardest pivot. You must move from “Manager” to “Consultant.” If you try to control a teen, they will pull away to establish their own identity.
Tip: Use active listening. When they talk, your goal is to be a “non-anxious presence.” Instead of giving advice, ask: “Do you want me to just listen, or do you want me to help you brainstorm solutions?”
4. The Power of the “Repair”
This is the single most important tool in a “Sturdy Parent’s” kit. You will mess up. You will yell. You will be dismissive.
The Hack: Go back later. “I’m sorry I yelled earlier. I was feeling overwhelmed, and it wasn’t your fault. Can we try that conversation again?” This models accountability and shows the child that relationships can be broken and fixed.
The journey of teaching a child to read often feels like a high-stakes marathon. As parents, we feel the weight of every milestone, wondering if our little ones are “on track” or if we’re doing enough. But here is the secret that changed everything for me: reading isn’t a race to be won; it’s a world to be unlocked.
By shifting our focus from high-pressure drills to a philosophy of “Consistency Over Intensity,” we can foster a genuine love for literacy that lasts a lifetime. This guide provides a 9-step blueprint to help your child find their footing in the world of words, built on patience, trust, and simple daily habits.
The Science of the “Million Word Gap”
Before we dive into the steps, it’s helpful to understand the “why.” Recent neuroimaging studies show that when we read aloud, the brain’s auditory and visual cortices are activated simultaneously, creating robust neural networks. Researchers at The Ohio State University found that children whose parents read to them five times a day enter kindergarten having heard nearly 1.5 million more words than those who weren’t read to. This “million-word gap” is a powerful predictor of later academic success, but the goal isn’t just a number—it’s about the rhythmic activity that “nudges” a child’s brain into detecting patterns in language.
Phase 1: Setting the Foundation
The first three steps are about building a positive relationship with books and sounds. We want to weave literacy into the fabric of your daily life without it feeling like “work.”
Read for Every 10 Minutes: Consistency is your greatest tool. Dedicating just ten minutes a day to reading aloud creates a predictable, cozy routine that associates books with safety and connection. For the youngest learners, focus on “interactive reading”—ask them what they think is happening in the pictures or how a character feels.
Teach 5 New Words Everyday: You don’t need flashcards. Introduce words through context—point out labels at the grocery store, read recipes together, or look at “print-rich” environments like cereal boxes and street signs. This shows children that reading has a practical purpose in the real world.
Introduce One Letter Sound at a Time: Focus on phonemic awareness—the ability to hear individual sounds. Start with the most common sounds (like ‘m’ for mommy or ‘s’ for sun). Use a multi-sensory approach: have them trace letters in sand or use magnetic letters on the fridge to bridge the gap between sound and symbol.
Phase 2: Playing with Language
Once your child is comfortable with basic sounds, it’s time to bridge the gap between hearing a sound and seeing a word through play-based phonics.
Play Simple Word Games: Turn learning into a “Silly Sound Safari.” Call out a sound (e.g., /b/) and hunt through the house for things that start with it. Rhyming games are also crucial; try “Rhyming Ball,” where you roll a ball back and forth only when you hear a rhyming pair (cat/hat).
Help Them Blend Easy Words: This is where the magic happens. Start with simple CVC (Consonant-Vowel-Consonant) words. Use the “Stretching” technique: say the word slowly—/m/ /a/ /p/—and have them “catch” the word. This builds the auditory processing needed for decoding.
Introduce Simple Phonic Rules: Start with the basics, like digraphs (two letters making one sound, like sh or ch). You can introduce “Tricky Words” or “Sight Words”—common words that don’t follow typical rules (like was or they)—gradually, so they don’t get stuck on the “un-phonetic” parts of English.
Phase 3: Building Confidence and Trust
The final phase is about the transition from learning to read to reading for pleasure.
Use Decodable Readers: Success breeds confidence. Choose books that contain only the letter sounds your child has already mastered. When a child can successfully read every word on a page, their “self-efficacy” sky-rockets, making them eager for the next book.
Consistency Over Intensity: It is better to practice for five minutes every single day than for an hour once a week. For busy parents, this might mean “reading” the back of a shampoo bottle during bath time or a quick poem before nap time.
Be Patient and Trust the Process: Every child’s “reading spark” ignites at a different time. Some children are early explorers (ages 2-4), while others need more time for their cognitive infrastructure to settle. Avoid “toxic stress” by keeping the experience joyful.
A Note for the “Productive Mom”
It is easy to turn “teaching to read” into another item on your to-do list. But true literacy grows in the soil of Slow Motherhood. If your child wants to read the same book for the 100th time, let them. Re-reading is actually a neuro-developmental hack that builds familiarity and fluency.
If you are feeling overwhelmed, remember that self-care is part of being a “sturdy parent.” Take five minutes for yourself—journal, breathe, or enjoy your coffee—so that when you sit down for those ten minutes of reading, you are fully present. Your child doesn’t need a perfect teacher; they need a connected guide who enjoys the story as much as they do.
Modern parenting often feels like a high-stakes race to keep our children happy and comfortable at all costs. As a parent, particularly if you identify as a “busy mom,” there is an immense pressure to fix every “everyday hurdle” and shield your children from the slightest discomfort. However, in our quest to be the “perfect” provider, we might be missing the most critical skill for the next generation: Emotional Resilience.
This is where the concept of Sturdy Parenting comes in. It is a strategic move away from a style that can sometimes feel permissive or over-functioning, and toward a psychology-informed approach where the parent acts as the “calm pilot” in a child’s emotional storm. By focusing on sturdy parenting and emotional regulation, we aren’t just raising “nice” kids; we are raising an emotionally sturdy generation capable of navigating a complex world with grit and confidence.
The Core Philosophy: Being the “Pilot in the Storm”
Emotional sturdiness begins with the parent, not the child. When a child is spiraling into a meltdown, they don’t need us to spiral with them. They need a “comforting presence during tough times” who remains grounded and unshakeable.
Think of the “Pilot” analogy: during heavy turbulence, you don’t want the pilot to come over the intercom screaming; you want them to stay calm and fly the plane. When we practice sturdy parenting, we acknowledge the child’s “big feelings” without letting those feelings dictate the boundaries or safety of the home. This creates a sense of safety for the child and a pathway to burnout recovery for the parent, as you no longer feel it is your job to “fix” every uncomfortable emotion. You are there to witness the emotion, not to be consumed by it.
The Wise Teacher: Modeling Resilience in Real Time
We often think of teaching as a lecture or a planned activity, but children learn most by watching us navigate our own lives. Your child sees you as a “wise teacher of life’s important lessons” through your daily actions. Resilience is caught, not taught.
When you hit a “stressful Tuesday”—perhaps a work deadline is looming or a project is failing—how do you react? By modeling healthy emotional regulation out loud, you provide the blueprint for their own resilience. You might say, “I’m feeling very frustrated right now because this didn’t go as planned, so I’m going to take a deep breath before I try again.” In this moment, you become the “role model for kindness and compassion” by showing them how to treat themselves when things go wrong. You are teaching them that it is okay to be human, and it is possible to be sturdy even when things are hard.
The Understanding Heart: Radical Acceptance and Validation
The image of a mother with an “understanding heart that accepts them as they are” is the foundation of long-term mental health. In psychological terms, this is known as Radical Acceptance. It is the act of seeing your child’s struggle without judgment.
Sturdy parenting teaches us to validate the feeling while holding the boundary on the behavior. You can be a “gentle guide” who says, “I see you are really angry that play-time is over, and it’s okay to feel that way,” while still moving forward with the transition. This validation builds emotional intelligence because the child learns that their internal world is valid and manageable. When we accept them “as they are” in their messiest moments, we give them the internal security to eventually accept themselves.
The Creative Problem-Solver: Building Grit through Collaboration
Instead of removing every obstacle in their path, a sturdy parent acts as a “creative problem-solver for everyday hurdles”alongside the child. Resilience grows in the “struggle,” not in the ease.
When a child struggles with a difficult task, our instinct as busy parents is often to do it for them to save time or avoid a tantrum. However, by being a “playful companion” who asks, “That looks really tough, what’s one way we could try to fix this?”, you empower them to build grit. You shift from being the “fixer” to being a mentor. This collaborative approach teaches them that they have the agency to change their situation. It transforms a moment of defeat into a moment of mastery.
Moving Toward the “Memory-Maker” Role
As we move away from the stress of over-parenting, we find more energy to be the “memory-maker who creates special moments”. When we aren’t constantly managing our children’s emotions, we have the emotional bandwidth to actually enjoy them.
Sturdy parenting isn’t about being cold or distant; it’s about being so secure in your role as the leader of the home that you can afford to be playful. You can be the “source of comfort food and warm hugs” because your “understanding heart” isn’t drained by the daily battle of wills. You are raising children who know that no matter how big their feelings get, their parent is bigger, sturdier, and always ready to listen.
Conclusion: A Legacy of Emotional Grit
The world our children are entering is increasingly complex, and the “nice” child may struggle where the “sturdy” child thrives. By embracing these pillars—regulation, modeling, acceptance, and collaborative problem-solving—you are providing them with an internal compass that will last a lifetime. You are being exactly the kind of mom they need: a “patient listener” who hears their stories and a “gentle guide” who helps them find their own strength.