When you sit in a barber’s chair and ask for a fade, you’re opening the door to dozens of variations—each with its own unique shape, length, and effect. Two of the most popular and frequently confused fade styles are the low taper fade and the drop fade. While they share some similarities, their differences in shape, placement, and overall effect can dramatically change your final look. Understanding the distinction between a low taper fade and a drop fade will help you communicate clearly with your barber and walk out with exactly the haircut you wanted. In this guide, you’ll learn everything about low taper fade vs. drop fade, including defining characteristics, which face shapes each suits best, maintenance requirements, and how to choose the right one for your style. If you’re exploring other fade options, these men’s haircuts for round face over 50 offer additional shaping ideas.
Understanding the Basics: What Is a Fade?
Before diving into the differences, let’s establish what a fade actually is.
A fade is a gradual transition from short hair (often down to the skin) at the bottom of the sides and back to longer hair at the top. The “fade” refers to the way the hair length “fades” from short to long. Fades can be classified by:
How high they start – Low, mid, or high
How they shape around the ear – Straight vs. curved (drop)
How they blend – Tapered vs. compressed
Fade Type
Starting Point
Shape
Best For
Low Taper Fade
Just above the ear
Straight/arched
Conservative, professional looks
Drop Fade
High on the sides, drops behind the ear
Curved down toward the nape
Modern, edgy, stylish looks
What Is a Low Taper Fade?
The low taper fade is a classic, conservative fade that starts just above the natural hairline around the ears. The hair is shortest at the very bottom (often faded to skin or a #1 guard) and gradually lengthens as it moves up the head. The “low” refers to how low the fade starts—it doesn’t go high up the sides.
Key Characteristics of a Low Taper Fade
Characteristic
Description
Starting point
Just above the ear, following the natural hairline
Shape around ear
Straight or slightly arched (not curved down)
Height
Low—typically 1–2 inches above the ear
Transition
Gradual and subtle
Back of head
Tapers down to the nape in a straight or slightly curved line
Overall vibe
Professional, clean, conservative
Who Looks Good with a Low Taper Fade?
The low taper fade is universally flattering because it’s subtle. It works particularly well for:
Professional environments – Conservative enough for suits and ties
Round faces – The low placement doesn’t add extra height that can emphasize roundness
Older men – A more classic, age-appropriate fade
Thinning hair – The subtle transition doesn’t draw attention to sparse areas
First-time fade clients – A gentle introduction to faded haircuts
How to Style a Low Taper Fade
The beauty of the low taper fade is that it works with virtually any hairstyle on top:
Short crops – The fade keeps the sides clean without overwhelming the top
Pompadours – The low fade provides contrast without competing for attention
Slicked-back – Clean sides keep the focus on the top
Textured quiffs – The subtle fade adds polish without being dramatic
Buzz cuts – A low taper fade adds dimension to a uniform buzz
Maintenance for a Low Taper Fade
Fade refresh: Every 7–10 days
Top trim: Every 3–5 weeks
Difficulty to maintain at home: Moderate (taper lines need precision)
For men with thinning hair, the low taper fade’s subtle transition can be especially flattering. These haircuts for thinning hair men over 50 offer additional options.
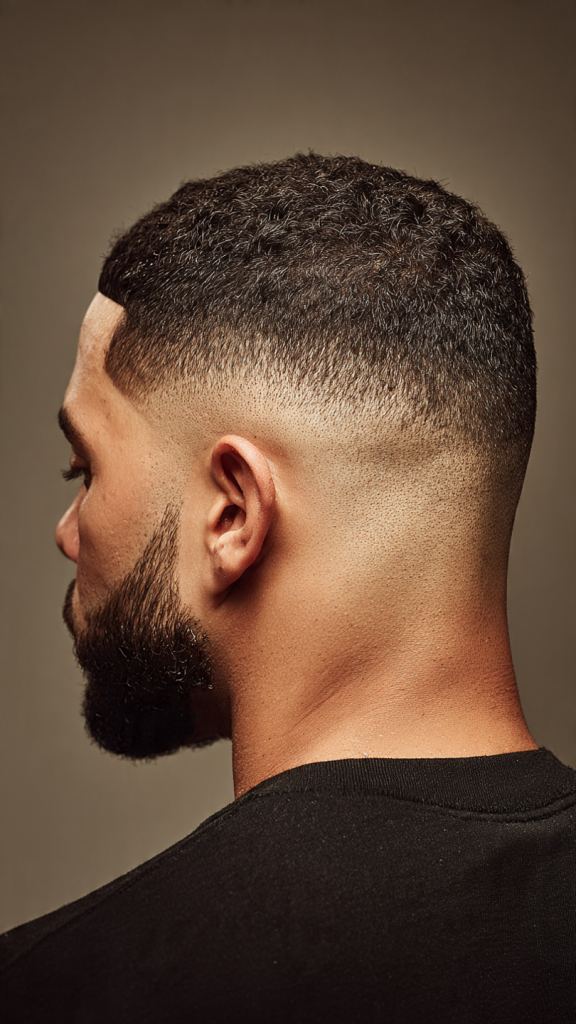
What Is a Drop Fade?
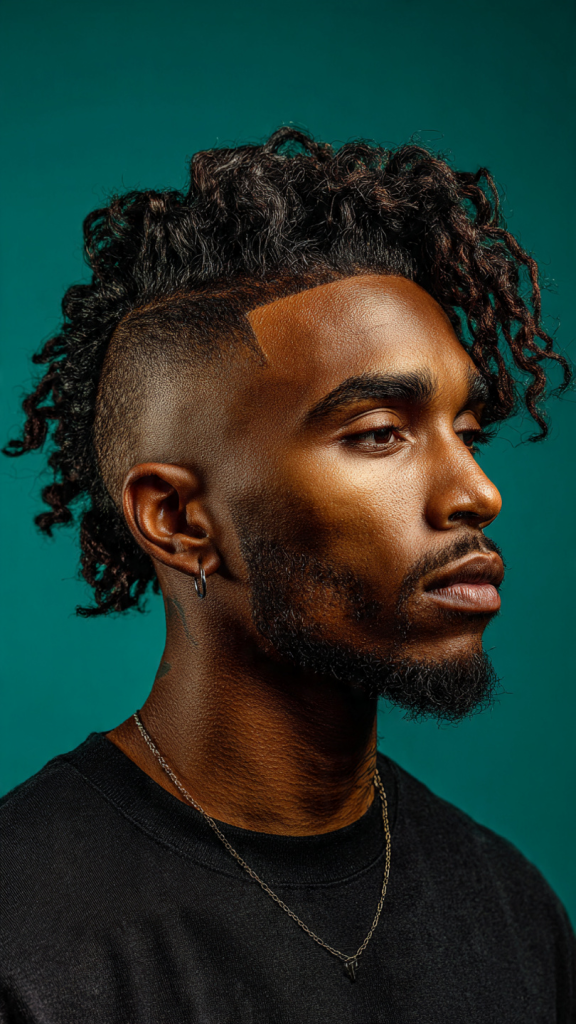
The drop fade is a more modern, dramatic variation. Instead of following a straight or slightly arched line around the ear, the fade “drops” down behind the ear, curving toward the nape of the neck. The result is a fade that sits higher on the sides but drops lower in the back, creating a distinctive curved shape.
Key Characteristics of a Drop Fade
Characteristic
Description
Starting point
High on the sides (mid to high fade)
Shape around ear
Curves downward behind the ear
Height
Higher on sides, drops lower in back
Transition
More dramatic than a low taper
Back of head
Curves down to hug the nape
Overall vibe
Modern, edgy, stylish
The “Drop” Explained
The “drop” refers to how the fade line drops down behind the ear. In a standard fade, the fade line continues in a relatively straight line around the head. In a drop fade, the line:
Sits higher on the sides (mid to high placement)
Curves down behind the ear
Drops lower toward the nape of the neck
This creates a more dramatic, sculpted look that emphasizes the shape of the head.
Who Looks Good with a Drop Fade?
The drop fade is more striking and works best for:
Younger men – The edgy look suits a modern aesthetic
Square or oval faces – The drop adds shape without over-emphasizing width
Men with thick hair – The dramatic fade contrasts well with dense top hair
Those who want attention – Drop fades get noticed
Creative professionals – Edgy enough for style-forward industries
How to Style a Drop Fade
The drop fade pairs well with bolder styles on top:
Pompadours – The drop adds drama that complements the height
Curly tops – The drop fade contrasts beautifully with natural texture
Longer styles – The drop fade keeps sides clean while top stays long
Hard parts – A shaved part complements the dramatic fade line
Maintenance for a Drop Fade
Fade refresh: Every 5–7 days (the “drop” shape needs precision)
Top trim: Every 3–5 weeks
Difficulty to maintain at home: Difficult (the curved shape requires skill)
Low Taper Fade vs. Drop Fade: Direct Comparison
Feature
Low Taper Fade
Drop Fade
Starting height
Low (just above ear)
Mid to high
Shape around ear
Straight or slightly arched
Curved downward
Back of head
Straight or slight curve
Drops lower at nape
Dramatic effect
Subtle, conservative
Bold, edgy
Best for face shape
All, especially round
Oval, square
Professional setting
Yes
Maybe (depending on industry)
Maintenance frequency
Every 7–10 days
Every 5–7 days
Difficulty to execute
Moderate
High (requires skill)
Best with
Any top style
Bolder top styles
Visualizing the Difference
The Fade Line Path
Imagine tracing the line where the fade transitions from short to long:
Low Taper Fade:
Starts 1 inch above the ear
Travels in a relatively straight line around the head
May have a slight arch over the ear
Stays at a consistent height around the back
Drop Fade:
Starts higher on the sides (2–3 inches above the ear)
Curves DOWNWARD behind the ear
“Drops” to a lower point at the nape
Creates a U-shaped or horseshoe-like fade line
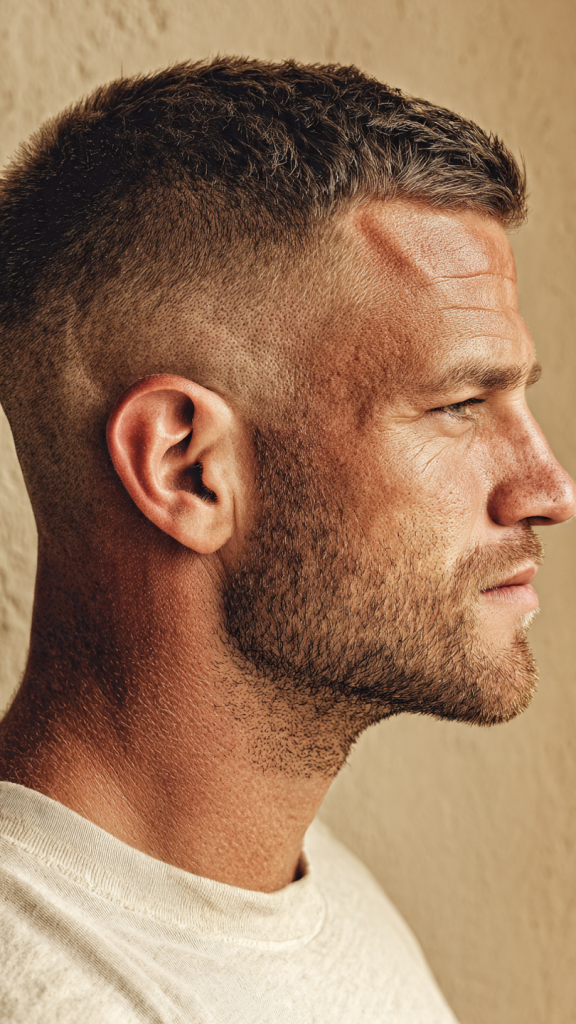
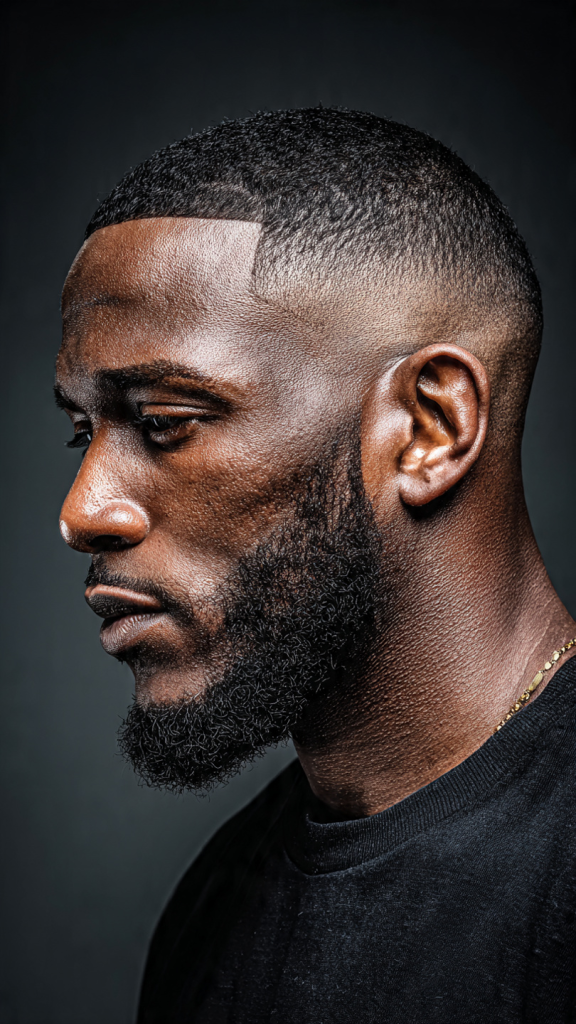
The Side Profile
Low Taper Fade: The fade line is low and subtle. You notice clean sides but the fade itself doesn’t scream for attention.
Drop Fade: The fade line is higher and curves down. The “drop” behind the ear is immediately noticeable and creates a distinctive silhouette.
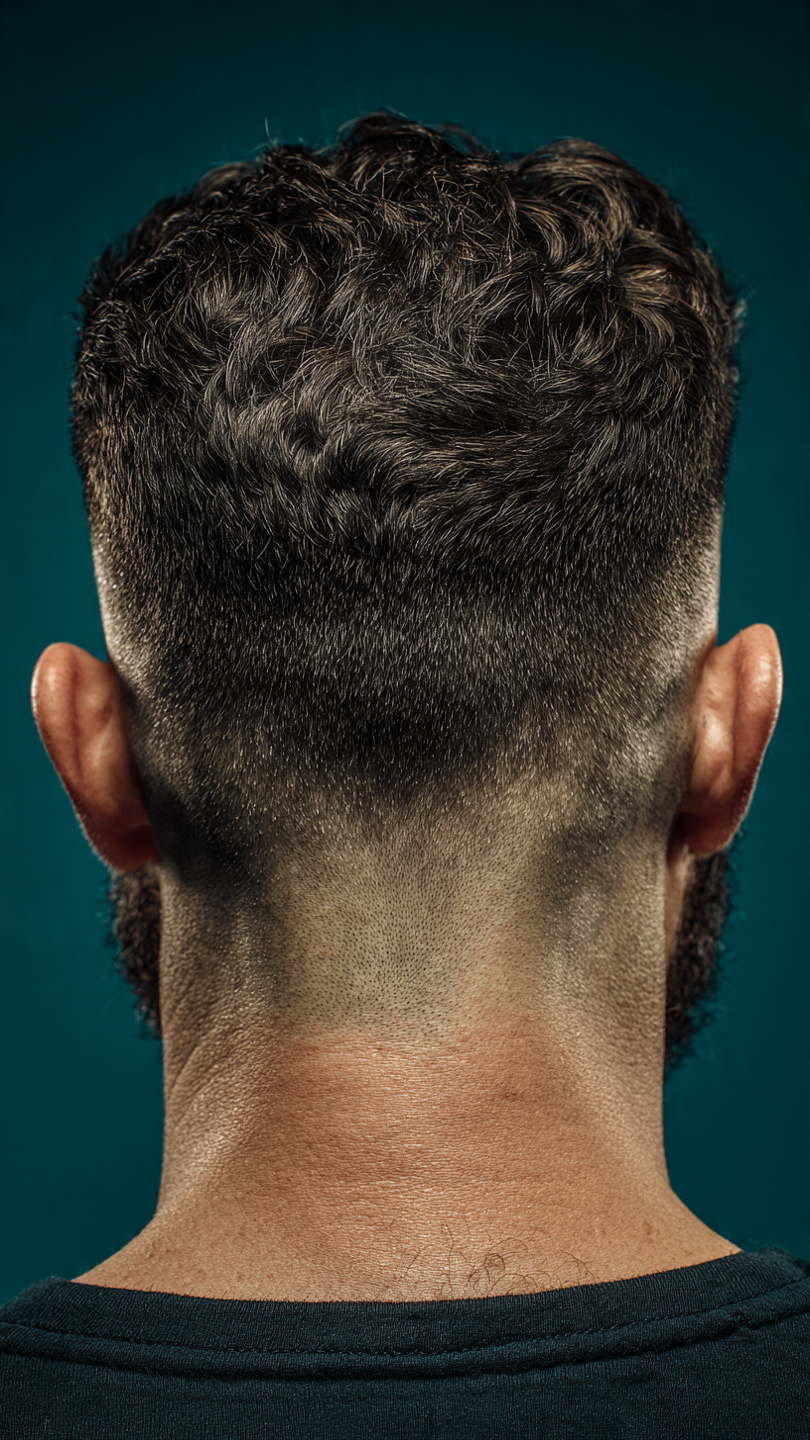
The Back View
Low Taper Fade: The back tapers down in a straight or slightly curved line to the nape. It looks clean and polished.
Drop Fade: The back has a more dramatic “V” or “U” shape, with the fade dropping lower at the center of the nape.
For men with round faces who want to maximize slimming effects, these men’s haircuts for round face over 50 offer additional strategies.
Which Should You Choose?
Choose a Low Taper Fade If:
✅ You work in a conservative professional environment ✅ You have a round face and want to avoid adding height ✅ You’re older and prefer a classic, age-appropriate look ✅ You want a subtle fade that doesn’t scream for attention ✅ You have thinning hair and don’t want to emphasize it ✅ This is your first fade and you want to start subtle ✅ You prefer low-maintenance styles (can go longer between fade touch-ups)
Choose a Drop Fade If:
✅ You want a modern, edgy, stylish look ✅ You have an oval or square face shape ✅ You have thick hair that can support dramatic contrast ✅ You work in a creative or style-forward industry ✅ You’re willing to commit to weekly fade touch-ups ✅ You want people to notice your haircut ✅ You’re pairing it with a bolder top style (pompadour, spikey crop, curly top)
Fade Variations Within Each Category
Low Taper Fade Variations
Variation
Description
Best For
Low skin fade
Fades to bare skin at the bottom
Sharp, clean look
Low bald fade
Fades to smooth shaved skin
Most dramatic low fade
Low shadow fade
Leaves a #0.5 or #1 shadow at the bottom
Subtle, natural look
Low temp fade
A low fade with a sharp, lined-up hairline
Clean, barbered finish
Drop Fade Variations
Variation
Description
Best For
Mid drop fade
Fade starts mid-way, drops behind ear
Balanced, versatile
High drop fade
Fade starts high, dramatic drop
Boldest drop fade
Skin drop fade
Fades to skin with a visible drop
Maximum contrast
Burr drop fade
Leaves short stubble (#1 guard) in the drop
Softer drop effect
Common Mistakes to Avoid
Low Taper Fade Mistakes
Mistake
Why It’s a Problem
How to Avoid
Taking it too high
Becomes a mid fade, not low
Specify “low taper” and show a photo
Uneven around ears
Looks sloppy
Ask barber to check symmetry
Blending too high
Loses the “taper” effect
Ensure the transition is gradual
Drop Fade Mistakes
Mistake
Why It’s a Problem
How to Avoid
Drop too shallow
Doesn’t look like a drop fade
Ask barber to emphasize the “drop”
Drop too extreme
Unnatural, cartoonish
Find a barber who specializes in drop fades
Uneven drop on both sides
Visible asymmetry
Check both sides with a mirror
Blended poorly
Visible lines in the curve
Only go to experienced barbers
How to Ask Your Barber for Each Fade
Asking for a Low Taper Fade
*”I’d like a low taper fade. Keep the fade low—just above my ears—and taper down to a [skin/shadow/#1] at the bottom. I want a subtle, clean transition with no harsh lines. The top can stay [state length/style].”*
Key phrases to use:
“Low taper fade”
“Just above the ears”
“Subtle transition”
“No harsh lines”
Asking for a Drop Fade
“I’d like a drop fade. Start the fade [mid/high] on the sides, and make sure it drops down behind my ears. I want the fade to be visible—a clean, sharp drop to [skin/shadow] at the bottom. Keep the top [state length/style].”
Key phrases to use:
“Drop fade”
“Drop behind the ears”
“Clean, sharp drop”
“Make sure the drop is visible”
Best Practice for Both
ALWAYS bring a reference photo. Fade terminology varies by region and barber. A photo eliminates any confusion.
Quick Reference Card
Low Taper Fade
Drop Fade
Height
Low (just above ear)
Mid to high
Shape
Straight/arched
Curved down
Drama
Subtle
Bold
Maintenance
Every 7–10 days
Every 5–7 days
Professional
Yes
Maybe
Best for face
Round, all
Oval, square
Best with
Any top style
Bolder top styles
Final Thoughts
Choosing between a low taper fade and a drop fade comes down to your personal style, face shape, and lifestyle. The low taper fade is classic, conservative, and universally flattering—perfect for professional settings and first-time fade clients. The drop fade is modern, edgy, and attention-grabbing—ideal for those who want their haircut to make a statement. Both require skilled barbers and regular maintenance, but the right choice will leave you looking sharp, confident, and perfectly styled. Take this guide to your next appointment, bring reference photos, and communicate clearly. Your perfect fade is waiting.
Every year, social media serves up a fresh collection of haircut disasters that make us cringe, laugh, and thank our lucky stars for skilled barbers. In 2026, the worst men’s haircuts ranged from tragic attempts at trending styles to barber misinterpretations that went horribly wrong. From the “invisible fade” that’s anything but invisible to the “bowl cut revival” no one asked for, these viral barber fails remind us that not every trend should be tried—and not every barber should be trusted. In this guide, you’ll discover 25 of the worst men’s haircuts of 2026, complete with what went wrong, why they went viral, and how to avoid similar disasters at your next appointment. If you’re looking for actually good haircuts, these haircuts for men with round faces offer reliable flattering options.
The Common Thread: What Makes a Haircut a “Fail”
Before diving into the worst of 2026, it’s worth understanding what separates a bad haircut from a viral disaster:
Poor execution of a trendy style – Attempting a popular cut without the right technique
Ignoring face shape – A cut that works on one face shape can look terrible on another
What it was supposed to be: A seamless, graduated fade from skin to longer length What went viral: A fade so poorly blended it looked like stair steps—distinct lines of demarcation at every guard change, creating a terraced effect on the sides of the head Why it failed: The barber either didn’t know how to use clippers properly or rushed through the blending process How to avoid: Ask to see your barber’s fade work before sitting in the chair. A good fade has no visible lines.
2. The “Crooked Line Up”
What it was supposed to be: A crisp, sharp, perfectly symmetrical hairline What went viral: A line up that started in the correct place on one side and ended a full inch higher on the other, creating a noticeably slanted, lopsided forehead Why it failed: The barber didn’t step back to check symmetry or rushed the finishing touches How to avoid: Always have your barber do the line up last, and don’t be afraid to speak up if something looks uneven.
3. The “Patchy Skin Fade”
What it was supposed to be: A smooth, clean transition from skin to hair What went viral: A skin fade with visible patches of missed hair, leaving the sides looking like a dalmatian—bald spots next to patches of stubble Why it failed: Poor clipper technique or dull blades that couldn’t cut evenly How to avoid: Find a barber who specializes in fades. Check their portfolio before booking.
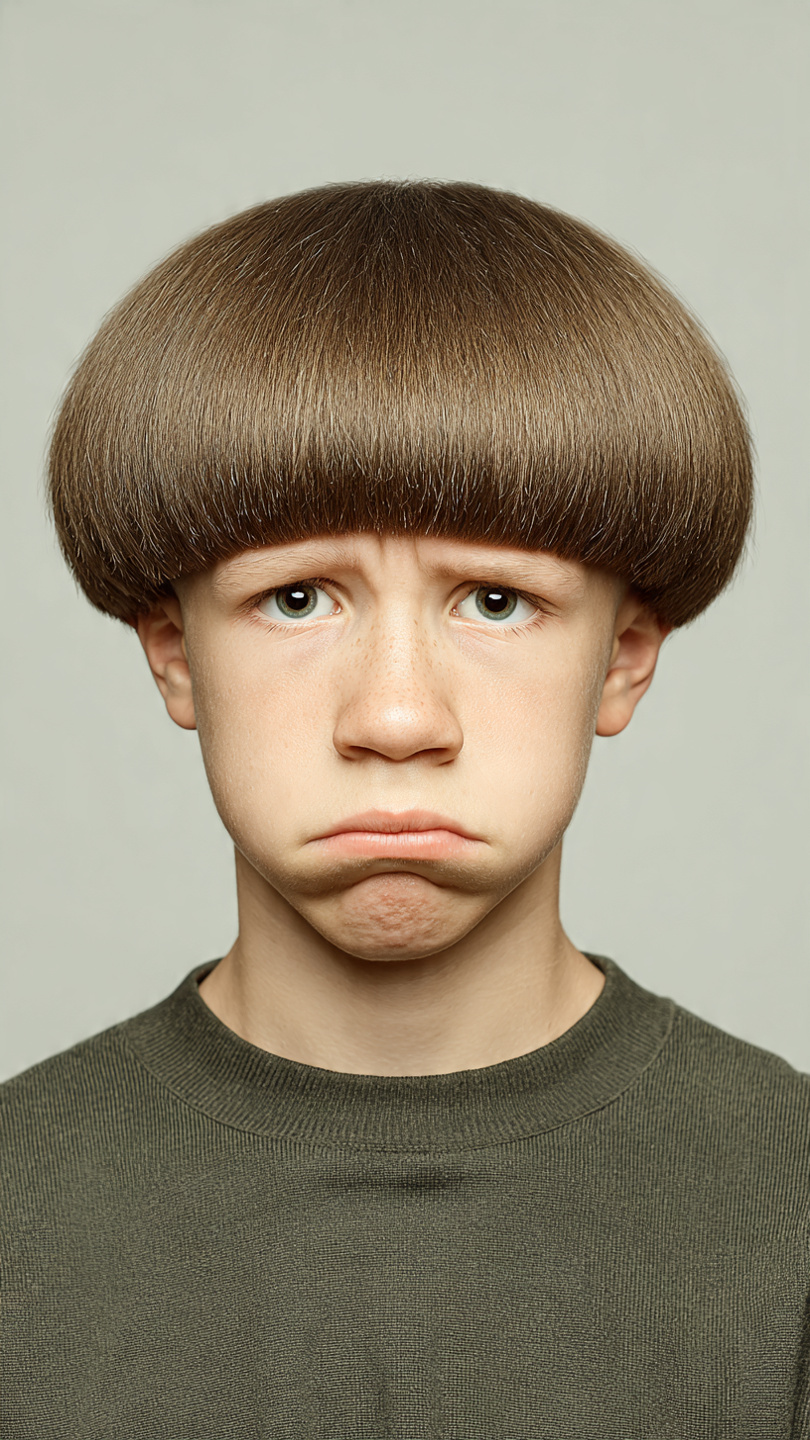
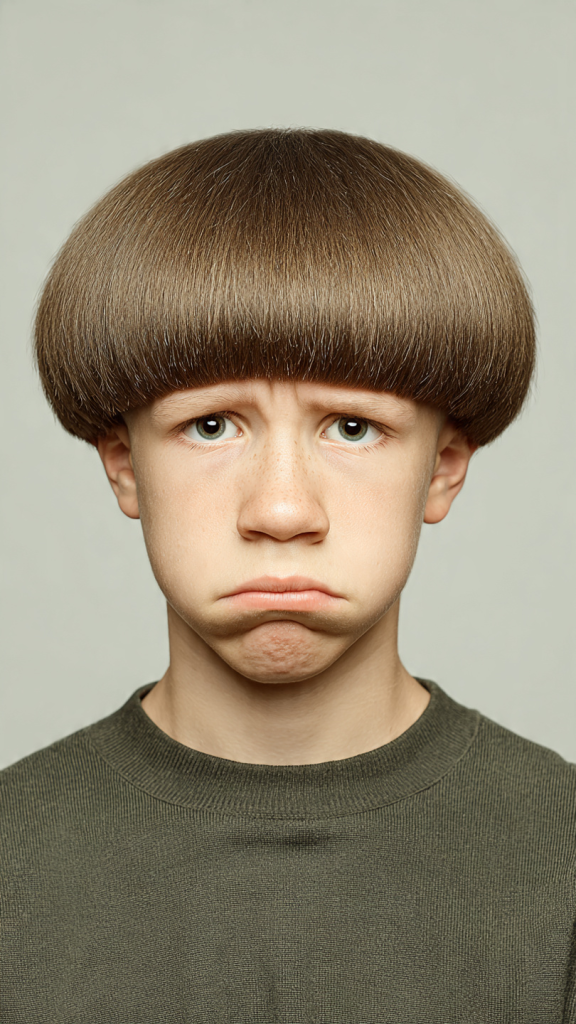
4. The “Choppy Bowl Cut”
What it was supposed to be: A textured, modern take on the classic bowl cut What went viral: An actual bowl was placed on the client’s head and cut around—complete with uneven, jagged edges and a perfect circular shape that made the client look like a cartoon character Why it failed: Taking a meme trend literally, or perhaps the worst misunderstanding between barber and client ever How to avoid: Use photos, not descriptions. Show your barber exactly what you want.
5. The “Barbie Fade”
What it was supposed to be: A mid fade with some texture on top What went viral: A fade that started so low on the back of the head it disappeared entirely, leaving a tiny strip of hair at the crown that made the client look like a Ken doll Why it failed: The barber misunderstood “low fade” as “lowest possible fade” How to avoid: Be specific: “low fade” means starting just above the ear. Show a photo.
For men with thinning hair who want to avoid disasters, these haircuts for thinning hair men over 50 offer reliable, flattering options.
What it was supposed to be: A simple trim at home What went viral: A DIY haircut where the clippers slipped, removing a 2-inch-wide strip of hair from the crown to the forehead, leaving a bald racing stripe down the middle of an otherwise full head of hair Why it failed: No guard on clippers + overconfidence + one wrong move How to avoid: Watch multiple tutorials before attempting DIY. Start with a longer guard than you think you need.
7. The “Bowl Cut 2.0”
What it was supposed to be: A trendy, textured short cut What went viral: The classic at-home bowl cut—hair cut perfectly straight around the head using an actual mixing bowl as a guide, resulting in a helmet-like shape with no graduation or texture Why it failed: The bowl cut has been a DIY disaster for generations, and 2026 was no exception How to avoid: If you’re going to DIY, invest in proper clippers with multiple guards. Leave the kitchen supplies in the kitchen.
8. The “Mullet Mistake”
What it was supposed to be: A modern, stylish mullet What went viral: A mullet where the “business in the front” was completely shaved, and the “party in the back” was down to the waist—creating a jarring, ridiculous silhouette Why it failed: Extreme interpretation of a trend without understanding proportions How to avoid: Modern mullets have subtle length differences. If you want extreme, go to a professional.
9. The “Missing Sideburn”
What it was supposed to be: A clean line up and fade What went viral: A home haircut where one entire sideburn was accidentally shaved off while the other remained full length—and the person didn’t notice until they saw the video Why it failed: Lack of mirrors and self-awareness during DIY How to avoid: Use two mirrors to see all angles. Take a photo before you start as reference.
10. The “Reverse Mohawk”
What it was supposed to be: A simple buzz cut What went viral: Instead of shaving the sides and leaving the middle, the DIY barber left the sides and shaved the center strip from forehead to nape—creating an anti-mohawk that looked like a landing strip Why it failed: Complete misunderstanding of basic haircut terminology How to avoid: Know the difference between “fade,” “undercut,” and “mohawk” before you pick up clippers.
Category 3: Extreme Trend Interpretations
11. The “Pineapple Top”
What it was supposed to be: A textured crop with some height What went viral: A haircut where the top was left extremely long (8+ inches) while the sides were completely shaved, and the long top was styled straight up with so much product it looked like a pineapple plant growing out of the client’s head Why it failed: Taking “volume at the crown” to an absurd extreme How to avoid: When a barber suggests “some height,” they mean an inch, not a foot.
12. The “Slicked-Back Disaster”
What it was supposed to be: A polished, sophisticated slicked-back style What went viral: A slicked-back cut so severe and with so much gel that the hair looked like a shiny helmet—completely stiff, immovable, and unnatural Why it failed: Product overload combined with an overly tight cut How to avoid: Slicked-back styles should have movement. If your hair doesn’t move, you’ve used too much product.
13. The “Buzz Cut Blowout”
What it was supposed to be: A clean, uniform buzz cut What went viral: A buzz cut where the barber used different guards on different sections without blending—resulting in a patchwork of lengths that looked like a topographical map Why it failed: The barber didn’t understand how to use clipper guards consistently How to avoid: A buzz cut should be done with ONE guard for consistent length, or properly blended if using multiple guards.
For those considering a buzz cut, these grade 2 buzzcut for men instructions will help you get it right.
Category 4: The “What Were They Thinking?” Files
14. The “Barcode Fade”
What it was supposed to be: A creative design shaved into the fade What went viral: A fade with vertical lines shaved so close together that it resembled a barcode from a supermarket product—complete with a “price” shaved below (allegedly the cost of the cut itself) Why it failed: Creative ambition exceeding artistic skill How to avoid: If you want shaved designs, go to a barber who specializes in them. Check their portfolio first.
15. The “Melted Candle”
What it was supposed to be: A textured, layered top What went viral: A haircut where the top was left long and styled with so much wax that it drooped over the forehead like a melted candle dripping down Why it failed: Product misuse and poor styling technique How to avoid: Less product is more. Start with a pea-sized amount and add gradually.
16. The “Whoops, Wrong Guard”
What it was supposed to be: A #4 buzz cut all over What went viral: A home haircut where the DIY barber accidentally used a #1 guard on one patch of the crown, then tried to “fix” it by doing the same to the rest—resulting in a much shorter cut than intended, complete with a nervous, regretful expression in the video Why it failed: Not checking the guard before the first pass How to avoid: Always test your clipper guard on a small, hidden section first.
17. The “Feather Fail”
What it was supposed to be: A softly feathered, textured cut What went viral: A cut where the barber used thinning shears excessively, leaving the hair looking stringy, wispy, and damaged—like it had been attacked by a flock of birds Why it failed: Overuse of texturizing tools How to avoid: Thinning shears should be used sparingly. A few passes is plenty.
Category 5: Color Catastrophes
18. The “Skunk Stripe”
What it was supposed to be: Subtle highlights or a money piece What went viral: A single, 3-inch-wide streak of bright blonde running from forehead to nape, with the rest of the hair left natural dark brown—creating a stark, skunk-like contrast Why it failed: The client asked for “highlights” and the barber interpreted it as “one single highlight” How to avoid: Be specific. “I want a money piece” (two face-framing highlights) is different from “I want highlights throughout.”
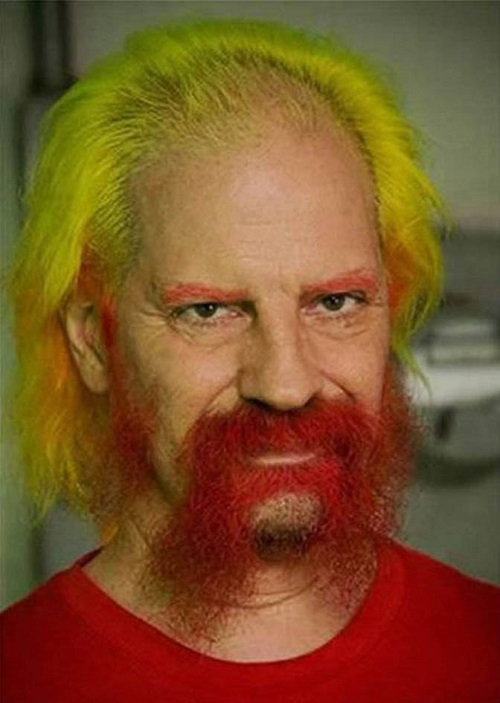
19. The “Invisible Bleach”
What it was supposed to be: Platinum blonde hair What went viral: A bleach job that lifted the hair to a pale yellow but was never toned, leaving the client with a head of screaming yellow hair that glowed under fluorescent lights Why it failed: The barber skipped the toning step entirely How to avoid: Toning is not optional. Purple shampoo alone won’t fix a missed toner.
20. The “Root Disaster”
What it was supposed to be: A root touch-up What went viral: A home root touch-up where the bleach was applied unevenly, resulting in a halo of bright orange roots surrounded by dark, unprocessed lengths—creating a “reverse ombré” effect that no one asked for Why it failed: Uneven application and improper processing time How to avoid: DIY color is risky. If you must do it at home, section carefully and watch multiple tutorials.
Category 6: Trend-Turned-Tragedy
21. The “Broccoli Head”
What it was supposed to be: A trendy curly perm with volume What went viral: An overly tight perm that produced curls so small, dense, and perfectly rounded that the client’s head looked exactly like a head of broccoli Why it failed: Using perm rods that were too small for the desired look How to avoid: Show photos of the exact curl size you want. Don’t rely on descriptions.
22. The “Viral Wolf Cut Wrong”
What it was supposed to be: The popular wolf cut (shag meets mullet) What went viral: A wolf cut where the layers were so extreme and disconnected that the top looked like a separate haircut from the bottom—no blending whatsoever Why it failed: The barber didn’t understand how to connect the layers in a wolf cut How to avoid: The wolf cut requires skill. Find a barber who has done the style successfully before.
23. The “Modern Mullet Miss”
What it was supposed to be: The modern, soft mullet What went viral: A mullet where the back was left to grow for two years while the top and sides were kept at a #2 guard—a silhouette so extreme it looked like a mistake Why it failed: Misunderstanding the modern mullet’s subtle proportions How to avoid: Modern mullets have subtle length differences. If you want retro extreme, that’s a different cut.
For women considering the mullet, these modern mullet for women over 50 styles show how to do it right.
Category 7: Social Media Stunts
24. The “Rubber Band Challenge”
What it was supposed to be: A haircut What went viral: Not really a haircut—a trend where people put dozens of rubber bands around sections of their hair, then cut above them to create a “spiky” look. The result was uneven, choppy, and often required a professional fix Why it failed: DIY social media challenges rarely produce salon-quality results How to avoid: Just say no to viral haircut challenges. Your hair will thank you.
25. The “AI-Generated Haircut”
What it was supposed to be: A haircut designed by artificial intelligence What went viral: A client brought an AI-generated image to their barber—a physically impossible haircut that defied gravity and hair physics. The barber’s attempt to recreate it resulted in a comical disaster Why it failed: AI doesn’t understand hair texture, growth patterns, or what’s actually achievable How to avoid: Use real photos of real haircuts on real people with similar hair types to yours.
How to Avoid Becoming a Viral Barber Fail
Before Your Appointment
Research your barber – Look at their portfolio, especially for the specific style you want
Bring reference photos – Multiple angles: front, side, and back
Know your face shape – Not every trend works on every face
Be realistic – If you have thinning hair, a thick pompadour isn’t happening
Communicate clearly – Don’t just say “short” or “a fade.” Be specific or show the photo
During Your Appointment
Speak up early – If something looks wrong during the cut, say something immediately
Check the back – Ask for a mirror to see the back and sides
Bring a friend – A second pair of eyes can catch issues you might miss
After Your Appointment
Take photos – Document the cut right away for reference
Ask for fixes – Most barbers will fix honest mistakes for free within a few days
Leave honest reviews – Help others avoid the same fate
Quick Reference: The Worst of 2026
Category
Worst Offender
Why It Failed
Barber Fails
The Invisible Fade
No blending between guard lengths
Barber Fails
The Crooked Line Up
Uneven hairline
Barber Fails
The Patchy Skin Fade
Spots of missed hair
DIY Disasters
The Missing Chunk
No guard on clippers
DIY Disasters
The Bowl Cut 2.0
Using an actual bowl
Extreme Trends
The Pineapple Top
Ridiculous height
Extreme Trends
The Slicked-Back Disaster
Product overload
Color Catastrophes
The Skunk Stripe
Single huge highlight
Color Catastrophes
The Invisible Bleach
Skipped the toner
Trend Tragedies
The Broccoli Head
Perm rods too small
Trend Tragedies
The Viral Wolf Cut Wrong
No layering connection
Social Media Stunts
The Rubber Band Challenge
Viral challenge fail
Final Thoughts
The worst men’s haircuts of 2026 serve as cautionary tales for anyone sitting in a barber’s chair—or picking up clippers at home. From professional barber fails to DIY disasters and extreme trend interpretations, these viral moments remind us that a great haircut requires skill, communication, and realistic expectations. The good news is that with proper research, clear communication, and a trusted barber, you can avoid becoming the next viral sensation for all the wrong reasons. Take these lessons to your next appointment, and may your fades be seamless, your lines be straight, and your haircuts be unforgettable for the right reasons.
As we look ahead to 2026, men’s haircut trends are moving toward effortless texture, lived-in styles, and cuts that work with natural hair patterns rather than against them. Gone are the days of rigid, overly polished looks that require hours of maintenance. The new wave of men’s hairstyles embraces movement, versatility, and personal expression—from the continued dominance of textured crops to the surprising comeback of longer lengths. Whether you have straight, wavy, curly, or thinning hair, there’s a trend for you. In this guide, you’ll discover 8 men’s haircut trends that will be huge in 2026, complete with styling tips, face shape advice, and maintenance schedules. If you love modern, low-maintenance styles, these grown-out shag for men offer additional inspiration.
The Biggest Haircut Trends of 2026 for Men
This year, three major themes define men’s haircuts: textured volume, lived-in length, and strategic fades. Whether you prefer a bold chop or subtle refresh, these trends are designed to be wearable and low-maintenance.
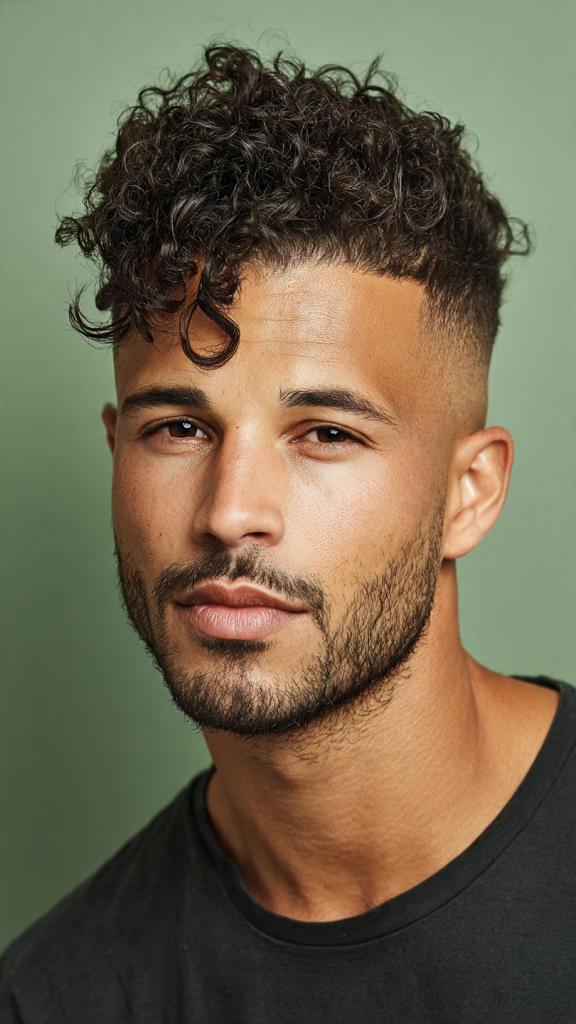
1. The Textured Crop
Why it’s huge in 2026: The textured crop continues its reign as the most requested men’s haircut. This style keeps the top at 1.5–2.5 inches with heavy point-cutting throughout, while the sides and back are tapered or faded. The texture creates multiple endpoints that reflect light, making hair look denser and more dynamic. For men with thinning hair, the textured crop is especially flattering because the choppy layers disguise sparse areas.
How to style it: Apply matte paste or texturizing clay to completely dry hair. Rub between palms, then rake through the top pushing everything forward. The texture will create natural lift and separation. No blow-dryer needed. For extra volume, apply a small amount of texturizing powder to the roots before the paste. Keep the sides clean—they should be tapered or faded weekly.
Best face shapes: Oval, square, heart (the crop adds structure to rounder faces)
Maintenance needs: Top trim every 4–5 weeks; sides need refreshing every 2–3 weeks
For men with thinning hair, the textured crop is one of the best options. These haircuts for thinning hair men over 50 offer additional choices.
2. The Modern Mullet
Why it’s huge in 2026: The modern mullet has shed its 80s stereotypes and emerged as a sophisticated, wearable style for 2026. Unlike the extreme mullets of the past, today’s version features subtle length differences—shorter on top and at the crown, gradually transitioning into longer, wispier lengths in the back. The modern mullet works beautifully on straight, wavy, and curly hair alike, and it’s surprisingly low-maintenance.
How to style it: Apply texturizing spray to damp hair. Blow-dry using your fingers, lifting at the crown for volume. The back can be left to air-dry or lightly tousled. Use matte paste to piece out the ends. The contrast between the shorter top and longer back should be noticeable but not extreme. The goal is lived-in texture—not perfection.
Best face shapes: Oval, square, heart (the mullet adds dimension to rounder faces)
Maintenance needs: Top trim every 5–6 weeks; back can go 8–10 weeks between trims
For men considering a mullet, these grown-out shag for men offer similar textured, lived-in vibes.
3. The Curtain Bangs Revival
Why it’s huge in 2026:Curtain bangs—once associated primarily with women’s styles—have crossed over into men’s grooming in a big way. This soft, face-framing fringe parts in the middle and sweeps to each side, creating a relaxed, effortlessly cool look. Curtain bangs work especially well on medium to long hair and are perfect for men with longer face shapes or high foreheads.
How to style it: Apply lightweight mousse to damp hair. Blow-dry the curtain bangs using a small round brush, rolling them away from your face. The rest of the hair can be styled with your fingers—tousled, swept back, or left natural. To refresh bangs on day two, mist with water and re-roll around a round brush with heat for 10 seconds.
Best face shapes: Oval, heart, oblong (curtain bangs soften high foreheads)
Maintenance needs: Bangs trim every 3–4 weeks; overall cut every 6–8 weeks
For men over 50 who want soft, face-framing options, these curtain bangs for women over 50 offer universal styling techniques.
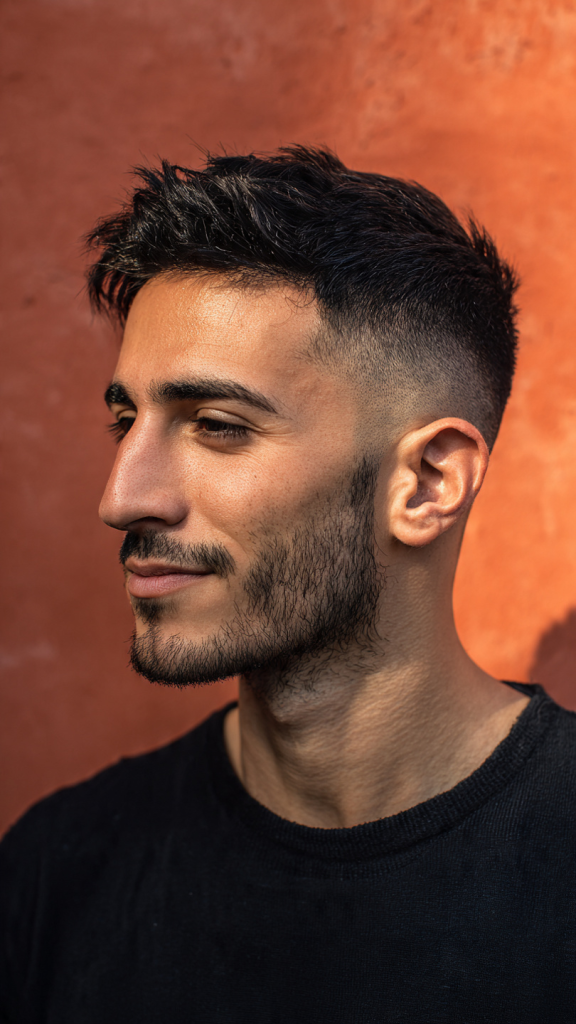
4. The Tapered Buzz Cut
Why it’s huge in 2026: The tapered buzz cut is the evolution of the classic buzz cut. Instead of uniform length all over, this version keeps the top slightly longer (using a #3 or #4 guard) while the sides and back are faded to a #1 or #2. The result is a clean, sharp look that’s more dimensional than a traditional buzz cut. It’s perfect for men who want ultra-low maintenance without sacrificing style.
How to style it: There is minimal styling required. Wash, towel-dry, and go. The key is maintaining the fade every 7–10 days with home clippers or barber visits. For a slightly more polished look, run your fingers through the top in one direction. For best results, ask your barber for a tapered buzz cut specifically—not just a uniform buzz.
Best face shapes: Oval, square, heart (the taper adds sharpness to rounder faces)
Maintenance needs: Top refresh every 2–3 weeks; fade needs refreshing every 7–10 days
For those considering a buzz cut, these grade 2 buzzcut for men instructions will help you get it right.
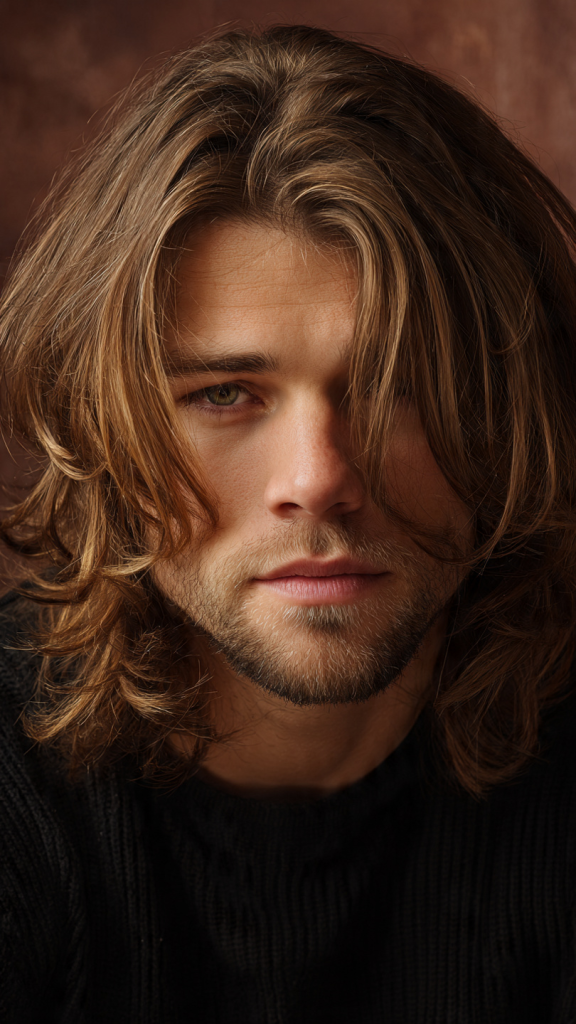
5. The Long Textured Top with Short Sides
Why it’s huge in 2026: This style keeps 4–6 inches of textured length on top while the sides and back are clipped short (usually with clippers, not shaved to skin). The contrast between the long, flowing top and the clean, short sides creates a balanced silhouette that works for both professional and casual settings. This is ideal for men with wavy or straight hair who want to show off length without looking unkempt.
How to style it: Apply curl cream (for wavy/curly) or volumizing mousse (for straight) to soaking wet hair. Blow-dry using a round brush or your fingers, lifting at the roots for volume. The short sides need only a quick towel-dry. For a more polished look, use a flat iron to smooth the top, or for texture, use sea salt spray and scrunch.
Best face shapes: Oval, heart, oblong (the top length elongates round faces)
Maintenance needs: Top trim every 8–10 weeks; sides need refreshing every 3–4 weeks
For men with thick hair, these medium length hairstyles for thick hair offer additional bulk-taming ideas.
6. The Textured Quiff
Why it’s huge in 2026: The textured quiff is a softer, more relaxed version of the classic pompadour. Instead of a slick, polished finish, the textured quiff embraces movement and separation. The front is styled upward and slightly to the side, while the back and sides are tapered or faded. This cut works well for men with straight or wavy hair who want volume without the commitment of a full pompadour.
How to style it: Apply volumizing foam to damp hair. Blow-dry using a round brush or your fingers, directing the front section upward and to one side. For a no-heat option, apply curl cream and use a curl sponge to define texture, then finger-style the front upward. Finish with light hold hairspray or texturizing powder at the roots for lift.
Best face shapes: Oval, heart, oblong (the quiff adds height to rounder faces)
Maintenance needs: Top trim every 4–6 weeks; sides need refreshing every 2–3 weeks
For men with round faces, the textured quiff can add needed height. These men’s haircuts for round face over 50 offer additional slimming strategies.
7. The Bro Flow (Wavy Medium Length)
Why it’s huge in 2026: The bro flow—wavy, medium-length hair that falls naturally around the ears and collar—has made a major comeback. This style embraces natural wave patterns and requires minimal styling. It’s perfect for men who want to grow their hair out but still look put-together. The key is strategic layering to prevent the “mushroom head” effect.
How to style it: Apply sea salt spray or wave-enhancing cream to damp hair. Scrunch section by section with a microfiber towel. Air-dry completely—about 30–40 minutes. Do not touch while drying. Once dry, shake out at the roots with your fingers. Never brush—use a wide-tooth comb only when wet. For a more polished look, tuck the sides behind your ears.
Best face shapes: All face shapes (most universally flattering wave pattern)
Maintenance needs: Trim every 8–10 weeks. Waves hide grow-out beautifully.
For men over 60 seeking effortless styles, these wash and wear haircuts for women over 60 offer universal low-maintenance ideas.
8. The Wolf Cut for Men
Why it’s huge in 2026: The wolf cut—a hybrid of a shag and a mullet—is one of the biggest trends crossing over from women’s to men’s grooming. Features shorter, choppy layers on top and at the crown, gradually transitioning into longer, wispier lengths in the back. The wolf cut creates volume at the crown, softens facial features, and works beautifully with natural texture. It’s edgy but wearable, modern but not “trying too hard.”
How to style it: Apply texturizing spray to damp hair. Blow-dry using your fingers, lifting at the crown for volume. Once dry, use a small amount of matte clay to piece out individual sections. The back can be left to air-dry or lightly tousled. The goal is lived-in texture—not perfection. For curly hair, apply curl cream to soaking wet hair and diffuse.
Best face shapes: Oval, square, heart (most universally flattering)
Maintenance needs: Trim every 6–8 weeks. The wolf cut improves with grow-out.
For men interested in this trend, these wolf cut for men over 50 styles offer age-appropriate variations.
How to Choose the Right 2026 Trend for You
If you want…
Choose…
Why
Low maintenance, clean look
Tapered Buzz Cut
Zero styling, easy upkeep
Volume and texture
Textured Crop
Maximum volume with minimal effort
To grow your hair out
Bro Flow
Embraces natural waves, low manipulation
Face-framing softness
Curtain Bangs
Softens high foreheads, adds character
Modern edge
Wolf Cut
Edgy but wearable, works with texture
Professional with personality
Long Textured Top with Short Sides
Balanced, office-appropriate
Height without pomade
Textured Quiff
Volume without the polished finish
Length with attitude
Modern Mullet
Surprisingly sophisticated, low-maintenance
Quick Reference: 2026 Men’s Haircut Trends
Trend
Best For
Key Styling Product
Maintenance Level
Textured Crop
All hair types, thinning hair
Matte paste
Moderate
Modern Mullet
Wavy or curly hair
Texturizing spray
Low to moderate
Curtain Bangs
Medium to long hair, high foreheads
Lightweight mousse
Moderate (bangs need trims)
Tapered Buzz Cut
Low-maintenance lovers, thinning hair
None
Low
Long Textured Top with Short Sides
Men who want length
Curl cream or mousse
Moderate
Textured Quiff
Straight or wavy hair
Volumizing foam
Moderate
Bro Flow
Natural waves
Sea salt spray
Low
Wolf Cut
All hair types
Texturizing spray
Low to moderate
Final Thoughts
Men’s haircut trends for 2026 are defined by a shift toward authenticity, ease, and personal expression. This year’s trends prove that you don’t need a complicated routine to look sharp; you just need the right cut for your texture and face shape. Whether you’re drawn to the textured crop, the modern mullet, or the tapered buzz cut, the most important element is that your style works for you. Take these trends to your barber, discuss a version tailored to your unique features, and step into 2026 with fresh, effortless hair.
For women over 50 transitioning to gray or looking to enhance their natural silver, the debate between balayage and traditional highlights is an important one. Both techniques can beautifully blend gray hair, but they work very differently and offer distinct advantages depending on your goals, maintenance preferences, and natural gray pattern. Balayage offers a soft, sun-kissed, low-maintenance grow-out, while traditional highlights provide more uniform, consistent coverage. In this guide, you’ll discover the key differences between balayage and highlights for gray hair, along with which technique is better for different situations, maintenance needs, and desired outcomes for women over 50. If you’re exploring color options for gray hair, these grey blending highlights in ash blonde offer additional cool-toned inspiration.
Understanding the Basics: What’s the Difference?
Before diving into which is “better,” it’s essential to understand how each technique works.
Feature
Balayage
Traditional Highlights
Application method
Hand-painted freehand onto the surface of the hair
Wrapped in foils or using a cap with pulled-through sections
Look achieved
Soft, natural, sun-kissed, lived-in
Uniform, consistent, more structured
Grow-out
Very soft; no harsh line of demarcation
More noticeable; roots create a defined line
Contrast
Low to medium contrast
Can be low, medium, or high contrast
Processing
Open-air processing (no heat from foil)
Heat from foil accelerates processing
Best for
Women who want low-maintenance color
Women who want uniform coverage
Gray coverage
Blends and softens gray
Can cover gray more uniformly
What Is Balayage?
Balayage (pronounced bah-lee-ahge) is a French word meaning “to sweep” or “to paint.” The colorist paints lightener directly onto the surface of the hair in a sweeping motion, creating a soft, graduated effect. Because the color is painted on by hand, no two balayage applications are exactly alike—each is customized to your hair and face.
How Balayage Works on Gray Hair
For women with gray hair, balayage works by painting lighter pieces through the mid-lengths and ends, leaving the roots darker or natural. This creates a soft, blended transition between your natural gray roots and the lighter ends. The effect is particularly beautiful on women with 20–60% gray, where the balayage pieces connect with natural silver strands.
Advantages for gray hair:
Soft grow-out – No harsh line when roots come in
Low maintenance – Can go 12–16 weeks between appointments
Customizable – Can be placed strategically where gray is most concentrated
Adds dimension – Breaks up solid gray or solid dark color
Works with natural gray pattern – Enhances what you already have
Disadvantages for gray hair:
Less predictable – Results depend heavily on the colorist’s skill
Not ideal for full gray coverage – Works best for blending, not covering
Can be more expensive – Requires an experienced colorist
May need multiple sessions – For dramatic lightening from dark brown
For women with fine hair considering color, these low maintenance haircuts for women over 50 with fine hair pair beautifully with balayage.
What Are Traditional Highlights?
Traditional highlights use foils (or a cap) to isolate sections of hair, which are then saturated with lightener and wrapped in foil. The foil traps heat, accelerating the lightening process and allowing for more predictable, consistent lift. This technique can create anything from subtle babylights to bold, chunky highlights.
How Highlights Work on Gray Hair
For women with gray hair, traditional highlights can be used to either cover gray completely (by using permanent color) or blend gray (by using lightener). Foils allow for precise placement and consistent results, making them ideal for women who want uniform color throughout their hair.
Advantages for gray hair:
More predictable results – The foil creates consistent lift
Better gray coverage – When using permanent color, can cover 100% of grays
Can create uniform color – Ideal for all-over blonde or consistent highlights
Works for high-contrast looks – Can create dramatic lightening
Good for resistant gray – The heat in foils helps process stubborn gray strands
Disadvantages for gray hair:
More noticeable grow-out – Creates a defined line at the roots
Higher maintenance – Needs touch-ups every 4–8 weeks
More damage potential – Heat in foils can increase damage risk
Can look stripy – If not done well, can create harsh lines
Balayage vs. Highlights: Side-by-Side Comparison for Gray Hair
Factor
Balayage
Traditional Highlights
Winner
Natural look
Soft, sun-kissed, lived-in
Can look natural or structured depending on placement
Balayage
Low maintenance
12–16 weeks between appointments
4–8 weeks between appointments
Balayage
Gray blending
Blends beautifully with 20–60% gray
Blends or covers depending on technique
Tie
Full gray coverage
Not ideal
Excellent with permanent color
Highlights
Predictability
Depends on colorist skill
Very predictable
Highlights
Damage risk
Lower (no foil heat)
Higher (foil heat)
Balayage
Cost per appointment
Higher
Lower to moderate
Highlights
Cost per year
Lower (fewer appointments)
Higher (more appointments)
Balayage
Best for curl/wave
Excellent (painted on)
Good (can create stripes if not careful)
Balayage
Best for straight hair
Good (can look subtle)
Excellent (uniform placement)
Highlights
Which Is Better for Your Gray Hair Pattern?
For 0–20% Gray (Minimal Gray)
Recommendation: Balayage. With minimal gray, balayage can add dimension and brightness while making the few gray strands look intentional. The soft, natural look of balayage complements sparse gray without overwhelming it.
Why: You don’t need full coverage; you need blending. Balayage’s soft transition is perfect for early gray.
For 20–60% Gray (Moderate Gray)
Recommendation: Either—depending on your goal. If you want to embrace your gray and blend it seamlessly, choose balayage. If you want to cover most of your gray for a more uniform color, choose traditional highlights with permanent color.
Why: This is the gray sweet spot where both techniques work well. Your choice depends on whether you want to highlight your gray (balayage) or hide it (highlights).
For 60–100% Gray (Significant to Full Gray)
Recommendation: Traditional highlights with permanent color. If you have significant gray, you need consistent coverage. Traditional foils with permanent color can cover even resistant grays. However, if you want to embrace your full gray and just add dimension, a silver-enhancing gloss might be better than either technique.
Why: Balayage alone won’t provide enough coverage for significant gray. You need the consistency of foils.
For women fully embracing their silver, these silver and gray blending techniques offer additional options.
Combining Both: The Best of Both Worlds
Many colorists now use combined techniques—especially for gray hair. A common approach:
Base color – Permanent color in foils to cover resistant grays at the roots
Balayage – Painted highlights through the mid-lengths and ends for softness
Toner – A gloss to blend everything together
This hybrid approach gives you the gray coverage of traditional highlights with the soft, lived-in finish of balayage. It’s more expensive initially but provides beautiful, long-lasting results.
Balayage on Gray Hair: What to Expect
Best Candidates for Balayage on Gray Hair
Women with 20–60% gray who want to blend, not cover
Those who want low-maintenance color (appointments every 3–4 months)
Women with natural waves or curls (balayage looks stunning on texture)
Those who prefer a soft, natural, sun-kissed look
Women who want to embrace their gray while adding dimension
What to Ask Your Colorist
“Can you show me examples of balayage on gray hair you’ve done?”
“How will you work with my natural gray pattern?”
“What toner will you use to prevent brassiness?”
“How long will this last before I need a touch-up?”
“Will this work with my percentage of gray?”
Maintenance for Balayage on Gray Hair
Touch-up frequency: Every 12–16 weeks
Toning appointments: Every 6–8 weeks (to prevent brassiness)
Purple shampoo: Use weekly to maintain cool tones
Gloss treatments: Every 4–6 weeks for shine and tone refresh
Highlights on Gray Hair: What to Expect
Best Candidates for Highlights on Gray Hair
Women with 60–100% gray who want consistent coverage
Those who prefer more uniform, predictable color
Women with straight hair (highlights show up clearly)
Those who want higher contrast between light and dark
Women with resistant gray that needs heat from foils to process
What to Ask Your Colorist
“What developer volume will you use for my resistant grays?”
“How will you prevent my gray from looking yellow or brassy?”
“What’s the recommended touch-up schedule for my gray percentage?”
“Will you use permanent color or lightener?”
“Can we add lowlights for dimension?”
Maintenance for Highlights on Gray Hair
Touch-up frequency: Every 6–10 weeks (depending on gray growth)
Toning appointments: Every 4–6 weeks
Purple shampoo: Use 2–3 times weekly
Deep conditioning: Weekly to maintain health
The Brassiness Factor: Gray Hair’s Biggest Challenge
Both balayage and traditional highlights on gray hair face the same challenge: brassiness. Gray and silver hair naturally pulls warm tones—yellow, orange, or gold—especially when lightened.
How to Prevent Brassiness
Method
Balayage
Highlights
Purple shampoo
Weekly
2–3 times weekly
Toning gloss
Every 6–8 weeks
Every 4–6 weeks
Cool-toned toner
Applied at each appointment
Applied at each appointment
Avoid warm-toned products
Essential
Essential
Cold water rinses
Helps maintain cool tones
Helps maintain cool tones
Signs Your Gray Hair Is Getting Brassy
Your silver looks yellowish
Your highlights have a golden or orange hue
Your gray looks dull rather than bright
Your hair has lost its cool, ashy tone
Solution: Use purple shampoo immediately and schedule a toning appointment.
Cost Comparison: Balayage vs. Highlights for Gray Hair
Factor
Balayage
Traditional Highlights
Initial appointment
$150–300+
$100–250
Touch-up appointment
$150–300 (every 12–16 weeks)
$100–250 (every 6–10 weeks)
Toner/gloss appointment
$50–80 (every 6–8 weeks)
$50–80 (every 4–6 weeks)
Yearly total (approx.)
$800–1,500
$1,200–2,000
Balayage typically costs less per year because you need fewer full color appointments, despite higher per-appointment costs.
Quick Reference: Balayage vs. Highlights for Gray Hair
If you want…
Choose…
Soft, natural, sun-kissed look
Balayage
Uniform, consistent color
Highlights
Low maintenance (3–4 months between appointments)
Balayage
Full gray coverage
Highlights
To embrace your gray pattern
Balayage
To minimize damage
Balayage
Predictable, reliable results
Highlights
To spend less per appointment
Highlights
To spend less per year
Balayage
Wavy or curly hair
Balayage
Straight hair
Highlights
To blend 20–60% gray
Balayage
To cover 60–100% gray
Highlights
Final Thoughts
Balayage vs. highlights for gray hair isn’t about which is objectively “better”—it’s about which is better for your specific gray pattern, lifestyle, and aesthetic preferences.
Choose balayage if: You have 20–60% gray, want a soft natural look, prefer low-maintenance color (appointments every 3–4 months), and want to embrace your gray while adding dimension.
Choose traditional highlights if: You have 60–100% gray, want consistent, predictable coverage, don’t mind more frequent appointments (every 6–10 weeks), and prefer a more uniform blonde or highlighted look.
Consider a combination if: You want the gray coverage of highlights with the soft grow-out of balayage—many colorists now offer hybrid techniques that give you the best of both worlds.
The most important factor is finding a colorist who specializes in gray hair and understands how to work with your specific texture and gray percentage. Take this guide to your consultation, ask the right questions, and get ready to love your gray—whether highlighted, balayaged, or beautifully natural.
For women over 50 ready to break free from convention, the modern mullet offers a bold, empowering, and surprisingly sophisticated option. Gone are the days when “business in the front, party in the back” meant something to hide. Today’s mullet is soft, textured, and deliberately artistic—shorter layers on top and at the crown gradually transition into longer, wispier lengths in the back. For women over 50, the modern mullet creates volume at the crown (where thinning often occurs), frames the face beautifully, and projects confidence and individuality. In this guide, you’ll discover 10 variations of modern mullet for women over 50, each designed to flatter mature features, work with age-related texture changes, and make you feel bold and beautiful. If you love edgy, age-defying styles, these funky short hair for older women offer additional inspiration.
Why the Modern Mullet Works for Women Over 50
The modern mullet has evolved into a sophisticated, wearable style. Here’s why the modern mullet for women over 50 is so effective:
Creates volume at the crown – The shorter top layers lift at the roots, addressing age-related thinning
Softens facial features – Face-framing layers and wispy ends soften jawlines and forehead lines
Removes bulk where not needed – The shorter top reduces weight, while the longer back keeps length
Works with natural texture – Straight, wavy, or curly hair all take to the mullet beautifully
Projects confidence – This cut says you’re bold, creative, and unapologetically yourself
Low maintenance – Designed to look intentional when slightly messy, requiring minimal daily styling
Camouflages graying roots – The textured, layered nature makes root regrowth less noticeable
For women with fine hair, the modern mullet’s layered structure can also create the illusion of density—similar to these low maintenance haircuts for women over 50 with fine hair.
The 10 Modern Mullet Variations for Women Over 50
1. The Soft Modern Mullet
Why it works: The soft modern mullet is the most wearable version for women over 50. The top and crown have soft, subtle layers that create gentle volume, while the back has longer, wispy ends that barely reach the shoulders. There’s no harsh contrast between sections—everything blends seamlessly. This version is perfect for women who want to try the trend without a dramatic commitment.
How to style it: Apply texturizing spray to damp hair. Blow-dry using your fingers, lifting at the crown for volume. The back can be left to air-dry or quickly smoothed. Once dry, use a small amount of matte paste to piece out the ends. The overall effect should be soft and lived-in, not harsh.
Best face shapes: Oval, heart, round (the softness works for everyone)
Maintenance needs: Trim every 6–8 weeks. The soft shape is forgiving.
For women with round faces who want slimming effects, these best haircuts for round faces over 50 offer additional strategies.
2. The Curly Modern Mullet
Why it works: Curly hair was made for the mullet. The curly modern mullet features shorter, voluminous curls on top and at the crown, transitioning into longer, bouncier curls in the back. The layers remove weight, preventing the dreaded “triangle head” effect, while the length in the back allows curls to shine. For women over 50 with natural curls, this cut celebrates texture while keeping it manageable.
How to style it: Apply leave-in conditioner and curl cream to soaking wet hair. Use a denman brush to define curl clumps. Scrunch vigorously with a microfiber towel. Air-dry completely or use a diffuser on low heat. Once dry, shake out at the roots. The shorter top curls should have more volume; the back curls should be longer and looser.
Best face shapes: Oval, heart, round (curls soften angular features)
Maintenance needs: Trim every 8–10 weeks (dry cut only). Curly hair hides grow-out well.
For women with thin curly hair, these curly haircuts for thin hair offer additional volume-building ideas.
3. The Wavy Modern Mullet
Why it works: The wavy modern mullet is the sweet spot for women with natural 2B to 2C waves. The shorter waves on top create volume and lift, while the longer waves in the back cascade down gracefully. The waves interact with the choppy layers to create the perfect lived-in texture. This cut requires minimal styling—just scrunch and go.
How to style it: Apply sea salt spray or wave-enhancing cream to damp hair. Scrunch section by section with a microfiber towel. Air-dry completely—about 30–40 minutes. Do not touch while drying. Once dry, shake out at the roots with your fingers. Never brush—use a wide-tooth comb only when wet.
Best face shapes: All face shapes (most universally flattering wave pattern)
Maintenance needs: Trim every 8–10 weeks. Waves hide grow-out beautifully.
For women over 60 seeking effortless styles, these wash and wear haircuts for women over 60 offer additional low-maintenance ideas.
4. The Textured Modern Mullet with Curtain Bangs
Why it works: Adding curtain bangs to a modern mullet softens the overall look and creates beautiful face-framing. The bangs part in the middle and sweep to each side, blending seamlessly into the shorter top layers. This combination is especially flattering for women over 50 because it softens forehead lines, draws attention to the eyes, and adds a romantic, Parisian feel to the edgy mullet silhouette.
How to style it: Apply lightweight mousse to damp hair. Blow-dry the curtain bangs using a small round brush, rolling them away from your face. The rest of the mullet can be styled with your fingers—tousled and piecey. To refresh bangs on day two, mist with water and re-roll around a round brush with heat for 10 seconds.
Best face shapes: Oval, heart, round (curtain bangs slim wider foreheads)
Maintenance needs: Bangs trim every 3–4 weeks; mullet trim every 6–8 weeks
For more face-framing inspiration, these curtain bangs for women over 50 offer age-defying styling tips.
5. The Short Modern Mullet (Above Shoulders)
Why it works: The short modern mullet keeps the entire cut above the shoulders, making it less dramatic and more office-appropriate while still maintaining the mullet’s signature shape. The top is shorter with volume, the sides are tapered, and the back extends just to the shoulders—no longer. This version is perfect for women who want edge but need a more conservative silhouette.
How to style it: Apply texturizing spray to damp hair. Blow-dry using your fingers, lifting at the crown. The shorter length means it will dry in whatever direction it wants—embrace this. Use matte paste to piece out the ends. The mullet shape should be noticeable but subtle.
Best face shapes: Oval, square, heart (the shorter length suits stronger bone structure)
Maintenance needs: Trim every 5–6 weeks. The short shape needs regular upkeep.
For plus size women seeking flattering options, these short haircuts for plus size women over 50 offer additional slimming ideas.
6. The Modern Mullet for Fine Hair
Why it works: Women with fine hair can absolutely rock a modern mullet. The key is soft, subtle layers rather than dramatic choppiness. The shorter top layers create volume where fine hair needs it most, while the longer back pieces are kept wispy to avoid weighing down the cut. This version uses lighter layering to add movement without sacrificing density.
How to style it: Apply volumizing mousse to damp roots. Blow-dry upside down to maximize lift at the crown. Use texturizing powder at the roots for grip. Avoid heavy products that will weigh fine hair down. The back should be lightweight and piecey. Finish with dry shampoo at the crown.
Best face shapes: Oval, heart, round (the volume adds balance)
Maintenance needs: Trim every 6–8 weeks. Keep the layering subtle—too much will make fine hair look wispy.
For women with fine hair, these short hairstyles for thin fine hair offer additional density-building ideas.
7. The Modern Mullet with Micro Bangs
Why it works:Micro bangs (also called baby bangs) sit high on the forehead, often an inch or more above the eyebrows. Pairing them with a modern mullet creates a bold, editorial contrast—the short, blunt bangs against the longer, shaggy back is striking and fashion-forward. This combination is for the boldest women over 50 who want to make a serious statement.
How to style it: Apply smoothing cream to the bangs only. Blow-dry them straight down using a fine-tooth comb and a blow dryer. The rest of the mullet should be styled in direct contrast—messy, textured, and piecey. Use texturizing spray on the mullet sections only. The goal is clean bangs, chaotic mullet.
Best face shapes: Oval, heart, diamond (micro bangs suit strong bone structure)
Maintenance needs: Bangs trim every 2–3 weeks (they grow out fast); mullet trim every 6–8 weeks
8. The Modern Mullet with Tapered Sides
Why it works: For a slightly more structured and neat look, consider a modern mullet with tapered sides. The hair near the ears is cut shorter and gradually gets longer as it moves toward the top and back, creating a cleaner line. This version is great for reducing bulk around the ears and gives the overall look a more tailored, sophisticated feel while maintaining the mullet’s signature shape.
How to style it: Apply styling cream to damp hair on top only. Use a small round brush to lift the crown while blow-drying. The tapered sides need only a quick towel-dry. Run wax through the top length for separation, pushing it slightly forward or to the side. The back should remain longer and piecey.
Best face shapes: Oval, square, oblong (the clean lines suit sharper features)
Maintenance needs: Top trim every 6–8 weeks; tapered sides need refreshing every 4 weeks
9. The Modern Mullet with Color Accents
Why it works: Adding color accents—subtle highlights or a bold streak—elevates the modern mullet from casual to statement-making. For women with gray or silver hair, adding platinum or lavender streaks adds dimension and modernity. For darker hair, subtle caramel or copper highlights woven through the layers make the mullet’s shape pop. The color should be placed strategically to emphasize the contrast between the shorter top and longer back.
How to style it: Style your mullet as usual. The color will naturally enhance the layers. For best visibility of the mullet shape, style with texture and separation—smooth styles hide the cut’s architecture. Use color-depositing conditioner to maintain vibrancy.
Best face shapes: All face shapes (color adds dimension regardless of cut)
Maintenance needs: Mullet trim every 6–8 weeks; color touch-up every 6–12 weeks
For those blending grays with color, these grey blending highlights in ash blonde offer cool, sophisticated options.
10. The Silvery Modern Mullet (Embracing Gray)
Why it works: For women embracing their natural silver or gray hair, the modern mullet is a stunning choice. The layered texture adds dimension to silver strands, making them look luminous rather than flat. The contrast between the shorter top layers and longer back creates visual interest that enhances the natural variations in gray hair. This is a sophisticated, low-maintenance way to celebrate your silver while rocking an edgy cut.
How to style it: Style your mullet as usual. Use purple shampoo once weekly to prevent yellowing and keep silver bright. For added shine, use a silver-enhancing gloss every 2–3 weeks. The layered texture will catch the light beautifully, making your silver stand out. Avoid heavy products that can make gray hair look dull.
Best face shapes: All face shapes (silver adds elegance to any style)
Maintenance needs: Trim every 6–8 weeks; tone every 4–6 weeks to maintain cool silver
How to Style the Modern Mullet for Women Over 50
Styling the modern mullet is intentionally low-maintenance. Here’s your daily roadmap:
Embrace texture – The mullet looks best when it’s slightly messy. Use texturizing spray, sea salt spray, or dry shampoo to add grip and separation.
Focus on crown volume – The signature of the modern mullet is volume at the crown. Blow-dry the crown section upward with a small round brush, or add texturizing powder for instant lift.
Keep the back piecey – The longer back sections should look wispy and separated, not heavy or blunt. Use dry wax or matte paste on the ends to define individual pieces.
Air-dry when possible – The mullet is designed to look great with minimal heat. Apply product to damp hair, scrunch, and let it air-dry.
Create bends, not curls – For straight hair, use a 1-inch curling iron to create random bends throughout the back section only. Alternate directions for a natural look.
Refresh with water – On non-wash days, mist your hair with plain water from a spray bottle. Re-scrunch and go. Water reactivates the original products.
Sleep on a satin pillowcase – A satin pillowcase preserves your texture and prevents frizz.
Avoid heavy products – Butters, oils, and heavy creams will weigh down the choppy layers. Stick to lightweight sprays, mousses, and powders.
For silver hair – Use purple shampoo once weekly to prevent yellowing and keep silver bright.
Quick Maintenance Cheat Sheet
Style
Trim Frequency
Special Notes
Soft Modern Mullet
6–8 weeks
Most wearable, subtle version
Curly Modern Mullet
8–10 weeks (dry cut)
Always cut dry for curls
Wavy Modern Mullet
8–10 weeks
Waves hide grow-out well
Textured Modern Mullet with Curtain Bangs
Bangs: 3–4 weeks; Mullet: 6–8 weeks
Bangs require frequent trims
Short Modern Mullet (Above Shoulders)
5–6 weeks
Shortest interval on this list
Modern Mullet for Fine Hair
6–8 weeks
Keep layering subtle
Modern Mullet with Micro Bangs
Bangs: 2–3 weeks; Mullet: 6–8 weeks
Micro bangs grow fast
Modern Mullet with Tapered Sides
Top: 6–8 weeks; Sides: 4 weeks
Taper requires precision
Modern Mullet with Color Accents
Mullet: 6–8 weeks; Color: 6–12 weeks
Color adds dimension
Silvery Modern Mullet
6–8 weeks
Tone every 4–6 weeks
Final Thoughts
The modern mullet for women over 50 proves that age is no barrier to bold, creative self-expression. Whether you choose a soft, subtle version, a curly interpretation, or a silvery gray style, the key is embracing texture, volume, and individuality. This cut celebrates what you have—whether that’s fine hair needing lift, curls needing shape, or silver strands needing dimension—while making you feel confident, edgy, and undeniably yourself. Take this guide to your stylist, discuss which of these 10 options aligns with your hair type and lifestyle, and get ready to discover how liberating and stylish the modern mullet can be at 50 and beyond.
For women over 50, making hair look thicker is one of the most common and achievable beauty goals. As we age, hair naturally becomes finer, more fragile, and often less dense. But the right combination of haircut, styling techniques, and products can create the illusion of significant volume and thickness—often without any chemical treatments or extensions. In this guide, you’ll discover proven strategies for how to make your hair look thicker over 50, including the best cuts, the most effective products, and professional tricks that transform fine, thin hair into full, voluminous style. If you’re looking for specific haircut ideas, these low maintenance haircuts for women over 50 with fine hair offer excellent options.
Why Hair Gets Thinner After 50—and What You Can Do About It
Understanding why hair changes helps you choose the right solutions. Here’s what happens and how to address it:
Change
Why It Happens
Solution
Hair becomes finer
Hormonal shifts (especially during menopause) reduce hair shaft diameter
Choose cuts that add volume; use lightweight volumizing products
Growth slows
Aging hair follicles produce hair at a slower rate
Scalp massage; biotin and collagen supplements; gentle handling
Increased shedding
Hormonal changes can shorten the growth phase
Consult a doctor; reduce stress; use strengthening products
Dryer, more brittle
Oil production decreases with age
Deep conditioning; leave-in treatments; avoid heat damage
Gray hair has a different structure—often more wiry
Extra moisture; purple shampoo for brightness
The good news is that with the right approach, you can create the appearance of significantly thicker hair regardless of your starting density.
Part 1: The Best Haircuts for Thicker-Looking Hair
The foundation of thicker-looking hair is the right cut. Here are the most effective cuts for creating volume and density.
1. The Stacked Bob
Why it works: A stacked bob has graduated layers in the back that create a built-in bump of volume at the crown. The stacking is cut into the interior of the hair, so the volume comes from the cut itself—not from styling. For women with fine hair, this is one of the most effective volume-building cuts available.
How to style it: Apply root-lifting spray to the crown area. Blow-dry the stacked back using a small round brush for 2–3 minutes, lifting aggressively. The front can be left to air-dry or quickly smoothed. Finish with dry texture spray at the crown.
Best for: Fine hair, thinning at the crown
Maintenance: Trim every 5–6 weeks
2. The Textured Pixie
Why it works: The textured pixie keeps the top at 1–1.5 inches with heavy point-cutting throughout, while the sides and back are tapered close. The texture creates multiple endpoints that reflect light, making fine hair look denser. The short sides prevent any bulk at the cheeks, keeping the focus on volume at the crown.
How to style it: Apply matte paste to dry hair. Rub between palms, then rake through the top pushing everything forward. For extra volume, apply texturizing powder to the roots before the paste.
Best for: Very fine or thinning hair, women who want ultra-low maintenance
Maintenance: Trim every 4–5 weeks
3. The Layered Bob (Chin-Length)
Why it works: A layered bob at chin-length removes interior weight so hair falls naturally into place without precision styling. The layers should be soft and subtle—not choppy or disconnected—so they blend seamlessly. For fine hair, this length is ideal because it’s short enough to avoid being weighed down but long enough to tuck behind ears.
How to style it: Apply lightweight mousse to damp roots. Blow-dry using a small round brush (1 inch), lifting each section at the root. The layers will create natural movement without curling.
Best for: All face shapes, women who want versatility
Maintenance: Trim every 6–8 weeks
4. The Blunt Bob with Soft Ends
Why it works: A blunt bob at chin-length creates the appearance of maximum density because every hair ends at the same point. Softening the very ends (micro-point cutting) prevents the “helmet head” look while keeping the weight line intact. For fine hair, this cut creates the illusion of thickness without layers that can make fine hair look wispy.
How to style it: Apply lightweight mousse to damp hair. Comb through with a wide-tooth comb. Air-dry completely, using your fingers to gently separate any clumps. Never add heavy products that will weigh down the blunt line.
Best for: Very fine hair that lacks density
Maintenance: Trim every 5–6 weeks
5. The French Bob
Why it works: The French bob is cropped between the earlobe and chin, often with a subtle undercurl at the ends. The blunt edge creates the illusion of density, while the short length prevents the hair from looking wispy. It’s effortlessly chic and requires almost no daily effort.
How to style it: Apply smoothing cream to damp hair. Tuck hair behind your ears while it air-dries to encourage that signature curved-under shape. Never use a straightener—the French bob celebrates imperfect, lived-in texture.
Best for: Women who want a chic, low-maintenance cut
Maintenance: Trim every 6 weeks
For more haircut ideas, these best haircuts for round faces over 50 offer additional flattering options.
Part 2: The Best Products for Thicker-Looking Hair
The right products can dramatically improve the appearance of thickness. Here’s what to look for and what to avoid.
Bumble and Bumble Thickening Spray, Aveda Pure Abundance
What to AVOID
Product Type
Why to Avoid
Better Alternative
Heavy oils (coconut, castor)
Weigh fine hair down, make it look greasy
Jojoba or argan oil (use 1 drop only on ends)
Heavy butters (shea, cocoa)
Coat strands, prevent volume
Lightweight leave-in conditioners
High-shine serums
Can make fine hair look oily and flat
Matte finish products or dry texture sprays
Heavy creams
Weigh hair down at the roots
Mousse or root-lifting spray instead
Styling Tools That Help
Small round brush (¾–1 inch) – Creates tension and lift on fine hair better than large brushes
Diffuser – Enhances natural waves and curls while adding volume
Blow-dryer with cool shot button – Locks volume in place
Wide-tooth comb – Detangles without flattening volume
Boar bristle brush – Smooths the top layer while maintaining under-layer volume
Part 3: Professional Tricks for Instant Volume
These styling techniques create immediate, visible thickness.
1. Blow-Dry Upside Down
This is the single most effective trick for adding volume. Flip your head upside down and blast roots with warm heat for 30 seconds before you even pick up a brush. This pre-lifts the roots and cuts drying time in half.
2. The Cool Shot
After heating each section with a round brush, hit it with 10 seconds of cool air before releasing. This locks the bend and extends volume for hours. This is what professionals do—and it makes a dramatic difference.
3. Dry Shampoo on Clean Hair
Most women use dry shampoo only on second-day hair. But applying dry shampoo to clean, dry hair adds grip and texture that makes fine hair look twice as thick. Spray at the roots, wait 30 seconds, then massage in.
4. Texturizing Powder at the Roots
A small amount of texturizing powder (like Schwarzkopf Osis Dust It) at the roots creates instant, gravity-defying lift. Sprinkle onto your fingers, then work into the roots at the crown. A little goes a long way.
5. The Velcro Roller Trick
For zero-heat volume, wrap damp crown sections around large Velcro rollers (2 inches). Leave for 15–20 minutes while you do your makeup or get dressed. Remove and finger-comb. The volume will last for hours.
6. Strategic Parting
A deep side part (aligned with the arch of your eyebrow) immediately creates asymmetrical volume. Never center-part fine hair—it creates the illusion of a bald spot at the part line.
7. Pin Curls for Overnight Volume
Before bed, twist small sections of your crown and pin them flat against your head. Sleep on a satin pillowcase. In the morning, remove the pins and shake out. You’ll have built-in volume without any heat.
8. The “Pineapple” for Curls
For wavy or curly hair, gather hair loosely at the very top of your head and secure with a satin scrunchie before bed. In the morning, shake out. This preserves curl definition and creates height at the crown.
For women with curly hair, these curly haircuts for thin hair offer additional volume-building ideas.
Part 4: Color Techniques That Create Depth and Dimension
Strategic color can make hair look significantly thicker.
1. Root Shadowing
Leaving the roots slightly darker than the ends creates depth and contrast that mimics fullness. A root shadow (also called a shadow root) makes the hairline look denser and regrowth less noticeable.
2. Highlights and Lowlights
Adding both highlights and lowlights (not all-over color) creates dimension that tricks the eye into seeing more hair. The contrast between light and dark pieces adds visual texture that reads as thickness.
3. Face-Framing Highlights
Placing lighter pieces around the face draws attention upward and creates the illusion of lifted, fuller hair. This is especially effective when paired with a layered cut.
4. Glossing
A clear or tinted gloss smooths the cuticle, adding shine and the appearance of density. Gloss treatments can be done at home or in a salon every 4–6 weeks.
5. Avoid All-Over Dark Color
Solid, dark colors can make fine hair look flat and emphasize the scalp. If you prefer dark hair, add subtle highlights or a root shadow to create dimension.
For those blending grays, these grey blending highlights in ash blonde offer cool, sophisticated options.
Part 5: Lifestyle Changes That Support Thicker Hair
Healthy hair starts from within. These lifestyle changes support hair thickness over time.
Nutrition for Hair Thickness
Nutrient
Food Sources
Why It Helps
Protein
Eggs, fish, chicken, beans, Greek yogurt
Hair is made of protein (keratin)
Biotin
Eggs, nuts, salmon, avocado
Supports keratin production
Iron
Spinach, red meat, lentils, fortified cereal
Iron deficiency causes hair thinning
Vitamin D
Fatty fish, egg yolks, sunlight
Linked to hair follicle health
Zinc
Oysters, pumpkin seeds, chickpeas
Supports hair growth and repair
Omega-3s
Salmon, sardines, walnuts, flaxseed
Keeps scalp healthy
Supplements to Consider
Always consult your doctor before starting supplements. Some evidence supports:
Scalp serums – Products with rosemary oil or peptides may support growth
Gentle cleansing – Avoid harsh sulfates that strip natural oils
Exfoliating – Use a scalp scrub once monthly to remove buildup
Part 6: Quick Reference – Thicker Hair Toolkit
Best Cuts for Thicker-Looking Hair
Cut
Best For
Trim Frequency
Stacked Bob
Fine hair, crown thinning
5–6 weeks
Textured Pixie
Very fine or thinning hair
4–5 weeks
Layered Bob
Versatility, all face shapes
6–8 weeks
Blunt Bob with Soft Ends
Very fine hair lacking density
5–6 weeks
French Bob
Chic, low-maintenance style
6 weeks
Best Products for Volume
Product Type
Key Ingredients
When to Use
Volumizing mousse
Polymers, lightweight hold
On damp hair before blow-drying
Root-lifting spray
Film-forming agents
At the crown before blow-drying
Texturizing powder
Silica, starches
On dry roots for instant lift
Dry shampoo
Starches, clays
On clean or second-day roots
Volumizing spray
Panthenol, proteins
Throughout damp hair
Everyday Volume Routine (5 Minutes)
Apply volumizing mousse to damp roots
Flip head upside down and blow-dry roots for 30 seconds
Apply texturizing powder to dry roots at the crown
Create a deep side part
Finish with dry shampoo at the roots for extra grip
Final Thoughts
Making your hair look thicker over 50 is entirely achievable with the right combination of haircut, products, and techniques. The key is choosing a cut that removes weight from the ends (like a stacked bob or textured pixie), using lightweight volumizing products, and mastering simple tricks like blow-drying upside down and using a deep side part. Remember that fine hair is often healthier and shinier than thick hair—it just needs the right approach to show its best self. Take this guide to your stylist, invest in a few key products, and get ready to discover how voluminous and beautiful your hair can be at 50 and beyond.
For men who want a haircut that looks cool without trying too hard, the grown-out shag is the perfect answer. This style embraces length, texture, and intentional imperfection—think rock-and-roll vibes meets effortless everyday wearability. Unlike precision cuts that require frequent trims, the grown-out shag is designed to look better as it gets longer. The layers create movement, the texture adds interest, and the relaxed silhouette works for everything from casual weekends to creative professional settings. In this guide, you’ll discover 10 grown-out shag variations for men, each designed to work with different hair types and face shapes. If you love textured, low-maintenance styles, these curly haircuts for men offer additional inspiration. grown-out shag for men
What Is a Grown-Out Shag?
The grown-out shag is a layered haircut that’s intentionally kept longer than a traditional shag. Key characteristics include:
Extended length – Typically falls between chin and shoulders when dry
Heavy layering throughout – Creates movement and reduces bulk
Textured ends – Wispy, piecey finishes that look lived-in
Often paired with curtain bangs or fringe – Softens the face and adds character
Minimal maintenance – Designed to look better as it grows
Versatile styling – Can be worn messy, slicked back, or pushed to the side
The grown-out shag works exceptionally well for men with wavy or curly hair, but can be adapted for straight textures with the right styling products.
Why the Grown-Out Shag Is Trending
The grown-out shag has become increasingly popular among men for several reasons:
Low maintenance – Requires fewer salon visits than precision cuts
Effortless cool – The lived-in look projects confidence without appearing try-hard
Works with natural texture – Enhances waves and curls rather than fighting them
Hides thinning – The layers and texture camouflage sparse areas
Versatile length – Long enough to tie back, short enough to stay off the neck
Ages well – Looks intentional at every stage of growth
For men experiencing thinning hair, the grown-out shag’s texture can be especially flattering. These haircuts for thinning hair men over 50 offer additional options.
The 10 Grown-Out Shag for Men
1. The Classic Grown-Out Shag
Why it works: The classic grown-out shag features heavy layering throughout, with shorter layers at the crown and longer layers at the perimeter. The length typically falls between the chin and shoulders. This is the most requested version of the cut and works on virtually every hair type. For men with wavy or straight hair, the classic shag adds movement and volume that one-length cuts lack.
How to style it: Apply texturizing spray to damp hair. Blow-dry using your fingers, lifting at the roots for volume. Once dry, use a small amount of matte clay to piece out individual sections. For a more polished look, sweep the front to one side. The goal is lived-in texture—not perfection.
Best face shapes: Oval, square, heart (most universally flattering)
Maintenance needs: Trim every 8–10 weeks. The shag improves with grow-out.
For men with round faces who want slimming effects, these men’s haircuts for round face over 50 offer additional strategies.
2. Curly Grown-Out Shag
Why it works: Curly hair was made for the shag. The heavy layering removes weight, preventing the dreaded “triangle head” effect, while the length allows curls to form beautiful spirals. The curly grown-out shag celebrates natural texture while keeping it manageable. The longer length weighs down roots slightly, preventing excessive volume at the sides.
How to style it: Apply leave-in conditioner and curl cream to soaking wet hair. Use a wide-tooth comb to distribute. Scrunch vigorously with a microfiber towel. Air-dry completely or use a diffuser on low heat. Once dry, shake out at the roots. Never brush dry curls—use your fingers to separate.
Best face shapes: Oval, heart, round (curls soften angular features)
Maintenance needs: Trim every 8–10 weeks (dry cut only). Curly hair hides grow-out well.
For men with curly hair seeking more styling ideas, these curly haircuts for men offer additional inspiration.
3. Wavy Grown-Out Shag
Why it works: The wavy grown-out shag is the sweet spot for men with natural 2B to 2C waves. The waves interact with the choppy layers to create the perfect lived-in texture. The shorter layers at the crown lift the waves, creating volume, while the longer layers allow the wave pattern to shine through. This cut requires minimal styling—just scrunch and go.
How to style it: Apply sea salt spray or wave-enhancing cream to damp hair. Scrunch section by section with a microfiber towel. Air-dry completely—about 30–40 minutes. Do not touch while drying. Once dry, shake out at the roots with your fingers. Never brush—use a wide-tooth comb only when wet.
Best face shapes: All face shapes (most universally flattering wave pattern)
Maintenance needs: Trim every 8–10 weeks. Waves hide grow-out beautifully.
4. Straight Grown-Out Shag
Why it works: While the shag is often associated with waves and curls, it works beautifully on straight hair. The heavy layering creates movement and volume that straight hair often lacks. Without natural wave, the cut relies on the choppy layers to create the signature shaggy silhouette. The grown-out length keeps it from looking too severe.
How to style it: Apply volumizing mousse to damp roots. Blow-dry using a round brush, lifting sections at the crown for height. Use texturizing spray on dry hair to add grip and separation. For extra movement, run a flat iron over random sections, bending the ends in different directions. The goal is texture, not smoothness.
Best face shapes: Oval, heart, oblong (the layers add movement to longer faces)
Maintenance needs: Trim every 8–10 weeks. Straight hair shows uneven ends more easily, so don’t skip trims.
5. Grown-Out Shag with Curtain Bangs
Why it works: Adding curtain bangs to a grown-out shag softens the overall look and creates beautiful face-framing. The bangs part in the middle and sweep to each side, blending seamlessly into the shorter layers. This combination is especially flattering for men with longer faces or high foreheads, as it softens the hairline and draws attention to the eyes.
How to style it: Apply lightweight mousse to damp hair. Blow-dry the curtain bangs using a small round brush, rolling them away from your face. The rest of the shag can be styled with your fingers—tousled and piecey. To refresh bangs on day two, mist with water and re-roll around a round brush with heat for 10 seconds.
Best face shapes: Oval, heart, oblong (curtain bangs soften high foreheads)
Maintenance needs: Bangs trim every 3–4 weeks; shag trim every 8–10 weeks
6. Grown-Out Shag with Fringe
Why it works: A fuller fringe (bangs that sit across the forehead) adds a youthful, slightly mysterious vibe to the grown-out shag. The fringe should be textured and slightly piecey—not blunt or heavy. This style works well for men with strong brows or those who want to draw attention to their eyes.
How to style it: Apply texturizing spray to damp hair. Blow-dry the fringe forward using a round brush, creating a slight bend at the ends. The rest of the shag can be blow-dried with fingers. The fringe should sit just above the eyebrows. Finish with light hairspray on the fringe only.
Best face shapes: Oval, heart, round (fringe shortens longer faces)
Maintenance needs: Fringe trim every 3–4 weeks; shag trim every 8–10 weeks
7. Messy Grown-Out Shag
Why it works: The messy grown-out shag is deliberately disheveled—think “I just rolled out of bed but in a cool way.” The cut features uneven, jagged layers throughout, with some sections shorter than others. This intentional messiness is a blessing because perfection is not the goal. Second-day hair actually looks better, and the texture hides any thinning areas.
How to style it: On dry hair (clean or second-day), apply dry shampoo generously at the roots. Flip head upside down and scrunch vigorously for 30 seconds. Flip back and use your fingers to texturize random sections. Add texturizing powder at the crown for piecey separation. Do not use a brush or comb.
Best face shapes: Oval, heart, square (messiness softens angular features)
Maintenance needs: Trim every 8–10 weeks. The lived-in look means grow-out adds to the charm.
8. Slicked-Back Grown-Out Shag
Why it works: The slicked-back grown-out shag takes the textured cut and adds polish. The top layers are combed back away from the face, creating a clean, sophisticated silhouette. The texture remains visible underneath, adding interest. This style is perfect for professional settings or evenings out when you want to look put-together without losing the shag’s edge.
How to style it: Apply medium hold pomade or gel to damp hair. Use a fine-tooth comb to comb all hair back away from your forehead. The sides can be tucked behind your ears or left to fall. For a modern finish, leave the front slightly piecey rather than perfectly smooth. Lock in place with medium hold hairspray.
Best face shapes: Oval, square, diamond (slicked-back elongates rounder faces)
Maintenance needs: Trim every 8–10 weeks. The slicked style can be worn between washes.
9. Grown-Out Shag for Thick Hair
Why it works: Men with thick hair often struggle with bulk and weight. The grown-out shag for thick hair uses heavy layering to remove interior bulk while maintaining length. The layers start higher—around the ears or cheekbones—to prevent the dreaded “helmet head” effect. The result is hair that feels lighter, moves better, and looks effortlessly styled.
How to style it: Apply smoothing cream to damp hair. Blow-dry using a large round brush, lifting at the roots for volume. For an air-dry option, apply wave spray and scrunch—the layers will prevent the hair from getting too puffy. Finish with shine serum on the ends only.
Best face shapes: All face shapes (removes bulk while keeping shape)
Maintenance needs: Trim every 8–10 weeks. Thick hair holds layers well.
For men with thick hair seeking more options, these medium length hairstyles for thick hair offer additional shaping ideas.
10. Grown-Out Shag for Thin Hair
Why it works: It might seem counterintuitive—doesn’t a shag remove a lot of hair? For thin hair, the key is a subtle grown-out shag with lighter layering. The shorter crown layers create volume where thin hair needs it most, while the longer perimeter maintains length. The choppy texture hides thinning areas. This version uses soft, wispy layers that add movement without sacrificing density.
How to style it: Apply volumizing mousse to damp roots. Blow-dry upside down to maximize lift. Use texturizing powder at the crown for grip. Avoid heavy products that will weigh thin hair down. The goal is volume and separation, not heavy texture.
Best face shapes: Oval, heart, round (the volume adds balance)
Maintenance needs: Trim every 8–10 weeks. Keep the layering subtle—too much will make thin hair look wispy.
For men with thinning hair, these haircuts for thinning hair men over 50 offer additional options.
How to Style the Grown-Out Shag for Men
Styling the grown-out shag is intentionally low-maintenance. Here’s your daily roadmap:
Embrace texture – The shag looks best when it’s slightly messy. Use texturizing spray, sea salt spray, or dry shampoo to add grip and separation.
Air-dry when possible – The shag is designed to look great with minimal heat. Apply product to damp hair, scrunch, and let it air-dry.
Use a diffuser for waves and curls – If you need to speed up drying, use a diffuser on low heat. Cup sections of hair and press toward your scalp.
Create random bends – For straight or wavy hair, use a 1-inch curling iron to create random bends throughout. Alternate directions. Brush through with a wide-tooth comb.
Focus on crown volume – The signature of the shag is volume at the crown. Blow-dry the crown section upward, or add texturizing powder for instant lift.
Refresh with water – On non-wash days, mist your hair with plain water from a spray bottle. Re-scrunch and go. Water reactivates the original products.
Sleep on a satin pillowcase – A satin pillowcase preserves your texture and prevents frizz.
Avoid heavy products – Butters, oils, and heavy creams will weigh down the choppy layers. Stick to lightweight sprays, mousses, and powders.
Quick Maintenance Cheat Sheet
Style
Trim Frequency
Special Notes
Classic Grown-Out Shag
8–10 weeks
Most versatile option
Curly Grown-Out Shag
8–10 weeks (dry cut)
Always cut dry for curls
Wavy Grown-Out Shag
8–10 weeks
Waves hide grow-out well
Straight Grown-Out Shag
8–10 weeks
Straight hair shows uneven ends
Grown-Out Shag with Curtain Bangs
Bangs: 3–4 weeks; Shag: 8–10 weeks
Bangs require frequent trims
Grown-Out Shag with Fringe
Fringe: 3–4 weeks; Shag: 8–10 weeks
Best for high foreheads
Messy Grown-Out Shag
8–10 weeks
Looks better with grow-out
Slicked-Back Grown-Out Shag
8–10 weeks
Can be styled between washes
Grown-Out Shag for Thick Hair
8–10 weeks
Removes bulk effectively
Grown-Out Shag for Thin Hair
8–10 weeks
Keep layering subtle
Final Thoughts
The grown-out shag for men proves that longer hair can be low-maintenance, textured, and effortlessly cool. Whether you have curly, wavy, or straight hair, this cut works with your natural texture to create movement, volume, and style. The key is embracing imperfection—the shag is designed to look better when it’s a little messy. Take this guide to your barber, discuss which of these 10 options aligns with your hair type and lifestyle, and get ready to discover how liberating the grown-out shag can be.
For women with kinky and coily hair textures, 2026 trending kinky coily hairstyles are all about celebrating your natural pattern in bold, innovative, and protective ways. Gone are the days when natural hair was seen as “difficult” or “unprofessional.” Today, the spotlight is on the beauty of tight coils, defined curl clumps, and the incredible versatility of type 4 hair. From elevated protective styles to stunning wash-and-goes, 2026 brings fresh energy to kinky coily textures. In this guide, you’ll discover 15 trending kinky coily hairstyles for 2026, each designed to showcase your natural texture while keeping your hair healthy, moisturized, and undeniably stylish. If you love celebrating natural texture, these 4C hairstyles ideas offer additional inspiration.
Why Kinky Coily Hair Is Taking Center Stage in 2026
The natural hair movement has evolved, and 2026 is the year of fearless self-expression. Here’s why kinky coily hairstyles are trending now:
Emphasis on health over manipulation – More women are prioritizing hair health, choosing styles that protect while showcasing natural texture
Innovative products – New gels, moisturizers, and tools make defining tight coils easier than ever
Celebrity influence – Stars are proudly wearing their coily textures on red carpets
Versatility in length – From teeny weeny Afros (TWAs) to waist-length coils, every length is celebrated
Protective meets stylish – Protective styles no longer mean hiding your hair; they now enhance and frame your face
Hydration focus – The emphasis on moisture-rich routines keeps coily hair looking juicy and defined
The 15 Trending Kinky Coily Hairstyles for 2026
1. Defined Wash-and-Go with Maximum Shrinkage
Why it works: The defined wash-and-go has been elevated in 2026. Instead of stretching or manipulating coils, this style embraces maximum shrinkage—celebrating how tight coils spring up close to the scalp. The result is a cropped, rounded shape that’s full of definition and personality. For women with kinky coily hair, this style requires the right gel and technique to lock in definition.
How to style it: Start with freshly washed, soaking wet hair. Apply leave-in conditioner, then layer with a strong hold gel (like Eco Styler, Wetline Xtreme, or Uncle Funky’s Daughter). Use the “praying hands” method to smooth product through sections, then scrunch vigorously. Air-dry completely (4–6 hours) or sit under a hooded dryer for 45–60 minutes. Do not touch while drying. Once 100% dry, gently fluff at the roots with a pick. Do not separate the clumps.
Best face shapes: All face shapes (most authentic to natural texture)
Maintenance needs: Lasts 5–7 days with nightly pineappling and a satin bonnet
For women with fine coily hair who want definition without weight, these curly haircuts for thin hair offer additional volume-building ideas.
2. Elevated Bantu Knots
Why it works:Bantu knots are a traditional African hairstyle that has been reimagined for 2026. Instead of uniform knots, the elevated version plays with placement, size, and accessories. Larger knots, asymmetrical placement, and gold cuffs or beads elevate this classic style. Bantu knots can be worn as a style themselves or unraveled for a bantu knot-out.
How to style it: Start with damp, detangled hair. Apply leave-in conditioner and curl cream. Part your hair into sections—size determines knot size. Take a section, twist it tightly from root to tip, then wrap the twisted hair around itself to form a small knot. Tuck the end underneath. Secure with a small elastic if needed. Add gold cuffs or beads for 2026 flair. Repeat until all hair is knotted. Allow to dry completely (overnight or under a hooded dryer for 2–3 hours).
Best face shapes: Oval, heart, diamond (knots add visual interest and height)
Maintenance needs: Bantu knots last 1–2 weeks; knot-out lasts 3–5 days
3. Coily Finger Coils with Color Accents
Why it works:Finger coils have been a staple for defining coily hair, but 2026 brings color accents into the mix. Individual coils are formed by wrapping small sections of hair around the finger, creating perfect spiral curls. Adding vibrant color accents—like burgundy, honey blonde, or copper—to select coils creates dimension and visual interest. This style is time-intensive but delivers stunning, sculptural results.
How to style it: Start with damp, detangled hair. Apply leave-in conditioner and curl defining gel. Take a small section (½ inch) and apply product. Wrap the hair around your finger from root to tip, forming a tight coil. Allow the coil to sit on its own or secure with a small clip. Repeat until all hair is coiled. For color accents, have a stylist add highlights or color-depositing conditioner to select coils. Allow to dry completely (air-dry overnight or sit under a hooded dryer for 3–4 hours).
Best face shapes: All face shapes (most defined look for coily hair)
Maintenance needs: Finger coils last 1–2 weeks; coil-out lasts 3–5 days
4. Fulani Braids with Beaded Details
Why it works:Fulani braids (also called tribal braids) remain a top protective style for 2026. The style features cornrows braided close to the scalp with a central braid down the middle, side braids sweeping back, and often a braided fringe. The 2026 update adds beaded details—wooden, gold, or colorful beads threaded onto the ends. This style is cultural, beautiful, and protective.
How to style it: Start with freshly washed, detangled hair stretched via blow-drying. Apply leave-in conditioner and braiding gel. Create a center part. Braid a cornrow down the center from forehead to nape. Create cornrows on each side, angling them toward the center. Leave the ends out and braid them into three-strand braids. Thread wooden beads, gold cuffs, or colorful beads onto the ends. Secure edges with edge control.
Best face shapes: Oval, heart, diamond (the central line elongates the face)
Maintenance needs: Fulani braids last 4–6 weeks with proper care
5. The Coily Frohawk
Why it works: The coily frohawk combines the volume of an Afro with the edge of a mohawk. The sides are shaved or closely tapered, while a strip of coily length remains from forehead to nape. This style celebrates natural volume while creating a striking, sculptural silhouette. For 2026, the frohawk is softer and more rounded than previous years—less punk, more sophisticated.
How to style it: Apply leave-in conditioner, curl cream, and gel to soaking wet hair on the center strip only. Use a denman brush to define curl clumps. Scrunch vigorously. Air-dry or diffuse. Once dry, pick out the roots gently to create height and fullness. The shaved sides require no styling—keep them moisturized to prevent irritation and refresh every 1–2 weeks.
Best face shapes: Oval, diamond, square (the height elongates rounder faces)
Maintenance needs: Center strip trim every 6–8 weeks; shaved sides need refreshing every 1–2 weeks
For plus size women who love bold styles, these short haircuts for plus size women over 50 offer additional slimming ideas.
6. Kinky Twists with Mixed Lengths
Why it works:Kinky twists (two-strand twists using kinky texture hair) are a protective staple. The 2026 update features mixed lengths—some twists are cut shorter around the face, others are left longer. This intentional unevenness creates movement and visual interest. Kinky twists are lightweight, long-lasting, and versatile.
How to style it: Start with freshly washed, detangled hair stretched via blow-drying or banding. Apply leave-in conditioner and twisting butter. Part hair into sections. Take each section and divide into two strands, twisting from root to tip. For mixed lengths, trim some twists at the front to chin-length after installation. Use mousse on the ends to prevent frizz. Kinky twists can last 4–8 weeks with proper care.
Best face shapes: All face shapes (most versatile protective style)
Maintenance needs: Retwist edges every 5–7 days; full retwist every 4–6 weeks
7. Tapered Coily Crop
Why it works: The tapered coily crop is short on the sides and back with more length on top—similar to a men’s fade but designed for coily texture. This cut is perfect for women who want a low-maintenance, wash-and-go lifestyle. The taper removes bulk where it’s not needed, leaving volume on top for styling. For 2026, the tapered coily crop is paired with defined curl clumps, not a blown-out Afro.
How to style it: Apply leave-in conditioner and curl gel to soaking wet hair on top only. Define curl clumps with fingers or a denman brush. The tapered sides need minimal product—just moisture. Air-dry or diffuse. Once dry, fluff the top gently. The contrast between the defined top and clean taper is the whole point.
Best face shapes: Oval, square, heart (the taper adds definition to round faces)
Maintenance needs: Top trim every 4–5 weeks; taper needs refreshing every 2–3 weeks
8. Chunky Twists with Gold Cuffs
Why it works:Chunky twists are larger, more substantial two-strand twists that make a statement. For 2026, they’re elevated with gold cuffs—small gold jewelry pieces slid onto individual twists. This style is perfect for special occasions or days when you want your protective style to feel like an accessory. The chunkiness of the twists also means faster installation time.
How to style it: Start with damp, stretched hair. Apply leave-in conditioner and twisting butter. Take larger sections (1–2 inches) and divide into two strands, twisting from root to tip. Slide gold cuffs or hair jewelry onto select twists before securing the ends. Seal ends with gel or by dipping in hot water. The gold adds a luxurious, elevated touch.
Best face shapes: All face shapes (most jewelry-friendly protective style)
Maintenance needs: Chunky twists last 2–4 weeks with proper care
9. Coily Puff with Scarf Styling
Why it works: The coily puff is a simple, elegant style where coily hair is gathered into a high, low, or side puff. For 2026, the coily puff is elevated with scarf styling—a silk or satin scarf tied around the base of the puff or wrapped around the head. The scarf adds color, pattern, and polish to an otherwise simple style. This is perfect for second or third-day hair.
How to style it: Start with stretched hair (twist-out, braid-out, or blown out). Gather hair into your desired puff placement (high, low, or side). Secure with a satin scrunchie. Smooth edges with edge control. Take a silk scarf folded into a strip, wrap it around the base of the puff (or around your head), and tie in a knot or bow. The scarf should complement your outfit.
Best face shapes: All face shapes (most accessory-friendly style)
Maintenance needs: Refresh puff daily; stretch and redo every 5–7 days
10. Coily Bob with Defined Ends
Why it works: The coily bob takes the classic bob silhouette and applies it to kinky coily texture. Hair is cut to chin or shoulder length when stretched, but the coils spring up to create a rounded, cropped shape. For 2026, the focus is on defined ends—using gel or curl cream to ensure each coil ends in a perfect spiral, not frizz. This cut is modern, chic, and low-maintenance.
How to style it: Apply leave-in conditioner and curl gel to soaking wet hair. Define curl clumps with a denman brush or finger-coiling. Air-dry completely or use a hooded dryer. Once dry, do not touch. The defined coils will create a rounded bob shape. Trim ends every 6–8 weeks to maintain definition.
Best face shapes: Oval, heart, round (the rounded shape softens angular features)
Maintenance needs: Trim every 6–8 weeks (dry cut only)
For women with curly hair who want more layering ideas, these curly haircuts for thin hair offer additional volume-building techniques.
11. Flat Twist Updo
Why it works:Flat twists are two-strand twists that lie flat against the scalp, similar to cornrows. Gathering flat twists into an updo creates an elegant, formal style that’s perfect for weddings, galas, or any special occasion. For 2026, flat twist updos are softer and more organic—less severe, with wispy pieces left out. This style is protective and stunning.
How to style it: Start with damp, detangled hair. Apply leave-in conditioner, curl cream, and edge control. Create flat twists along the hairline and crown, angling them toward a central gathering point at the back or side. Gather the remaining twisted ends into a bun, chignon, or twisted shape. Secure with bobby pins (use 10–15). Leave a few wispy curls around the face for softness.
Best face shapes: All face shapes (most elegant protective style)
Maintenance needs: Style lasts 5–10 days with nightly pinning
12. Wash-and-Go with Iced Tips
Why it works: A wash-and-go with iced tips takes the classic defined wash-and-go and adds color to the ends only. The roots remain natural, while the last 1–2 inches of each coil are colored in platinum, silver, or pastel shades. The effect is “iced”—like the tips of the coils have been dipped in frost. This is a low-commitment color trend because regrowth isn’t noticeable.
How to style it: Have a stylist apply lightener only to the ends of your coils, then tone them to your desired shade (platinum, lavender, rose gold, etc.). For the wash-and-go, follow the same steps as the defined wash-and-go. The iced tips will be visible when your coils spring up, creating a beautiful two-tone effect. Use purple shampoo to maintain cool tones.
Best face shapes: All face shapes (color adds dimension regardless of cut)
Maintenance needs: Wash-and-go lasts 5–7 days; color touch-up every 6–8 weeks
13. The Pineapple Updo
Why it works: The pineapple updo is a nighttime preservation technique that has become a daytime style itself. Hair is gathered very high on the head (like a pineapple) with the ends folded over, creating a playful, voluminous shape. For 2026, the pineapple updo is worn intentionally as a day style, often paired with a satin scrunchie or scarf. It’s perfect for second-day hair when you want a quick, chic look.
How to style it: Start with stretched hair (twist-out, braid-out, or day-old defined wash-and-go). Flip your head upside down. Gather all hair at the very top of your head and secure with a satin scrunchie. Do not pull the hair all the way through—leave the ends folded over to create a “pineapple” shape. Smooth edges with edge control. The pineapple can be worn as-is or with a scarf tied around the base.
Best face shapes: Oval, heart, round (the height elongates round faces)
Maintenance needs: Refresh pineapple daily; restretch every 5–7 days
14. Coily Mullet
Why it works: The coily mullet is a bold, rock-and-roll style for 2026. The sides are tapered or faded, the crown is left full and voluminous, and the back is kept longer—creating the classic mullet silhouette but with coily texture. This style is edgy, unexpected, and absolutely stunning on kinky coily hair. It’s for the woman who wants to make a statement.
How to style it: Have a stylist taper the sides and keep the back length. The top should have volume. For styling, apply curl cream and gel to soaking wet hair. Define curls with a denman brush or finger-coiling. Air-dry or diffuse. The shaved or tapered sides need no styling—keep them moisturized. The longer back will coil up but still maintain length.
Best face shapes: Oval, heart, diamond (the mullet adds width to narrow faces)
Maintenance needs: Top and sides trim every 6–8 weeks; back length can go longer
15. Coily Pixie with Defined Curls
Why it works: The coily pixie is a short, cropped style that celebrates tight coils. Unlike traditional pixies that are blown out or straightened, the coily pixie keeps curls defined and springy. The top is left longer (1.5–2 inches when stretched), while the sides and back are tapered close. For 2026, the coily pixie is all about definition—each coil should be visible and juicy, not brushed out into a fro.
How to style it: Apply leave-in conditioner and curl gel to soaking wet hair. Use finger-coiling to define individual curls. Air-dry completely—do not touch while drying. Once dry, the coils should be springy and defined. The tapered sides need only moisture. For a fun variation, add a gold cuff to a few coils on top. This cut is low-maintenance and high-impact.
Best face shapes: Oval, heart, square (the pixie adds height to round faces)
Maintenance needs: Trim every 4–5 weeks. The shape needs regular upkeep.
How to Care for Kinky Coily Hair (Daily Routine)
Maintaining healthy kinky coily hair requires consistent moisture and gentle handling. Here’s your daily roadmap:
Hydrate daily – Kinky coily hair needs daily moisture. Use a water-based leave-in conditioner or refresher spray every morning.
Seal with oil – After moisturizing, seal with a natural oil (jojoba, coconut, or castor oil) to lock in moisture.
Sleep on satin – A satin bonnet or satin pillowcase is non-negotiable for preventing breakage and preserving styles.
Protect your edges – Avoid tight styles that pull at the hairline. Use edge control gently and never sleep with tight styles.
Deep condition weekly – A deep conditioner with heat restores moisture and strengthens coily hair.
Detangle gently – Always detangle on wet hair with slippery conditioner and a wide-tooth comb or your fingers.
Avoid over-manipulation – Low manipulation styles (twists, braids, buns) help retain length and prevent breakage.
Trim regularly – Trim split ends every 8–12 weeks to maintain healthy growth.
For color-treated coily hair – Use sulfate-free shampoo and deep condition weekly to maintain moisture and color vibrancy.
Quick Maintenance Cheat Sheet
Style
Longevity
Daily Maintenance
Special Notes
Defined Wash-and-Go
5–7 days
Pineapple at night
Maximum shrinkage embraced
Elevated Bantu Knots
1–2 weeks
Refresh edges every 3–5 days
Also worn for knot-out
Coily Finger Coils with Color
1–2 weeks
Refresh with water and gel
Color accents on select coils
Fulani Braids with Beads
4–6 weeks
Refresh edges weekly
Most decorative protective style
Coily Frohawk
Center: 6–8 weeks; Sides: 1–2 weeks
Refresh sides weekly
Most dramatic option
Kinky Twists with Mixed Lengths
4–8 weeks
Retwist edges weekly
Lightweight protective style
Tapered Coily Crop
4–5 weeks
Refresh top daily
Lowest maintenance
Chunky Twists with Gold Cuffs
2–4 weeks
Retwist edges weekly
Most jewelry-friendly
Coily Puff with Scarf
5–7 days
Refresh puff daily
Most accessory-friendly
Coily Bob with Defined Ends
6–8 weeks (trim)
Refresh definition daily
Modern, chic cut
Flat Twist Updo
5–10 days
Nightly pinning
Most elegant protection
Wash-and-Go with Iced Tips
5–7 days
Pineapple at night
Color on ends only
Pineapple Updo
5–7 days
Refresh daily
Daytime pineapple style
Coily Mullet
Top: 6–8 weeks; Sides: 1–2 weeks
Refresh sides weekly
Edgy, rock-and-roll
Coily Pixie with Defined Curls
4–5 weeks
Refresh with water daily
Most defined short cut
Final Thoughts
2026 trending kinky coily hairstyles prove that tight coils are not a limitation—they’re a canvas for creativity, self-expression, and stunning style. Whether you prefer the defined wash-and-go, elegant Fulani braids, or a bold coily mullet, the key is embracing moisture, definition, and protective practices. These 15 styles are designed to celebrate your natural texture while keeping your hair healthy and vibrant. Take this guide to your stylist or your mirror, experiment with different techniques, and get ready to discover how beautiful and versatile your kinky coily hair can be in 2026.
If you’re looking for a haircut that delivers volume, movement, and undeniable style, the octopus haircut might be your perfect match. This trendy yet surprisingly sophisticated cut has been making waves across social media, and for good reason—it offers the edgy texture of a shag with the playful shape of its namesake sea creature. For women over 50, the octopus cut is especially appealing because it creates volume at the crown (where thinning often occurs), softens facial features, and works beautifully with natural gray or silver strands. In this guide, you’ll discover 18 octopus haircut styles tailored specifically for women over 50, along with styling tips, maintenance advice, and everything you need to know before booking your salon appointment. If you love textured, voluminous styles, these low maintenance haircuts for women over 50 with fine hair offer additional inspiration.
What Is the Octopus Haircut?
The octopus haircut is a layered style characterized by voluminous, rounded layers on top that gradually transition into longer, thinner, wispy pieces at the bottom—resembling the shape of an octopus with its full head and flowing tentacles. It’s essentially a hybrid of the classic shag and the wolf cut, but with a more pronounced contrast between the short, dense top layers and the long, feathery ends.
Key characteristics of the octopus cut:
Voluminous crown – Shorter layers create a rounded, full shape at the top of the head
Tentacle-like ends – Longer, thinner, wispy pieces cascade down like octopus tentacles
Soft, feathered edges – Ends are typically point-cut or razor-cut for a light, airy finish
Movement and texture – The dramatic layering creates bounce and flow
The cut works best on medium to long hair—typically shoulder-length or longer—because the “tentacle” effect requires enough length to create the cascading layers. For women over 50, the octopus cut is particularly flattering because the volume at the crown creates a lifting effect that draws the eye upward and creates a more youthful silhouette.
Why Women Over 50 Love the Octopus Cut
The octopus haircut has become increasingly popular among women over 50 for several compelling reasons:
Adds volume where it matters most – The shorter, dense layers at the crown create built-in lift, addressing age-related thinning at the top of the head
Softens facial features – The wispy, face-framing layers around the cheeks and jawline soften angular features and minimize the appearance of fine lines
Works with natural texture – Whether your hair is straight, wavy, or curly, the octopus cut enhances what you already have
Low-maintenance styling – The cut is designed to look intentional when slightly messy, meaning air-drying often produces beautiful results
Camouflages graying roots – The textured, layered nature of the cut makes root regrowth less noticeable between color appointments
Youthful but age-appropriate – The octopus cut is edgy without being “trying too hard,” making it perfect for mature women who want modern style
For plus size women over 50, the octopus cut’s vertical lines and crown volume can also create a slimming, elongating effect—similar to these short haircuts for plus size women over 50.
The 18 Octopus Haircut Styles for Women Over 50
1. The Classic Octopus Cut
Why it works: The classic octopus cut features dramatic short layers on top that create a rounded, voluminous crown, transitioning into longer, feathered ends that cascade down like tentacles. This original version works beautifully for women over 50 with medium to thick hair who want maximum volume and movement.
How to style it: Apply texturizing spray to damp hair. Blow-dry using a round brush, focusing on lifting the crown section upward to enhance the rounded shape. For the ends, use the brush to flick them outward slightly. For an air-dry option, apply sea salt spray, scrunch, and let dry naturally—the cut is designed to look great with minimal effort.
Best face shapes: Oval, heart, square (the crown volume elongates round faces)
Maintenance needs: Trim every 6–8 weeks to maintain the layered shape.
For women with fine hair who want to try this style, these low maintenance haircuts for women over 50 with fine hair offer similar volume-building benefits.
2. Short Octopus Shag
Why it works: The short octopus shag keeps the hair above the shoulders but still features those distinct short layers on top and longer, thinner pieces underneath. This version is more edgy and rebellious than the classic, making it perfect for women who want a bold, modern short cut with attitude.
How to style it: Apply texturizing cream or matte paste to dry hair. Use your fingers to piece out individual sections, emphasizing the choppy layers. The short length means you can also air-dry with a bit of mousse for a softer finish. This cut requires virtually no heat styling.
Best face shapes: Oval, square, heart (the short length softens strong jawlines)
Maintenance needs: Trim every 5–6 weeks. The short shape needs regular upkeep.
3. Long Octopus with Subtle Layers
Why it works: For women who prefer to keep their length, the long octopus cut maintains hair past the shoulders or even to the waist. The “octopus” effect comes from careful, subtle layering—top layers are still shorter to create lift, but the difference between layers is less dramatic. This elegant version adds gentle movement without sacrificing length.
How to style it: Apply leave-in conditioner and wave spray to damp hair. Scrunch vigorously and air-dry. The subtle layers will create soft bends throughout the length. For a polished look, use a 1.5-inch curling iron on just the face-framing pieces.
Best face shapes: All face shapes (most universally flattering long option)
Maintenance needs: Trim every 8–10 weeks. Long layers hide grow-out well.
4. Curly Octopus Cut
Why it works: Curly hair absolutely shines with the octopus cut! The natural bounce and volume of curls are perfect for the short layers around the crown, giving amazing lift. The longer, thinner tendrils of curls create a beautiful, flowing shape that enhances your natural curl pattern. This cut helps reduce bulk in thick curly hair while still maintaining volume.
How to style it: Apply leave-in conditioner and curl cream to soaking wet hair. Use a denman brush to define curl clumps. Scrunch with a microfiber towel. Air-dry completely—do not touch while drying. Once dry, shake out at the roots. The layers will create natural separation.
Best face shapes: Oval, heart, round (curls soften angular features)
Maintenance needs: Trim every 8–10 weeks (dry cut only). Curly hair hides grow-out well.
For those with naturally curly or coily hair, these 2026 trending kinky coily hairstyles offer additional texture-celebrating inspiration.
5. Wavy Octopus with Beach Vibes
Why it works: For women with natural waves or who love creating them, the wavy octopus cut uses the waves to create even more texture and movement. The shorter layers on top enhance the natural wave pattern, making hair look fuller and more dynamic. The longer waves then gracefully flow down, creating that signature tentacle look.
How to style it: Apply sea salt spray to damp hair. Scrunch section by section with a microfiber towel. Air-dry completely—about 30–40 minutes. Do not touch while drying. Once dry, shake out at the roots with your fingers. The cut embodies a laid-back, beachy vibe with minimal effort.
Best face shapes: All face shapes (most universally flattering wave pattern)
Maintenance needs: Trim every 8–10 weeks. Waves hide grow-out beautifully.
For women over 60 seeking effortless styles with natural texture, these wash and wear haircuts for women over 60 offer additional low-maintenance ideas.
6. Octopus Cut with Curtain Bangs
Why it works: Adding curtain bangs to an octopus cut softens the overall look and creates beautiful face-framing. The bangs part in the middle and sweep to each side, blending seamlessly into the shorter top layers. This combination is especially flattering for women over 50 because it softens forehead lines and draws attention to the eyes.
How to style it: Apply lightweight mousse to damp hair. Blow-dry the curtain bangs using a small round brush, rolling them away from your face. The rest of the octopus cut can be styled with your fingers—tousled and piecey. To refresh bangs on day two, mist with water and re-roll around a round brush with heat for 10 seconds.
Best face shapes: Oval, heart, round (curtain bangs slim wider foreheads)
Maintenance needs: Bangs trim every 3–4 weeks; octopus cut trim every 6–8 weeks
For more face-framing inspiration, these curtain bangs for women over 50 offer age-defying styling tips.
7. Octopus Cut with Wispy Bangs
Why it works:Wispy bangs—light, feathery, and slightly separated—are a softer alternative to curtain bangs. They add just enough forehead coverage without feeling heavy. When paired with an octopus cut, wispy bangs create a romantic, gentle silhouette that’s perfect for mature women who want softness around the face.
How to style it: Apply lightweight mousse to damp hair. Blow-dry the wispy bangs using a small round brush, directing them forward and slightly to the side. The bangs should not be blunt—they should have visible separation. The rest of the octopus cut can be tousled with fingers. Finish with light hairspray on the bangs only.
Best face shapes: Oval, heart, oblong (wispy bangs soften longer faces)
Maintenance needs: Bangs trim every 3–4 weeks; octopus cut trim every 6–8 weeks
8. Asymmetrical Octopus Cut
Why it works: An asymmetrical octopus cut features layers that are intentionally uneven, with one side perhaps shorter or having more prominent layers than the other. This unique approach keeps the basic structure of the octopus cut but adds a rebellious twist. For women over 50, asymmetry adds a modern, edgy feel that reads as confident and youthful.
How to style it: Apply texturizing cream to damp hair. Blow-dry using your fingers, directing the longer side forward and the shorter side back behind your ear. The key is to embrace the unevenness—don’t try to make both sides match. Finish with dry wax on the ends of the longer side for definition.
Best face shapes: Oval, heart, diamond (asymmetry balances fullness)
Maintenance needs: Trim every 5–6 weeks. The angle needs regular refreshing.
9. Octopus Cut with Tapered Sides
Why it works: For a slightly more structured and neat look, consider an octopus cut with tapered sides. The hair near the ears is cut shorter and gradually gets longer as it moves toward the top and back, creating a cleaner line. This version is great for reducing bulk around the ears and gives the overall look a more tailored, sophisticated feel.
How to style it: Apply styling cream to damp hair on top only. Use a small round brush to lift the crown while blow-drying. The tapered sides need only a quick towel-dry. Run wax through the top length for separation, pushing it slightly forward.
Best face shapes: Oval, square, oblong (the clean lines suit sharper features)
Maintenance needs: Top trim every 5–6 weeks; tapered sides need refreshing every 4 weeks
10. Voluminous Octopus for Fine Hair
Why it works: Don’t think the octopus cut is only for thick hair! This special version is crafted to bring maximum volume to fine hair. The layers are precisely cut to create lift and give the illusion of much thicker hair, especially at the crown. The “tentacles” are kept lighter and usually fewer in number so as not to overwhelm fine strands.
How to style it: Apply volumizing mousse to damp roots. Blow-dry upside down to maximize lift. Use texturizing powder at the crown for grip. Avoid heavy products that will weigh fine hair down. The goal is volume and separation, not heavy texture.
Best face shapes: Oval, heart, round (the volume adds balance)
Maintenance needs: Trim every 6–8 weeks. Keep the layering subtle—too much will make fine hair look wispy.
For women with fine hair who want more density, these short hairstyles for thin fine hair offer additional volume-building ideas.
11. Octopus Cut with Balayage Highlights
Why it works:Balayage highlights—hand-painted, sun-kissed pieces—are a perfect match for the octopus cut. The highlights add dimension that emphasizes the dramatic layers, making the tentacle effect pop. The grow-out is seamless, so you can go months between color appointments. This combination is especially flattering for women with gray or silver hair who want to add warmth.
How to style it: Style your octopus cut as usual. The balayage will naturally enhance the layers. For best visibility, style with loose waves or textured bends—straight hair won’t show off the dimensional color as effectively. Use purple shampoo if your balayage has cool tones to prevent brassiness.
Best face shapes: All face shapes (the dimension flatters everyone)
Maintenance needs: Octopus cut trim every 6–8 weeks; balayage touch-up every 12–16 weeks
For those blending grays with color, these grey blending highlights in ash blonde offer cool, sophisticated options.
12. Octopus Cut with Undercut
Why it works: For the truly adventurous, an octopus cut with an undercut removes hair from the nape or behind the ears. The longer, layered octopus style then falls over it, giving a surprising reveal when the hair moves. This is also great for managing very thick hair and keeping you cool. It’s a bold fusion of two trendy styles.
How to style it: Style the top octopus layers as usual—tousled, textured, and piecey. The undercut requires no styling. The key benefit is how much lighter your hair will feel. For a dramatic reveal, pull your hair up into a ponytail or bun.
Best face shapes: All face shapes (the undercut is hidden when hair is down)
Maintenance needs: Octopus cut trim every 6–8 weeks; undercut needs refreshing every 3–4 weeks
13. Octopus Cut with Face-Framing Layers
Why it works: This gentle take on the octopus cut focuses on flattering your face. The layers around your face are intentionally designed to sweep back softly, highlighting your best features. The overall cut is still very much an octopus, but the focus is on a softer, more blended look. This is a great choice for women over 50 who want to try the trend but prefer a less dramatic style.
How to style it: Apply sea salt spray to damp hair throughout. Blow-dry the face-framing layers using a small round brush, directing them away from your face. The rest of the hair can be air-dried or blow-dried with your fingers. The face-framing pieces should fall naturally below your cheekbones.
Best face shapes: Oval, heart, round (face-framing softens and slims)
Maintenance needs: Trim every 6–8 weeks. Face-framing layers may need more frequent attention.
14. Shaggy Octopus with Razored Ends
Why it works: If you love texture and a slightly undone look, the shaggy octopus with razored ends is for you. Instead of scissor cutting, the ends of the longer sections are cut with a razor, creating super fine, wispy, and textured ends that practically float. This style is very playful and gives off a rock-and-roll vibe.
How to style it: Apply texturizing spray to damp hair. Blow-dry using your fingers, lifting at the roots. Once dry, use your fingers to piece out individual sections. The razored ends will create natural separation. Finish with dry shampoo at the roots for grip. Do not use heavy products that will weigh down the wispy ends.
Best face shapes: Oval, heart, round (texture softens angular features)
Maintenance needs: Trim every 6–8 weeks. The razored ends need regular refreshing.
15. Sleek Octopus with Straight Edges
Why it works: While octopus cuts are known for being wild and free, you can definitely make it sleek! This version involves very precise, straight layers on top, giving a smooth dome shape, and the longer pieces are also kept quite straight. This cut looks incredibly sophisticated and shows off the distinct lines of the octopus style. It’s best for straight hair.
How to style it: Apply smoothing cream and heat protectant to damp hair. Blow-dry using a flat paddle brush, directing all hair straight down. For a mirror-like finish, use a flat iron on small sections. Add shine spray for a glossy, reflective surface. The sleek finish emphasizes the sharp lines of the cut.
Best face shapes: Oval, oblong, square (the clean lines add structure)
Maintenance needs: Trim every 6–8 weeks. The blunt line shows every uneven hair.
16. Octopus Cut with Silver and Gray Blending
Why it works: For women embracing their natural gray or silver hair, the octopus cut is a stunning choice. The layered texture adds dimension to silver strands, making them look luminous rather than flat. The dramatic layers also help blend natural gray patterns with any remaining darker pieces. This is a sophisticated, low-maintenance way to celebrate your silver.
How to style it: Style your octopus cut as usual. Use purple shampoo once weekly to prevent yellowing and keep silver bright. For added shine, use a silver-enhancing gloss every 2–3 weeks. The layered texture will catch the light beautifully, making your silver stand out.
Best face shapes: All face shapes (silver adds elegance to any style)
Maintenance needs: Trim every 6–8 weeks; tone every 4–6 weeks to maintain cool silver
17. Octopus Cut for Thick Hair
Why it works: For women with thick, heavy hair, the octopus cut is a game-changer. The dramatic layering removes significant bulk while the rounded crown shape creates the illusion of lightness. The tentacle-like ends prevent the dreaded “triangle head” effect, making thick hair look styled rather than overwhelming.
How to style it: Apply smoothing cream to damp hair. Blow-dry using a large round brush, lifting at the roots for volume. For an air-dry option, apply wave spray and scrunch—the layers will prevent the hair from getting too puffy. Finish with shine serum on the ends only.
Best face shapes: All face shapes (removes bulk while keeping shape)
Maintenance needs: Trim every 6–8 weeks. Thick hair holds layers well but needs regular upkeep.
18. The Pixie-Octopus Hybrid
Why it works: Can an octopus cut be super short? Yes, especially when blended with a pixie cut! Imagine a pixie cut that has longer, wispy pieces left around the ears and nape of the neck, resembling octopus tentacles. The top is still cut short with lots of volume, typical of an octopus style. This hybrid is fantastic for those who want a bold, modern short cut that still has movement. For women over 50 looking for funky short styles, these funky short hair for older women offer additional edgy inspiration.
How to style it: Apply matte paste to dry hair. Use your fingers to lift the crown upward while pulling the longer pieces around the ears forward. The contrast between the short top and the longer wispy pieces is the whole point. Finish with texturizing powder at the crown for extra height.
Best face shapes: Oval, heart, square (the pixie adds height; the wispy pieces add softness)
Maintenance needs: Trim every 4–5 weeks. The short shape needs regular upkeep.
How to Style the Octopus Cut for Women Over 50
Styling the octopus cut is intentionally low-maintenance. Here’s your daily roadmap:
Embrace air-drying – The octopus cut is designed to look great with minimal heat. Apply product to damp hair, scrunch, and let it air-dry.
Use texturizing products – Sea salt spray, texturizing spray, or dry shampoo add grip and enhance the piecey, tentacle-like separation.
Focus on crown volume – The signature of the octopus cut is volume at the crown. Blow-dry the crown section upward with a round brush, or add texturizing powder for instant lift.
Create bends, not curls – For straight hair, use a 1-inch curling iron to create random bends throughout. Alternate directions for a natural look. Brush through with a wide-tooth comb to create soft movement.
Refresh with water – On non-wash days, mist your hair with plain water from a spray bottle. Re-scrunch and go. Water reactivates the original products.
Sleep on a satin pillowcase – A satin pillowcase preserves your texture and prevents frizz.
Avoid heavy products – Butters, oils, and heavy creams will weigh down the choppy layers. Stick to lightweight sprays, mousses, and powders.
For silver hair – Use purple shampoo once weekly to prevent yellowing and keep silver bright.
Quick Maintenance Cheat Sheet
Style
Trim Frequency
Special Notes
Classic Octopus Cut
6–8 weeks
Most versatile option
Short Octopus Shag
5–6 weeks
Best for short hair lovers
Long Octopus with Subtle Layers
8–10 weeks
Longest interval on this list
Curly Octopus Cut
8–10 weeks (dry cut)
Always cut dry for curls
Wavy Octopus with Beach Vibes
8–10 weeks
Waves hide grow-out well
Octopus Cut with Curtain Bangs
Bangs: 3–4 weeks; Cut: 6–8 weeks
Bangs require frequent trims
Octopus Cut with Wispy Bangs
Bangs: 3–4 weeks; Cut: 6–8 weeks
Softest fringe option
Asymmetrical Octopus Cut
5–6 weeks
Angle needs regular refreshing
Octopus Cut with Tapered Sides
Top: 5–6 weeks; Sides: 4 weeks
Taper requires precision
Voluminous Octopus for Fine Hair
6–8 weeks
Keep layering subtle
Octopus Cut with Balayage
Cut: 6–8 weeks; Color: 12–16 weeks
Most low-maintenance color
Octopus Cut with Undercut
Cut: 6–8 weeks; Undercut: 3–4 weeks
Best for weight reduction
Octopus Cut with Face-Framing Layers
6–8 weeks
Face-framing may need attention
Shaggy Octopus with Razored Ends
6–8 weeks
Razored ends need refreshing
Sleek Octopus with Straight Edges
6–8 weeks
Best for straight hair
Octopus Cut with Silver Blending
6–8 weeks
Tone every 4–6 weeks
Octopus Cut for Thick Hair
6–8 weeks
Removes bulk effectively
Pixie-Octopus Hybrid
4–5 weeks
Shortest interval on this list
Final Thoughts
The octopus haircut offers women over 50 a fresh, modern way to embrace volume, texture, and movement. Whether you prefer the classic version, a curly interpretation, or a bold pixie hybrid, the key is working with your natural texture and choosing a variation that complements your face shape and lifestyle. This cut celebrates what you have—whether that’s fine hair needing lift, thick hair needing shaping, or silver strands needing dimension. Take this guide to your stylist, discuss which of these 18 options aligns with your hair type and maintenance preferences, and get ready to discover how liberating and stylish the octopus cut can be.
For women over 50 with fine hair, low maintenance haircuts are the ultimate solution for looking polished without spending hours in front of the mirror. As we age, hair naturally becomes finer, more fragile, and often more difficult to style. The right haircut works with your hair’s natural tendencies—not against them—creating volume, movement, and shape that lasts all day with minimal effort. Whether you have paper-fine strands, thinning at the crown, or a mix of textures, there’s a low maintenance cut that will make your mornings easier and your hair look fuller. In this guide, you’ll discover 25 low maintenance haircuts for women over 50 with fine hair, each designed to maximize volume, minimize styling time, and give you the confident, effortless look you deserve. If you love easy, time-saving styles, these wash and wear haircuts for women over 60 offer additional inspiration.
Why Low Maintenance Cuts Are Essential for Fine Hair After 50
Fine hair presents unique challenges that require a specialized approach. Here’s why low maintenance haircuts for women over 50 with fine hair are so effective:
Removes weight that pulls hair down – Fine hair is easily weighed down by its own length. Shorter cuts and strategic layering eliminate this problem
Creates the illusion of density – Texture and layers add multiple endpoints that reflect light, making hair look thicker
Hides scalp visibility – Strategic cutting at the crown conceals thinning areas without heavy products
Air-dries quickly – Fine hair dries in 10–15 minutes, and the right cut makes air-drying look intentional
Works with natural texture – Whether your fine hair is straight, slightly wavy, or has a gentle bend, the right cut enhances it
Reduces product dependency – A well-cut fine hair style requires minimal mousse, spray, or other volumizers
The 25 Low Maintenance Haircuts for Women Over 50 with Fine Hair
1. The Classic Pixie
Why it works: The classic pixie is the ultimate low maintenance cut for fine hair. Short on the sides and back with slightly longer length on top (1.5–2 inches), this cut requires virtually no styling. After washing, simply towel-dry, run your fingers through it, and go. The short length means no tangles, no bedhead, and no heat styling needed. For women with fine hair, the pixie creates the illusion of density by removing length that would otherwise weigh strands down.
How to style it: After shampooing, towel-dry vigorously. Apply a pea-sized amount of lightweight styling cream or mousse to damp hair. Use your fingers to tousle the top forward while pushing the sides down. For extra lift, flip your head upside down and shake at the roots. No blow-dryer required.
Best face shapes: Oval, heart, square (softens strong jawlines)
Maintenance needs: Trim every 4–6 weeks to maintain shape.
For women with thinning edges or very fine hair, these short hairstyles for thin fine hair offer additional density-building ideas.
2. The Soft Pixie with Wispy Layers
Why it works: A soft pixie with wispy layers takes the classic pixie and adds delicate, feathery texture. The ends are point-cut to create barely-there edges that eliminate any blunt line. For women with very fine or thinning hair, this is the most flattering option because the wispy ends prevent the hair from looking sparse. The softness also adds a gentle, feminine quality that’s perfect for mature women.
How to style it: Apply lightweight mousse to damp hair. Towel-dry aggressively, then use your fingers to push the top forward. Air-dry completely—about 10 minutes. Avoid heavy products like wax or pomade, which will clump the fine ends together. Finish with a micro-mist of shine spray from 12 inches away.
Best face shapes: Oval, heart, oblong (wispiness softens longer faces)
Maintenance needs: Trim every 5–6 weeks. The wispy ends are forgiving between trims.
3. The Textured Pixie Crop
Why it works: The textured pixie crop keeps the top at 1–1.5 inches with heavy point-cutting throughout, while the sides and back are tapered very close. The texture creates multiple endpoints that reflect light, making fine hair look denser. This is the shortest version of the pixie—ideal for women who want ultra-low maintenance and maximum volume. The short sides prevent any bulk at the cheeks.
How to style it: Apply matte paste to dry hair. Rub between palms, then rake through the top pushing everything forward. The texture will create natural lift and separation. No blow-dryer needed. For extra volume, apply a small amount of texturizing powder to the roots before the paste.
Best face shapes: Oval, square, heart (the crop adds structure to round faces)
Maintenance needs: Trim every 4–5 weeks. The texture needs regular refreshing.
4. The Stacked Bob
Why it works: A stacked bob has graduated layers in the back that create a built-in bump of volume at the crown. The stacking is cut into the interior of the hair, so the volume comes from the cut itself—not from styling. For women with fine hair, this is one of the most effective volume-building cuts available. The front is left slightly longer (chin-length) for softness.
How to style it: Apply root-lifting spray to the crown area. Blow-dry the stacked back using a small round brush for 2–3 minutes, lifting aggressively. The front can be left to air-dry or quickly smoothed. The stacked section will naturally lift and hold volume without product. Finish with dry texture spray at the crown.
Best face shapes: Oval, round, heart (crown volume adds balance)
Maintenance needs: Trim every 5–6 weeks. The stacked interior loses its lift quickly if the graduation grows out.
For women over 50 who want soft, face-framing options, these curtain bangs for women over 50 offer age-defying styling tips that pair perfectly with a stacked bob.
5. The French Bob
Why it works: The French bob is cropped between the earlobe and chin, often with a subtle undercurl at the ends. It’s effortlessly chic and requires almost no daily effort because the shorter length prevents tangles and bedhead. For women with fine hair, the French bob’s blunt edge creates the illusion of density, while the short length prevents the hair from looking wispy.
How to style it: Apply smoothing cream to damp hair. Tuck hair behind your ears while it air-dries to encourage that signature curved-under shape. If you have natural wave, use a diffuser on low heat and let the ends curl freely. Never use a straightener—the French bob celebrates imperfect, lived-in texture.
Best face shapes: Oval, heart, square (avoid if you have a very long face)
Maintenance needs: Trim every 6 weeks. The blunt edge is key to the style.
6. The Layered Bob (Chin-Length)
Why it works: A layered bob at chin-length removes interior weight so hair falls naturally into place without precision styling. The layers should be soft and subtle—not choppy or disconnected—so they blend seamlessly. For fine hair, this length is ideal because it’s short enough to avoid being weighed down but long enough to tuck behind ears. The layers create movement and the illusion of density.
How to style it: Apply lightweight mousse to damp roots. Blow-dry using a small round brush (1 inch), lifting each section at the root. The layers will create natural movement without curling. For an air-dry option, apply wave spray and scrunch—the layers will create texture that looks intentional, not frizzy.
Best face shapes: All face shapes (most universally flattering option)
Maintenance needs: Trim every 6–8 weeks. Soft layers hide grow-out beautifully.
7. The Inverted Bob
Why it works: An inverted bob is shorter in the back and longer in the front, creating an angled line that draws the eye forward. For fine hair, the inversion removes weight from the nape (where fine hair can look sparse) while keeping length in the front for slimming face-framing. The angle also creates the illusion of more volume at the crown.
How to style it: Apply volumizing foam to damp hair. Blow-dry the back section first using a round brush, directing hair downward. For the longer front pieces, use a flat iron to create a slight bend away from the face. The angle should be visible—the front should be noticeably longer than the back. Finish with shine spray.
Best face shapes: Oval, heart, oblong (the angle elongates rounder faces)
Maintenance needs: Trim every 5–6 weeks. The angle must be maintained.
8. The Blunt Bob with Soft Ends
Why it works: A blunt bob at chin-length creates the appearance of maximum density because every hair ends at the same point. Softening the very ends (micro-point cutting) prevents the “helmet head” look while keeping the weight line intact. For women with fine hair, this cut creates the illusion of thickness without requiring layers that can make fine hair look wispy.
How to style it: Apply lightweight mousse to damp hair. Comb through with a wide-tooth comb. Air-dry completely, using your fingers to gently separate any clumps. For a more polished look, blow-dry with a flat paddle brush on low heat for 5 minutes, directing all hair straight down. Never add heavy products that will weigh down the blunt line.
Best face shapes: Oval, oblong, square (adds width to very narrow faces)
Maintenance needs: Trim every 5–6 weeks. The blunt line shows every uneven hair.
9. The Long Pixie (Pixie Bob)
Why it works: The long pixie (sometimes called a “pixie bob”) keeps the top longer (2–3 inches) while the back and sides are tapered but not shaved. This cut offers more versatility than a traditional pixie—you can sweep it to the side or add a small amount of texture. For women with fine hair, the extra length on top provides more surface area for volume without adding weight.
How to style it: Apply texturizing spray to damp hair. Blow-dry using your fingers, lifting at the roots. Once dry, use your fingers to piece out individual sections. The choppy ends will create natural movement. For a more polished look, sweep the top to one side with a small amount of matte paste.
Best face shapes: Oval, heart, oblong (the length elongates round faces)
Maintenance needs: Top trim every 5–6 weeks; back and sides every 4–5 weeks
10. The Textured Lob (Long Bob)
Why it works: A textured lob hits between the chin and collarbone. For fine hair, this length works best when heavily textured—think piecey ends and invisible layers. The extra length gives you versatility (ponytails, half-up styles) while the texture prevents the dreaded flat, stringy look. The lob is one of the most forgiving cuts for fine hair because the texture hides thinning.
How to style it: Apply sea salt spray to damp hair throughout. Scrunch vigorously, then air-dry completely—do not touch while drying. Once dry, shake out with fingers and add dry texture spray at the roots. For a polished version, use a 1.5-inch curling iron to create loose bends, then brush through with a wide-tooth comb.
Best face shapes: All face shapes (most versatile length for fine hair)
Maintenance needs: Trim every 8–10 weeks. The longest interval on this list.
For women with fine hair who want more volume, these short hairstyles for thin fine hair offer additional density-building ideas.
11. The Wispy Pixie
Why it works: A wispy pixie takes the classic pixie to its most delicate extreme. The ends are texturized until they are almost feathery, with very fine, barely-there points at every edge. For women with extremely fine or thinning hair, this is the most flattering option because the wispy ends eliminate any blunt line that could emphasize how little hair you have.
How to style it: Apply lightweight mousse to damp hair. Towel-dry aggressively, then use your fingers to push the top forward. Air-dry completely—about 10 minutes. Avoid heavy products like wax or pomade, which will clump the fine ends together. Finish with a micro-mist of shine spray from 12 inches away.
Best face shapes: Oval, heart, oblong (wispiness softens longer faces)
Maintenance needs: Trim every 5–6 weeks. The wispy ends are forgiving between trims.
12. The Layered Lob
Why it works: The layered lob combines the length of a lob with soft, subtle layers that start at the chin. For fine hair, the layers add movement without removing too much density. The longer length gives you options—wear it down, in a low ponytail, or half-up. The layers create natural volume at the crown where fine hair needs it most.
How to style it: Apply volumizing mousse to damp roots. Blow-dry using a round brush, lifting at the roots for volume. For an even faster option, flip your head upside down and blow-dry roots for 2 minutes, then air-dry the rest. The layers will create natural movement without curling. Finish with dry shampoo at the roots for extra volume.
Best face shapes: All face shapes (most versatile longer option)
Maintenance needs: Trim every 8–10 weeks. Layers hide grow-out beautifully.
13. The Shoulder-Length Layered Cut
Why it works: For women who prefer to keep some length, a shoulder-length layered cut is the perfect balance. Long enough to pull back but short enough to avoid feeling heavy, this cut uses soft, subtle layers to add movement and volume. The weight of the longer length helps control fine hair, while the layers prevent it from looking flat.
How to style it: Apply leave-in conditioner and wave spray to damp hair. Scrunch vigorously. Air-dry completely or use a diffuser on low heat. The layers will create soft bends throughout the length. For a polished look, use a 1.5-inch curling iron on just the face-framing pieces.
Best face shapes: All face shapes (most universally flattering longer option)
Maintenance needs: Trim every 8–10 weeks. Layers hide grow-out well.
14. The Asymmetric Pixie
Why it works: An asymmetric pixie is shorter on one side than the other—often with one side closely tapered and the other side left longer (2–3 inches). The diagonal line created by asymmetry breaks the symmetry of a round face and adds visual interest. For fine hair, asymmetry creates the illusion of more volume on the longer side. This cut is modern, edgy, and low maintenance.
How to style it: Apply texturizing cream to damp hair. Blow-dry using your fingers, directing the longer side forward and across your forehead. The shorter side can be tucked behind your ear. The key is to embrace the unevenness—don’t try to make both sides match. Finish with dry wax on the longer side for definition.
Best face shapes: Round, oval, diamond (asymmetry balances fullness)
Maintenance needs: Trim every 4–5 weeks. The angle needs regular refreshing.
15. The Deep Side Part Pixie
Why it works: This isn’t a different cut—it’s a styling technique that transforms any pixie. A deep side part (the part aligned with the arch of your eyebrow) immediately creates asymmetrical volume because all the hair is swept to one side, lifting off the scalp on the deeper side. For women with fine hair, this one styling change can add 50% more visible volume instantly.
How to style it: On damp hair, create a deep side part (the part should align with the arch of your eyebrow). Blow-dry using a round brush, lifting the hair on the deeper side straight up and directing it across your head. The shorter side can be tucked behind your ear. Lock the part in place with light hold spray on the roots.
Best face shapes: Round, oval, heart (the diagonal line slims the face)
Maintenance needs: No additional maintenance beyond your underlying cut schedule
16. The Messy Bedhead Pixie
Why it works: The messy bedhead pixie is deliberately disheveled—think “just rolled out of bed but in a cool way.” The cut features uneven, jagged layers throughout, with some sections shorter than others. For fine hair, this intentional messiness is a blessing because perfection is not the goal. Second-day hair actually looks better, and the texture hides any thinning areas.
How to style it: On dry hair (clean or second-day), apply dry shampoo generously at the roots. Flip head upside down and scrunch vigorously for 30 seconds. Flip back and use your fingers to texturize random sections. Add texturizing powder at the crown for piecey separation. Do not use a brush or comb.
Best face shapes: Oval, heart, square (messiness softens angular features)
Maintenance needs: Trim every 5–6 weeks. The lived-in look means grow-out adds to the charm.
17. The Curly Pixie (for Fine Curls)
Why it works: For women with naturally fine curly hair, a cropped pixie shape is a dream. The short length removes weight so curls spring up tighter and bouncier, creating volume where fine curls need it most. This cut celebrates your natural texture while keeping it manageable. The curls provide built-in volume at the crown without any product.
How to style it: Apply leave-in conditioner and curl gel to very wet hair. Use fingers to define individual curl clumps. Air-dry completely—do not touch while drying. Once dry, scrunch out any crunch with a drop of oil on your palms. Never brush dry curls; use a wide-tooth comb only when wet.
Best face shapes: Oval, heart, square (curls soften angular features)
Maintenance needs: Trim every 6–8 weeks (dry cut only). Curly hair hides grow-out well.
For women with thin curly hair, these curly haircuts for thin hair offer additional volume-building ideas.
18. The Short Shag
Why it works: The short shag features heavy layering throughout, with choppy, piecey texture and often curtain bangs. For fine hair, the shag is a revelation because the layers create surface texture that hides thinning areas. The cut is designed to look intentionally mussy, so perfection is not the goal—and the texture draws the eye vertically, creating the illusion of length.
How to style it: Apply texturizing spray to damp hair. Blow-dry using your fingers, lifting at the roots. Once dry, use your fingers to piece out individual sections. The goal is soft, lived-in texture—not dramatic, disconnected layers. Finish with dry shampoo at the roots for grip.
Best face shapes: Oval, heart, round (texture softens angular features)
Maintenance needs: Trim every 8–10 weeks. The soft shag improves with grow-out.
19. The Tapered Nape Pixie
Why it works: A tapered nape pixie keeps length on top (2–3 inches) while the back and sides are clipper-tapered very short, blending seamlessly. This creates a clean, polished silhouette that looks intentional even when bedhead strikes. For women with fine hair, the tapered nape removes weight from the area where hair is often thinnest, creating a longer, leaner line.
How to style it: Apply styling cream to damp hair on top only. Use a small round brush to lift the crown while blow-drying for 2 minutes—or simply air-dry and use your fingers to push the top forward. The tapered sections dry instantly with a towel. Run wax through the top length for separation, pushing it slightly forward.
Best face shapes: Oval, square, oblong (the clean lines suit sharper features)
Maintenance needs: Top trim every 5–6 weeks; tapered nape needs refreshing every 4 weeks
20. The Micro Bob (Ear-Length)
Why it works: The micro bob is cropped right at or slightly below the earlobe, making it shorter than a traditional bob but longer than a pixie. This length requires almost no styling because the hair isn’t long enough to tangle or misbehave. For women with fine hair, the micro bob’s blunt perimeter creates the illusion of density while the short length prevents wispy ends.
How to style it: Apply smoothing balm to damp hair. Comb straight back away from your face, then let hair fall naturally. The shortness means it will dry in whatever direction it wants—and that’s the charm. If you have cowlicks, a small round brush on just that section for 30 seconds solves everything.
Best face shapes: Oval, heart, square (very short lengths require strong bone structure)
Maintenance needs: Trim every 4–5 weeks. Any growth beyond the earlobe changes the proportion.
21. The Layered Pixie with Crown Volume
Why it works: This cut focuses all the layering at the crown—the area where fine hair typically looks flattest. The crown layers are cut shorter and stacked, creating a built-in bump of volume that requires no teasing or backcombing. The sides and nape are tapered close to keep the focus on the crown. For women with fine hair, this is one of the most effective volume-building cuts.
How to style it: Apply root-lifting spray directly to the crown area. Blow-dry using a small round brush, lifting the crown section straight up at a 90-degree angle. Hit with cool air for 10 seconds before releasing. The rest of the hair can be quickly smoothed. Do not put product near the crown—let the cut do the work.
Best face shapes: Oval, oblong, heart (crown volume lengthens round faces)
Maintenance needs: Trim every 5–6 weeks. The crown layers lose their lift quickly as they grow.
22. The Piecey Pixie
Why it works: A piecey pixie takes texture to its most visible extreme. Individual strands are cut and styled to stand apart from each other, creating a separated, almost architectural effect. For fine hair, piecey separation hides the fact that individual strands are thin—the eye reads the separation as intentional, not sparse. This cut creates vertical lines that add length to the face.
How to style it: Apply dry wax or paste to completely dry hair. Rub between palms to warm the product, then pinch and pull small sections to create individual pieces. Focus on the ends and the crown. Do not brush or comb. For extra piecey-ness, use a texturizing powder at the roots before applying wax.
Best face shapes: Oval, heart, square (piecey texture softens strong jawlines)
Maintenance needs: Trim every 6–8 weeks. The style looks best when ends are kept sharp and separated.
23. The Graduated Bob
Why it works: A graduated bob features layers that increase in length from back to front, creating a soft, sloping line. Unlike a stacked bob (which has distinct tiers), a graduated bob is smoother and more subtle. For fine hair, this cut offers lift in the back and length in the front without harsh lines. The graduation creates natural volume without teasing.
How to style it: Apply root booster to damp hair, focusing on the back crown. Blow-dry using a round brush, lifting each section at a 90-degree angle. The front pieces can be blown smooth or left with a slight bend. The graduation creates natural volume without teasing, and fine hair holds the shape well.
Best face shapes: Oval, round, square (the graduation adds length)
Maintenance needs: Trim every 6–8 weeks. The graduation line is forgiving but benefits from regular upkeep.
24. The Cropped French Crop
Why it works: The cropped French crop features short, textured sides and back with a slightly longer, choppy top that is often swept forward. It’s essentially an ultra-low maintenance men’s-inspired cut adapted for women, requiring literally zero styling tools. For women with very fine or thinning hair, this cut makes the scalp less visible by keeping length minimal.
How to style it: Apply matte styling paste to completely dry hair. Rub between palms to warm the product, then rake through the top section pushing everything forward toward your forehead. That’s it. No blow dryer, no brushes, no mirrors required. The cropped sides need nothing—they’ll dry perfectly on their own.
Best face shapes: Oval, heart, square (best for strong bone structure)
Maintenance needs: Trim every 4–5 weeks. The clipper-cut back and sides need frequent upkeep.
25. The Wash-and-Wave (for Naturally Wavy Fine Hair)
Why it works: For women with naturally fine, wavy hair (2A to 2B), a wash-and-wave cut with long, subtle layers is the ultimate low-maintenance style. The weight of medium-length hair pulls waves into a consistent, flattering pattern without frizz. This cut requires no heat and about 3 minutes of active styling time—perfect for women with fine hair who want to embrace their natural texture.
How to style it: Apply wave-enhancing cream to damp hair. Scrunch section by section with a microfiber towel. Air-dry completely—about 20–30 minutes. Do not touch while drying. Once dry, shake out at the roots with your fingers. The layers will create natural separation. Never brush—use a wide-tooth comb only when wet.
Best face shapes: All face shapes (most universally flattering wave pattern)
Maintenance needs: Trim every 8–10 weeks. Waves hide grow-out beautifully.
For women over 60 who want effortless styles, these wash and wear haircuts for women over 60 offer additional low-maintenance ideas.
How to Style Low Maintenance Fine Hair (Daily Routine)
Styling fine, thin hair requires the right techniques and products to maximize volume. Here’s your daily roadmap:
Start with volumizing products at the roots only – Apply mousse or root-lifting spray exclusively to your roots and crown. Applying to the ends will weigh them down.
Blow-dry upside down – Flip your head over and blast roots with warm heat for 30 seconds before you even pick up a brush. This pre-lifts the roots and cuts drying time in half.
Use a small round brush – A ¾-inch or 1-inch round brush is ideal for fine hair because it allows you to wrap small sections tightly for maximum lift.
Cool shot is your best friend – After heating each section with a round brush, hit it with 10 seconds of cool air before releasing. This locks the bend and extends volume for hours.
Dry shampoo is a volume product, not just a refresher – Apply dry shampoo to clean, dry hair—not just second-day hair. It adds grip and texture that makes fine hair look twice as thick.
Texturizing powder over hairspray – Hairspray can weigh fine hair down. Instead, use texturizing powder at the roots for instant, gravity-defying lift.
Avoid heavy oils and butters – Coconut oil, argan oil, and shea butter are too heavy for fine hair. If you need shine, use a micro-mist of shine spray from 12 inches away.
Second-day refresh – Mist roots with sea salt spray, flip head upside down, and blow-dry on low heat for 60 seconds while scrunching with your fingers. This revives volume without re-washing.
For gray or silver fine hair – Use purple-tinged dry shampoo to add volume while preventing yellowing. Avoid heavy products that can make silver hair look dull.
Quick Maintenance Cheat Sheet
Cut Style
Trim Frequency
Special Notes
Classic Pixie
4–6 weeks
Most versatile, lowest maintenance
Soft Pixie with Wispy Layers
5–6 weeks
Most forgiving ends
Textured Pixie Crop
4–5 weeks
Best for maximum volume
Stacked Bob
5–6 weeks
Built-in volume needs upkeep
French Bob
6 weeks
Blunt edge is key
Layered Bob (Chin-Length)
6–8 weeks
Most versatile bob
Inverted Bob
5–6 weeks
Angle must be maintained
Blunt Bob with Soft Ends
5–6 weeks
Blunt line requires upkeep
Long Pixie (Pixie Bob)
Top: 5–6 weeks; Sides: 4–5 weeks
Most versatile pixie
Textured Lob
8–10 weeks
Longest interval on this list
Wispy Pixie
5–6 weeks
Most forgiving ends
Layered Lob
8–10 weeks
Best for length retention
Shoulder-Length Layered Cut
8–10 weeks
Most universally flattering longer option
Asymmetric Pixie
4–5 weeks
Angle needs refreshing
Deep Side Part Pixie
Same as underlying cut
Styling change, not cut change
Messy Bedhead Pixie
5–6 weeks
Looks better with grow-out
Curly Pixie (for Fine Curls)
6–8 weeks (dry cut)
Always cut dry for curls
Short Shag
8–10 weeks
Improves with grow-out
Tapered Nape Pixie
Top: 5–6 weeks; Nape: 4 weeks
Taper requires precision
Micro Bob
4–5 weeks
Shortest bob interval
Layered Pixie with Crown Volume
5–6 weeks
Crown focus requires upkeep
Piecey Pixie
6–8 weeks
Keep ends sharp
Graduated Bob
6–8 weeks
Most forgiving graduation
Cropped French Crop
4–5 weeks
Shortest interval on this list
Wash-and-Wave (for Wavy Fine Hair)
8–10 weeks
Best for natural waves
Final Thoughts
Low maintenance haircuts for women over 50 with fine hair prove that thinning doesn’t mean sacrificing style. Whether you prefer a classic pixie, a stacked bob, or a textured lob, the key is choosing a cut that removes weight, adds volume, and works with your natural texture. These 25 cuts are designed to make your mornings easier, your hair look fuller, and your confidence soar. Take this guide to your stylist, discuss which option aligns with your face shape, thinning pattern, and lifestyle, and get ready to discover how liberating low maintenance fine hair can be.