Category: Mom hairstyles

  • 16 Gray Blending Hair Highlights in Ash Blonde for Women That Create Cool, Dimensional Silver

    16 Gray Blending Hair Highlights in Ash Blonde for Women That Create Cool, Dimensional Silver

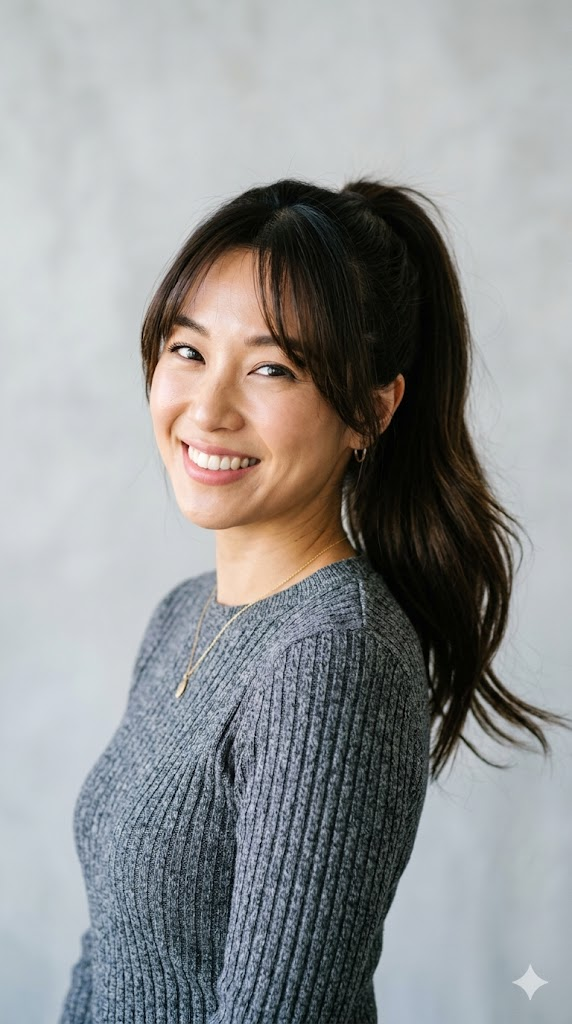
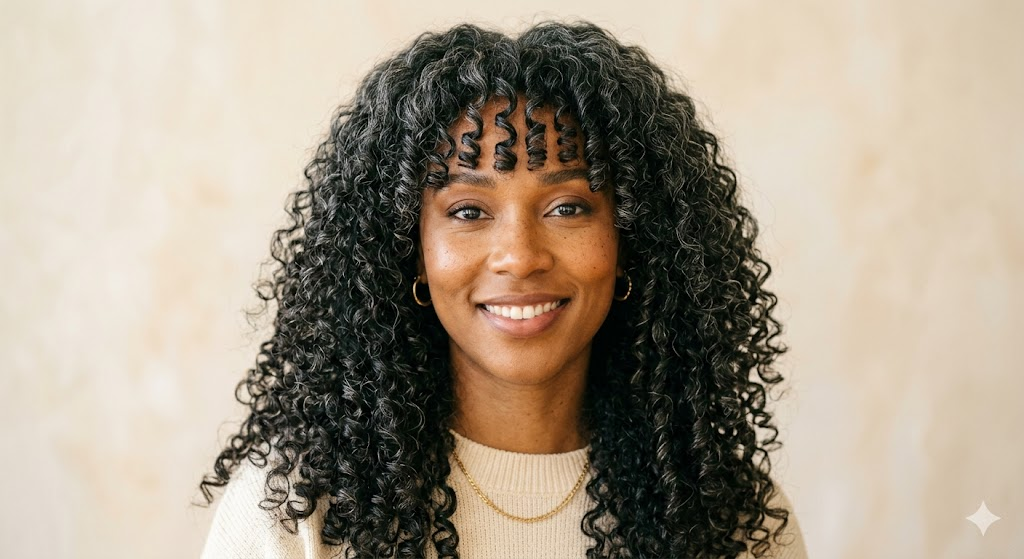
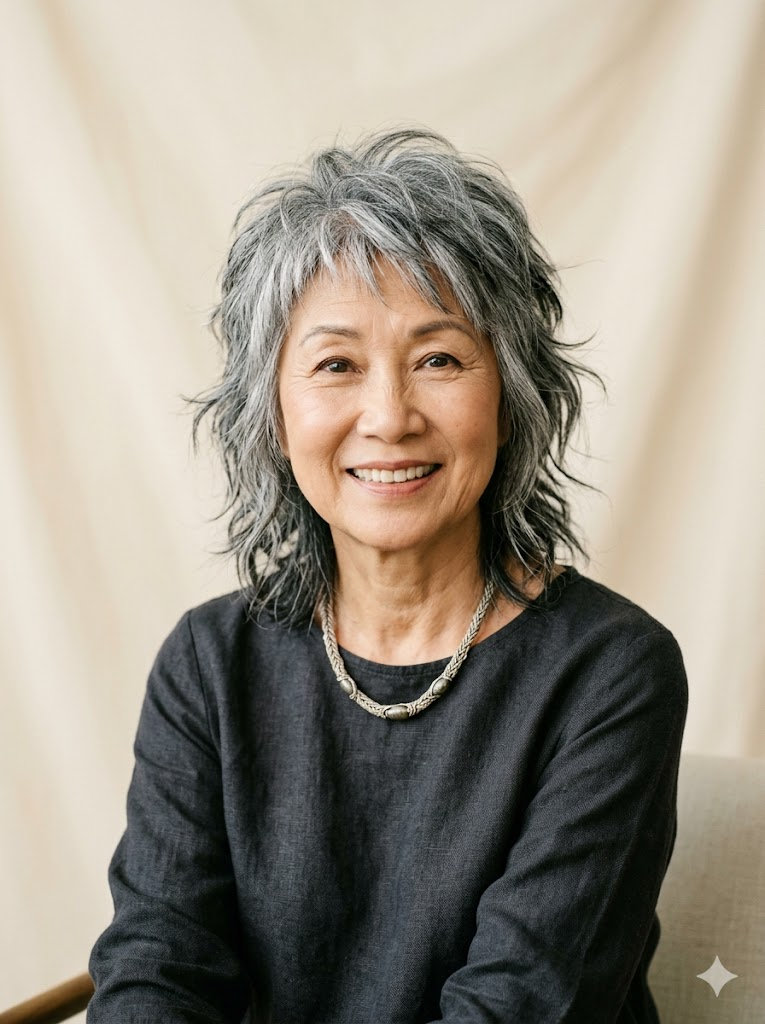
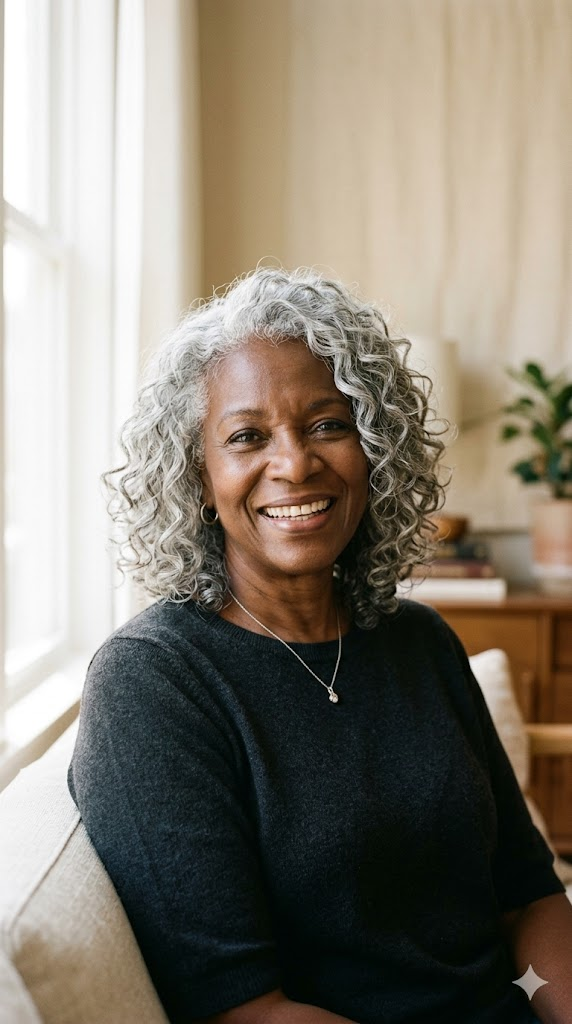
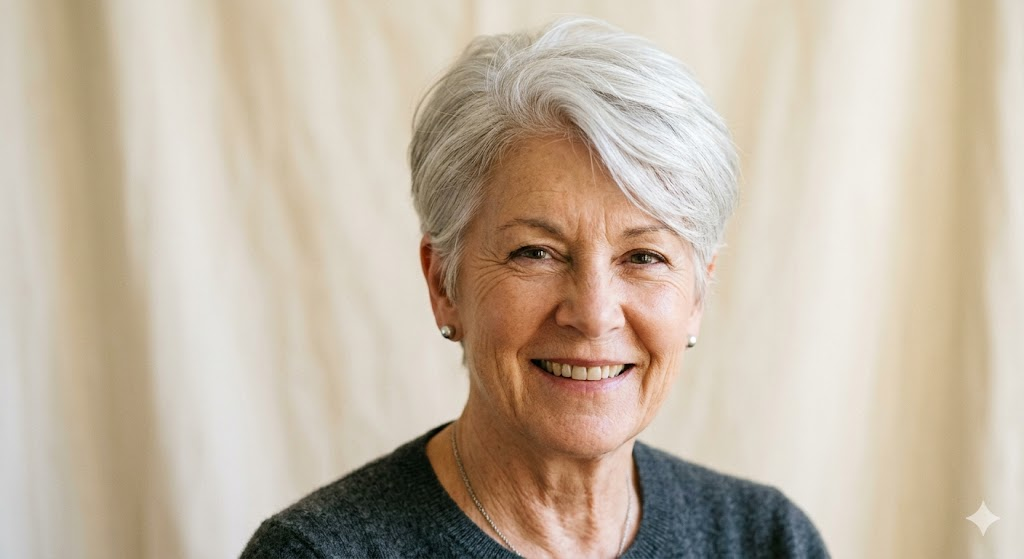
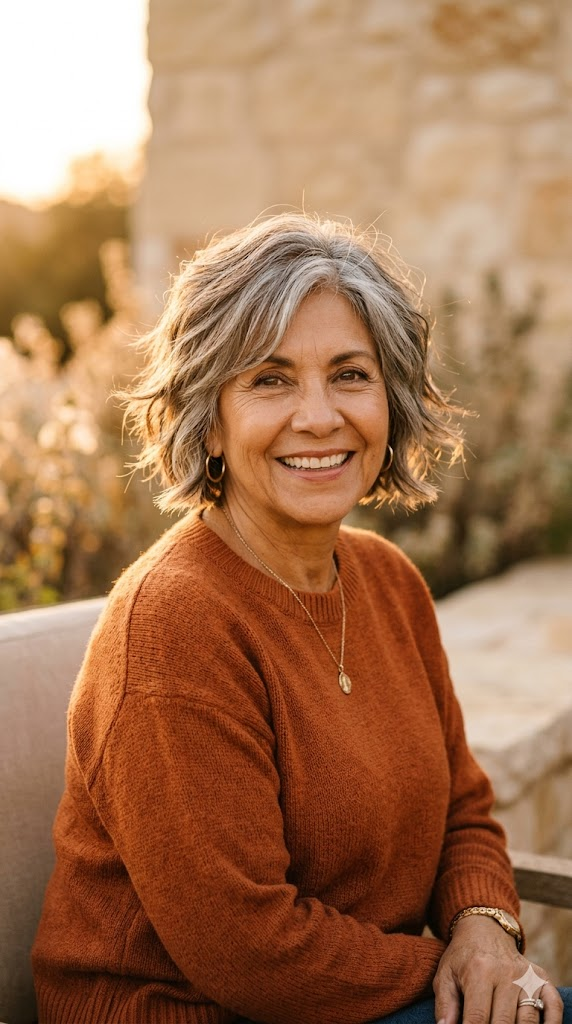
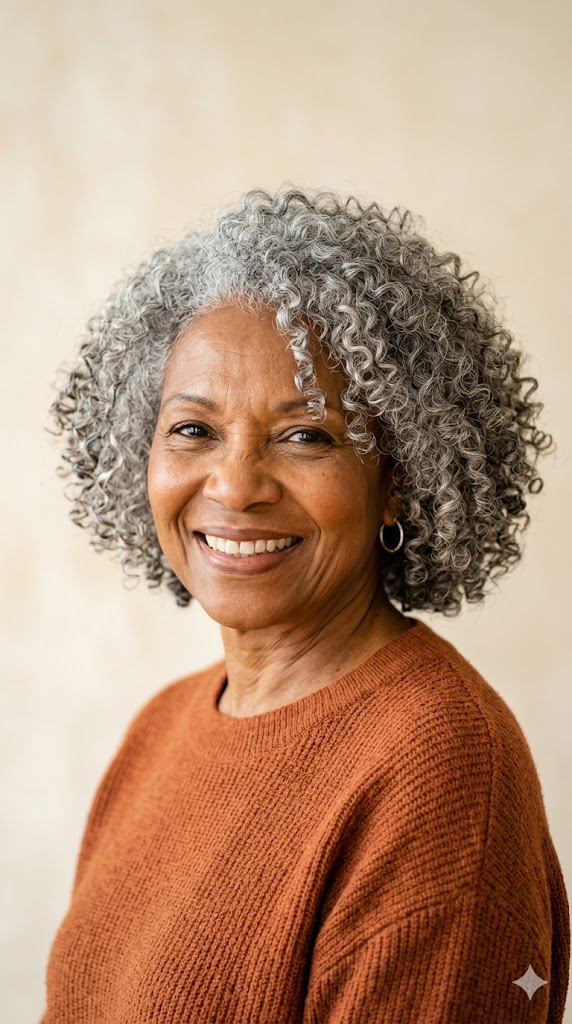
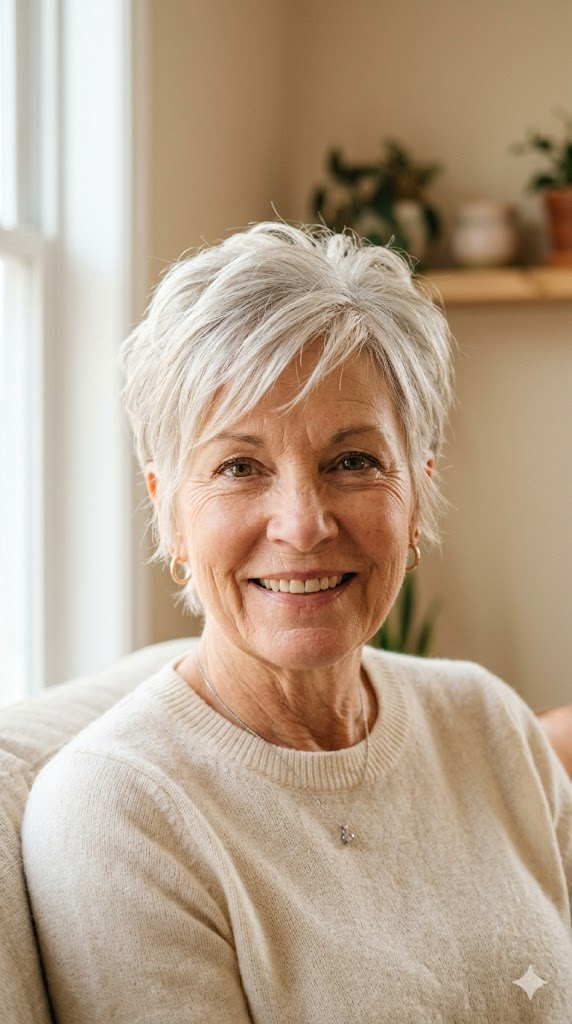
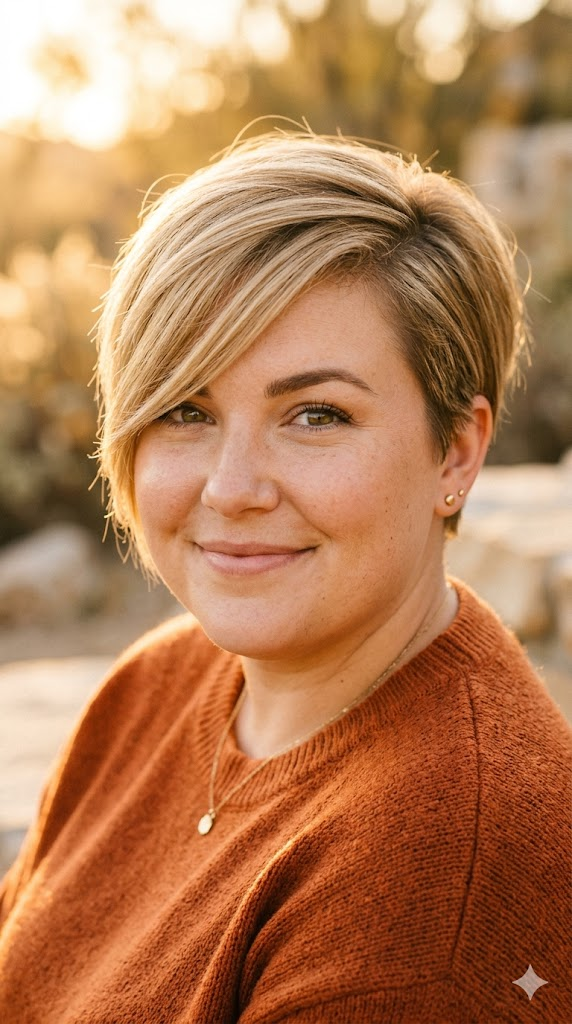
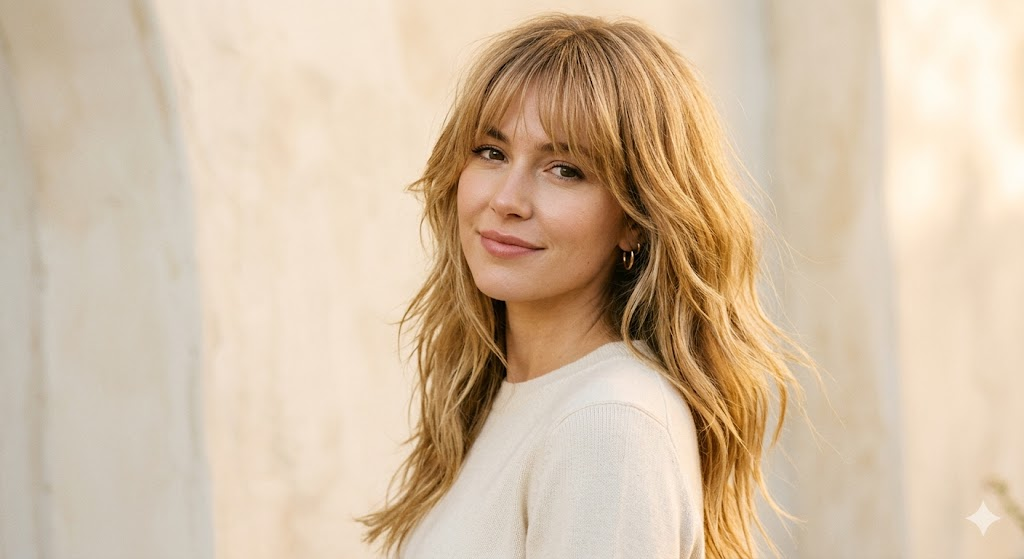
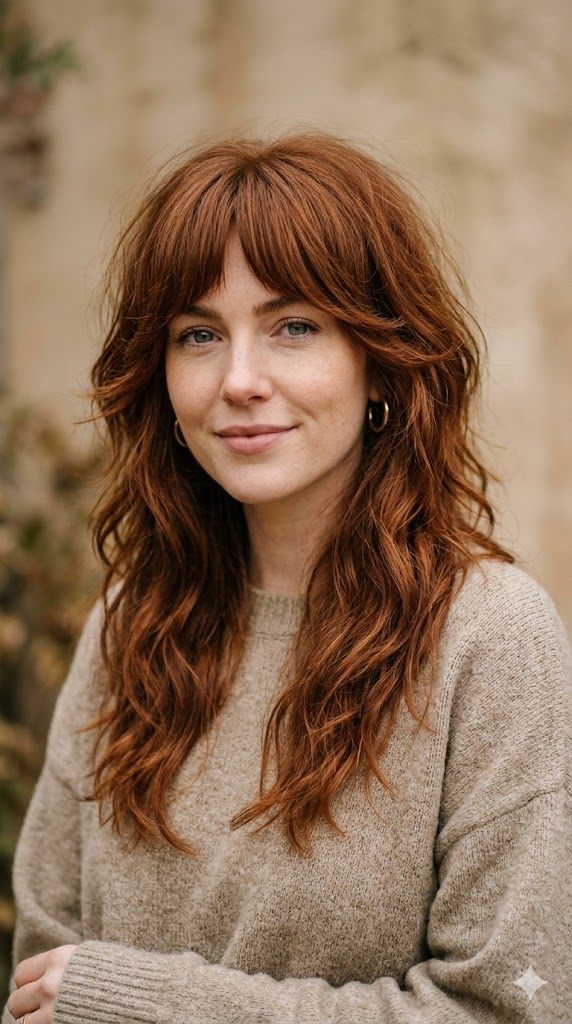
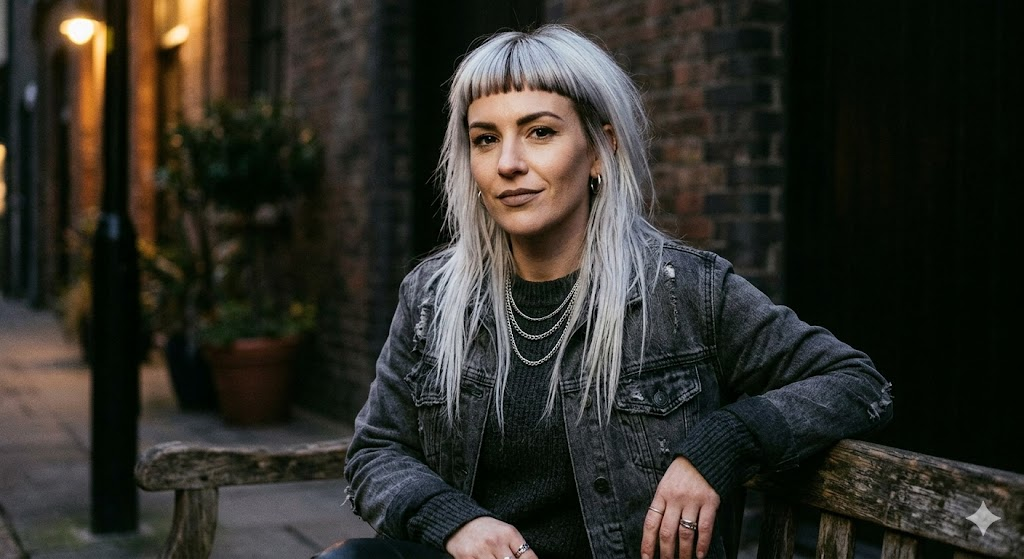
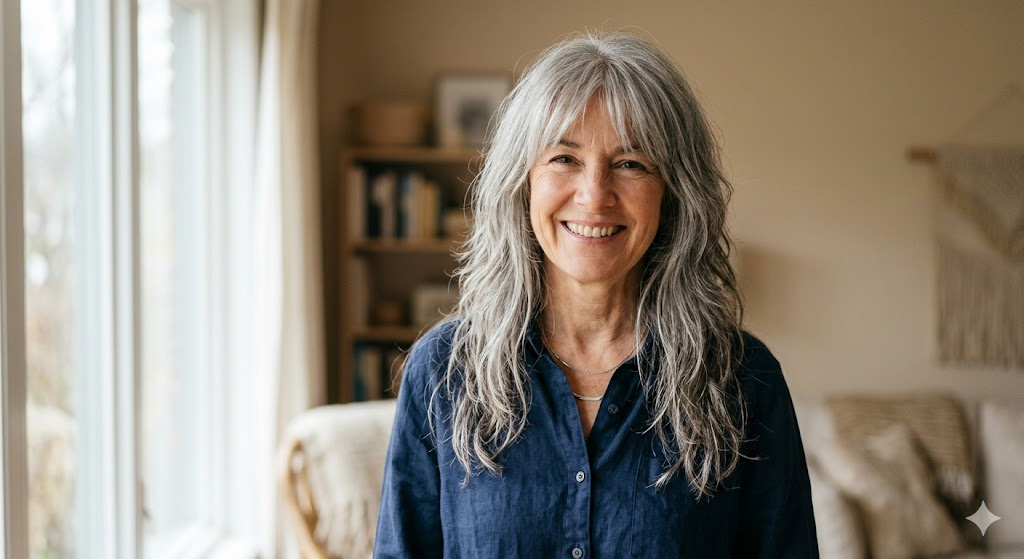
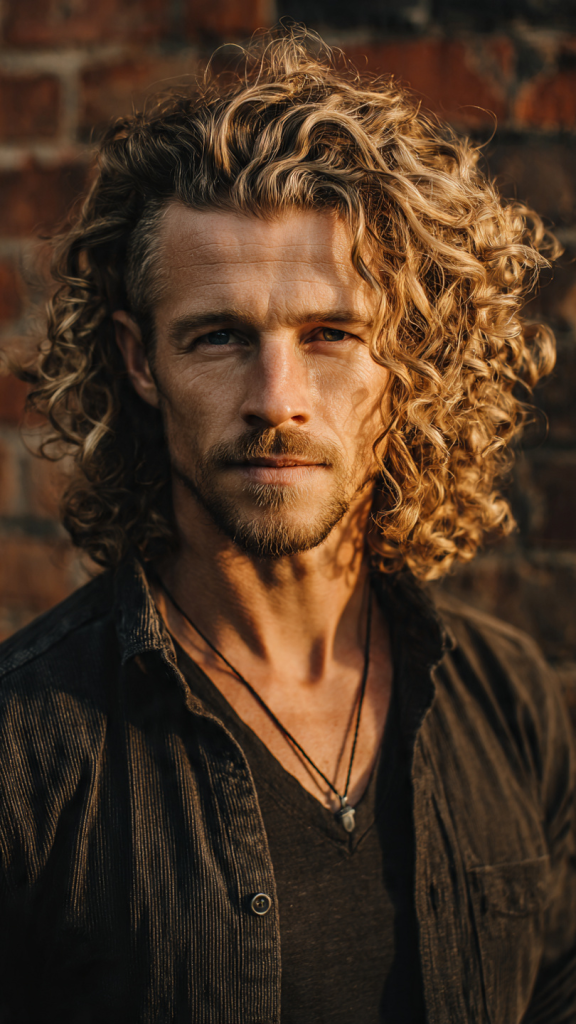
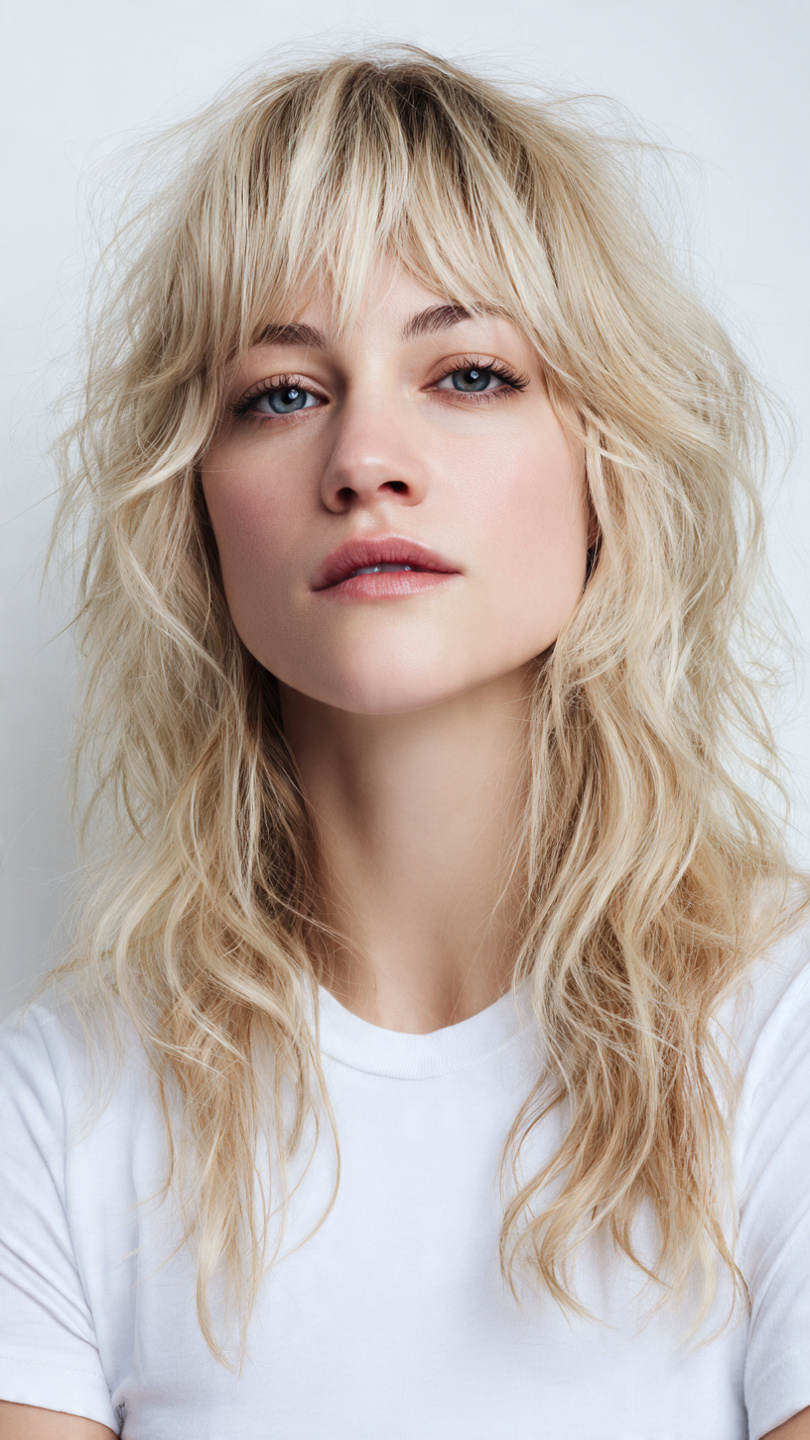
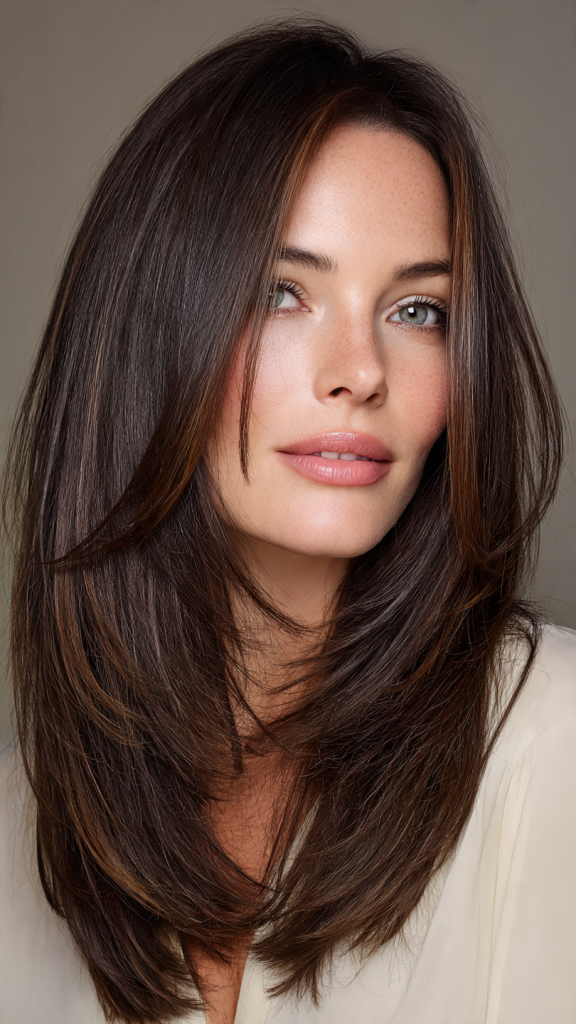
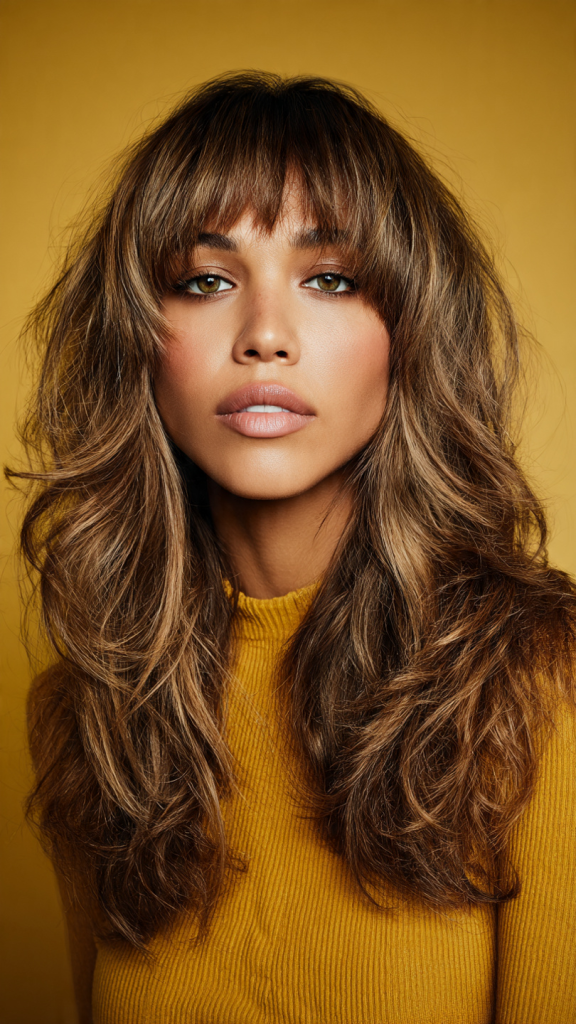
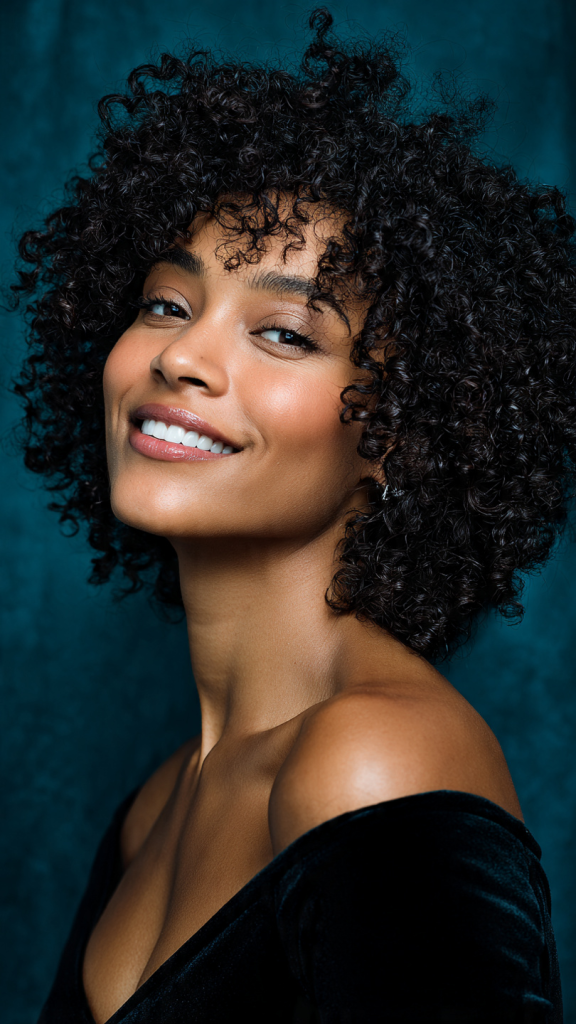
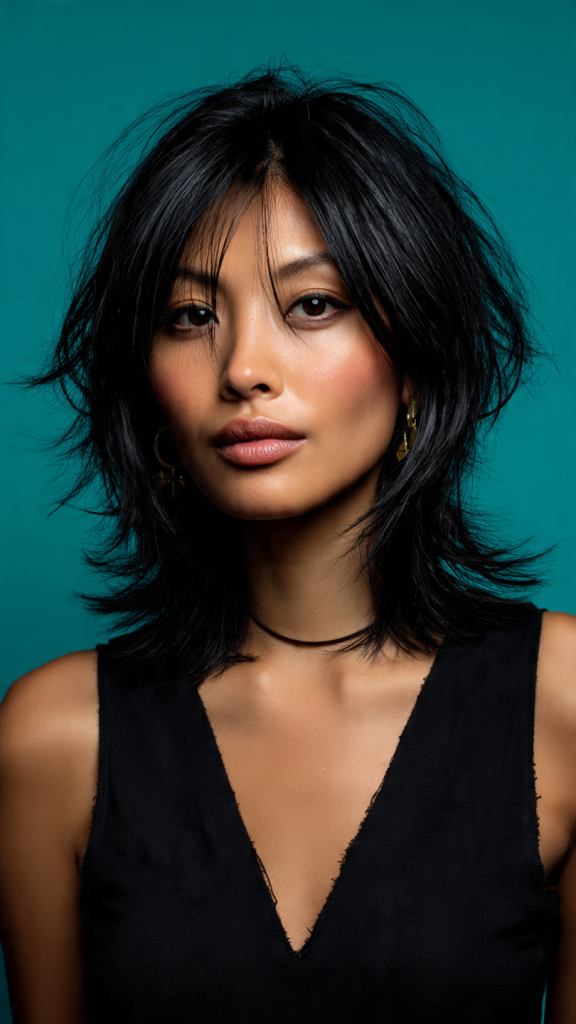
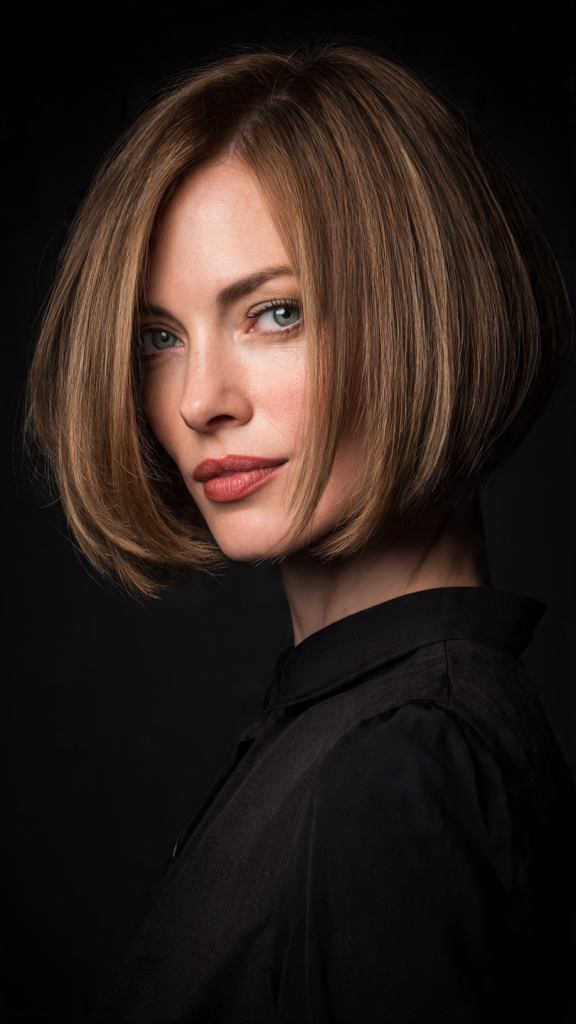
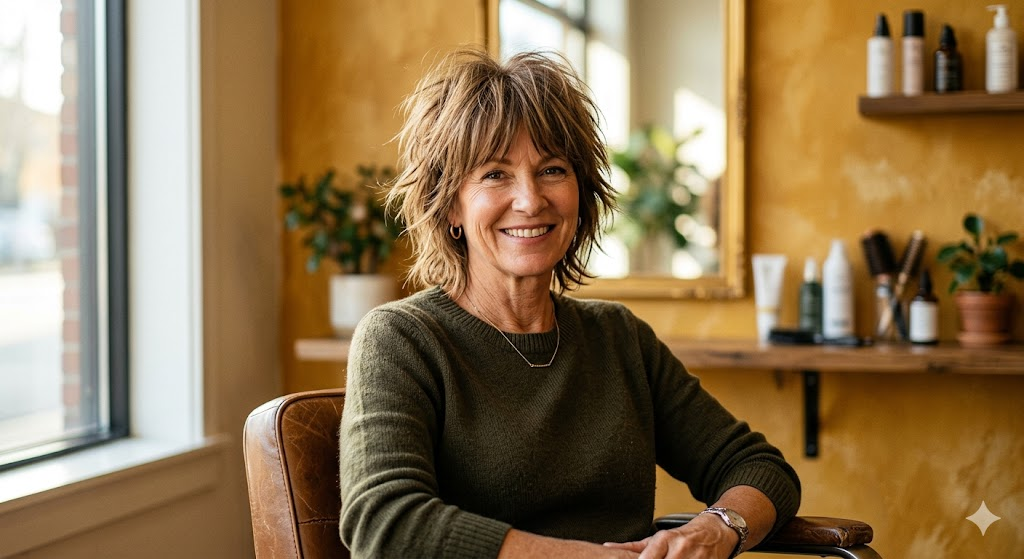
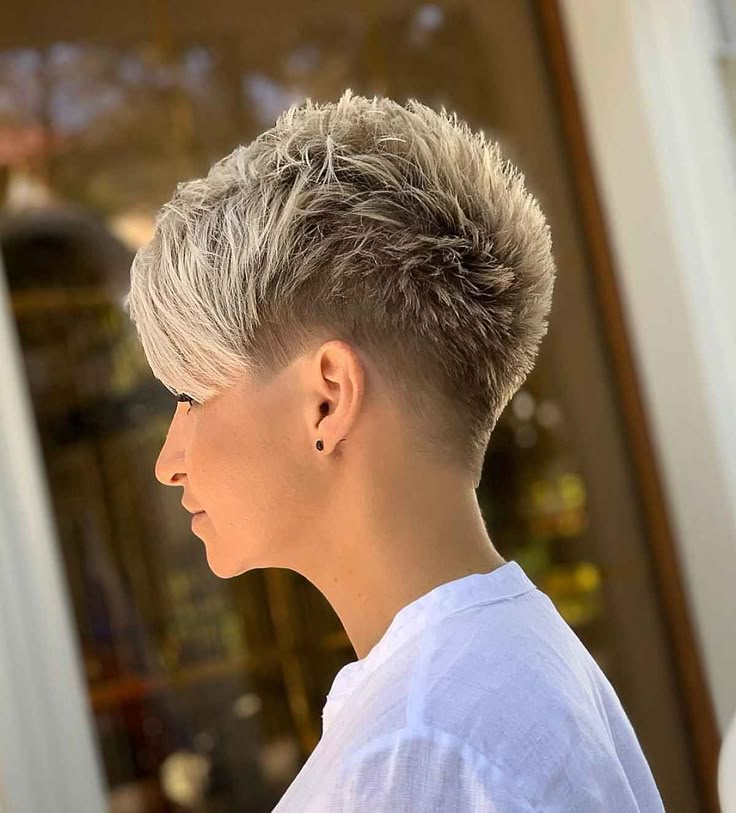
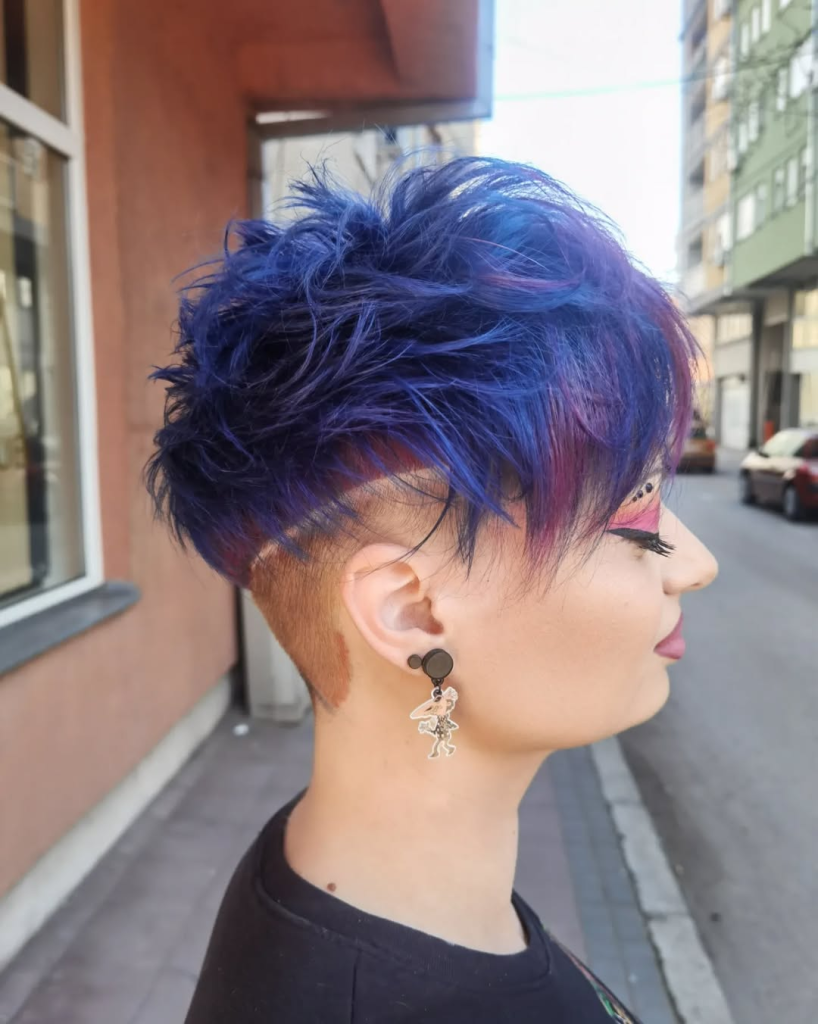
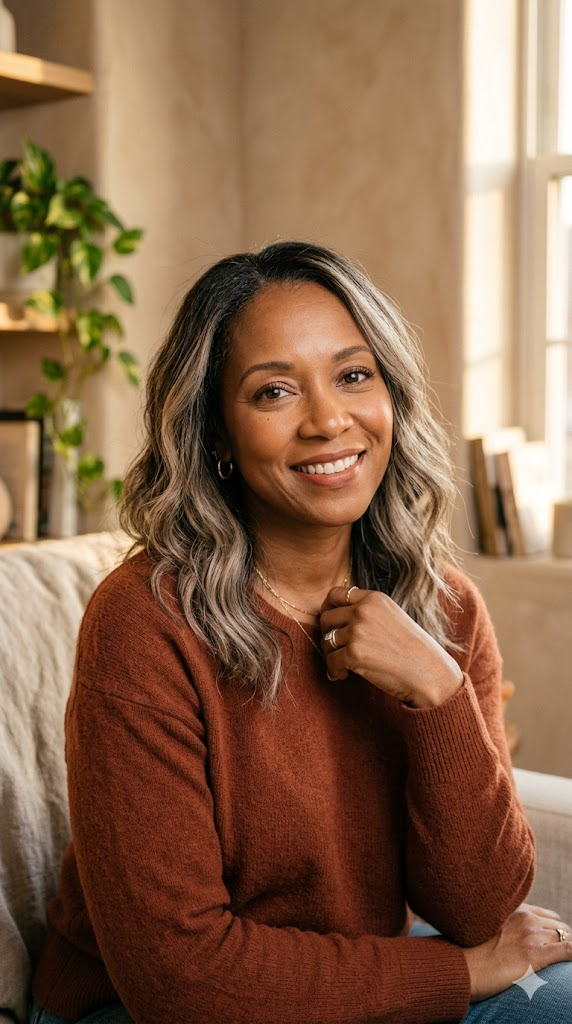
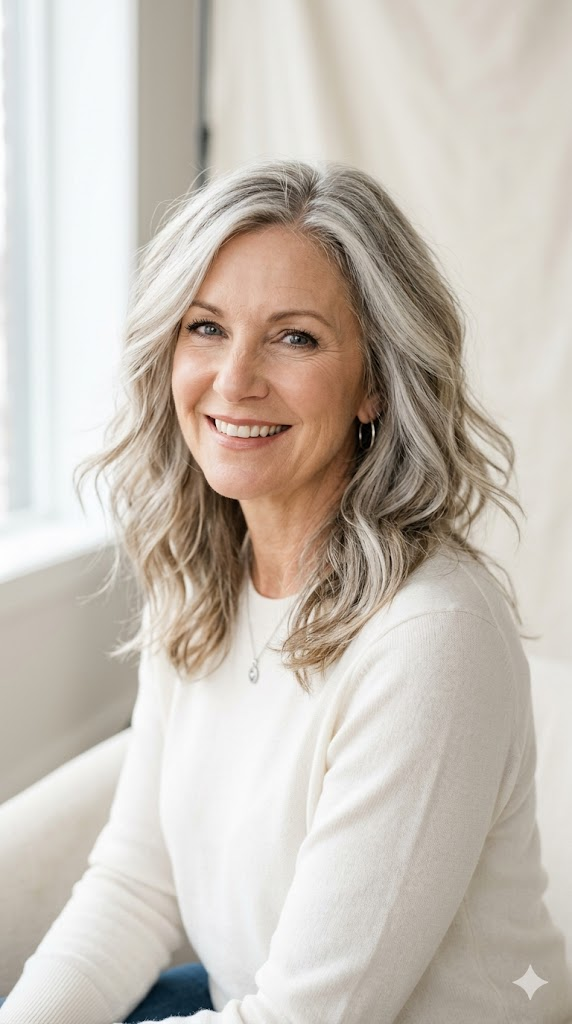
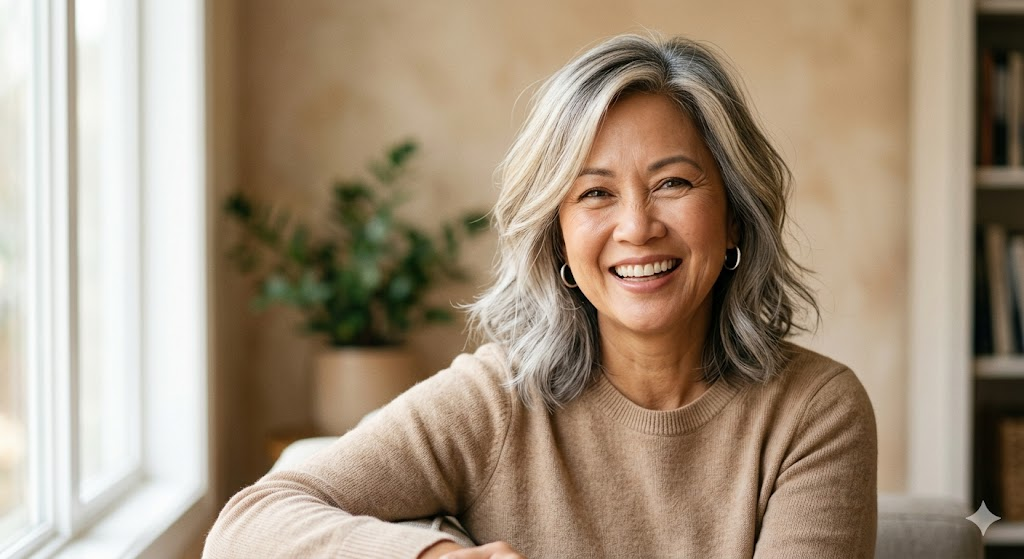
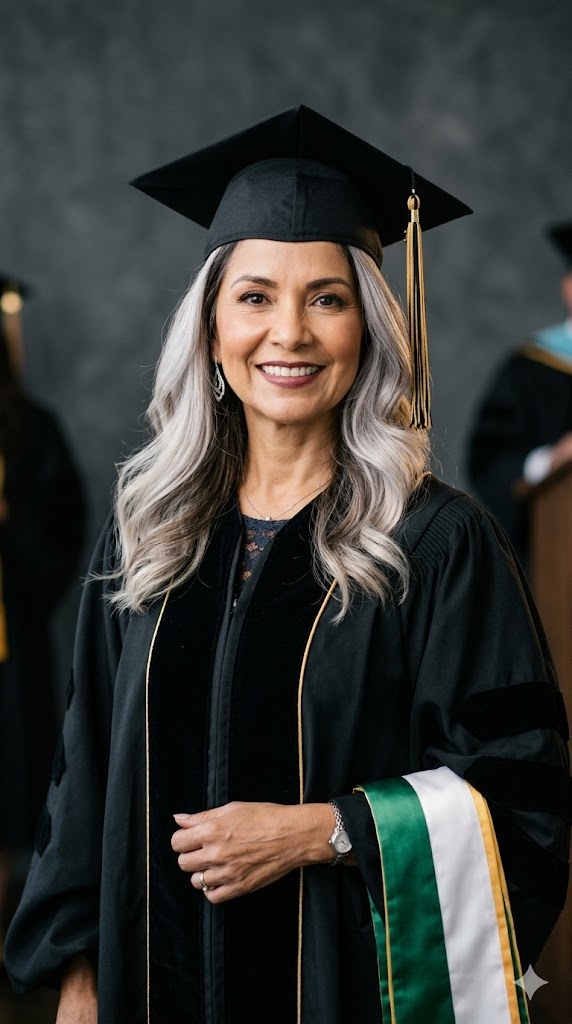
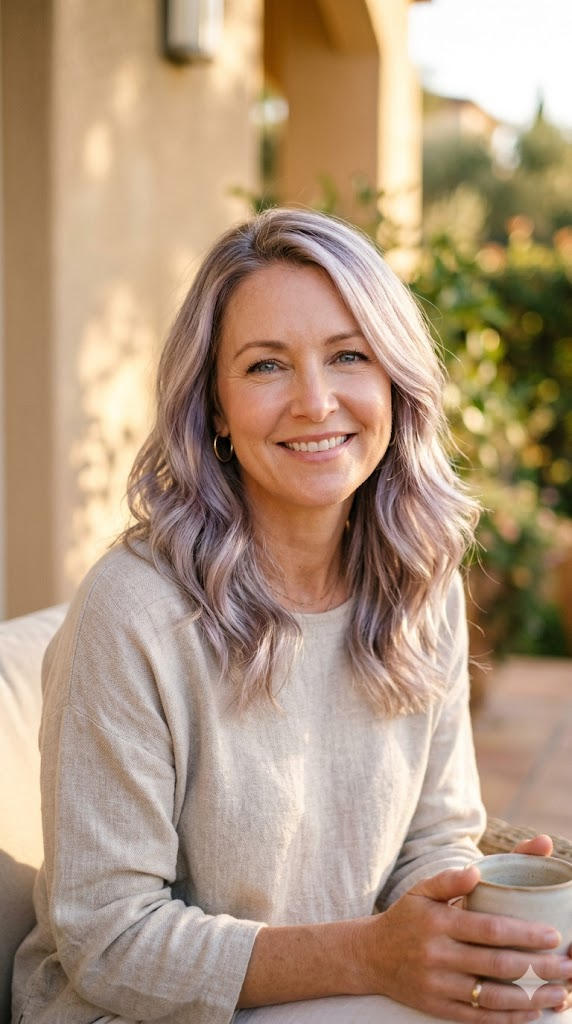
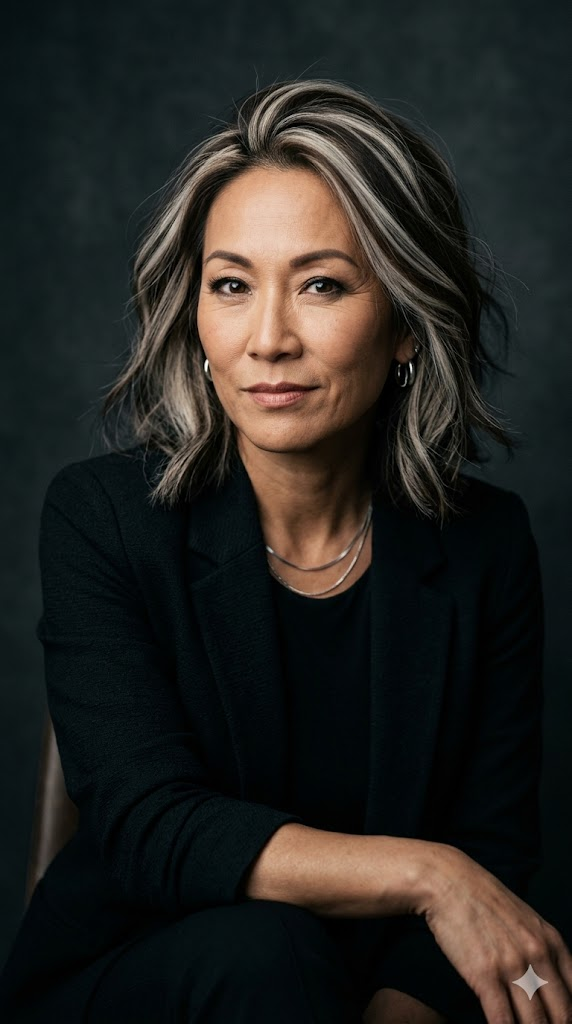
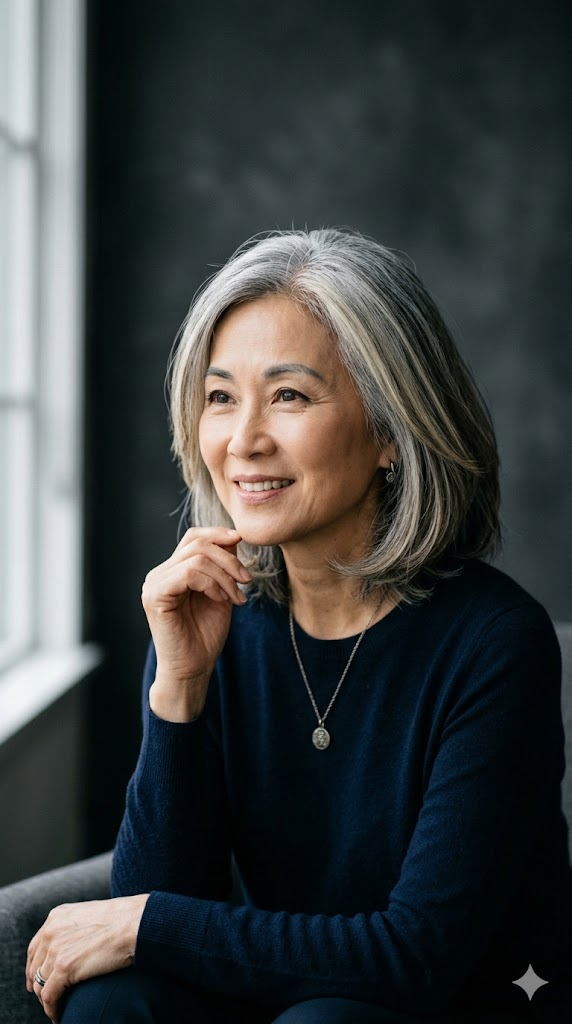
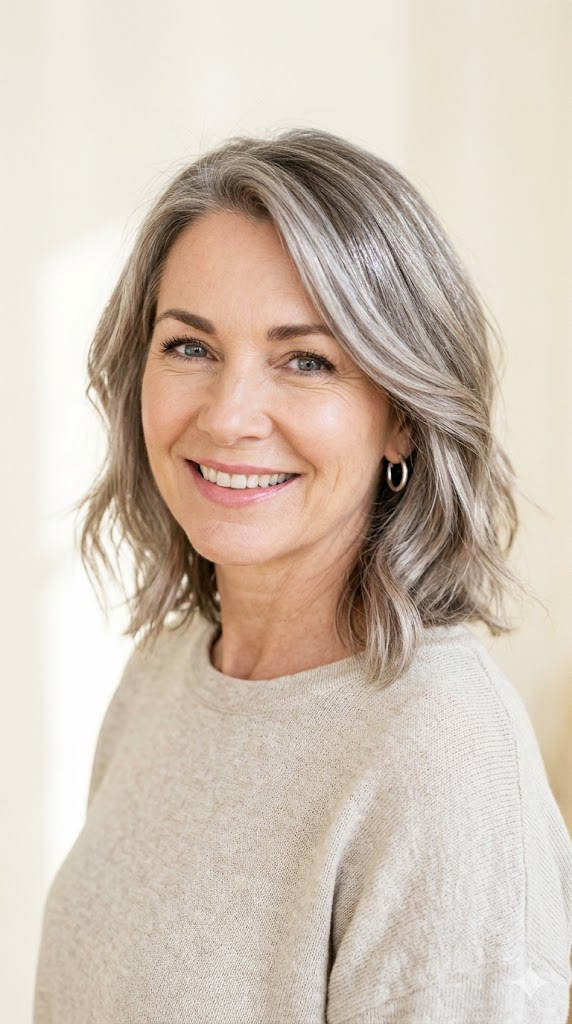
    The 16 gray blending hair highlights in ash blonde for women in this guide offer the perfect solution for brunettes who want to embrace their natural grays without going fully silver overnight. Ash blonde is the ideal bridge color—cool enough to blend seamlessly with gray and white strands, but light enough to add brightness and dimension. Unlike warm blondes that can clash with cool-toned grays, ash blonde highlights create a harmonious, expensive-looking blend that grows out softly. Whether you are just starting to see your first grays or are already significantly silver, there is an ash blonde gray blending technique here for you. In this guide, we will explore sixteen gray blending highlight techniques using ash blonde tones, complete with why each works, how to style it, best face shapes, and maintenance needs.


    Why Ash Blonde Is Perfect for Gray Blending

    Gray and white hair have cool undertones. Ash blonde shares those cool undertones, making it the perfect companion. Here is why ash blonde works:

    • Cool tones match cool grays without brassiness
    • Creates a seamless blend between colored and natural gray hair
    • Adds brightness without harsh contrast
    • Neutralizes unwanted warmth from previous color
    • Grows out softly with no harsh root line
    • Flatters both cool and warm skin tones when customized

    The 16 Gray Blending Hair Highlights in Ash Blonde

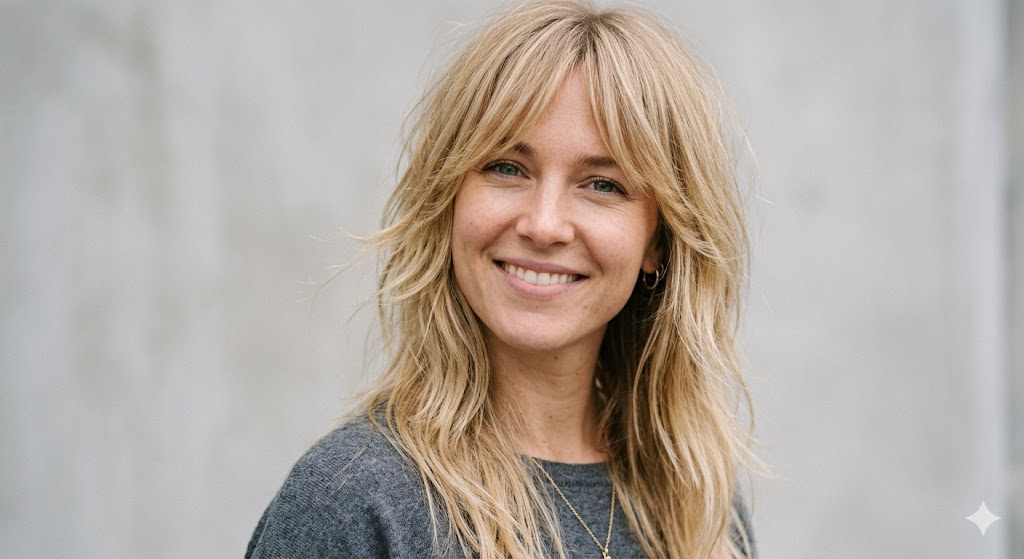
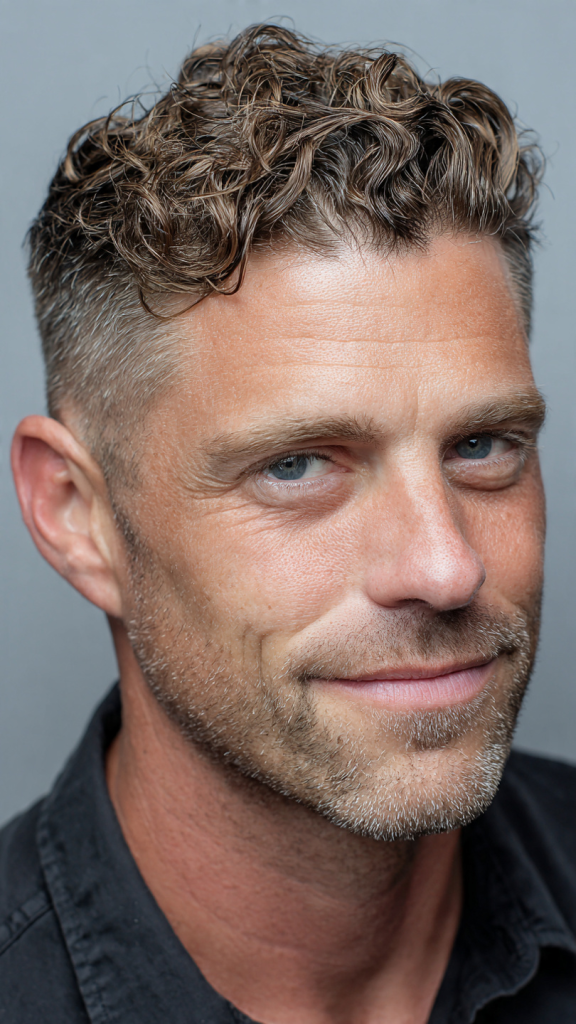
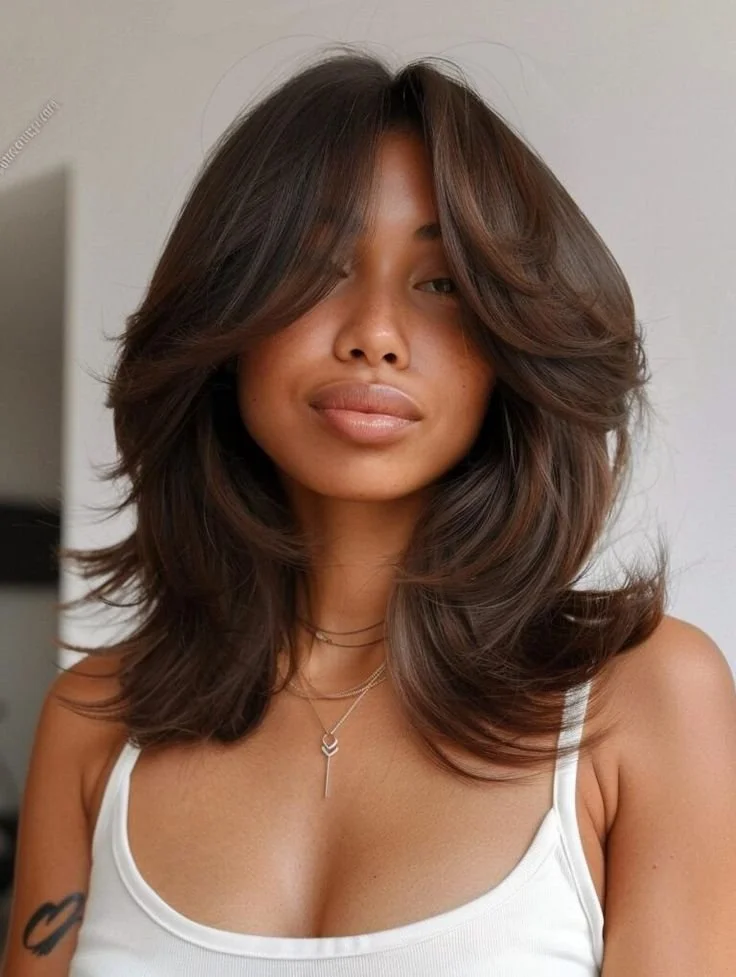
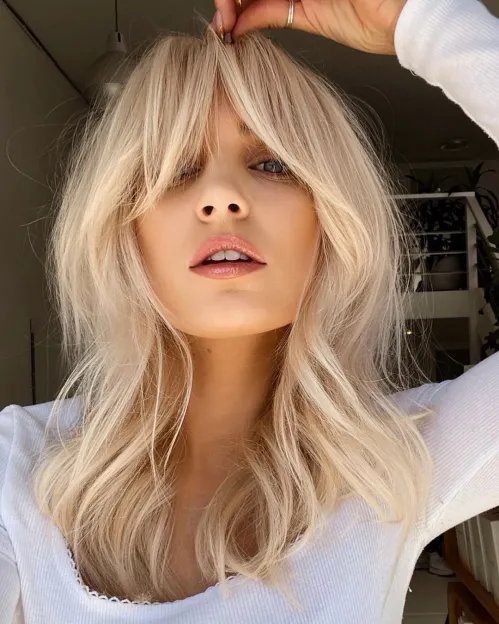
    1. Ash Blonde Babylights

    Babylights are ultra-fine, delicate highlights woven throughout your hair. When done in ash blonde, they create a soft, shimmering effect.

    Why it works: Because babylights are so fine, they do not create harsh stripes. They melt into your existing gray and brunette base, making the transition to silver look intentional and expensive.

    How to style it: Style your hair as usual. The babylights will catch the light naturally. Use a purple shampoo weekly to maintain cool ash tones.

    Best face shapes: All face shapes. Babylights are universally flattering.

    Maintenance needs: Every 12–16 weeks. Babylights grow out incredibly softly.

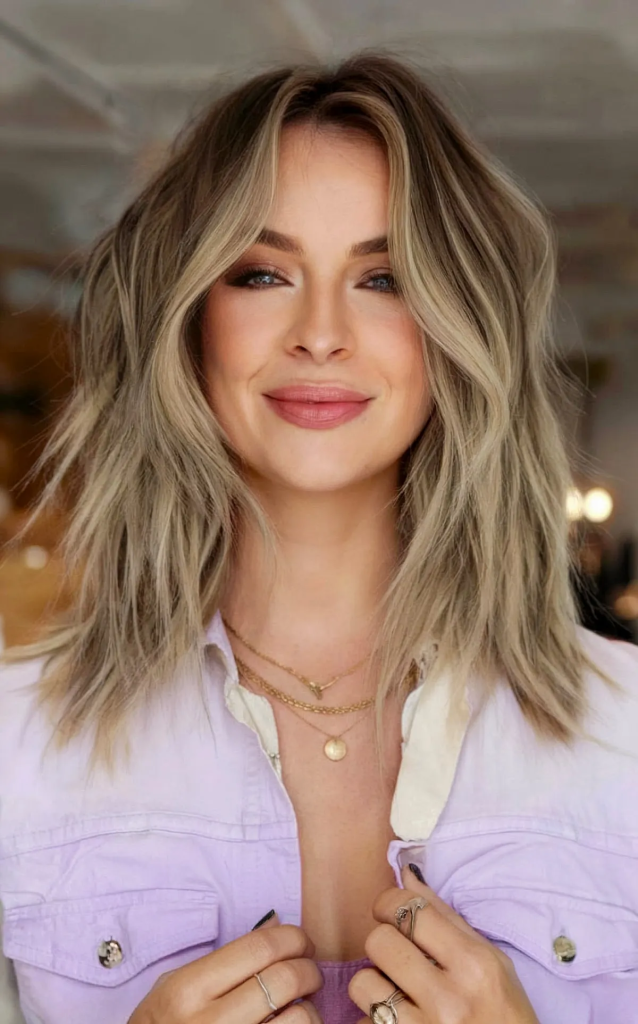
    2. Ash Blonde Money Pieces

    Money pieces are face-framing highlights concentrated around the hairline and temples. Ash blonde on these strategic pieces brightens your complexion instantly.

    Why it works: The cool brightness around your face lights up your complexion and makes you look more awake. The rest of your hair stays darker, keeping maintenance low.

    How to style it: Style your hair so the face-framing pieces fall naturally forward. Curl them slightly away from your face to emphasize the brightness.

    Best face shapes: Oval, heart, round. The brightness draws attention to your best features.

    Maintenance needs: Every 8–10 weeks. Money pieces grow out visibly.

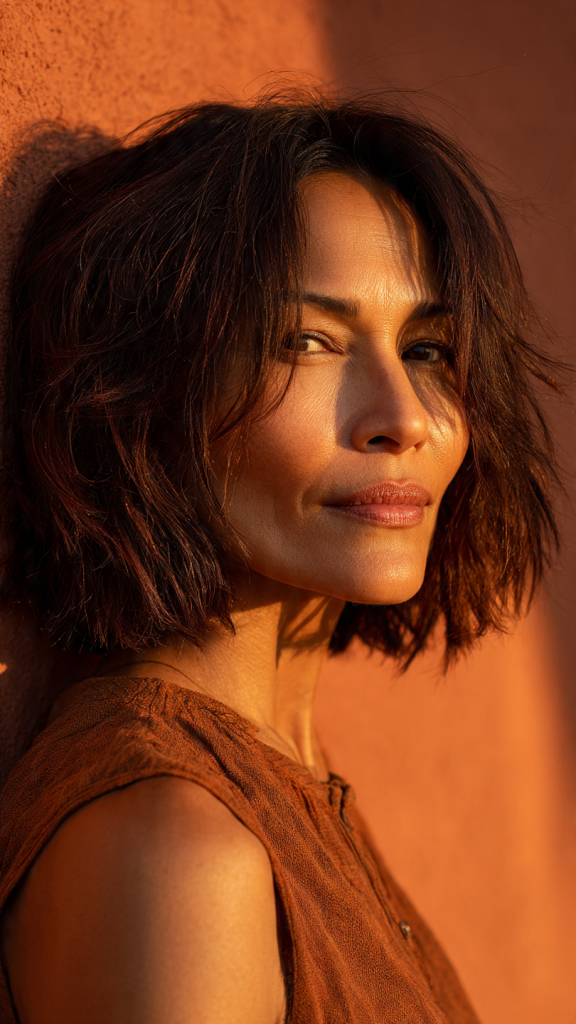
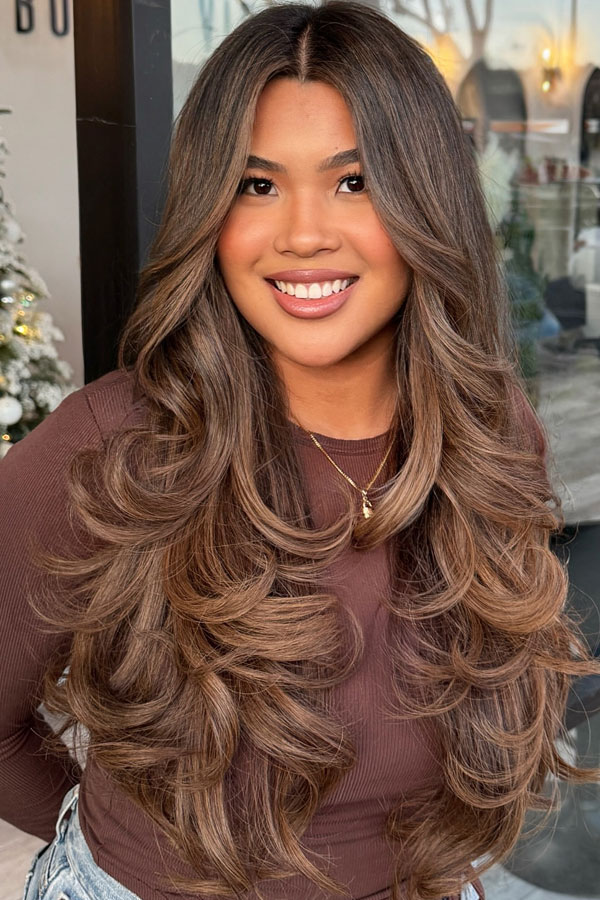
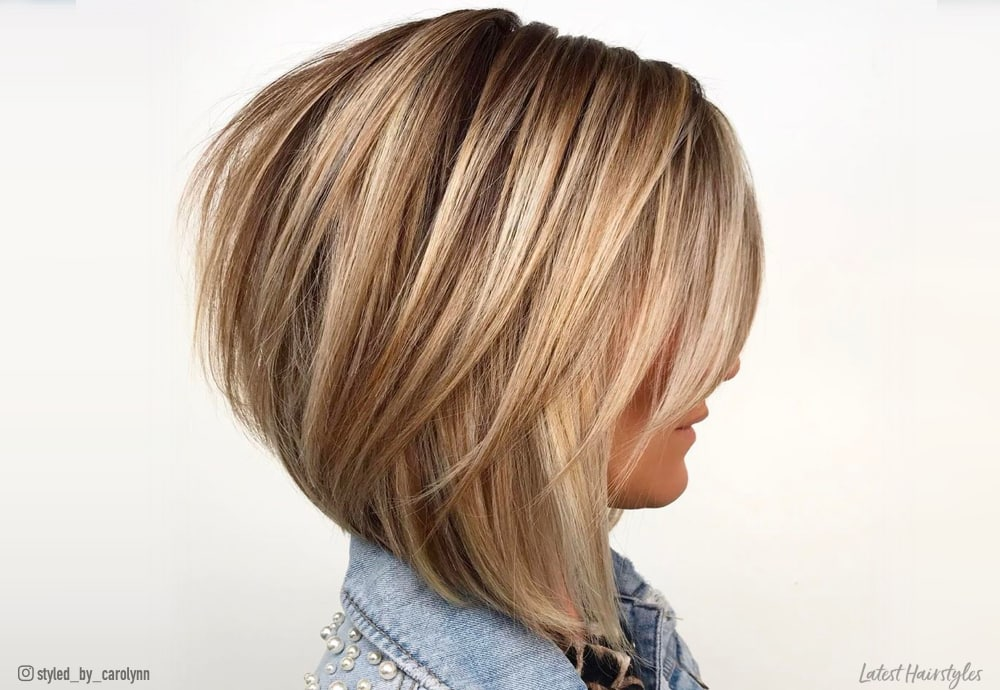
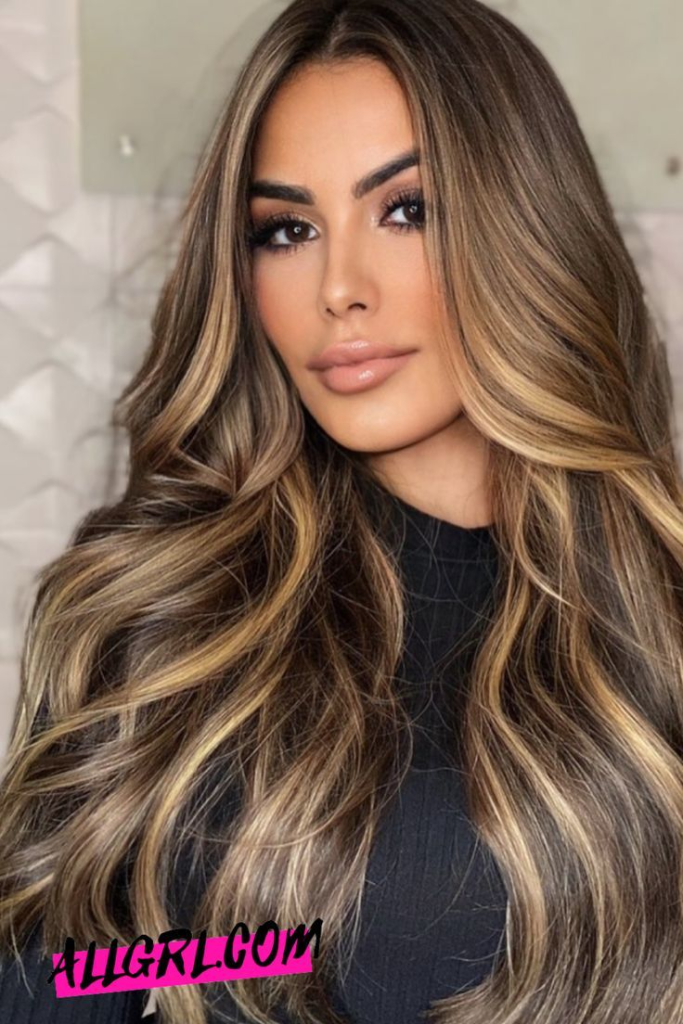
    3. Ash Blonde Balayage on Brunette

    Balayage is a hand-painted highlighting technique that creates a soft, graduated effect. Ash blonde balayage is painted through the mid-lengths and ends.

    Why it works: The hand-painted application looks natural and sun-kissed—but with cool, ash tones instead of warm. The dark roots mean zero harsh grow-out lines.

    How to style it: Air-dry or blow-dry with a round brush. The balayage is designed to look beautiful with minimal styling. Loose waves enhance the graduated effect.

    Best face shapes: All face shapes.

    Maintenance needs: Every 12–16 weeks. Balayage is famously low maintenance.

    4. Ash Blonde Foilyage

    Foilyage is a hybrid between balayage and foil highlights. Ash blonde tones are painted onto the hair and then wrapped in foil for a brighter result.

    Why it works: Foilyage gives you the brightness of foil highlights with the soft, lived-in look of balayage. It is the best of both worlds for gray blending.

    How to style it: Style as you normally would. The foilyage will look dimensional whether your hair is straight, wavy, or curly.

    Best face shapes: All face shapes.

    Maintenance needs: Every 10–12 weeks.

    5. Ash Blonde Root Smudge with Gray Ends

    This technique leaves your roots dark (your natural brunette) and focuses ash blonde highlights on the mid-lengths and ends. A root smudge softly blurs the transition.

    Why it works: Dark roots are low maintenance—you can go months without a touch-up. The ash blonde ends add brightness and dimension exactly where you want it.

    How to style it: Loose waves or beachy texture work beautifully to blend the root smudge with the lighter ends. Air-drying enhances the lived-in feel.

    Best face shapes: All face shapes. Dark roots create a slimming effect around the face.

    Maintenance needs: Every 12–16 weeks. One of the lowest-maintenance options.

    6. Ash Blonde Quarter Highlights

    Quarter highlights are placed strategically on just 25% of your hair—usually around the face and on top. Ash blonde tones mimic the look of natural grays in these concentrated areas.

    Why it works: You get the brightness of gray blending with half the work and cost of full highlights. Strategic placement means maximum impact with minimum maintenance.

    How to style it: Style your hair so the highlighted pieces sit on top or around your face. A side part can help distribute the brightness evenly.

    Best face shapes: Oval, heart, round. The brightness around the face lifts your complexion.

    Maintenance needs: Every 10–12 weeks.

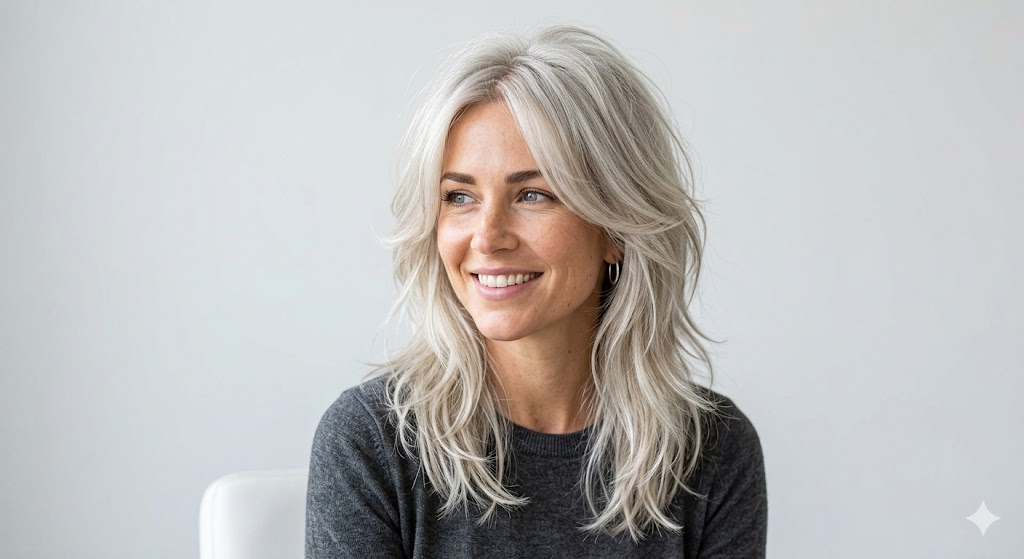
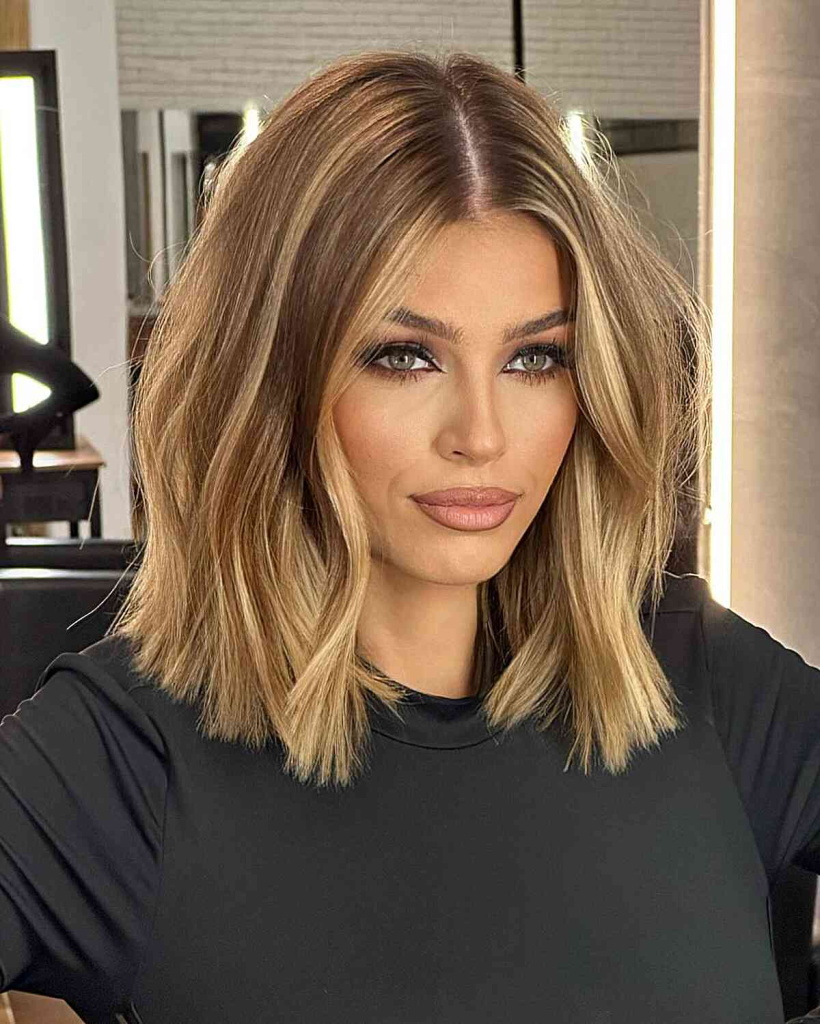
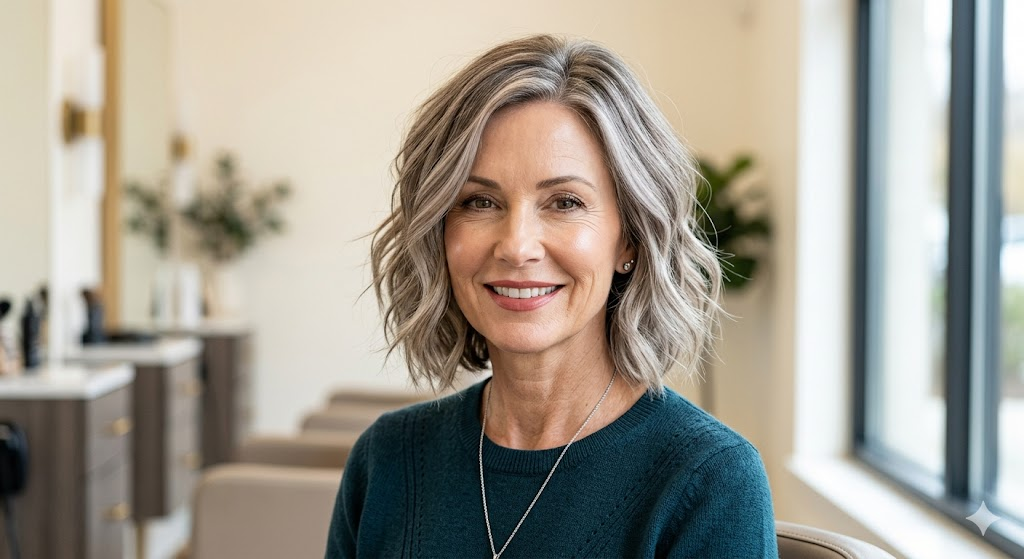
    7. Silver Ash Blonde Ombré

    Ombré is a graduated transition from darker roots to lighter ends. In this version, you transition from dark brunette roots to ash blonde or silver ends.

    Why it works: The grow-out is virtually invisible because the roots are already dark. The ash blonde ends add brightness and dimension exactly where you want it.

    How to style it: Loose waves or beachy texture enhance the ombré effect. Sleek, straight styles make the transition more obvious—choose based on your preference.

    Best face shapes: All face shapes. Dark roots create a slimming effect.

    Maintenance needs: Every 12–16 weeks. One of the longest-lasting options.

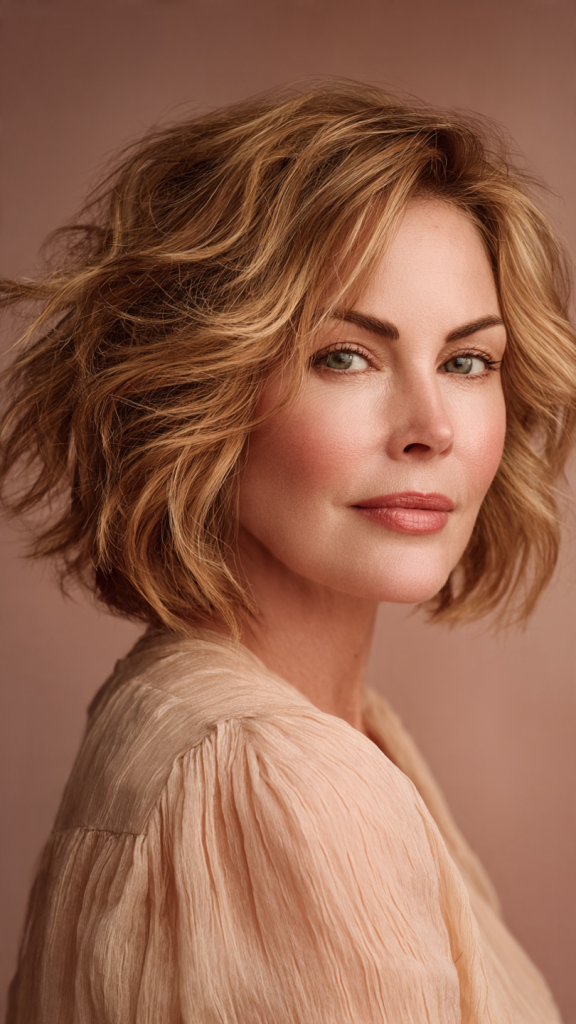
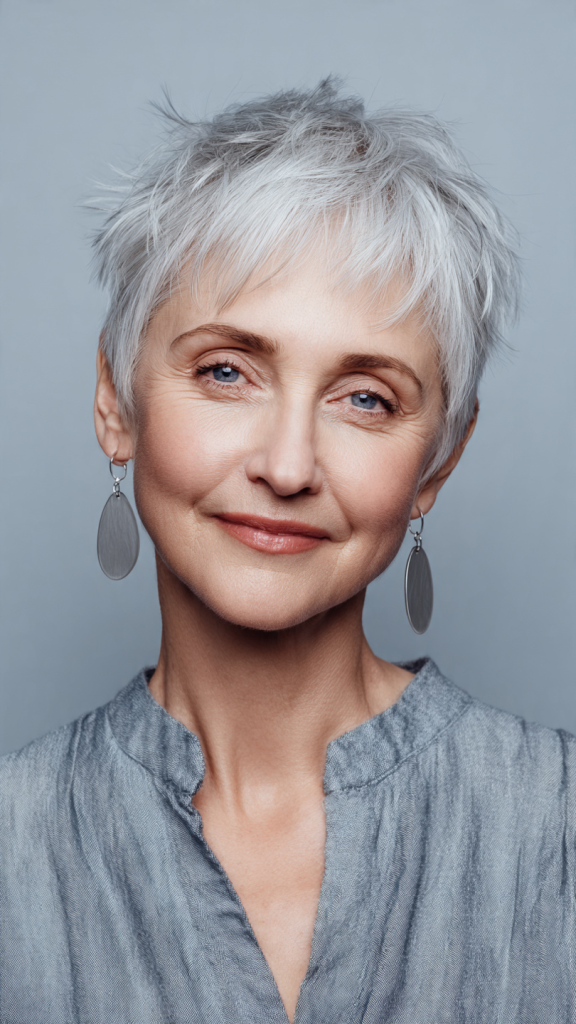
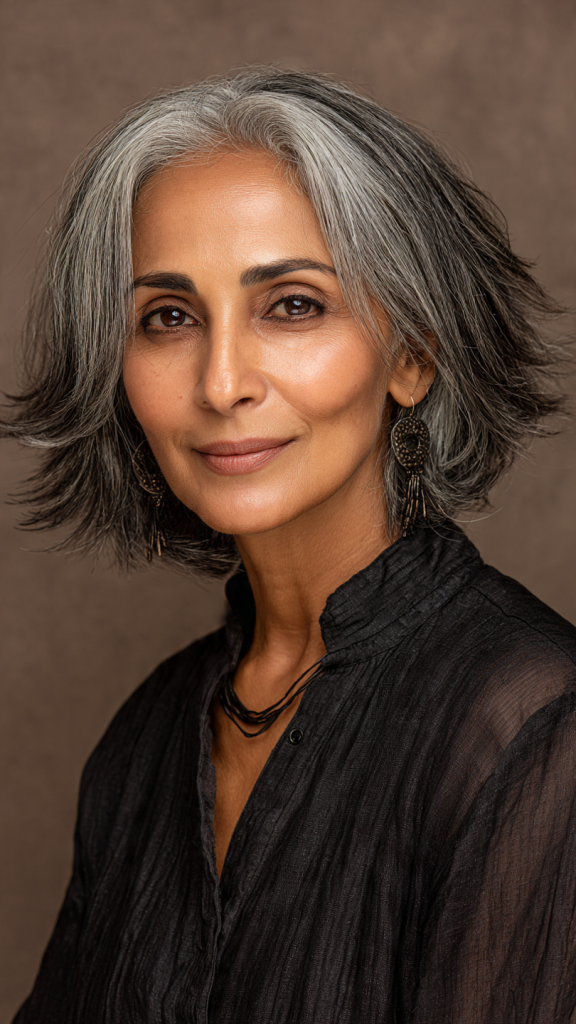
    8. Mushroom Ash Blonde Base with Silver Highlights

    Mushroom brown is a cool, ashy brown with gray undertones. Adding ash blonde and silver highlights to this base creates a monochromatic, sophisticated gray blend.

    Why it works: Because the base already has gray undertones, the ash blonde highlights blend seamlessly. There is no harsh contrast—just soft, dimensional coolness.

    How to style it: A smooth, glossy blowout emphasizes the sophisticated color. Texture spray adds modern edge.

    Best face shapes: All face shapes. Mushroom brown is universally flattering.

    Maintenance needs: Every 10–12 weeks. Cool tones need purple shampoo maintenance.

    9. Pearl Ash Blonde Highlights

    Pearl ash blonde has subtle violet undertones that create a soft, luminous finish. This shade works beautifully on both warm and cool skin tones.

    Why it works: The violet in pearl ash blonde neutralizes any yellow or gold tones that can appear in natural gray hair, keeping your silver clean and bright.

    How to style it: Use a purple shampoo weekly to maintain the pearl tone. A glossing treatment adds shine.

    Best face shapes: All face shapes.

    Maintenance needs: Every 8–10 weeks. Pearl tones require more maintenance.

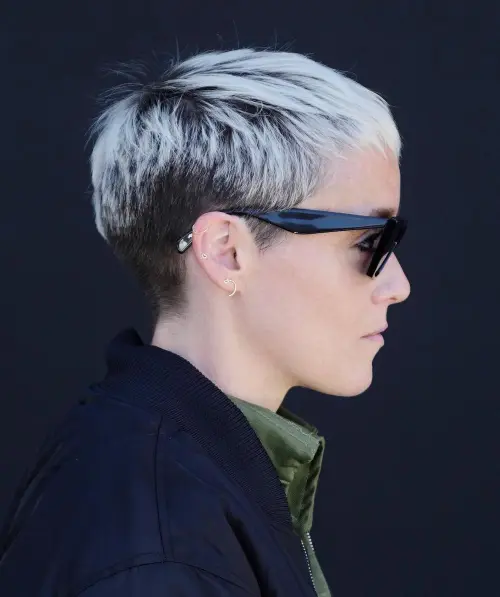
    10. Ash Blonde Chunky Highlights

    For a bolder look, chunky ash blonde highlights create deliberate stripes of cool blonde through your brunette hair.

    Why it works: The high contrast between dark brown and ash blonde is striking and modern. It works best for women who are already significantly gray and want to lean into it.

    How to style it: Loose waves or curls help blend the chunky highlights so they do not look like stripes.

    Best face shapes: Oval, heart, diamond. Avoid if you have a very round face.

    Maintenance needs: Every 8–10 weeks. Chunky sections grow out more visibly.

    11. Ash Blonde Face-Framing Foils

    This technique places foils only around the hairline and temples, creating brightness exactly where you want it.

    Why it works: The brightness around your face lifts your complexion. The rest of your hair stays natural, keeping maintenance low.

    How to style it: Style your hair so the face-framing pieces fall naturally forward. Curl them slightly away from your face.

    Best face shapes: Oval, heart, round. The brightness flatters all.

    Maintenance needs: Every 8–10 weeks.

    12. Cool Ash Blonde Full Highlights

    Full highlights mean highlighting every section of your hair. When done in cool ash blonde, the result is an all-over dimensional gray blend.

    Why it works: This is for women who are ready to embrace their gray fully but are not ready to go completely silver. The dark base or lowlights keep some depth.

    How to style it: Sleek, straight styles emphasize the dimensional contrast. Waves and curls soften the look.

    Best face shapes: All face shapes.

    Maintenance needs: Every 8–10 weeks. Full highlights need more frequent upkeep.

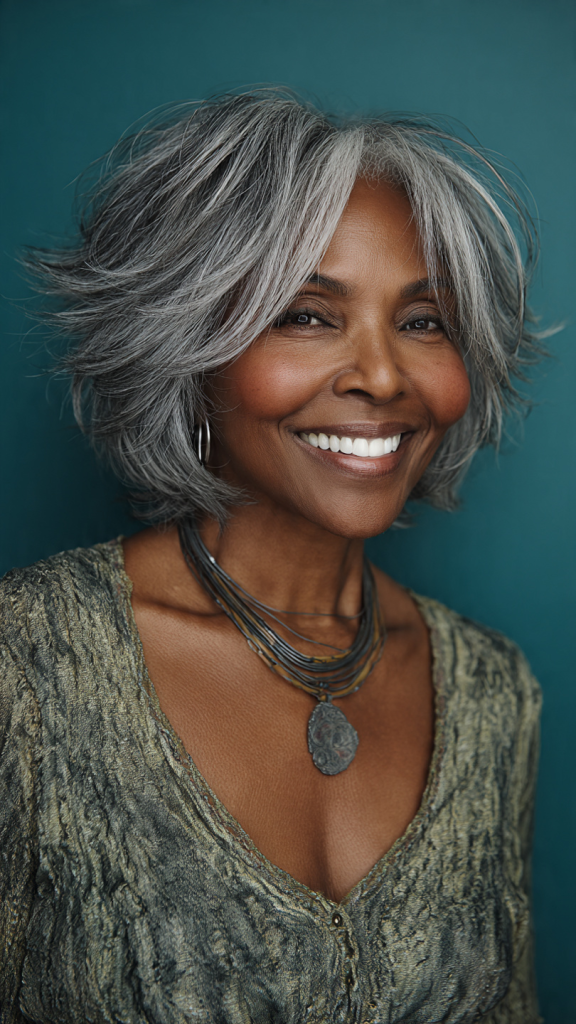
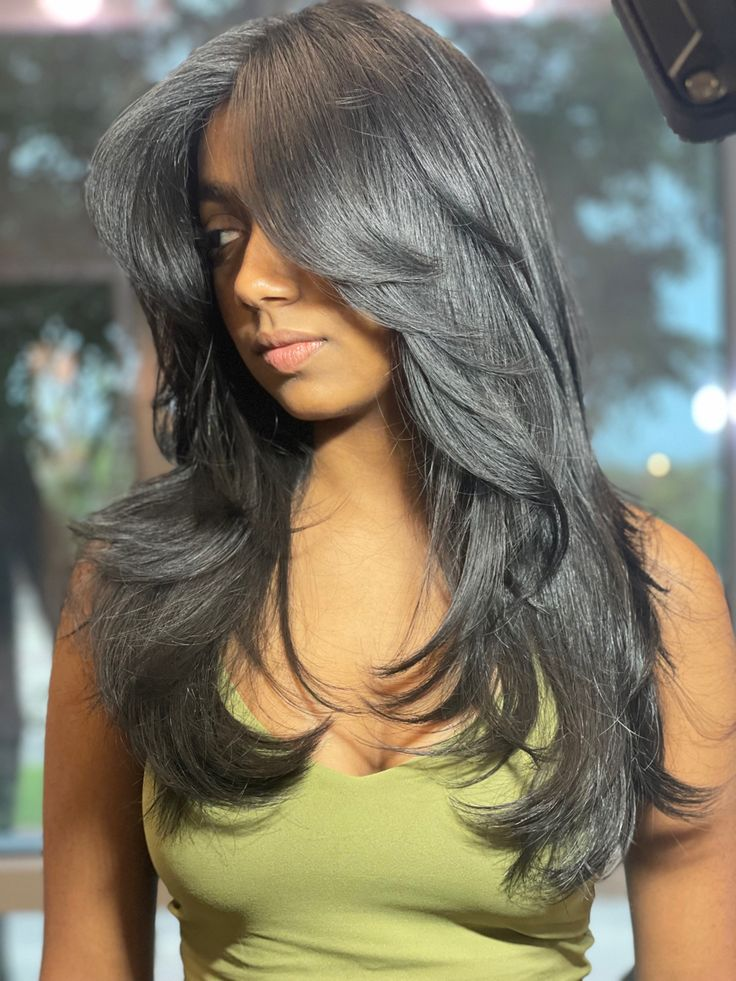
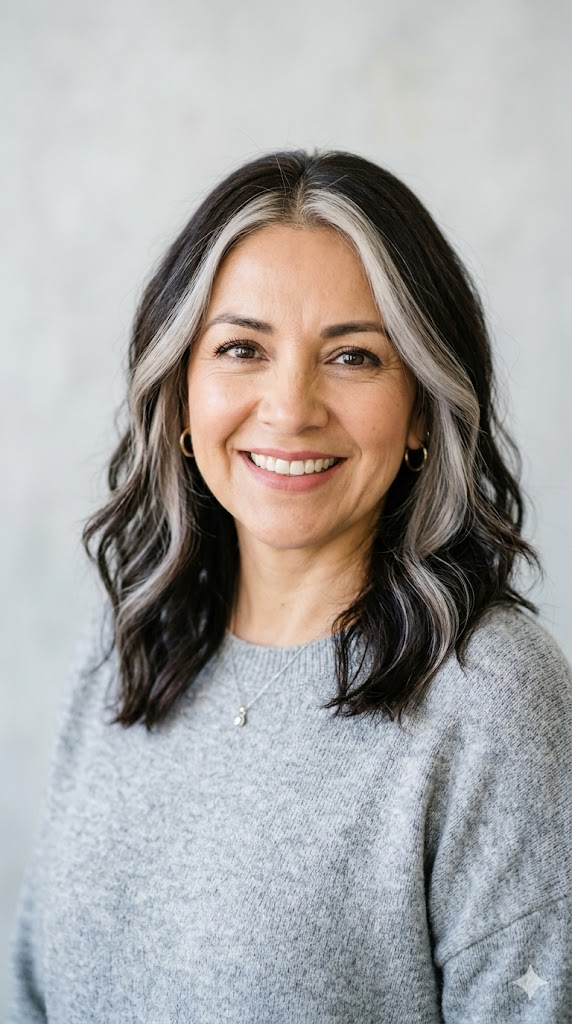
    13. Ash Blonde and Silver Weaving

    Weaving alternates ash blonde and silver highlights throughout your hair, creating a multidimensional, textured look.

    Why it works: The alternating tones mimic natural gray variation. The result is incredibly natural-looking and lived-in.

    How to style it: Style as usual. The woven highlights will catch the light and create movement.

    Best face shapes: All face shapes.

    Maintenance needs: Every 10–12 weeks.

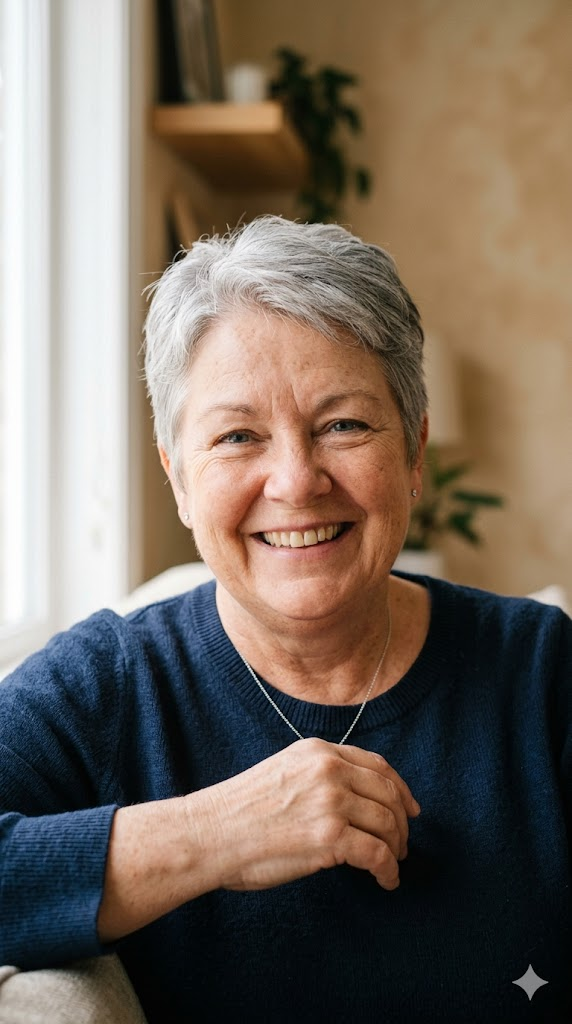
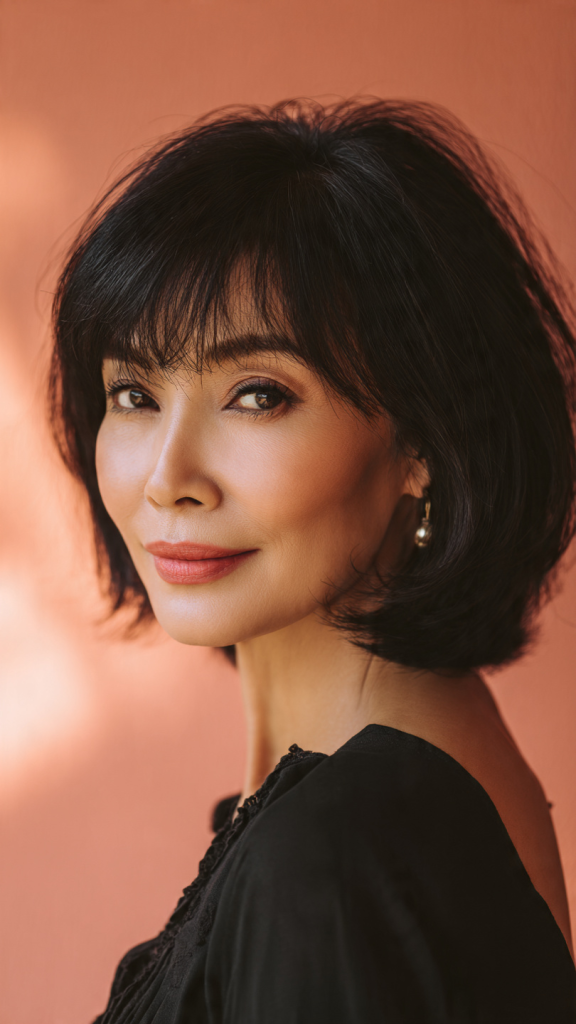
    14. Ash Blonde Shadow Root

    The roots are left dark (your natural color or slightly darkened), while ash blonde highlights are placed throughout the mid-lengths and ends.

    Why it works: The shadow root means zero harsh grow-out lines. You can go months between salon visits without visible regrowth.

    How to style it: Loose waves or beachy texture work beautifully. The shadow root creates a slimming effect around the face.

    Best face shapes: All face shapes.

    Maintenance needs: Every 12–16 weeks. Very low maintenance.

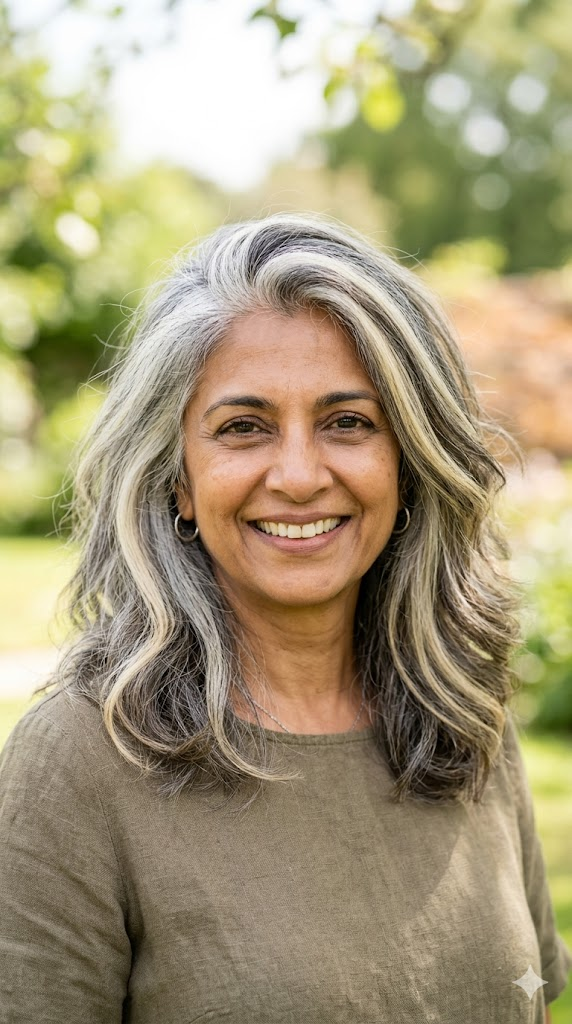
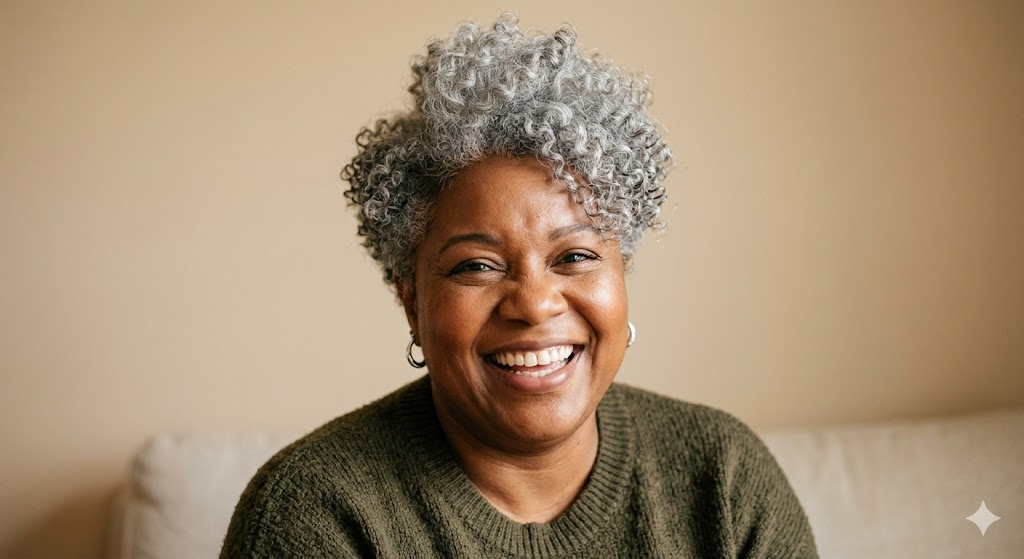
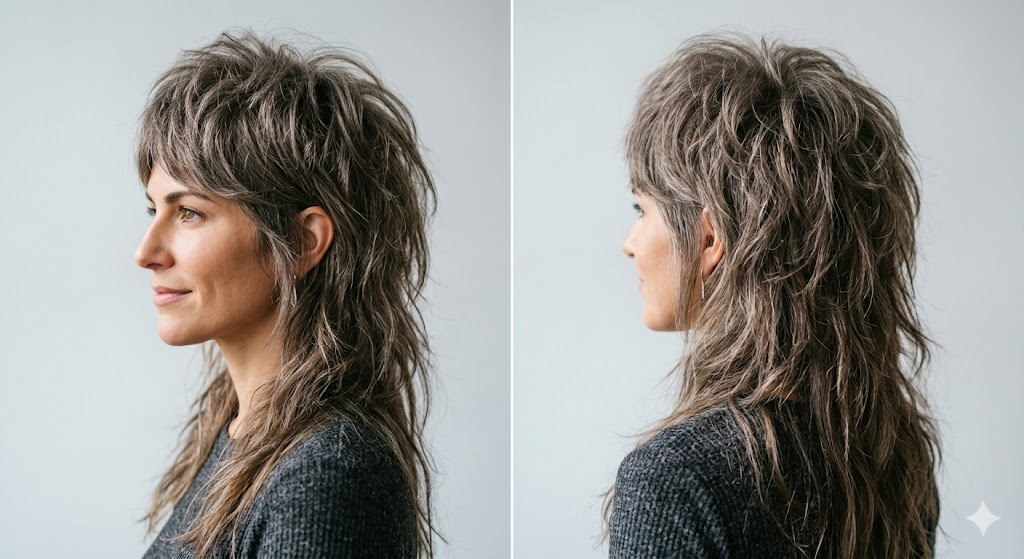
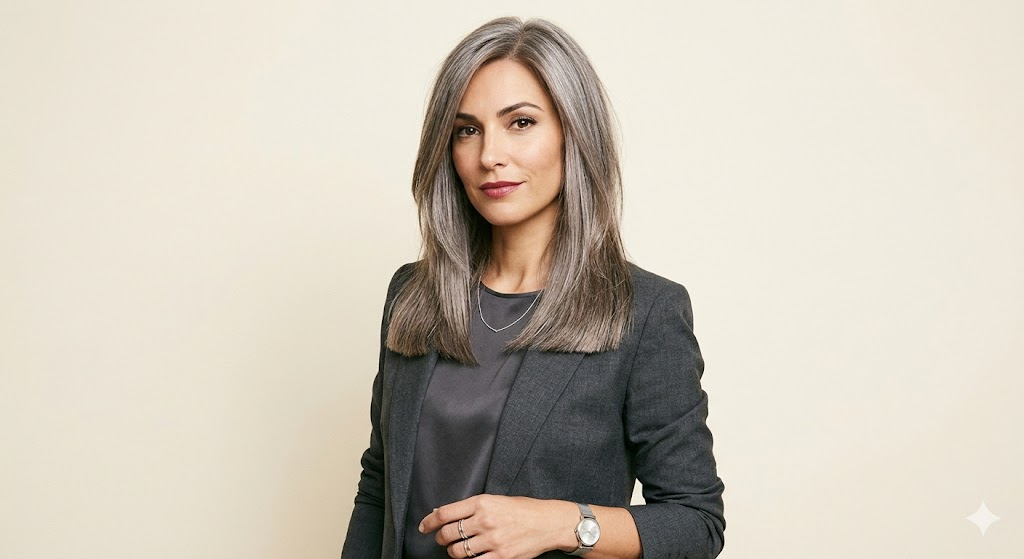
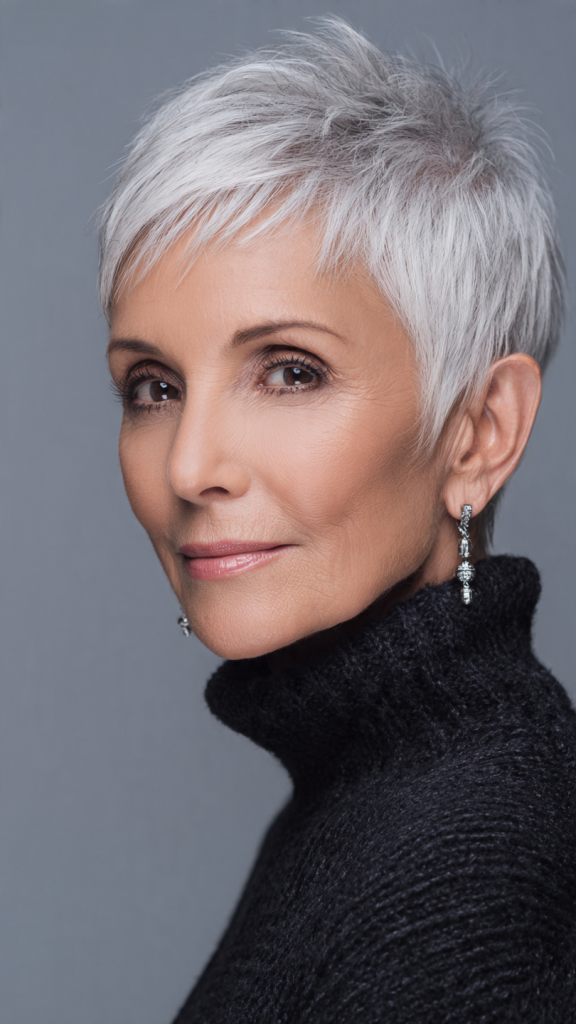
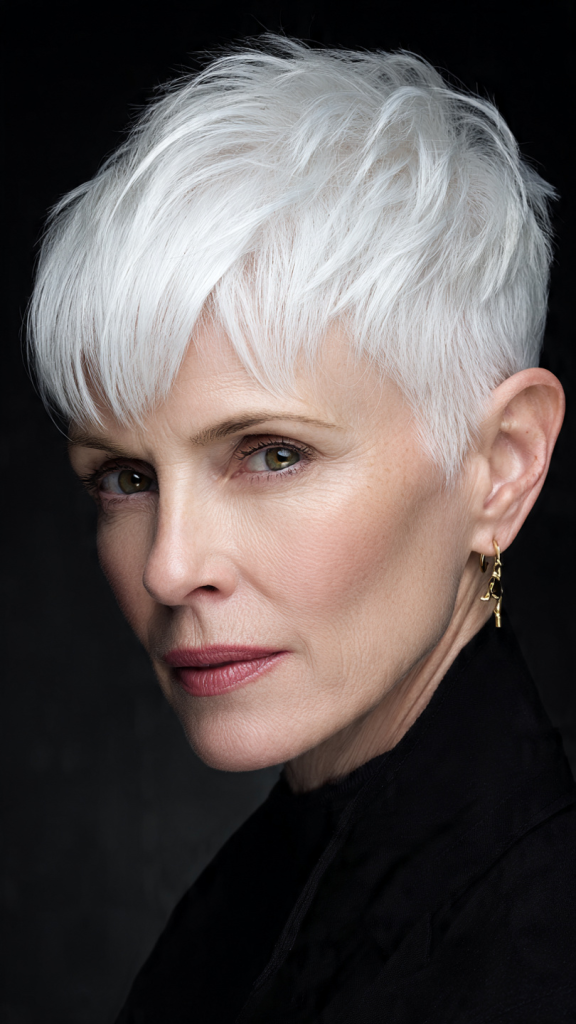
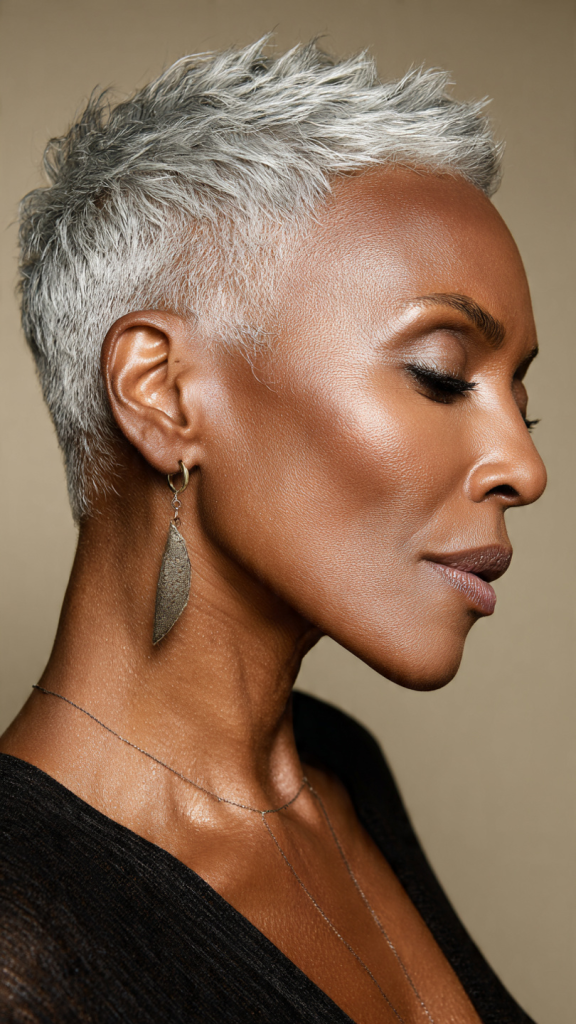
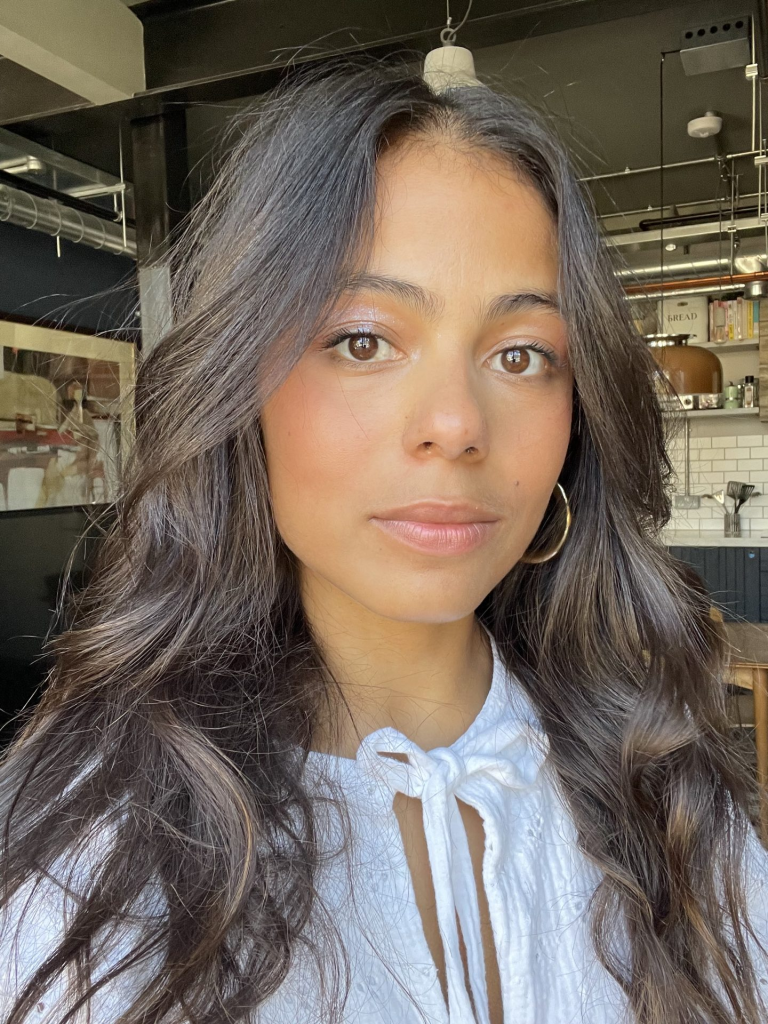
    15. Ash Blonde Lowlights on Gray Hair

    For women who are already fully gray or silver, ash blonde lowlights add depth and dimension back into the color.

    Why it works: All-over gray can look flat. Ash blonde lowlights create contrast and movement without adding warmth.

    How to style it: Style as usual. The lowlights will add dimension and depth.

    Best face shapes: All face shapes.

    Maintenance needs: Every 10–12 weeks.

    16. Subtle Ash Blonde Toning Gloss

    Not a traditional highlight, but a toning gloss in ash blonde can refresh existing highlights and blend grays without full highlighting.

    Why it works: A gloss is fast, affordable, and low-commitment. It adds shine, neutralizes brassiness, and helps gray hairs blend with your colored hair.

    How to style it: Apply the gloss at the salon or with an at-home glaze. Style as usual. The effect lasts 4–6 weeks.

    Best face shapes: All face shapes.

    Maintenance needs: Every 4–6 weeks for gloss refresh. No trim needed.


    How to Maintain Ash Blonde Gray Blending Highlights

    Maintenance TaskFrequency
    Purple or blue shampoo1–2 times per week
    Deep conditioning maskOnce per week
    Glossing or toning treatmentEvery 4–6 weeks
    Salon touch-upEvery 8–16 weeks
    TrimEvery 8–10 weeks

    Products to use:

    • Purple shampoo (neutralizes yellow and brass)
    • Blue shampoo (neutralizes orange)
    • Color-safe conditioner
    • Heat protectant
    • Glossing treatment

    Products to avoid:

    • Sulfate shampoos (strip color)
    • Hot water (opens cuticle, fades color faster)
    • Heavy oils (can cause brassiness)

    Ash Blonde Gray Blending by Base Color

    Base ColorBest Ash Blonde Technique
    Light brown to dark blondeBabylights, balayage, money pieces
    Medium brownFull highlights, foilyage, ombré
    Dark brownBalayage, root smudge, quarter highlights
    Already gray/low silverAsh blonde lowlights, toning gloss
    Warm brunette (red/gold undertones)Ash blonde foilyage + purple shampoo

    Quick Maintenance Cheat Sheet

    TechniqueSalon Visit FrequencySpecial Notes
    Ash blonde babylights12–16 weeksGrows out very softly
    Ash blonde money pieces8–10 weeksFace-framing only
    Ash blonde balayage12–16 weeksVery low maintenance
    Ash blonde foilyage10–12 weeksBrighter than balayage
    Root smudge with ash ends12–16 weeksOne of the lowest maintenance
    Quarter highlights10–12 weeksStrategic placement
    Silver ash ombré12–16 weeksNo root grow-out
    Mushroom ash base10–12 weeksNeeds purple shampoo
    Pearl ash highlights8–10 weeksHigher maintenance
    Chunky ash highlights8–10 weeksVisible grow-out
    Face-framing foils8–10 weeksOnly around face
    Full ash highlights8–10 weeksMost maintenance
    Ash and silver weaving10–12 weeksNatural variation
    Ash shadow root12–16 weeksVery low maintenance
    Ash lowlights on gray10–12 weeksAdds depth
    Ash toning gloss4–6 weeksLow commitment

    Final Thoughts

    Ash blonde gray blending highlights offer a beautiful, low-maintenance way to transition to silver or enhance your natural gray. The cool tones of ash blonde complement gray and white strands perfectly, creating a seamless, expensive-looking blend that grows out softly. Whether you choose delicate babylights, bold chunky highlights, or a low-commitment toning gloss, the key is working with a colorist who understands cool tones and gray blending. Bring photos from this guide. Invest in purple shampoo. And enjoy a cool, dimensional look that celebrates your natural silver.

  • 13 Long Hairstyles with Curtain Bangs That Frame Your Face and Elevate Your Length

    13 Long Hairstyles with Curtain Bangs That Frame Your Face and Elevate Your Length

    The 13 long hairstyles with curtain bangs in this guide prove that you do not have to sacrifice length to get a fresh, face-framing update. Curtain bangs—soft, center-parted fringe that curves to each side like a curtain opening—are one of the most versatile and flattering bang styles for long hair. They soften forehead lines, highlight cheekbones, and blend seamlessly into face-framing layers. Whether you have straight, wavy, curly, fine, or thick hair, there is a long curtain bang style here for you. In this guide, we will explore thirteen long hairstyles with curtain bangs, complete with why each works, how to style it, best face shapes, and maintenance needs.


    Why Curtain Bangs Work So Well with Long Hair

    Curtain bangs offer unique benefits when paired with long hair:

    • Softens the face without hiding it completely
    • Creates vertical length through the open center part
    • Blends seamlessly into face-framing layers
    • Hides forehead lines while still showing your features
    • Grows out gracefully—no awkward in-between phase
    • Works with all textures from pin-straight to tight curls

    The 13 Long Hairstyles with Curtain Bangs

    1. Long Layered Hair with Curtain Bangs

    This is the classic combination. Long, soft layers throughout the length with curtain bangs that blend into face-framing pieces.

    Why it works: The layers add movement and volume without sacrificing length. The curtain bangs soften the face and draw attention to your eyes.

    How to style it: Apply a volumizing mousse to damp hair. Blow-dry the curtain bangs using a round brush, directing left to left and right to right. The rest can be air-dried or blown out smooth.

    Best face shapes: Oval, round, heart. The curtain bangs elongate round faces.

    Maintenance needs: Bangs every 5–6 weeks. Length every 8–12 weeks.

    2. Long Straight Hair with Curtain Bangs

    Pin-straight long hair gets a soft update with curtain bangs. The bangs add movement and frame the face without disrupting the sleek length.

    Why it works: The contrast between the sleek, straight length and the soft, curved bangs is beautiful. The bangs prevent straight hair from looking too severe.

    How to style it: Blow-dry the bangs using a round brush, creating a soft C-shape to each side. Flat-iron the length for maximum sleekness. A drop of shine serum finishes the look.

    Best face shapes: Oval, heart, oblong. The sleekness flatters angular faces.

    Maintenance needs: Bangs every 5–6 weeks. Trim every 8–10 weeks.

    3. Long Wavy Hair with Curtain Bangs

    Beachy, effortless waves paired with curtain bangs create a romantic, bohemian look.

    Why it works: The waves and bangs work together to create softness and movement. The curtain bangs blend naturally into the wave pattern.

    How to style it: Apply sea salt spray to damp hair. Scrunch to encourage waves. Air-dry or diffuse. The curtain bangs can be blow-dried separately or left to air-dry with the rest.

    Best face shapes: Oval, round, heart. The softness flatters all face shapes.

    Maintenance needs: Bangs every 5–6 weeks. Length every 8–12 weeks.

    4. Long Curly Hair with Curtain Bangs

    Curly hair and curtain bangs are a match made in heaven. The bangs are cut to blend with your curl pattern.

    Why it works: The open center of curtain bangs reveals your forehead, adding vertical length. The curved sides frame your cheekbones without adding width.

    How to style it: On soaking wet hair, apply leave-in conditioner and curl cream. Define the curtain bangs separately, directing left to left and right to right. Diffuse or air-dry. Never brush.

    Best face shapes: Oval, round, heart. Curtain bangs are ideal for round faces.

    Maintenance needs: Bangs every 5–6 weeks. Length every 8–10 weeks. Deep condition weekly.

    5. Long Shag with Curtain Bangs

    The long shag features choppy, disconnected layers throughout with curtain bangs blending into face-framing pieces.

    Why it works: The shag adds volume at the crown and texture throughout. The curtain bangs soften the edgy shag layers.

    How to style it: Apply texturizing spray to damp hair. Scrunch as you blow-dry with a diffuser. Define the curtain bangs to each side.

    Best face shapes: Oval, round, heart. The crown volume balances round faces.

    Maintenance needs: Bangs every 5–6 weeks. Length every 8–10 weeks.

    6. Long Hair with Bottleneck Curtain Bangs

    Bottleneck bangs are narrow at the center (like a bottle neck) and widen toward the cheekbones—a more dramatic version of curtain bangs.

    Why it works: The widening effect at the cheekbones balances a pointed chin. This is ideal for heart-shaped faces.

    How to style it: Blow-dry the bangs using a round brush, creating a narrow opening at the center that widens at the cheeks.

    Best face shapes: Heart, oval, round. Ideal for heart-shaped faces.

    Maintenance needs: Bangs every 4–5 weeks. Length every 8–12 weeks.

    7. Long Blunt Cut with Curtain Bangs

    A blunt, one-length cut gets softness and movement from curtain bangs. The length stays heavy and full.

    Why it works: The blunt perimeter gives the illusion of thick, healthy ends. The curtain bangs add face-framing softness without sacrificing the blunt shape.

    How to style it: Blow-dry the length smooth using a paddle brush. Use a round brush on the curtain bangs only, directing them to each side.

    Best face shapes: Oval, square, oblong. The blunt line adds width to longer faces.

    Maintenance needs: Bangs every 5–6 weeks. Length every 8–10 weeks.

    8. Long Face-Framing Layers with Curtain Bangs

    This cut features longer face-framing layers that start at the chin or collarbone, with curtain bangs blending into them.

    Why it works: The face-framing layers create vertical lines that elongate the face. The curtain bangs soften the forehead and complete the framing.

    How to style it: Blow-dry using a round brush, directing the face-framing pieces away from your face. The curtain bangs go left and right.

    Best face shapes: Oval, round, square. The vertical lines flatter round faces.

    Maintenance needs: Bangs every 5–6 weeks. Length every 8–10 weeks.

    9. Long Fine Hair with Wispy Curtain Bangs

    For fine hair, the curtain bangs are cut wispy and thin rather than heavy. The length has subtle layers for movement.

    Why it works: Fine hair cannot handle heavy bangs that create gaps. Wispy curtain bangs add softness without sacrificing density.

    How to style it: Apply root-lifting spray to damp roots. Blow-dry upside down for volume. Define the wispy bangs to each side with a small round brush.

    Best face shapes: Oval, oblong, heart. The softness flatters longer faces.

    Maintenance needs: Bangs every 4–5 weeks. Length every 8–10 weeks.

    10. Long Thick Hair with Curtain Bangs

    Thick hair needs weight removal. This cut features long layers throughout with curtain bangs that are slightly heavier to blend with the thick length.

    Why it works: The layers remove bulk from thick hair. The curtain bangs are substantial enough to blend with the thick length without looking separate.

    How to style it: Apply lightweight mousse to damp hair. Blow-dry using a round brush. The curtain bangs should curve away from your face.

    Best face shapes: Oval, square, heart. The volume flatters all.

    Maintenance needs: Bangs every 5–6 weeks. Length every 8–10 weeks.

    11. Long Hair with Curtain Bangs and Highlights

    Adding dimensional highlights—balayage, babylights, or face-framing brightness—enhances the curtain bang effect.

    Why it works: The highlights add depth and dimension that make the curtain bangs pop. Lighter pieces around the face brighten your complexion.

    How to style it: Style as usual. The highlights will catch the light and enhance the movement of the bangs and layers.

    Best face shapes: All face shapes. Highlights are customizable.

    Maintenance needs: Bangs every 5–6 weeks. Color every 10–12 weeks. Trim every 8–12 weeks.

    12. Long Hair with Curtain Bangs and Braids

    Curtain bangs pair beautifully with braided styles—loose braids, crown braids, or half-up braids.

    Why it works: The bangs frame the face while the braids keep the length controlled. It is a romantic, boho look.

    How to style it: Create your braid of choice. The curtain bangs are left out to frame your face. A texturizing spray adds grip.

    Best face shapes: All face shapes. The braids can be adjusted.

    Maintenance needs: Bangs every 5–6 weeks. Length every 8–12 weeks.

    13. Long Hair with Curtain Bangs and Ponytails

    High ponytails, low ponytails, or side ponytails all look better with curtain bangs left out to frame the face.

    Why it works: The bangs soften the pulled-back look. They add movement and interest to an otherwise simple style.

    How to style it: Gather your hair into a ponytail at your desired height. Leave the curtain bangs out. Define them to each side with a round brush or your fingers.

    Best face shapes: All face shapes. The ponytail height adjusts the effect.

    Maintenance needs: Bangs every 5–6 weeks. Length every 8–12 weeks.


    How to Style Curtain Bangs with Long Hair

    Daily styling for curtain bangs (2 minutes):

    1. Dampen the bangs slightly with water from a spray bottle
    2. Blow-dry using a small round brush (1–1.5 inches)
    3. For the left side, brush left and slightly away from your face
    4. For the right side, brush right and slightly away from your face
    5. The bangs should create a soft C-shape or S-shape curve

    For air-dried curtain bangs:

    1. Apply a small amount of styling cream to damp bangs
    2. Use your fingers to part them down the center
    3. Twist each side gently away from your face
    4. Let air-dry completely
    5. Separate with your fingers

    Products for curtain bangs:

    • Lightweight mousse
    • Styling cream
    • Texturizing spray
    • Dry shampoo (for texture)

    Curtain Bangs by Face Shape

    Face ShapeBest Curtain Bang StyleAvoid
    RoundStandard curtain bangs, longer sidesVery short curtain bangs
    OvalAny curtain bang styleNone
    HeartBottleneck curtain bangsVery heavy bangs
    SquareSoft rounded curtain bangsBlunt straight bangs
    OblongShorter curtain bangsVery long curtain bangs
    DiamondStandard curtain bangs, medium lengthVery short bangs

    Quick Maintenance Cheat Sheet

    StyleBang Trim FrequencyLength Trim Frequency
    Long layered with curtain bangs5–6 weeks8–12 weeks
    Long straight with curtain bangs5–6 weeks8–10 weeks
    Long wavy with curtain bangs5–6 weeks8–12 weeks
    Long curly with curtain bangs5–6 weeks8–10 weeks
    Long shag with curtain bangs5–6 weeks8–10 weeks
    Bottleneck curtain bangs4–5 weeks8–12 weeks
    Long blunt cut with curtain bangs5–6 weeks8–10 weeks
    Face-framing layers with curtain bangs5–6 weeks8–10 weeks
    Wispy curtain bangs for fine hair4–5 weeks8–10 weeks
    Thick hair with curtain bangs5–6 weeks8–10 weeks
    With highlights5–6 weeks8–12 weeks

    Final Thoughts

    Curtain bangs are one of the most forgiving and flattering bang styles for long hair. They soften your features, hide forehead lines, and grow out beautifully—no awkward in-between phase. Whether you pair them with long layers, beachy waves, curly texture, or a sleek blunt cut, curtain bangs will refresh your look without sacrificing your length. Bring photos from this guide to your stylist. Ask for curtain bangs that hit around your cheekbones. And enjoy a fresh, face-framing update that still lets you keep your long hair.

  • 14 Wash and Wear Haircuts for Women Over 60 That Save Time Without Sacrificing Style

    14 Wash and Wear Haircuts for Women Over 60 That Save Time Without Sacrificing Style

    The 14 wash and wear haircuts for women over 60 in this guide prove that looking polished does not require a thirty-minute blowout or a drawer full of hot tools. Wash and wear haircuts are designed to air-dry beautifully, hold their shape without product, and still look intentional from morning to night. As hair naturally changes with age—becoming finer, drier, or more brittle—the right cut becomes even more essential. Whether you have fine hair that needs volume, curly hair that needs definition, or straight hair that needs movement, there is a wash and wear cut here that will simplify your mornings. In this guide, we will explore fourteen wash and wear haircuts for women over 60, complete with why each works, how to style it, best face shapes, and maintenance needs.


    What Makes a Haircut Wash and Wear

    A true wash and wear haircut is cut specifically to look good with minimal effort. Key features include:

    • Strategic layering that falls naturally when air-dried
    • Texture that hides unevenness and adds interest
    • Length that works with your natural texture rather than against it
    • No need for heat styling to look finished
    • Grows out gracefully so you can stretch time between trims

    The 14 Wash and Wear Haircuts for Women Over 60

    1. Classic Wash and Wear Pixie

    The classic pixie is short on the sides and back with slightly longer layers on top. When cut correctly, it air-dries into a soft, textured shape.

    Why it works: The short length means no tangles, no knots, and almost no drying time. The top layers naturally fall into place without brushing or product.

    How to style it: Wash and condition. Towel-dry gently. Apply a pea-sized amount of lightweight mousse if desired. Use your fingers to push the top pieces in the direction you want them to dry. Air-dry completely. That is it.

    Best face shapes: Oval, heart, oblong. The height on top balances rounder faces.

    Maintenance needs: Trim every 4–6 weeks.

    2. Textured Crop

    The textured crop keeps hair very short—usually 1–2 inches—but adds choppy, piece-y ends throughout.

    Why it works: The texture hides any unevenness from air-drying. The choppiness creates the illusion of density, which is especially helpful for women with fine or thinning hair.

    How to style it: Wash and condition. Towel-dry gently. Apply a texturizing spray to damp hair. Use your fingers to tousle and lift. Air-dry. Do not use a brush. The messier, the better.

    Best face shapes: Oval, round, heart. The texture softens all face shapes.

    Maintenance needs: Trim every 5–6 weeks.

    3. Short Layered Bob

    The short layered bob falls between the ear and the chin, with soft layers throughout to create movement.

    Why it works: The layers prevent the hair from looking flat or lifeless when air-dried. The shorter length keeps the cut lightweight and fast-drying.

    How to style it: Wash and condition. Towel-dry gently. Apply a leave-in conditioner and a light mousse. Use your fingers to push the hair into place. Air-dry. The layers will naturally create soft bends and waves.

    Best face shapes: Oval, round, square. The length at the chin softens jawlines.

    Maintenance needs: Trim every 6–8 weeks.

    4. Wash and Wear Shag

    The shag cut features choppy layers throughout, with the shortest layers at the crown and longer pieces around the face.

    Why it works: The choppiness hides any air-dry imperfections. The crown volume creates lift exactly where thinning hair needs it most—without any effort.

    How to style it: Wash and condition. Towel-dry gently. Apply a texturizing spray or sea salt spray to damp hair. Use your fingers to lift at the roots. Air-dry. Do not over-brush. The choppy ends should look piece-y and intentional.

    Best face shapes: Oval, square, heart. The choppiness softens strong jawlines.

    Maintenance needs: Trim every 6–8 weeks. The lived-in look means it grows out gracefully.

    5. Chin-Length Bob with Soft Layers

    This chin-length bob has soft, blended layers throughout. The ends are not blunt—they are slightly texturized for movement.

    Why it works: The soft layers prevent the dreaded triangle shape that can happen with blunt cuts. The chin length is flattering and easy to manage.

    How to style it: Wash and condition. Towel-dry gently. Apply a smoothing cream or light gel. Use your fingers to tuck the ends under slightly as they dry. Air-dry. For extra volume, flip your head upside down for 30 seconds before it fully dries.

    Best face shapes: Oval, round, square. The chin length balances wider faces.

    Maintenance needs: Trim every 6–8 weeks.

    6. Curly Wash and Wear Crop

    For women with natural curls or waves, a short crop removes weight and allows curls to spring up with definition.

    Why it works: Curly hair is naturally wash and wear. The curls create their own shape and volume. A short crop removes weight so your curls can bounce without effort.

    How to style it: Wash with a sulfate-free shampoo. Apply a leave-in conditioner and a light curl cream to soaking wet hair. Use your fingers to scrunch upward. Air-dry. Do not brush. Do not comb. Do not diffuse unless you have extra time.

    Best face shapes: Oval, heart, round. The softness of curls flatters all.

    Maintenance needs: Trim every 8–10 weeks. Deep condition weekly.

    7. Tapered Cut with Natural Volume

    This cut keeps the sides and back very short while concentrating length and volume at the crown.

    Why it works: The short sides require no styling. The crown air-dries with natural lift. This cut is ideal for women with fine or thinning hair who want effortless volume.

    How to style it: Wash and condition. Towel-dry gently. Apply a root-lifting spray to the crown area if desired. Use your fingers to lift the crown as it dries. The sides need nothing. Air-dry completely.

    Best face shapes: Oval, round, heart. The height elongates round faces.

    Maintenance needs: Sides every 3–4 weeks. Crown every 5–6 weeks.

    8. Wash and Wear Lob (Long Bob)

    The lob hits between the chin and the collarbone. This length is long enough to pull back but short enough to air-dry in under an hour.

    Why it works: Adding subtle layers prevents the ends from looking flat when air-dried. The lob offers versatility with minimal effort.

    How to style it: Wash and condition. Towel-dry gently. Apply a leave-in conditioner and a light gel. Use your fingers to arrange the hair. Air-dry. For beachy waves, twist sections of damp hair and let them dry before separating with your fingers.

    Best face shapes: Oval, round, square. The length elongates the face.

    Maintenance needs: Trim every 6–8 weeks.

    9. Pixie with Longer Top

    This pixie keeps the back and sides short but leaves the top longer—usually 1–2 inches.

    Why it works: The longer top gives you a little more styling flexibility without adding much time. It also creates more volume at the crown when air-dried.

    How to style it: Wash and condition. Towel-dry gently. Apply a lightweight mousse or styling cream. Use your fingers to sweep the longer top to one side or push it forward. Air-dry. A tiny amount of dry shampoo at the roots adds volume.

    Best face shapes: Oval, round, heart. The longer top balances rounder faces.

    Maintenance needs: Trim every 5–6 weeks.

    10. Short Shaggy Bob

    The shaggy bob (shob) is a hybrid between a short shag and a bob. It has the choppy layers of a shag with the perimeter shape of a bob.

    Why it works: This cut gives you the volume of a shag with slightly more length than a traditional short shag. The choppy layers air-dry beautifully.

    How to style it: Wash and condition. Towel-dry gently. Apply a texturizing spray to damp hair. Use your fingers to scrunch and lift. Air-dry. The shaggier, the better.

    Best face shapes: Oval, heart, round. Crown volume balances round faces.

    Maintenance needs: Trim every 6–8 weeks.

    11. Curly Wash and Wear Bob

    A curly bob hits at the chin or shoulders. The weight of the bob pulls curls down just enough to prevent frizz.

    Why it works: This cut is perfect for women with natural curls who want definition without effort. The length keeps curls from getting too big while allowing them to air-dry beautifully.

    How to style it: Wash with a sulfate-free shampoo. Apply a leave-in conditioner and a curl cream to soaking wet hair. Use your fingers to define individual curls. Air-dry. Do not touch until completely dry. Then scrunch gently to break the cast.

    Best face shapes: Oval, heart, round. The volume at the sides balances the face.

    Maintenance needs: Trim every 8–10 weeks.

    12. Feathered Crop

    The feathered crop is a short, airy cut with soft, feather-like layers that sweep away from the face.

    Why it works: The feathered layers add movement and volume without bulk. The cut air-dries into a soft, feminine shape.

    How to style it: Wash and condition. Towel-dry gently. Apply a light mousse to damp hair. Use your fingers to direct the layers upward and back from your face. Air-dry. A touch of styling cream defines the feathered ends if desired.

    Best face shapes: Oval, heart, diamond. The softness around the face flatters almost everyone.

    Maintenance needs: Trim every 6–8 weeks.

    13. Textured Pixie for Fine Hair

    This pixie is specifically designed for very fine or thinning hair. The layers are short and dense, creating maximum volume at the crown.

    Why it works: Fine hair needs volume, not length. The short, dense layers lift at the root and stay lifted, even when air-dried.

    How to style it: Wash and condition. Towel-dry gently. Use a root-lifting spray on damp roots. Blow-dry upside down for one minute (optional, for extra volume) or simply flip your head and shake. Air-dry. Avoid heavy creams or oils.

    Best face shapes: Oval, oblong, heart. The crown volume balances longer face shapes.

    Maintenance needs: Trim every 5–7 weeks. Fine hair shows growth quickly.

    14. Low-Maintenance Wash and Wear Cut

    This is the ultimate no-fuss cut. The hair is shaped so that it falls perfectly on its own. No products required. No tools needed.

    Why it works: This cut is for women who want to think about their hair as little as possible. The layers are subtle. The ends are textured. Air-drying looks intentional.

    How to style it: Wash and condition. Towel-dry gently. Shake out your hair with your fingers. Air-dry. That is it. No products. No brushes. No tricks.

    Best face shapes: Oval, round, heart. The simplicity works on all.

    Maintenance needs: Trim every 8–10 weeks.


    How to Make Any Wash and Wear Haircut Work Better

    The products that help:

    • Lightweight mousse or foam
    • Texturizing spray
    • Dry shampoo (apply to dry roots for instant lift)
    • Leave-in conditioner (for curly hair only)
    • Sea salt spray

    The products to avoid:

    • Heavy gels and creams
    • Oils and serums (they weigh air-dried hair down)
    • Thick butters and pomades

    The techniques that work:

    • Towel-dry gently—do not rub vigorously
    • Use your fingers, not a brush
    • Flip your head upside down and shake at the roots before it fully dries
    • Do not touch your hair while it is drying (touching creates frizz)

    Quick Maintenance Cheat Sheet

    Cut TypeTrim FrequencySpecial Notes
    Classic wash and wear pixie4–6 weeksNeeds frequent upkeep
    Textured crop5–6 weeksTexture hides growth
    Short layered bob6–8 weeksEasy to maintain
    Wash and wear shag6–8 weeksLooks better grown out
    Chin-length bob with soft layers6–8 weeksGrows out well
    Curly wash and wear crop8–10 weeksDeep condition weekly
    Tapered cut with natural volumeSides: 3–4 weeks / Crown: 5–6 weeksTaper needs upkeep
    Wash and wear lob6–8 weeksVersatile length
    Pixie with longer top5–6 weeksTop can go longer
    Short shaggy bob6–8 weeksGrows out gracefully
    Curly wash and wear bob8–10 weeksDeep condition weekly
    Feathered crop6–8 weeksFeathering fades
    Textured pixie for fine hair5–7 weeksVolume fades
    Low-maintenance wash and wear8–10 weeksLooks better grown out

    Final Thoughts

    Wash and wear haircuts for women over 60 prove that you do not have to choose between looking good and saving time. The right cut respects your morning routine while still delivering style, volume, and confidence. Whether you choose a classic pixie, a textured crop, a curly bob, or the ultimate low-maintenance cut, the goal is the same: wash, dry, go. Bring photos from this guide to your stylist. Be honest about how much time you want to spend on your hair. And enjoy the freedom of walking out the door with wet hair and zero stress.

  • 11 Short Haircuts for Chubby Faces That Slim, Flatter, and Add Angles

    11 Short Haircuts for Chubby Faces That Slim, Flatter, and Add Angles

    The 11 short haircuts for chubby faces in this guide prove that short hair is not only possible for fuller faces—it can be incredibly flattering when done right. The key is choosing a cut that adds length, creates angles, and avoids adding width at the cheeks. Chubby faces (often called round faces) have beautiful, soft curves, and the right short haircut will complement those curves by elongating the face and highlighting your bone structure. Whether you prefer a pixie, a bob, or something in between, there is a short cut here that will make you feel confident and stylish. In this guide, we will explore eleven short haircuts for chubby faces, complete with why each works, how to style it, best face shapes, and maintenance needs.


    Why Short Hair Works for Chubby Faces

    Chubby or round faces have equal width and length with soft, curved edges. The goal of a flattering haircut is to add the appearance of length and create angles. Here is why short hair works:

    • Adds structure to soft facial curves
    • Creates vertical lines that elongate the face
    • Removes width at the cheeks when cut correctly
    • Highlights cheekbones and jawline
    • Lifts the face with crown volume

    The 11 Short Haircuts for Chubby Faces

    1. Angled Pixie Bob

    The angled pixie bob is shorter in the back and gradually angles longer toward the front, hitting at the chin or just below.

    Why it works: The angle creates a diagonal line that draws the eye downward, elongating a chubby face. The longer front pieces create a slimming effect.

    How to style it: Blow-dry using a round brush, curling the longer front pieces slightly under or away from your face. A side part enhances the lengthening effect.

    Best face shapes: Round, oval, square. The angle is specifically designed to add length.

    Maintenance needs: Trim every 5–7 weeks.

    2. Asymmetrical Pixie

    One side is noticeably longer than the other—usually by 1–3 inches. The asymmetry is bold and modern.

    Why it works: Asymmetry breaks up the symmetry of a chubby face, drawing the eye diagonally and creating the illusion of length and angles.

    How to style it: Style as a standard pixie. The asymmetry does the work. A deep side part on the shorter side enhances the effect.

    Best face shapes: Round, oval, heart. The diagonal line is very flattering.

    Maintenance needs: Trim every 5–6 weeks. Asymmetry loses contrast as hair grows.

    3. Textured Pixie with Height at Crown

    This pixie keeps the sides short and the crown heavily layered for maximum lift and height.

    Why it works: Height at the crown adds vertical length to a chubby face. The short sides prevent added width at the cheeks.

    How to style it: Use volumizing powder or root-lifting spray at the crown. Blow-dry the crown straight up using a small round brush. The sides need minimal styling.

    Best face shapes: Round, oval, heart. The height elongates round faces beautifully.

    Maintenance needs: Trim every 4–6 weeks. Crown volume fades as layers grow.

    4. Side-Swept Pixie with Long Bangs

    Long, side-swept bangs sweep diagonally across the forehead, blending into the pixie.

    Why it works: The diagonal line across the forehead is one of the most slimming techniques for chubby faces. The long bangs also draw attention to your eyes.

    How to style it: Blow-dry the bangs using a round brush, sweeping them across your forehead to the opposite side. The rest of the pixie stays short and textured.

    Best face shapes: Round, square, heart. The diagonal line is very flattering.

    Maintenance needs: Bangs every 3–4 weeks. Rest of cut every 5–6 weeks.

    5. Short Layered Bob with Deep Side Part

    This bob hits at the chin or just below, with soft layers throughout. The key is a deep side part rather than a center part.

    Why it works: A center part adds width to a chubby face. A deep side part creates a diagonal line across the forehead, adding length and breaking up the roundness.

    How to style it: Create a deep side part while hair is damp. Blow-dry the heavier side up and away from your face using a round brush.

    Best face shapes: Round, oval, square. The deep side part is essential.

    Maintenance needs: Trim every 6–8 weeks.

    6. Short Shag with Curtain Bangs

    The short shag features choppy layers throughout with curtain bangs parted down the middle and curving to each side.

    Why it works: The open center of curtain bangs reveals the forehead, creating vertical length. The curved sides frame the cheekbones without adding width.

    How to style it: Blow-dry the curtain bangs using a round brush, directing left to left and right to right. The rest of the shag stays textured.

    Best face shapes: Round, oval, heart. Curtain bangs are ideal for chubby faces.

    Maintenance needs: Bangs every 5–6 weeks. Rest of cut every 6–8 weeks.

    7. Tapered Cut with Volume at Crown

    This cut keeps the sides and back very short while concentrating length and volume at the crown.

    Why it works: Chubby faces need volume at the crown, not the sides. The short sides remove width, while the crown height adds length.

    How to style it: Use root-lifting spray at the crown. Blow-dry the crown straight up. The tapered sides need no styling.

    Best face shapes: Round, oval, heart. The crown height is very flattering.

    Maintenance needs: Sides every 3–4 weeks. Crown every 5–6 weeks.

    8. Chin-Length Bob with Face-Framing Layers

    This bob hits exactly at the chin with softer, longer layers around the face that start at the cheekbones.

    Why it works: Face-framing layers draw attention to your best features and create vertical lines. The chin length works when paired with a deep side part.

    How to style it: Blow-dry using a round brush, directing the face-framing pieces away from your face.

    Best face shapes: Round, oval, square. The layers soften while adding length.

    Maintenance needs: Trim every 6–8 weeks.

    9. Short Spiky Pixie

    This pixie features short, spiky pieces on top created with styling product. The sides are very short or tapered.

    Why it works: The spikes add height and vertical lines that elongate a chubby face. The short sides prevent added width.

    How to style it: Apply styling wax or paste to dry hair. Use your fingers to pull pieces upward into spikes. No blow-dryer needed.

    Best face shapes: Round, oval, heart. The height flatters round faces.

    Maintenance needs: Trim every 4–5 weeks. Spikes lose structure as hair grows.

    10. Short Curly Cut with Height

    For women with natural curls, this cut keeps curls short (2–4 inches) with volume concentrated at the crown.

    Why it works: Curls naturally add volume. Keeping that volume at the crown rather than the sides elongates a chubby face. The height lifts the entire face.

    How to style it: On soaking wet hair, apply curl cream. Scrunch upward. Diffuse upside down for maximum crown volume. Do not brush.

    Best face shapes: Round, oval, heart. Curls are very forgiving and flattering.

    Maintenance needs: Trim every 6–8 weeks. Deep condition weekly.

    11. Low-Maintenance Wash-and-Wear Pixie

    This pixie is shaped so that air-drying looks intentional. The crown has subtle volume, and the sides are kept short.

    Why it works: Not every woman wants to spend time styling. This cut respects that while still adding the crown height and short sides that flatter chubby faces.

    How to style it: Wash and condition. Towel-dry gently. Apply lightweight leave-in conditioner. Use your fingers to push the crown upward as it dries. Air-dry completely. That is it.

    Best face shapes: Round, oval, heart. The softness flatters all.

    Maintenance needs: Trim every 8–10 weeks. This cut looks better slightly grown out.


    What to Avoid for Chubby Faces

    AvoidWhy
    Center parts at chin lengthAdds width
    Blunt bobs that hit at chinEmphasizes roundness
    Volume at the cheeksAdds unwanted width
    Very short crops with no heightNo elongation
    Heavy blunt bangsShortens the face

    What to Embrace for Chubby Faces

    EmbraceWhy
    Deep side partsCreates diagonal line
    Height at crownAdds vertical length
    Short or tapered sidesRemoves width
    Angled or asymmetrical cutsBreaks up symmetry
    Face-framing layersCreates vertical lines

    How to Style Short Hair for Chubby Faces

    The daily routine (5–7 minutes):

    1. Apply volumizing mousse or root-lifting spray to damp roots
    2. Blow-dry using a small round brush, focusing on lifting the crown
    3. For side-swept bangs: brush diagonally across forehead
    4. For curtain bangs: brush left to left, right to right
    5. Finish with dry shampoo at the roots for extra height
    6. Light hairspray to hold the lift

    Products to use:

    • Volumizing mousse
    • Root-lifting spray
    • Dry shampoo
    • Light-hold hairspray
    • Texturizing spray

    Products to avoid:

    • Heavy creams and butters
    • Oils near the roots
    • Thick gels that flatten

    Quick Maintenance Cheat Sheet

    Cut TypeTrim FrequencySpecial Notes
    Angled pixie bob5–7 weeksAngle loses definition
    Asymmetrical pixie5–6 weeksLoses contrast quickly
    Textured pixie with crown height4–6 weeksCrown volume fades
    Side-swept pixie with long bangsBangs: 3–4 weeks / Rest: 5–6 weeksBangs need attention
    Short layered bob with deep side part6–8 weeksPart does not affect trim
    Short shag with curtain bangsBangs: 5–6 weeks / Rest: 6–8 weeksCurtain bangs grow slower
    Tapered cut with crown volumeSides: 3–4 weeks / Crown: 5–6 weeksTaper needs upkeep
    Chin-length bob with face-framing6–8 weeksFace-framing grows faster
    Short spiky pixie4–5 weeksSpikes lose structure
    Short curly cut with height6–8 weeksDeep condition weekly
    Low-maintenance wash-and-wear8–10 weeksLooks better grown out

    Final Thoughts

    Chubby faces are beautiful, youthful, and full of personality. The right short haircut will complement those natural curves by adding length, angles, and structure. The key is crown height, short sides, deep side parts, and avoiding center parts at chin length. Bring photos from this guide to your stylist. Ask for volume at the crown and texture around the face. And enjoy a short cut that makes your chubby face look even more stunning.

  • 14 Long Shag Cuts That Bring Volume, Texture, and Effortless Rock-and-Roll Edge

    14 Long Shag Cuts That Bring Volume, Texture, and Effortless Rock-and-Roll Edge

    The 14 long shag cuts in this guide prove that the shag is not just for short hair. The long shag keeps your length while adding the choppy, disconnected layers, texture, and attitude that make the shag a timeless classic. With face-framing pieces, crown volume, and piece-y ends, the long shag works for every hair type—straight, wavy, curly, fine, or thick. It is the perfect cut for anyone who wants movement, edge, and a style that looks better the messier it gets. In this guide, we will explore fourteen long shag cuts, complete with why each works, how to style it, best face shapes, and maintenance needs.


    What Makes a Long Shag Different from Regular Layers

    A traditional layered cut has smooth, blended transitions between layers. A shag has disconnected, choppy layers that create intentional texture and separation. The long shag features:

    • Shorter layers at the crown for volume
    • Longer, piece-y ends that keep your length
    • Face-framing pieces often with bangs or curtain bangs
    • A lived-in, messy finish that looks intentional

    The 14 Long Shag Cuts

    1. Classic Long Shag with Curtain Bangs

    This is the blueprint for the long shag. Choppy layers throughout, curtain bangs parted down the middle, and piece-y ends that keep your length.

    Why it works: The curtain bangs soften the face while the choppy layers add volume at the crown. The long length stays intact for versatility.

    How to style it: Apply texturizing spray to damp hair. Scrunch as you blow-dry with a diffuser, or let air-dry. Define the curtain bangs by brushing left to left and right to right.

    Best face shapes: Oval, round, heart. The curtain bangs elongate round faces.

    Maintenance needs: Trim every 8–10 weeks. The shag looks better grown out.

    2. Long Shaggy Layers for Fine Hair

    This version uses softer, more blended choppy layers to add volume to fine hair without creating visible gaps.

    Why it works: Fine hair cannot handle harsh disconnected layers. This shag uses micro-layers at the crown and wispy ends to create the illusion of density.

    How to style it: Use root-lifting spray on damp hair. Blow-dry upside down for volume. Finish with dry shampoo at the roots. Avoid heavy products.

    Best face shapes: Oval, oblong, heart. Crown volume balances longer faces.

    Maintenance needs: Trim every 6–8 weeks. Fine hair shows growth faster.

    3. Long Curly Shag

    For women with natural curls or waves, the long curly shag removes weight and allows curls to spring up with definition.

    Why it works: Curly hair gets heavy and triangle-shaped without layers. The shag’s choppy layers add bounce and prevent bulk at the bottom.

    How to style it: On soaking wet hair, apply leave-in conditioner and curl cream. Scrunch upward. Diffuse or air-dry. Never brush.

    Best face shapes: All face shapes. Curls can be customized with or without bangs.

    Maintenance needs: Trim every 8–10 weeks. Deep condition weekly.

    4. Long Shag with Wispy Bangs

    Soft, wispy bangs replace traditional curtain bangs. The bangs are thin, piece-y, and graze the eyebrows.

    Why it works: Wispy bangs soften forehead lines without hiding your face. They add a romantic, feminine touch to the edgy shag.

    How to style it: Blow-dry the wispy bangs using a small round brush, keeping them soft and separated. The rest of the shag stays textured.

    Best face shapes: Oval, heart, round. The softness flatters all.

    Maintenance needs: Bangs every 3–4 weeks. Rest of hair every 8–10 weeks.

    5. Long Shag with Bottleneck Bangs

    Bottleneck bangs are narrow at the center and widen toward the cheekbones—a hybrid of curtain bangs and face-framing layers.

    Why it works: The widening effect at the cheekbones balances a pointed chin, making this ideal for heart-shaped faces.

    How to style it: Blow-dry the bangs forward and then to each side. The widest part should hit at your cheekbones.

    Best face shapes: Heart, oval, round. Ideal for heart-shaped faces.

    Maintenance needs: Bangs every 4–5 weeks. Rest of hair every 8–10 weeks.

    6. Long Shag with Heavy Crown Volume

    This cut concentrates the shortest layers at the crown, creating maximum lift and height.

    Why it works: Crown volume lifts the entire face. This is especially flattering for round faces and for women with thinning hair at the crown.

    How to style it: Use volumizing powder or backcombing at the crown. Diffuse upside down for maximum lift.

    Best face shapes: Round, oval, heart. The height elongates round faces.

    Maintenance needs: Trim every 8–10 weeks. Crown layers need refreshing.

    7. Long Shag with Choppy Face-Framing

    The face-framing pieces are cut with extra choppy, disconnected texture, while the rest of the shag is softer.

    Why it works: The contrast between the edgy face-framing pieces and the longer lengths adds visual interest. The choppiness draws attention to your eyes.

    How to style it: Define the choppy face-framing pieces separately with texturizing paste. Style the rest as usual.

    Best face shapes: Oval, heart, square. The edge flatters angular faces.

    Maintenance needs: Trim every 8–10 weeks.

    8. Long Shag with Micro Bangs

    Micro bangs sit 1–2 inches above the eyebrows. Paired with long shag layers, this is a bold, editorial look.

    Why it works: The shortness of the bangs contrasts dramatically with the long shag layers. It is high-fashion and confident.

    How to style it: Keep micro bangs pin-straight or slightly piece-y with a dab of paste. Do not curl them.

    Best face shapes: Oval, heart, diamond. Avoid if you have a round face.

    Maintenance needs: Bangs every 2–3 weeks. Rest of hair every 8–10 weeks.

    9. Long Shag with Feathered Ends

    The ends of the shag are heavily point-cut to create a feathered, wispy finish rather than blunt or piece-y ends.

    Why it works: Feathered ends are lighter and softer than traditional shag ends. This version is more romantic and feminine.

    How to style it: Blow-dry using a round brush, flicking the ends outward slightly. A light texturizing spray adds separation.

    Best face shapes: Oval, heart, round. The softness flatters all.

    Maintenance needs: Trim every 8–10 weeks. Feathered ends need refreshing.

    10. Long Shag with Side-Swept Bangs

    Side-swept bangs sweep diagonally across the forehead, blending into the choppy layers.

    Why it works: The diagonal line creates a slimming effect. Side-swept bangs are universally flattering and very low-maintenance.

    How to style it: Blow-dry the bangs using a round brush, sweeping them across your forehead to the opposite side.

    Best face shapes: Round, square, heart. The diagonal line flatters round faces.

    Maintenance needs: Bangs every 3–4 weeks. Rest of hair every 8–10 weeks.

    11. Long Shag for Thick Hair

    Thick hair needs dramatic weight removal. This shag uses disconnected layers throughout to remove bulk and prevent triangle shape.

    Why it works: Thick hair can feel heavy and unmanageable. The shag’s choppy layers lighten the load while keeping your length.

    How to style it: Use lightweight mousse. Blow-dry with a round brush or air-dry for texture. Avoid heavy creams.

    Best face shapes: Oval, square, heart. The volume is balanced.

    Maintenance needs: Trim every 6–8 weeks. Thick hair regains bulk quickly.

    12. Long Shag with Blunt Ends

    This contradicts the traditional shag. The ends are kept blunt while the internal layers are choppy. The perimeter stays full.

    Why it works: Blunt ends give the illusion of thick, healthy hair. The internal shag layers add movement without sacrificing density.

    How to style it: Blow-dry smooth using a paddle brush to emphasize the blunt line. The internal layers will create natural movement.

    Best face shapes: Oval, square, oblong. The blunt line adds width to longer faces.

    Maintenance needs: Trim every 6–8 weeks. Blunt lines show uneven growth.

    13. Long Shag with Razor Layers

    Razor cutting creates softer, more blended shag layers than shears. The ends are wispy and delicate.

    Why it works: Razor cutting removes weight gradually, creating a softer shag that works well for fine or medium hair. It also enhances wave patterns.

    How to style it: Apply texturizing spray. Air-dry or diffuse. The razor-cut ends will naturally separate.

    Best face shapes: All face shapes. The softness flatters everyone.

    Maintenance needs: Trim every 8–10 weeks.

    14. Low-Maintenance Long Shag

    This shag is cut so that air-drying looks intentional. The layers are placed to work with your natural texture, not against it.

    Why it works: Not every woman wants to diffuse or style for hours. This cut respects your time while still delivering shag volume and texture.

    How to style it: Wash and condition. Apply leave-in conditioner and sea salt spray. Scrunch. Air-dry. That is it.

    Best face shapes: All face shapes. The effortless approach flatters everyone.

    Maintenance needs: Trim every 10–12 weeks. This cut looks better slightly grown out.


    How to Style a Long Shag

    For maximum texture and volume (10 minutes):

    1. Apply texturizing spray or sea salt spray to damp hair
    2. Blow-dry using a diffuser, scrunching as you go
    3. Focus on lifting the roots at the crown
    4. Once dry, use your fingers to separate and piece out the ends
    5. Add a small amount of dry shampoo at the roots for lift
    6. Finish with a light texture spray

    For air-dried effortlessness:

    1. Apply leave-in conditioner and sea salt spray to wet hair
    2. Scrunch upward with your fingers
    3. Let air-dry completely
    4. Do not brush—use fingers only to fluff

    For fine hair:

    1. Use root-lifting spray before drying
    2. Blow-dry upside down for 2–3 minutes
    3. Avoid heavy creams and oils
    4. Dry shampoo is your best friend

    Quick Maintenance Cheat Sheet

    Cut TypeTrim FrequencySpecial Notes
    Classic long shag with curtain bangs8–10 weeksLooks better grown out
    Long shaggy layers for fine hair6–8 weeksVolume fades faster
    Long curly shag8–10 weeksDeep condition weekly
    With wispy bangsBangs: 3–4 weeks / Rest: 8–10 weeksBangs need attention
    With bottleneck bangsBangs: 4–5 weeks / Rest: 8–10 weeksShape needs upkeep
    With heavy crown volume8–10 weeksCrown needs refreshing
    With choppy face-framing8–10 weeksChoppiness fades
    With micro bangsBangs: 2–3 weeks / Rest: 8–10 weeksMost high-maintenance
    With feathered ends8–10 weeksEnds need refreshing
    With side-swept bangsBangs: 3–4 weeks / Rest: 8–10 weeksBangs need upkeep
    For thick hair6–8 weeksBulk returns quickly
    With blunt ends6–8 weeksBlunt line shows growth
    With razor layers8–10 weeksRazor edges need refreshing
    Low-maintenance long shag10–12 weeksLooks better grown out

    Final Thoughts

    The long shag is proof that you do not have to sacrifice length to have volume, texture, and edge. Whether you have fine hair that needs lift, thick hair that needs weight removal, or curly hair that needs bounce, the long shag delivers. The key is embracing the messiness—this cut is not meant to look perfect. Bring photos from this guide to your stylist. Ask for disconnected layers, piece-y ends, and the bang style that suits your face. And get ready to love hair that moves, shakes, and looks effortlessly cool.

  • 10 Curly Haircuts for Men That Embrace Texture and Elevate Style

    10 Curly Haircuts for Men That Embrace Texture and Elevate Style

    For men with natural curls, curly haircuts offer the perfect opportunity to work with your texture rather than fighting it. Curly hair has a mind of its own—it shrinks when dry, expands in humidity, and can feel unmanageable without the right cut. But the right curly haircut transforms that unpredictability into intentional style, creating shape, definition, and confidence. Whether you have tight coils, loose waves, or something in between, the key is choosing a cut that respects your curl pattern, removes bulk strategically, and makes morning styling effortless. In this guide, you’ll discover 10 curly haircuts for men, each designed to enhance your natural texture, suit your face shape, and fit your lifestyle.

    If you love the idea of textured, low-maintenance styles but want another option for managing curly hair, these wash and wear haircuts for women over 60 offer universal tips on working with natural texture that apply to anyone.


    Why the Right Curly Haircut Matters for Men

    Curly hair behaves completely differently than straight hair. Curly haircuts for men address the specific challenges of textured hair in ways that straight cuts cannot. Here’s why a specialized approach is essential:

    • Prevents triangle head – Without proper layering, curly hair widens at the bottom. Strategic cutting creates a tapered, masculine silhouette
    • Reduces bulk and weight – Curly hair can feel heavy and dense. The right cut removes interior bulk while preserving shape
    • Defines curl pattern – Certain cutting techniques (like dry cutting or curl-by-curl) enhance natural curl formation
    • Minimizes shrinkage frustration – Curly hair can shrink 50–75% when dry. The right cut accounts for this so you get the length you expect
    • Simplifies daily routine – A well-cut curly style requires minimal product and no heat styling
    • Works with your growth pattern – A skilled barber or stylist cuts according to how your curls fall, not against them

    The 10 Curly Haircuts for Men

    1. Classic Tapered Curly Cut

    Why it works: The classic tapered curly cut keeps length on top (2–4 inches when dry) while the sides and back are tapered gradually from short to shorter. The taper removes bulk from the sides—where curly hair often looks widest—while leaving enough length on top to show off your curl pattern. This is the most versatile and universally flattering curly cut for men.

    How to style it: Apply leave-in conditioner and curl cream to soaking wet hair. Use a wide-tooth comb to distribute products evenly. Scrunch vigorously with a microfiber towel. Air-dry completely or use a diffuser on low heat. Once dry, do not touch—breaking the cast of the products too early creates frizz. For extra definition, use a curl defining gel applied to wet hair.

    Best face shapes: Oval, square, heart (the taper slims rounder faces)

    Maintenance needs: Trim every 4–6 weeks for the taper; top can go 6–8 weeks between trims.

    For men with curly hair who want even more volume and definition, these short hairstyles for thin fine hair offer opposite-end inspiration for density concerns.


    2. Curly Fade (Skin Fade with Curls on Top)

    Why it works: The curly fade combines a high, mid, or low skin fade on the sides and back with longer curls on top. The contrast between the clean, shaved fade and the voluminous curls is striking and modern. This cut is perfect for men who want a sharp, barbered look that still celebrates their natural texture.

    How to style it: Apply curl-enhancing mousse to damp hair on top only. Scrunch and diffuse or air-dry. The faded sides require no styling—they’re shaved. For maximum definition, use a curl gel and let the curls air-dry completely. Once dry, pick out the roots gently for added height. The fade should be maintained weekly with home clippers between barber visits.

    Best face shapes: Oval, square, diamond (the fade adds sharpness to rounder faces)

    Maintenance needs: Top trim every 4–5 weeks; fade needs refreshing every 1–2 weeks


    3. Long Curly Top with Short Sides

    Why it works: This cut keeps 4–6 inches of curly length on top while the sides and back are clipped short (usually with clippers, not shaved to skin). The contrast between the long, flowing curls on top and the clean, short sides creates a balanced silhouette that works for both professional and casual settings. This is ideal for men with tight coils or loose curls who want to show off length.

    How to style it: Apply curl cream and gel to soaking wet hair. Use a denman brush or finger-coiling technique to define curl clumps. Scrunch with a microfiber towel. Air-dry completely or use a diffuser on low heat—this may take 30–45 minutes for thick curls. Once dry, fluff at the roots. The short sides need only a quick towel-dry.

    Best face shapes: Oval, heart, oblong (the top length elongates round faces)

    Maintenance needs: Top trim every 8–10 weeks; sides need refreshing every 3–4 weeks


    4. Curly Pompadour

    Why it works: The curly pompadour takes the classic pompadour shape—volume at the front, height at the crown, shorter back and sides—and adapts it for curly texture. The curls are styled upward and back, creating a masculine, retro-inspired silhouette that works beautifully with natural volume. This cut requires enough length on top (4–5 inches when dry) to create the signature height.

    How to style it: Apply volumizing mousse and curl gel to damp hair. Blow-dry using a round brush or your fingers, lifting the front sections upward and back. For maximum height, use a diffuser on low heat while lifting sections with a comb. Once dry, use a small amount of pomade or wax to define individual curl clumps and hold the shape. Finish with medium hold hairspray.

    Best face shapes: Oval, square, heart (the height adds balance to rounder faces)

    Maintenance needs: Trim every 4–5 weeks. The pompadour shape needs regular upkeep.

    For men who want soft, face-framing elements with their curly hair, these curtain bangs for women over 50 offer styling techniques that work universally for longer curly styles.


    5. Curly Mohawk (Frohawk)

    Why it works: The curly mohawk (often called a frohawk) keeps a strip of curly length from the forehead to the nape, while both sides are shaved or closely clipped. This cut is bold, edgy, and perfect for men with tight coils or afro-textured hair. The frohawk celebrates natural volume while creating a striking, sculptural silhouette.

    How to style it: Apply leave-in conditionercurl cream, and gel to soaking wet hair on the top strip only. Use a denman brush to define curl clumps. Scrunch vigorously. Air-dry or diffuse. Once dry, pick out the roots gently to create height and fullness. The shaved sides require no styling—keep them moisturized to prevent irritation. For extra drama, use a curl sponge to define individual coils.

    Best face shapes: Oval, diamond, square (the height elongates rounder faces)

    Maintenance needs: Top strip trim every 6–8 weeks; shaved sides need refreshing every 1–2 weeks


    6. Short Curly Crop

    Why it works: The short curly crop keeps curls uniformly short—typically 1–2 inches throughout the entire head. This is the lowest maintenance option for curly hair because there’s not enough length to tangle, frizz, or misbehave. The short length also minimizes shrinkage, so what you see is what you get. This cut works well for men with tight coils or looser waves.

    How to style it: Apply curl cream or leave-in conditioner to damp hair. Use your fingers to distribute. Air-dry completely—about 15–20 minutes. Do not brush or comb dry curls. For extra definition, apply a curl defining gel to wet hair before drying. The short length means you can also towel-dry vigorously and go.

    Best face shapes: Oval, square, heart (short curls soften strong jawlines)

    Maintenance needs: Trim every 4–5 weeks. Short curls need regular upkeep to maintain shape.

    For men over 50 who want effortless styles that embrace natural texture, these wash and wear haircuts for women over 60 offer universal low-maintenance ideas.


    7. Curly Quiff

    Why it works: The curly quiff is similar to the pompadour but with less height and more texture. The front is styled upward and slightly to the side, while the back and sides are tapered or faded. This cut works well for men with looser curls or waves (type 2B to 3A) who want volume without the commitment of a full pompadour.

    How to style it: Apply volumizing foam to damp hair. Blow-dry using a round brush or your fingers, directing the front section upward and to one side. For a no-heat option, apply curl cream and use a curl sponge to define texture, then finger-style the front upward. Finish with light hold hairspray or texturizing powder at the roots for lift.

    Best face shapes: Oval, heart, oblong (the quiff adds height to rounder faces)

    Maintenance needs: Trim every 4–6 weeks. The quiff shape needs regular upkeep.


    8. Curly Mullet (Modern)

    Why it works: The modern curly mullet features shorter curls on top and sides with longer curls in the back. This isn’t your father’s mullet—the modern version is softer, more textured, and intentionally disheveled. The curly mullet works beautifully for men with loose curls or waves who want an edgy, rock-and-roll look that’s made a strong comeback.

    How to style it: Apply texturizing spray and curl cream to damp hair. Scrunch vigorously. Air-dry completely. The key to the modern mullet is texture and separation—use dry wax on the ends of the back section to define individual curls. The top should have more volume; the back should be piecey and lived-in. Do not over-style.

    Best face shapes: Oval, heart, diamond (the mullet adds width to narrow faces)

    Maintenance needs: Top and sides trim every 6–8 weeks; back length can go longer between trims


    9. Tapered Curly Fringe

    Why it works: The tapered curly fringe keeps length in the front (creating a fringe that falls across the forehead) while the sides and back are tapered short. The fringe can be worn down (covering part of the forehead) or swept to the side. This cut works well for men with looser curls who want a youthful, modern look that softens the forehead.

    How to style it: Apply curl cream to damp hair. Use a wide-tooth comb to distribute. For the fringe, finger-curl sections forward. Air-dry or diffuse. Once dry, the fringe should fall naturally—do not force it to one side unless that’s your preference. Use a small amount of wax on the ends of the fringe to keep it from falling into your eyes.

    Best face shapes: Oval, heart, oblong (the fringe shortens longer faces)

    Maintenance needs: Fringe trim every 3–4 weeks; taper refresh every 4–5 weeks


    10. Coily High Top

    Why it works: The coily high top keeps significant length (4–6 inches) on top while the sides are clipped short or faded. The top is shaped into a rounded or flat-top silhouette, celebrating the natural volume and height of tight coils (type 4A to 4C). This classic cut has been a staple for men with afro-textured hair for decades—and for good reason.

    How to style it: Apply leave-in conditioner and curl defining cream to soaking wet hair on top. Use a denman brush or finger-coiling to define individual coils. For a rounded shape, pick out the roots gently to create even height. For a flat-top shape, use a comb to create a flat, even surface across the top. The sides require no styling—keep them clean-shaven or faded. Finish with sheen spray for a polished look.

    Best face shapes: Oval, square, diamond (the height adds balance to rounder faces)

    Maintenance needs: Top trim every 4–5 weeks (shape is critical); sides need refreshing every 1–2 weeks


    How to Style Curly Hair for Men (Daily Routine)

    Styling curly hair doesn’t have to be complicated. Here’s your daily roadmap to defined, frizz-free curls:

    • Never brush dry curls – Brushing dry curly hair creates frizz and destroys definition. Only use a wide-tooth comb or your fingers when hair is soaking wet and coated with conditioner.
    • Apply products to soaking wet hair – Curly hair absorbs product best when it’s dripping wet. Apply leave-in conditioner, curl cream, and gel in the shower before you even step out.
    • Use the “praying hands” method – Smooth products over your curl clumps with your palms pressed together (like praying) rather than raking with fingers. This prevents disruption of the curl pattern.
    • Scrunch, don’t rub – After applying products, scrunch sections upward toward your scalp with a microfiber towel. This encourages curl formation and removes excess water.
    • Diffuse on low heat – If you must use a blow-dryer, attach a diffuser and use low heat. Cup sections of curls in the diffuser and press toward your scalp. Hold for 15–20 seconds, then release.
    • Never touch until completely dry – Touching drying curls creates frizz. Let them dry completely (air-dry or diffuse), then gently fluff at the roots. If there’s a “cast” from gel, scrunch it out with one drop of oil on your palms.
    • Protect curls while sleeping – Sleep on a satin or silk pillowcase to reduce friction. For longer curls, tie them up loosely in a satin scarf or “pineapple” (high, loose ponytail on top of your head).
    • Refresh with water, not product – On non-wash days, mist curls with plain water from a spray bottle. Re-scrunch and go. Water reactivates the original products without buildup.

    Quick Maintenance Cheat Sheet

    Cut StyleTrim FrequencySpecial Notes
    Classic Tapered Curly CutTaper: 4–6 weeks; Top: 6–8 weeksMost versatile option
    Curly Fade (Skin Fade)Top: 4–5 weeks; Fade: 1–2 weeksFade requires weekly home upkeep
    Long Curly Top with Short SidesTop: 8–10 weeks; Sides: 3–4 weeksBest for length retention
    Curly Pompadour4–5 weeksShape requires regular upkeep
    Curly Mohawk (Frohawk)Top: 6–8 weeks; Sides: 1–2 weeksMost dramatic option
    Short Curly Crop4–5 weeksLowest maintenance
    Curly Quiff4–6 weeksGreat for looser curls
    Curly Mullet (Modern)Top/Sides: 6–8 weeks; Back: as neededEdgy, rock-and-roll style
    Tapered Curly FringeFringe: 3–4 weeks; Taper: 4–5 weeksBest for forehead coverage
    Coily High TopTop: 4–5 weeks; Sides: 1–2 weeksRequires precise shaping

    Final Thoughts

    Curly haircuts for men prove that natural texture is an asset, not a challenge. Whether you choose a classic tapered cut, a bold frohawk, or a modern curly mullet, the key is working with a barber or stylist who understands curly hair—specifically, the importance of dry cutting, curl-by-curl techniques, and strategic bulk removal. Take this guide to your next appointment, discuss which of these 10 options aligns with your curl type and lifestyle, and get ready to discover how great your natural curls can look with the right cut.

  • 18 Medium Length Hairstyles for Thick Hair That Tame Bulk and Create Shape

    18 Medium Length Hairstyles for Thick Hair That Tame Bulk and Create Shape

    For women with thick hair, medium length hairstyles offer the perfect balance between manageability and style. Thick hair can feel heavy, overwhelming, and difficult to control—especially as it grows longer. But the right medium cut removes internal bulk, adds strategic layering, and creates a shape that works with your density rather than against it. Medium length—typically falling between the chin and collarbone—is long enough to pull back but short enough to dry faster, weigh less, and stay shaped between trims. In this guide, you’ll discover 18 medium length hairstyles for thick hair, each designed to tame bulk, enhance your natural texture, and give you a style that feels light, manageable, and beautiful.

    If you love the idea of textured, manageable styles but want another option that creates effortless shape, these 17 low maintenance hairstyles for women over 50 that save time without sacrificing style offer even more inspiration for your next salon visit.


    Why Medium Length Is the Ultimate Choice for Thick Hair

    Thick hair requires a completely different approach than fine or thin hair. Medium length hairstyles address the specific challenges of dense, heavy hair in ways that longer or shorter cuts cannot. Here’s why medium length is transformative:

    • Removes significant weight – Medium length with layers can remove 30–50% of bulk, making your hair feel lighter and more comfortable
    • Reduces drying time – Thick hair can take an hour or more to dry. Medium length cuts drying time by half
    • Prevents triangle head – Without proper layering, thick hair widens at the ends. Medium layered cuts keep the silhouette narrow and shaped
    • Allows for versatile styling – Long enough for ponytails, buns, and braids, but short enough to air-dry and wear down
    • Creates movement and shape – Strategic layering adds swing and bounce, preventing the heavy, blocky look
    • Works with natural texture – Whether your thick hair is straight, wavy, or curly, medium layers enhance what you already have

    The 18 Medium Length Hairstyles for Thick Hair

    1. Long Layered Cut with Face-Framing Pieces

    Why it works: A long layered cut at medium length removes bulk from the interior while keeping length at the perimeter. The key is having layers that start at the chin and continue through the ends. Face-framing pieces add softness and prevent the cut from looking too heavy around your face.

    How to style it: Apply smoothing cream and heat protectant to damp hair. Blow-dry using a large round brush (2 inches), lifting at the roots for volume. The layers will create natural movement. For an air-dry option, apply wave spray and scrunch—the layers will prevent the dreaded puffy look. Finish with shine serum on the ends only.

    Best face shapes: All face shapes (most universally flattering for thick hair)

    Maintenance needs: Trim every 8–10 weeks. Layers hide grow-out beautifully.

    For women with thick hair who want even more volume-building options, these short hairstyles for thin fine hair that create instant density and volume offer opposite-end inspiration.


    2. Textured Lob with Internal Layers

    Why it works: A textured lob (long bob) hitting between the chin and collarbone with internal layers removes weight from the inside without changing the outer shape. This technique is ideal for thick hair because it eliminates bulk while maintaining a solid, polished perimeter. The result is hair that looks full but feels light.

    How to style it: Apply mousse to damp roots. Blow-dry using a round brush for 5–7 minutes, focusing on smoothing the outer layer. The internal layers will do the work of removing bulk. For a faster option, air-dry with texturizing spray—the internal layering prevents the “triangle” effect. Finish with dry texture spray at the roots.

    Best face shapes: Oval, heart, square (the lob length suits most face shapes)

    Maintenance needs: Trim every 6–8 weeks. The internal layers need refresher cuts to maintain weight removal.


    3. Stacked Layered Bob

    Why it works: A stacked layered bob has graduated layers in the back that create a built-in bump of volume while removing significant bulk from the nape area. For women with thick hair, the stacking prevents the dreaded “shelf” effect and keeps the back looking tidy and shaped.

    How to style it: Apply root-lifting spray to the crown area. Blow-dry the stacked back using a round brush, lifting aggressively. The front can be left longer—anywhere from chin to collarbone length. The stacked section will hold its shape without product. Finish with light hairspray to keep the stacked volume in place.

    Best face shapes: Oval, round, heart (crown volume adds balance to round faces)

    Maintenance needs: Trim every 5–6 weeks. The stacked interior loses its shape quickly if the graduation grows out.

    For women over 50 who want soft, face-framing options that pair beautifully with thick hair, these 10 curtain bangs for women over 50 offer age-defying styling tips.


    4. Inverted Bob (Angled)

    Why it works: An inverted bob is shorter in the back and longer in the front, creating an angled line that draws the eye forward. For thick hair, the inversion removes weight from the nape (where thick hair is heaviest) while keeping length in the front for styling versatility. The angle also prevents the heavy “mushroom” shape.

    How to style it: Apply volumizing foam to damp hair. Blow-dry the back section first using a round brush, directing hair downward. For the longer front pieces, use a flat iron to create a slight bend away from the face. The angle should be visible—the front should be noticeably longer than the back. Finish with shine spray.

    Best face shapes: Oval, heart, oblong (the angle elongates rounder faces)

    Maintenance needs: Trim every 6–7 weeks. The angle must be maintained, but thick hair holds the shape well.


    5. The Shag Cut (Medium Length)

    Why it works: The medium shag features heavy layering throughout, texture, and often curtain bangs. For thick hair, the shag is a revelation because the layers remove massive amounts of bulk while creating an intentional, lived-in shape. The cut is designed to look slightly messy, so perfection is not the goal.

    How to style it: Apply texturizing spray to damp hair. Blow-dry using your fingers, lifting at the roots. Once dry, use a 1-inch curling iron to create random bends in different directions throughout—this takes about 10 minutes for thick hair. Brush through with a wide-tooth comb to create connected texture. The overall effect should be lived-in and disheveled.

    Best face shapes: Oval, heart, round (texture softens angular features)

    Maintenance needs: Trim every 8–10 weeks. Shags actually improve with grow-out.


    6. Blunt Cut with Long Layers

    Why it works: A blunt cut at medium length with long, subtle layers creates the appearance of maximum density while still removing bulk. Unlike a one-length blunt cut (which can look heavy and boxy on thick hair), adding long layers allows movement and prevents the “helmet head” effect.

    How to style it: Apply smoothing cream to damp hair. Blow-dry using a flat paddle brush for 5–7 minutes, directing all hair straight down. The long layers will create natural movement without visible layer lines. For a more polished look, use a flat iron on the ends only to tuck them under slightly. Finish with shine spray for reflection off the blunt line.

    Best face shapes: Oval, oblong, square (the blunt line adds structure)

    Maintenance needs: Trim every 6–8 weeks. The blunt line shows every uneven hair, but long layers hide grow-out.


    7. Asymmetrical Medium Cut

    Why it works: An asymmetrical medium cut is longer on one side than the other—sometimes by just an inch, sometimes by several inches. For thick hair, asymmetry creates visual interest and the illusion of less bulk on the shorter side. The diagonal line also draws the eye across the face, which has a lengthening effect.

    How to style it: Apply texturizing cream to damp hair. Blow-dry using your fingers, directing the longer side forward and the shorter side back behind your ear. The key is to embrace the unevenness—don’t try to make both sides match. Finish with dry wax on the ends of the longer side for definition. Thick hair holds the asymmetric shape beautifully.

    Best face shapes: Oval, heart, diamond (asymmetry balances longer faces)

    Maintenance needs: Trim every 5–7 weeks. The angle needs occasional refreshing.


    8. Graduated Bob

    Why it works: A graduated bob features layers that increase in length from back to front, creating a soft, sloping line. Unlike a stacked bob (which has distinct tiers), a graduated bob is smoother and more subtle. For thick hair, this cut offers lift in the back and removal of bulk without harsh lines.

    How to style it: Apply root booster to damp hair, focusing on the back crown. Blow-dry using a round brush, lifting each section at a 90-degree angle. The front pieces can be blown smooth or left with a slight bend. The graduation creates natural volume without teasing, and thick hair holds the shape all day.

    Best face shapes: Oval, round, square (the graduation adds length)

    Maintenance needs: Trim every 6–8 weeks. The graduation line is forgiving but benefits from regular upkeep.


    9. Curly Medium Cut

    Why it works: For women with naturally thick, curly hair, a medium cut (shoulder-length when dry, accounting for shrinkage) is the perfect balance. Long enough to weigh down the roots slightly (preventing triangle head) but short enough to dry faster. The key is cutting it dry so the stylist can see the true curl pattern and remove bulk where needed.

    How to style it: Apply leave-in conditioner and curl cream to soaking wet hair. Use a denman brush to define curl clumps. Scrunch vigorously with a microfiber towel. Air-dry completely—do not touch while drying. Once dry, shake out at the roots with your fingers. Total active styling time: 5 minutes. Thick curls will hold definition for days.

    Best face shapes: Oval, heart, round (curls soften angular features)

    Maintenance needs: Trim every 8–10 weeks (dry cut only). Curly hair hides grow-out well.

    For women over 60 who want effortless styles that embrace natural texture, these wash and wear haircuts for women over 60 offer additional low-maintenance ideas.


    10. High-Low Layered Cut

    Why it works: A high-low layered cut keeps the interior layers short (for maximum bulk removal) while the exterior layers remain long (for length). This technique is specifically designed for very thick hair because it removes weight from the inside while preserving the outer shape. The result is hair that looks full but feels dramatically lighter.

    How to style it: Apply lightweight mousse to damp roots. Blow-dry using a round brush for 5 minutes, focusing on smoothing the exterior. The interior high-low layers will remove bulk so effectively that your hair will feel half as heavy. For an air-dry option, apply wave spray and scrunch—the interior layers prevent puffiness.

    Best face shapes: Oval, heart, oblong (crown volume adds balance)

    Maintenance needs: Trim every 6–8 weeks. The high-low structure needs regular upkeep.


    11. Wavy Medium Cut with Beach Waves

    Why it works: For women with naturally thick, wavy hair (2B to 2C), a medium cut with long layers is the ultimate wash-and-go style. The weight of medium-length hair pulls waves into a consistent, flattering pattern without frizz. This cut requires no heat and about 3 minutes of active styling time.

    How to style it: Apply wave-enhancing cream to damp hair. Scrunch section by section with a microfiber towel. Air-dry completely—about 45 minutes for thick waves. Do not touch while drying. Once dry, shake out at the roots with your fingers. For faster drying, use a diffuser on low heat for 10 minutes, then air-dry the rest. Never brush—use a wide-tooth comb only when wet.

    Best face shapes: All face shapes (most universally flattering wave pattern)

    Maintenance needs: Trim every 8–10 weeks. Waves hide grow-out beautifully.


    12. Layered Lob with Curtain Bangs

    Why it works: A layered lob paired with curtain bangs combines two thick-hair-friendly styles. The lob removes bulk through layering, and the curtain bangs add softness while removing weight from the front hairline—an area that can feel especially heavy for women with dense hair.

    How to style it: Apply sea salt spray to damp hair throughout. Blow-dry the curtain bangs using a small round brush (1 inch), rolling them away from your face. The rest of the lob can air-dry completely while you get dressed. Once dry, shake out the lob with your fingers. The bangs will be polished; the lob will be textured. This contrast is intentional and chic.

    Best face shapes: Oval, heart, round (bangs soften and slim)

    Maintenance needs: Bangs trim every 3–4 weeks; lob trim every 8–10 weeks

    For anyone considering bangs with their medium cut, these 10 curtain bangs for women over 50 offer age-defying styling tips that work beautifully at any age.


    13. Undercut Medium Length

    Why it works: An undercut removes hair from the nape and sometimes behind the ears, leaving only the top and crown. For women with extremely thick hair, an undercut can remove 40–60% of total bulk, making your hair feel dramatically lighter. The undercut is invisible when hair is down, so you get the weight relief without changing the look.

    How to style it: Style the top as you normally would—blow-dry smooth, add waves, or air-dry. The undercut requires no styling. The key benefit is how much lighter your hair will feel and how much faster it will dry. For a more dramatic look, pull your hair up into a ponytail or bun to reveal the undercut.

    Best face shapes: All face shapes (the undercut is hidden when hair is down)

    Maintenance needs: Top trim every 6–8 weeks; undercut needs refreshing every 3–4 weeks


    14. Choppy Medium Cut

    Why it works: A choppy medium cut uses visible, piecey layers that are cut with point-cutting techniques. The choppiness creates separation between strands, which is the opposite of the heavy, solid block that thick hair naturally wants to form. For thick hair, choppy layers remove bulk while adding movement and edge.

    How to style it: Apply dry wax or paste to completely dry hair. Rub between palms to warm the product, then pinch and pull small sections to create individual pieces. Focus on the ends and the crown. The choppy layers will separate naturally. Do not brush or comb. For a polished version, blow-dry smooth first, then add wax to the ends only.

    Best face shapes: Oval, heart, square (choppy texture softens strong jawlines)

    Maintenance needs: Trim every 6–8 weeks. The style looks best when ends are kept sharp.


    15. A-Line Bob

    Why it works: An A-line bob is a specific type of inverted bob where the front is significantly longer than the back—often by 2–3 inches. The line is sharp and intentional. For thick hair, the A-line removes weight from the nape (the heaviest area) while creating a dramatic, modern shape that showcases your hair’s density.

    How to style it: Apply smoothing cream to damp hair. Blow-dry using a round brush, directing the back section downward and the front sections forward. The A-line shape should be visible—the front should be noticeably longer. For a sleek finish, use a flat iron on the front pieces. Finish with shine spray to emphasize the sharp line.

    Best face shapes: Oval, heart, square (the sharp line adds structure)

    Maintenance needs: Trim every 5–6 weeks. The A-line requires precise upkeep.


    16. Textured Crop for Thick Hair

    Why it works: A textured crop at medium length (closer to chin-length) uses heavy point-cutting throughout to remove maximum bulk. For women with very thick hair who want to keep length but lose weight, this cut is ideal. The texture creates separation and movement, preventing the heavy, solid look.

    How to style it: Apply texturizing foam to damp hair. Blow-dry using your fingers, lifting at the roots. The textured ends should look piecey and separated—use wax to define individual strands. For an air-dry option, apply sea salt spray and scrunch—the texture will create natural volume without frizz.

    Best face shapes: Oval, heart, square (the crop keeps the silhouette narrow)

    Maintenance needs: Trim every 5–6 weeks. The texture needs regular refreshing.


    17. Medium Shag with Micro Bangs

    Why it works: The medium shag with micro bangs takes the classic shag and adds short, choppy bangs that sit high on the forehead. For thick hair, micro bangs remove bulk from the front hairline and create a bold, editorial look. The contrast between the heavy, textured shag and the short, precise bangs is striking.

    How to style it: Apply texturizing spray to damp hair. Blow-dry the micro bangs straight down using a fine-tooth comb. The rest of the shag should be styled in direct contrast—messy, textured, and piecey. Use dry wax on the shag sections only. The goal is clean bangs, chaotic shag.

    Best face shapes: Oval, heart, diamond (micro bangs suit strong bone structure)

    Maintenance needs: Bangs trim every 2–3 weeks (they grow out fast); shag trim every 8–10 weeks.


    18. Blunt Lob with Hidden Undercut

    Why it works: A blunt lob combined with a hidden undercut gives you the polished look of a blunt cut with the weight relief of an undercut. The undercut is hidden beneath the top layer, so when your hair is down, no one can see it. But you’ll feel the difference—your hair will be significantly lighter and will dry much faster.

    How to style it: Style the blunt lob as usual—smooth, straight, or wavy. The hidden undercut requires no styling. The key is working with a stylist who understands how to remove enough bulk without creating visible lines. When done correctly, the undercut is invisible when hair is down and a fun surprise when hair is up.

    Best face shapes: All face shapes (the undercut is hidden)

    Maintenance needs: Lob trim every 6–8 weeks; hidden undercut needs refreshing every 4–5 weeks


    How to Style Medium Length Thick Hair (Daily Routine)

    Styling thick, medium-length hair requires techniques that work with your density, not against it. Here’s your daily roadmap:

    • Apply products to soaking wet hair – Thick hair absorbs product better when wet. Apply leave-in conditioner, smoothing cream, or mousse in the shower before you even step out.
    • Use a microfiber towel or cotton t-shirt – Regular towels create friction and frizz on thick hair. Microfiber or cotton reduces drying time and smooths the cuticle.
    • Invest in a high-quality blow-dryer – Thick hair needs power. Look for a blow-dryer with at least 1800–2000 watts. A diffuser attachment is essential for curly or wavy textures.
    • Section your hair – Thick hair cannot be dried all at once. Use clips to divide your hair into 4–6 sections, and dry each section completely before moving on.
    • Use a large round brush – A 2-inch or 2.5-inch round brush creates tension and smoothness on thick hair. Smaller brushes will get tangled.
    • Consider a blow-dry brush – Tools like the Revlon One-Step or Dyson Airwrap can cut drying time in half on thick hair by combining brush and dryer.
    • Apply oil to ends only – Thick hair needs moisture at the ends but can become greasy at the roots. Apply a drop of argan or jojoba oil to the last 2–3 inches only.
    • Refresh with dry shampoo at the roots – Thick hair gets oily at the roots while remaining dry at the ends. Apply dry shampoo only to your roots and crown, not throughout.
    • Sleep in a loose bun or braid – Thick hair can become tangled overnight. A loose top bun or single braid prevents friction and preserves your style.

    Quick Maintenance Cheat Sheet

    Cut StyleTrim FrequencySpecial Notes
    Long Layered Cut with Face-Framing8–10 weeksMost versatile for thick hair
    Textured Lob with Internal Layers6–8 weeksInternal layers remove bulk
    Stacked Layered Bob5–6 weeksStacked back needs regular upkeep
    Inverted Bob (Angled)6–7 weeksAngle must be maintained
    The Shag Cut (Medium Length)8–10 weeksImproves with grow-out
    Blunt Cut with Long Layers6–8 weeksBlunt line shows uneven ends
    Asymmetrical Medium Cut5–7 weeksAngle needs occasional refreshing
    Graduated Bob6–8 weeksMost forgiving graduation
    Curly Medium Cut8–10 weeks (dry)Always cut dry for curls
    High-Low Layered Cut6–8 weeksMaximum bulk removal
    Wavy Medium Cut with Beach Waves8–10 weeksWaves hide grow-out
    Layered Lob with Curtain BangsBangs: 3–4 weeks; Lob: 8–10 weeksBangs require frequent trims
    Undercut Medium LengthTop: 6–8 weeks; Undercut: 3–4 weeksBest for weight reduction
    Choppy Medium Cut6–8 weeksKeep ends sharp
    A-Line Bob5–6 weeksSharpest angle requires upkeep
    Textured Crop for Thick Hair5–6 weeksTexture needs refreshing
    Medium Shag with Micro BangsBangs: 2–3 weeks; Shag: 8–10 weeksMicro bangs grow fast
    Blunt Lob with Hidden UndercutLob: 6–8 weeks; Undercut: 4–5 weeksHidden bulk removal

    Final Thoughts

    Medium length hairstyles for thick hair prove that dense, heavy hair doesn’t have to be a burden. The right cut—whether a stacked bob, a shag, or a layered lob—can remove significant bulk, reduce drying time, and create a shape that moves with you. The key is working with a stylist who understands how to layer thick hair properly (internal layers, point-cutting, and strategic weight removal) and committing to regular trims to maintain the shape. Take this guide to your stylist, discuss which of these 18 options aligns with your density and lifestyle, and get ready to discover how light and manageable your thick hair can feel.

  • 19 Layered Hairstyles for Women Over 50 with Thin Hair That Create Instant Density and Movement

    19 Layered Hairstyles for Women Over 50 with Thin Hair That Create Instant Density and Movement

    For women over 50 with thin hair, layered hairstyles are the single most effective way to create the illusion of volume, density, and youthful bounce. As we age, hair naturally becomes finer, thinner, and more prone to breakage. The right layers—strategically placed, carefully textured, and customized to your face shape—can transform limp, lifeless strands into a full, dynamic style that moves with you. Unlike blunt cuts that can make thin hair look even sparser, layers add endpoints that reflect light and create visual density. In this guide, you’ll discover 19 layered hairstyles for women over 50 with thin hair, each designed to maximize volume, minimize maintenance, and help you feel confident and beautiful every day.

    If you love the idea of layered, voluminous styles but want another option that creates effortless shape, these 17 low maintenance hairstyles for women over 50 that save time without sacrificing style offer even more inspiration for your next salon visit.


    Why Layers Are Essential for Thin Hair After 50

    Thin hair requires a completely different approach than thick or coarse hair. Layered hairstyles address the specific challenges of age-related thinning in ways that other cuts cannot. Here’s why layers are transformative:

    • Creates multiple endpoints – Each layer creates a new point where light reflects, making hair look denser and fuller than it actually is
    • Removes weight for lift – Thin hair is easily weighed down by its own length. Layers remove interior bulk, allowing roots to lift naturally
    • Hides scalp visibility – Strategic layering at the crown conceals thinning areas and makes the scalp less visible
    • Adds movement and swing – Fine, thin hair often hangs limply. Layers create bend and bounce with every head turn
    • Works with natural texture – Whether your hair is straight, wavy, or has a slight bend, layers enhance what you already have
    • Disguises uneven density – As hair thins unevenly, layers blend sparse areas into a cohesive, intentional style

    The 19 Layered Hairstyles for Women Over 50 with Thin Hair

    1. Short Layered Pixie

    Why it works: The short layered pixie keeps the top at 1–2 inches with tight,密集 layering throughout. The layers are cut close to the head at the crown, creating a built-in lift that requires no teasing or product. For women with significant thinning, this cut makes hair appear intentionally short and chic rather than sparse.

    How to style it: Apply volumizing mousse to damp roots only. Blow-dry using your fingers, lifting sections straight up. Once dry, run a small amount of matte paste through the top, pinching ends for piecey separation. The layers will do the work—you’re just enhancing them. Finish with texturizing powder at the crown.

    Best face shapes: Oval, heart, square (short layers soften angular features)

    Maintenance needs: Trim every 4–5 weeks. Short layers need regular upkeep to maintain lift.

    For women over 50 with thin hair who want even more volume-building options, these short hairstyles for thin fine hair that create instant density and volume offer additional cuts designed specifically for your hair type.


    2. Layered Bob (Chin-Length)

    Why it works: A layered bob at chin-length removes interior weight so hair falls naturally into place without precision styling. The layers should be soft and subtle—not choppy or disconnected—so they blend seamlessly. For thin hair, this length is ideal because it’s short enough to avoid being weighed down but long enough to tuck behind ears.

    How to style it: Apply lightweight mousse to damp roots. Blow-dry using a small round brush (1 inch), lifting each section at the root. The layers will create natural movement without curling. For an air-dry option, apply wave spray and scrunch—the layers will create texture that looks intentional, not frizzy.

    Best face shapes: All face shapes (most universally flattering option)

    Maintenance needs: Trim every 6–8 weeks. Soft layers hide grow-out beautifully.


    3. Stacked Layered Bob

    Why it works: A stacked layered bob has graduated layers in the back that create a built-in bump of volume at the crown. The stacking is cut into the interior of the hair, so the volume comes from the cut itself—not from styling. For thin hair, this is one of the most effective volume-building cuts available.

    How to style it: Apply root-lifting spray to the crown area. Blow-dry the stacked back using a round brush, lifting aggressively. The front can be left longer and softer. The stacked section will naturally lift and hold volume without product. Finish with dry texture spray at the crown.

    Best face shapes: Oval, round, heart (crown volume adds balance)

    Maintenance needs: Trim every 5–6 weeks. The stacked interior loses its lift quickly if the graduation grows out.

    For women over 50 who want soft, face-framing options that work beautifully with thin hair, these 10 curtain bangs for women over 50 offer age-defying styling tips that pair perfectly with a layered bob.


    4. Long Layered Lob

    Why it works: The long layered lob hits between the chin and collarbone. For thin hair, this length works best when the layers start at the chin and continue through to the ends. The longer length gives you versatility (ponytails, half-up styles) while the layers prevent the dreaded flat, stringy look.

    How to style it: Apply sea salt spray to damp hair throughout. Scrunch vigorously, then air-dry completely—do not touch while drying. Once dry, shake out with fingers and add dry texture spray at the roots. The layers will create natural volume and movement without heat.

    Best face shapes: All face shapes (most versatile length for thin hair)

    Maintenance needs: Trim every 8–10 weeks. The longest interval on this list.


    5. Feathered Layered Cut

    Why it works: A feathered layered cut uses very fine, delicate layers that are cut at an angle, creating a soft, feathery edge. This technique is ideal for thin hair because the feathering creates maximum light reflection at the ends, making hair look significantly thicker than it is.

    How to style it: Apply lightweight mousse to damp hair. Blow-dry using a round brush for 5 minutes, focusing on lifting the roots. The feathered ends should be blown outward (away from your face) to enhance the feathery effect. Finish with shine spray for extra reflection off the feathered tips.

    Best face shapes: Oval, heart, oblong (feathering softens longer faces)

    Maintenance needs: Trim every 6–8 weeks. The feathered ends are forgiving between trims.


    6. Shaggy Layered Cut

    Why it works: The shaggy layered cut features heavy layering throughout, with texture that’s intentionally piecey and undone. For thin hair, the shag is a revelation because the layers create surface texture that hides thinning areas. The cut is designed to look intentionally mussy, so perfection is not the goal.

    How to style it: Apply texturizing spray to damp hair. Blow-dry using your fingers, lifting at the roots. Once dry, use a 1-inch curling iron to create random bends in different directions throughout—this takes about 7 minutes. Brush through with a wide-tooth comb to create connected texture. The overall effect should be lived-in and disheveled.

    Best face shapes: Oval, heart, round (texture softens angular features)

    Maintenance needs: Trim every 8–10 weeks. Shags actually improve with grow-out.


    7. Asymmetric Layered Bob

    Why it works: An asymmetric layered bob is shorter on one side than the other—sometimes by just an inch, sometimes by several inches. For thin hair, asymmetry creates visual interest and the illusion of volume on the shorter side. The diagonal line also draws the eye across the face, which has a lengthening effect.

    How to style it: Apply texturizing cream to damp hair. Blow-dry using your fingers, directing the longer side forward and the shorter side back behind your ear. The key is to embrace the unevenness—don’t try to make both sides match. Finish with dry wax on the ends of the longer side for definition.

    Best face shapes: Oval, heart, diamond (asymmetry balances longer faces)

    Maintenance needs: Trim every 5–7 weeks. The angle needs occasional refreshing, but layers hide grow-out.


    8. Graduated Layered Bob

    Why it works: A graduated layered bob features layers that increase in length from back to front, creating a soft, sloping line. Unlike a stacked bob (which has distinct tiers), a graduated bob is smoother and more subtle. For thin hair, this cut offers lift in the back and length in the front without harsh lines.

    How to style it: Apply root booster to damp hair, focusing on the back crown. Blow-dry using a round brush, lifting each section at a 90-degree angle. The front pieces can be blown smooth or left with a slight bend. The graduation creates natural volume without teasing.

    Best face shapes: Oval, round, square (the graduation adds length)

    Maintenance needs: Trim every 6–8 weeks. The graduation line is forgiving but benefits from regular upkeep.


    9. Layered Pixie with Crown Volume

    Why it works: This cut focuses all the layering at the crown—the area where thin hair typically looks flattest. The crown layers are cut shorter and stacked, creating a built-in bump of volume that requires no teasing or backcombing. The sides and nape are tapered close to keep the focus on the crown.

    How to style it: Apply root-lifting spray directly to the crown area. Blow-dry using a small round brush, lifting the crown section straight up at a 90-degree angle. Hit with cool air for 10 seconds before releasing. The rest of the hair can be quickly smoothed. Do not put product near the crown—let the cut do the work.

    Best face shapes: Oval, oblong, heart (crown volume lengthens round faces)

    Maintenance needs: Trim every 5–6 weeks. The crown layers lose their lift quickly as they grow.


    10. Textured Layered Lob

    Why it works: A textured layered lob combines the length of a lob with heavy, piecey texture throughout. The layers are cut with point-cutting techniques that create soft, jagged edges. For thin hair, this texture prevents the hair from lying flat against the scalp and creates the illusion of density.

    How to style it: Apply sea salt spray to damp hair throughout. Scrunch vigorously, then air-dry completely. Do not touch while drying. Once dry, shake out with fingers. For a more polished version, use a 1.5-inch curling iron to create loose bends, then brush through with a wide-tooth comb.

    Best face shapes: All face shapes (most universally flattering textured option)

    Maintenance needs: Trim every 8–10 weeks. Texture hides grow-out beautifully.


    11. Wispy Layered Pixie

    Why it works: A wispy layered pixie takes the pixie to its most delicate extreme. The ends are texturized until they are almost feathery, with very fine, barely-there points at every edge. For extremely thin hair, this is the most flattering option because the wispy ends eliminate any blunt line that could emphasize sparseness.

    How to style it: Apply lightweight mousse to damp hair. Blow-dry using your fingers, lifting at the roots. Avoid heavy products like wax or pomade, which will clump the fine ends together. Finish with a micro-mist of shine spray from 12 inches away.

    Best face shapes: Oval, heart, oblong (wispiness softens longer faces)

    Maintenance needs: Trim every 5–6 weeks. The wispy ends are very forgiving between trims.


    12. Layered Bob with Side-Swept Bangs

    Why it works: Side-swept bangs are longer than traditional bangs and sweep diagonally across the forehead. When paired with a layered bob, they add softness and movement while drawing attention to your eyes. For thin hair, side-swept bangs add the illusion of density at the hairline without requiring a full fringe.

    How to style it: Apply mousse to damp hair. Blow-dry the side-swept bangs using a small round brush, directing them across your forehead and pinning them in place as they cool (this sets the sweep). The rest of the bob can be air-dried or quickly curled. Once dry, remove the pin and mist the bangs with light hairspray.

    Best face shapes: Oval, heart, round (sweeping bangs slim the face)

    Maintenance needs: Bangs trim every 3–4 weeks; bob trim every 6–8 weeks


    13. Invisible Layers Cut

    Why it works: Invisible layers (also called internal layers) are cut into the interior of the hair without changing the perimeter. This technique removes weight and adds movement while maintaining the appearance of a one-length cut. For thin hair, invisible layers are a game-changer—your hair will feel lighter and move better without looking layered.

    How to style it: Apply lightweight mousse to damp hair. Blow-dry using a round brush for 5–7 minutes, focusing on smoothing the perimeter. The invisible layers will create natural movement without any visible layer lines. For an air-dry option, apply wave spray and scrunch—the internal layers will create texture.

    Best face shapes: All face shapes (most subtle layering option)

    Maintenance needs: Trim every 8–10 weeks. Invisible layers grow out very gracefully.


    14. Layered Shag for Thin Hair

    Why it works: The layered shag for thin hair uses lighter, less dense layering than a traditional shag. The layers are cut with a razor or point-cutting to create soft, wispy texture rather than heavy chunks. This version of the shag adds movement without removing too much density.

    How to style it: Apply texturizing spray to damp hair. Blow-dry using your fingers, lifting at the roots. Once dry, use your fingers to piece out individual sections. The goal is soft, lived-in texture—not dramatic, disconnected layers. Finish with dry shampoo at the roots for grip.

    Best face shapes: Oval, heart, round (texture softens angular features)

    Maintenance needs: Trim every 8–10 weeks. The soft shag improves with grow-out.


    15. Precision-Layered Crop

    Why it works: A precision-layered crop uses very short layers (½ to 1 inch) that are cut with geometric precision. This is a modern, architectural take on the pixie that works beautifully for thin hair because the short layers stand up on their own, creating volume without product.

    How to style it: Apply matte styling paste to completely dry hair. Rub between palms, then rake through the top pushing everything forward. The precision layers will create natural height at the crown. No blow-dryer needed—the cut does all the work.

    Best face shapes: Oval, heart, square (precision cuts suit strong bone structure)

    Maintenance needs: Trim every 4 weeks. The short precision layers need frequent upkeep.


    16. Layered Mid-Length Cut

    Why it works: A layered mid-length cut falls between the shoulders and armpit—longer than a lob but shorter than traditional long hair. For thin hair, this length works when the layers start at the chin and continue through the ends. The weight of the longer length helps control flyaways while the layers add movement.

    How to style it: Apply leave-in conditioner and wave spray to damp hair. Scrunch vigorously. Air-dry completely or use a diffuser on low heat. The layers will create soft bends throughout the length. For a polished look, use a 1.5-inch curling iron on just the face-framing pieces.

    Best face shapes: All face shapes (best for those who want to keep length)

    Maintenance needs: Trim every 8–10 weeks. Mid-length layers hide grow-out well.


    17. Choppy Layered Bob

    Why it works: A choppy layered bob uses visible, piecey layers that are cut with point-cutting techniques. The choppiness creates separation between strands, which tricks the eye into seeing more hair than is actually there. For thin hair, this is one of the most effective illusion techniques.

    How to style it: Apply dry wax or paste to completely dry hair. Rub between palms to warm the product, then pinch and pull small sections to create individual pieces. Focus on the ends and the crown. The choppy layers will separate naturally. Do not brush or comb.

    Best face shapes: Oval, heart, square (choppy texture softens strong jawlines)

    Maintenance needs: Trim every 6–8 weeks. The style looks best when ends are kept sharp.


    18. Layered Bob with Curtain Bangs

    Why it works: Curtain bangs part in the middle and sweep to each side, framing the face like curtains. When paired with a layered bob, the bangs add softness and movement while drawing attention to your eyes. For thin hair, curtain bangs are especially flattering because they create the illusion of fullness around the face without requiring a dense fringe.

    How to style it: Apply lightweight mousse to damp hair. Blow-dry the curtain bangs using a small round brush, rolling them away from your face. The rest of the bob can be air-dried or quickly curled. To refresh bangs on day two, mist with water and re-roll around a large round brush with heat for 10 seconds.

    Best face shapes: Oval, heart, round (curtain bangs slim wider foreheads)

    Maintenance needs: Bangs trim every 3–4 weeks; bob trim every 6–8 weeks


    19. Tapered Layered Pixie

    Why it works: A tapered layered pixie keeps the sides and back closely tapered (fading from short to shorter), while the top is left with 2–3 inches of layered length. For thin hair, the taper removes bulk from the sides (where volume is less important) and concentrates all the layering on top (where volume matters most).

    How to style it: Apply volumizing mousse to damp roots on top. Blow-dry using a small round brush, lifting at the roots. The tapered sides need only a quick towel-dry. The top layers can be styled in multiple ways: swept to one side, spiked up, or left in soft bends.

    Best face shapes: All face shapes (most versatile pixie option for thin hair)

    Maintenance needs: Top trim every 5–6 weeks; tapered sides need professional refreshing every 4 weeks


    How to Style Layered Haircuts for Thin Hair (Daily Routine)

    Styling thin, layered hair requires the right techniques and products. Here’s your daily roadmap to maximum volume:

    • Start with volumizing products at the roots only – Apply mousse or root-lifting spray exclusively to your roots and crown. Applying to the ends is pointless on thin hair—focus entirely on the root area.
    • Blow-dry upside down – Flip your head over and blast roots with warm heat for 30 seconds before you even pick up a brush. This pre-lifts the roots and cuts drying time in half.
    • Use a small round brush – A ¾-inch or 1-inch round brush is ideal for thin hair because it allows you to wrap small sections tightly for maximum lift.
    • Cool shot is your best friend – After heating each section with a round brush, hit it with 10 seconds of cool air before releasing. This locks the bend and extends volume for hours.
    • Dry shampoo is a volume product, not just a refresher – Apply dry shampoo to clean, dry hair—not just second-day hair. It adds grip and texture that makes thin hair look twice as thick.
    • Texturizing powder over hairspray – Hairspray can weigh thin hair down. Instead, use texturizing powder at the roots for instant, gravity-defying lift.
    • Avoid heavy oils and butters – Coconut oil, argan oil, and shea butter are too heavy for thin hair. If you need shine, use a micro-mist of shine spray from 12 inches away.
    • Second-day refresh – Mist roots with sea salt spray, flip head upside down, and blow-dry on low heat for 60 seconds while scrunching with your fingers. This revives volume without re-washing.

    Quick Maintenance Cheat Sheet

    Cut StyleTrim FrequencySpecial Notes
    Short Layered Pixie4–5 weeksMost volume-building pixie
    Layered Bob (Chin-Length)6–8 weeksMost versatile option
    Stacked Layered Bob5–6 weeksBuilt-in volume needs upkeep
    Long Layered Lob8–10 weeksLongest interval on this list
    Feathered Layered Cut6–8 weeksBest for light reflection
    Shaggy Layered Cut8–10 weeksImproves with grow-out
    Asymmetric Layered Bob5–7 weeksAngle needs occasional refreshing
    Graduated Layered Bob6–8 weeksMost forgiving graduation
    Layered Pixie with Crown Volume5–6 weeksCrown focus requires upkeep
    Textured Layered Lob8–10 weeksTexture hides grow-out
    Wispy Layered Pixie5–6 weeksMost forgiving ends
    Layered Bob with Side-Swept BangsBangs: 3–4 weeks; Bob: 6–8 weeksBangs grow fastest
    Invisible Layers Cut8–10 weeksMost subtle layering
    Layered Shag for Thin Hair8–10 weeksSoft shag is forgiving
    Precision-Layered Crop4 weeksShortest interval on this list
    Layered Mid-Length Cut8–10 weeksBest for length retention
    Choppy Layered Bob6–8 weeksKeep ends sharp for best effect
    Layered Bob with Curtain BangsBangs: 3–4 weeks; Bob: 6–8 weeksMost face-framing option
    Tapered Layered PixieTop: 5–6 weeks; Sides: 4 weeksMost versatile pixie

    Final Thoughts

    Layered hairstyles for women over 50 with thin hair prove that thinning doesn’t mean sacrificing style. The right layers—whether short and precise or long and subtle—can transform limp, sparse strands into a voluminous, dynamic style that moves with you. The key is choosing a cut that works with your natural texture, your face shape, and your lifestyle, while committing to regular trims to maintain the layering structure. Take this guide to your stylist, discuss which of these 19 options aligns with your thinning pattern and daily routine, and get ready to fall in love with your hair all over again.

  • 12 Medium Length Hairstyles with Layers That Bring Volume, Shape, and Effortless Movement

    12 Medium Length Hairstyles with Layers That Bring Volume, Shape, and Effortless Movement

    The 12 medium length hairstyles with layers featured in this guide prove that you don’t need long hair to have beautiful, dynamic movement. Falling between the shoulders and collarbone, medium length hair is the ultimate versatile canvas—short enough to feel lightweight and easy to style, but long enough to pull back or experiment with different looks. Adding layers takes this already practical length to the next level, creating volume, removing bulk, and framing your face in all the right places. Whether you have fine, thick, straight, curly, or wavy hair, these twelve layered medium cuts will give you fresh energy and modern shape. In this guide, we’ll break down each style, why it works, how to style it, which face shapes it flatters, and the maintenance you’ll need to keep it looking its best.


    Why Layers Transform Medium Length Hair

    Medium length hair without layers can fall flat, look heavy, or feel shapeless. Here is why layers are essential:

    • Fine hair gains volume through strategic lift at the crown
    • Thick hair loses bulk that creates a triangle shape at the shoulders
    • Curly hair gets bounce when weight is removed
    • Straight hair gains movement that prevents a boring, blunt line

    The 12 Medium Length Hairstyles with Layers

    1. Classic Long Layers with Soft Face-Framing

    This is the most requested layered cut. Long, subtle layers start around the chin and continue to the ends, with slightly shorter pieces framing the face.

    Why it works: Long layers add movement without sacrificing length or density. The face-framing pieces soften strong jawlines and draw attention to your eyes.

    How to style it: Apply volumizing mousse to damp hair. Blow-dry using a round brush, curling the ends slightly under or away from your face. For a casual look, air-dry and finish with texturizing spray.

    Best face shapes: Oval, heart, square, oblong. The softness around the face flatters almost everyone.

    Maintenance needs: Trim every 8–10 weeks to prevent split ends and keep layers blended.

    2. Choppy Layered Shag for Medium Hair

    This version brings the popular shag cut to medium length. Choppy, disconnected layers create a textured, slightly messy look that feels modern and edgy.

    Why it works: The choppy layers add serious volume, making it ideal for fine or thinning hair. The texture also hides uneven growth between salon visits.

    How to style it: Apply texturizing spray to damp hair. Scrunch as you blow-dry with a diffuser, or let it air-dry completely. Finish with a small amount of styling paste on the ends for piece-y separation.

    Best face shapes: Oval, heart, round. The height and texture balance rounder face shapes.

    Maintenance needs: Every 6–8 weeks. The choppy layers lose definition as they grow.

    3. Curly Layered Medium Length Cut

    For women with natural curls or waves, medium length with layers is a dream. The layers remove weight, allowing curls to spring up with better definition and less bulk at the bottom.

    Why it works: Traditional one-length curly cuts create a triangle shape. Layers break up that silhouette, adding bounce and preventing the dreaded pyramid effect.

    How to style it: On soaking wet hair, apply leave-in conditioner and curl cream. Scrunch upward. Diffuse on low heat or air-dry. Once dry, shake out the roots with your fingers. Never brush—use a wide-tooth comb only when wet.

    Best face shapes: All face shapes. Curls can be customized with face-framing pieces or worn with or without bangs.

    Maintenance needs: Every 8–10 weeks. Curly hair hides damage longer, but dry ends need regular dusting.

    4. Invisible Layers for Fine Hair

    This specialized cut uses micro-layers that are so soft and blended they are almost invisible—but they create massive volume at the crown and through the mid-lengths.

    Why it works: Fine hair cannot handle harsh, choppy layers that create gaps. Invisible layers add movement and lift without removing too much density.

    How to style it: Use root-lifting spray on damp hair. Blow-dry upside down for two minutes. Flip back and use a round brush to smooth the ends slightly. Avoid heavy products—they will flatten fine hair instantly.

    Best face shapes: Oval, oblong, heart. The crown volume balances longer face shapes.

    Maintenance needs: Every 6–8 weeks. Fine hair shows growth quickly, and the volume effect fades as layers lengthen.

    5. Medium Layered Cut with Curtain Bangs

    Curtain bangs—soft, center-parted fringe that sweeps to the sides—pair perfectly with medium layered hair. The result is romantic, face-framing, and incredibly on-trend.

    Why it works: Curtain bangs soften forehead lines and high hairlines while drawing attention to your cheekbones. The long layers keep the overall look from feeling too heavy.

    How to style it: Blow-dry the curtain bangs using a round brush, rolling them away from your face on each side. The rest of the hair can be air-dried or blown out smooth. Light texturizing spray adds movement.

    Best face shapes: Oval, heart, round. The bangs elongate round faces and balance wider foreheads.

    Maintenance needs: Bangs need trimming every 3–4 weeks. The rest of the cut every 8–10 weeks.

    For more ways to soften your look with fringe, explore our guide to 10 Curtain Bangs for Women Over 50 That Soften, Frame, and Take Years Off that frame and take years off.

    6. Graduated Layered Cut (Medium Length)

    This cut is shorter in the back and gradually lengthens toward the front, ending around the collarbone. Layers throughout keep the graduation from looking severe.

    Why it works: The stacked back adds significant volume at the crown, making it excellent for fine or thinning hair. The longer front pieces frame the face beautifully.

    How to style it: Blow-dry the back using a round brush to enhance the stacked shape. The front pieces can be smoothed or lightly curled under for a polished finish.

    Best face shapes: Oval, long, heart. The volume at the back and crown balances longer face shapes.

    Maintenance needs: Every 6–8 weeks. The graduated back loses its shape quickly, so regular trims are essential.

    7. Textured Layered Cut with Bottleneck Bangs

    Bottleneck bangs are narrow at the center (like a bottle neck) and widen toward the cheekbones. Paired with textured medium layers, this cut feels bohemian and modern.

    Why it works: The widening effect at the cheekbones balances a pointed chin, making this ideal for heart-shaped faces. The textured layers add movement without bulk.

    How to style it: Spray sea salt spray on damp hair. Braid your hair into two loose braids overnight. Undo in the morning and finger-comb. Blow-dry the bottleneck bangs forward and to the sides using a small round brush.

    Best face shapes: Heart, oval, round.

    Maintenance needs: Bangs every 4 weeks. Rest of the cut every 8–10 weeks.

    8. Blunt Layered Cut (The Hidden Layer Technique)

    This cut looks blunt from the outside but has hidden internal layers that add movement. The perimeter is a clean, straight line, but the inside is carved out for lightness.

    Why it works: The blunt perimeter gives the illusion of thick, healthy ends. The internal layers prevent the hair from feeling heavy or looking like a helmet.

    How to style it: Blow-dry smooth using a paddle brush to emphasize the blunt line. Then add a drop of serum to the ends for shine. The internal layers will create natural movement without looking choppy.

    Best face shapes: Oval, square, oblong. The blunt line adds width, balancing longer face shapes.

    Maintenance needs: Every 7–9 weeks. Blunt lines show uneven growth quickly.

    9. Voluminous Layered Cut for Thick Hair

    Thick hair can become heavy and triangular at medium length. This cut removes significant internal weight through point-cutting and slide-cutting techniques.

    Why it works: Removing up to 40% of bulk eliminates the triangle shape while keeping the length. The layers are carved out internally so the perimeter stays full.

    How to style it: Use lightweight mousse and blow-dry with a large round brush. Avoid heavy creams or butters, which will weigh the cut back down. Texture spray at the ends adds separation.

    Best face shapes: Oval, square, heart.

    Maintenance needs: Every 6–8 weeks. Thick hair grows out quickly and will regain bulk within two months.

    10. Effortless Air-Dry Layered Cut

    This cut is specifically designed for women who refuse to use heat tools. The layers are cut in a way that encourages your natural wave or straight texture to look intentional when air-dried.

    Why it works: The layers are precision-cut to follow your natural growth patterns. When air-dried, the hair falls into a soft, flattering shape without any effort.

    How to style it: Wash. Towel dry gently. Apply lightweight leave-in conditioner and sea salt spray. Scrunch once. Walk away. No blow-dryer. No round brush. No stress.

    Best face shapes: Oval, heart, square. Avoid if your hair is extremely fine and straight, as it may just look flat rather than intentional.

    Maintenance needs: Every 8–10 weeks. This cut looks better slightly grown out.

    If you love low-maintenance styles, you will also enjoy these 10 Short Hairstyles for Older Women That Bring Fresh Energy and Easy Elegance that save time and look polished.

    11. Face-Framing Layers with Long Money Pieces

    Money pieces are the face-framing highlights of the haircut world—heavier, longer layers around the face that stand out from the rest of the cut. This technique uses layers, not color, to create brightness around your face.

    Why it works: The longer face-framing pieces draw attention to your eyes and cheekbones. The contrast between these longer pieces and the shorter interior layers adds dimension.

    How to style it: Curl the face-framing pieces away from your face using a 1-inch curling iron. Leave the rest of your hair straight or wavy. The contrast in texture emphasizes the layers.

    Best face shapes: Oval, heart, round. The longer pieces elongate round faces.

    Maintenance needs: Every 6–8 weeks. The face-framing pieces grow faster and lose their shape.

    12. Soft Feathered Layers

    Feathered layers are cut at an angle so they sweep away from the face. This technique creates a soft, airy, feminine silhouette that moves beautifully.

    Why it works: Feathered layers are lighter and more delicate than traditional choppy layers. They work exceptionally well for women with medium to fine hair who want movement without an edgy feel.

    How to style it: Blow-dry using a round brush, rolling the layers away from your face. A light shine spray enhances the feathered effect. Avoid heavy products that will weigh the feathers down.

    Best face shapes: Oval, heart, diamond. The softness around the face flatters almost everyone.

    Maintenance needs: Every 6–8 weeks to keep the feathering fresh.


    How to Style Medium Length Layered Hair in Under 10 Minutes

    Here is your universal daily routine:

    1. Damp hair: Apply volumizing mousse or texturizing spray from roots to ends.
    2. Blow-dry using a round brush for 5 minutes—focus on lifting the roots.
    3. Flip your head over and blast with cool air for 10 seconds to lock in volume.
    4. Optional: Use a flat iron to add slight bends to a few face-framing pieces.
    5. Finish with lightweight hairspray or texture spray.

    For air-dry days, just skip steps 2–4.


    Quick Maintenance Cheat Sheet

    Cut TypeTrim FrequencySpecial Notes
    Classic long layers8–10 weeksEasy to maintain
    Choppy shag layers6–8 weeksDefinition fades with growth
    Curly layers8–10 weeksDust dry ends regularly
    Invisible layers (fine hair)6–8 weeksVolume fades quickly
    With curtain bangsBangs: 3–4 weeks / Rest: 8–10 weeksBangs need constant attention
    Graduated layered cut6–8 weeksStacked back loses shape fast
    Bottleneck bangsBangs: 4 weeks / Rest: 8–10 weeksBangs grow into eyes
    Blunt layered cut7–9 weeksBlunt line shows uneven growth
    Voluminous cut (thick hair)6–8 weeksBulk returns quickly
    Air-dry cut8–10 weeksLooks better grown out
    Face-framing layers6–8 weeksFront pieces grow faster
    Feathered layers6–8 weeksFeathering loses shape

    Final Thoughts

    Medium length hairstyles with layers offer the perfect balance between short and long hair. The right layering technique can add volume to fine hair, remove bulk from thick hair, and give curly hair the bounce it deserves. Work with your stylist to choose the layering style that matches your hair type and lifestyle. Bring photos from this guide. And enjoy having hair that moves, swings, and frames your face beautifully every single day.

  • 20 Pixie Cut with Shaved Sides Styles That Bring Edge, Attitude, and Bold Confidence

    20 Pixie Cut with Shaved Sides Styles That Bring Edge, Attitude, and Bold Confidence

    The 20 pixie cut with shaved sides styles in this guide prove that short hair can be daring, dramatic, and deeply personal. Shaving one or both sides of a pixie cut transforms a classic short hairstyle into a statement of confidence and individuality. Whether you want a subtle undercut that hides beneath longer layers or a dramatic side shave that announces your arrival, this style works for every hair texture—straight, wavy, curly, or coily. In this guide, we will explore twenty stunning pixie cuts with shaved sides, complete with why each works, how to style it, which face shapes it flatters, and maintenance needs. From professional-friendly options to full rockstar rebellion, there is a shaved pixie here for every personality.


    Why Shaved Sides Transform a Pixie Cut

    Shaving the sides of a pixie cut does more than just look cool. Here is why this style works:

    • Removes bulk from thick hair that can feel heavy even when short
    • Adds instant edge that makes any outfit look more intentional
    • Creates contrast between the shaved section and longer top hair
    • Keeps you cool during hot weather or hot flashes
    • Highlights your bone structure by exposing the ears, temples, and neckline

    The 20 Pixie Cut with Shaved Sides Styles

    1. Classic Side Shave with Long Top

    One side of the head is shaved from the temple down to the nape. The hair on top remains long enough to sweep across to the opposite side.

    Why it works: The contrast between the shaved side and the long, textured top is dramatic but balanced. You can hide the shave by sweeping hair down, or reveal it by tucking hair behind your ear.

    How to style it: Apply texturizing paste to the long top section. Sweep it to the opposite side of the shave. The shaved side needs no product—just keep it clean.

    Best face shapes: Oval, heart, diamond. The asymmetry draws attention to your best features.

    Maintenance needs: Shaved side needs refreshing every 2–3 weeks. Top every 4–6 weeks.

    2. Double Side Shave with Textured Mohawk

    Both sides are shaved, leaving a strip of longer hair down the center of the head from forehead to nape. The top is heavily textured.

    Why it works: This is the most dramatic version of the shaved pixie. The central strip can be styled spiky, swept back, or messy.

    How to style it: Work styling wax or pomade through the center strip. Piece it upward or sweep it back. The shaved sides need no daily styling.

    Best face shapes: Oval, heart, square. Avoid if you have a very long face, as the height can exaggerate length.

    Maintenance needs: Sides every 2–3 weeks. Top every 4–5 weeks.

    3. Undercut Pixie (Shaved Nape Only)

    Only the nape of the neck is shaved, usually in a rounded or V-shape pattern. The rest of the pixie remains soft and layered.

    Why it works: The undercut is hidden when your hair is down but creates a surprising reveal when you tilt your head up or wear your hair slightly lifted. It is professional-friendly with a secret edge.

    How to style it: Style the top and sides as a classic pixie. The shaved nape needs no daily work.

    Best face shapes: All face shapes. The undercut does not affect face shape perception since it is at the back.

    Maintenance needs: Nape every 3–4 weeks. Top every 5–6 weeks.

    4. Curly Pixie with Shaved Sides

    For women with natural curls or coils, shaving the sides removes bulk while leaving the top curly and voluminous.

    Why it works: Curly hair can feel heavy and hot. Shaved sides lighten the load and create a striking contrast between the smooth shave and the textured curls on top.

    How to style it: On soaking wet top hair, apply curl cream and leave-in conditioner. Diffuse or air-dry. The shaved sides stay clean-shaven. Never brush the curly top.

    Best face shapes: Oval, heart, round. The volume on top balances rounder face shapes.

    Maintenance needs: Sides every 2–3 weeks. Top every 6–8 weeks.

    5. Disconnected Pixie with Shaved Design

    The shaved section includes a design—lines, zigzags, dots, or shapes—shaved into the hair.

    Why it works: This is wearable art. The design makes your haircut completely unique and personal.

    How to style it: Style the top as usual. The shaved design needs no daily styling—just keep the area clean and moisturized.

    Best face shapes: Oval, heart, diamond. The design draws attention, so make sure you love where your eyes are being directed.

    Maintenance needs: Every 1–2 weeks. Shaved designs grow out faster than any other cut element.

    6. Long Pixie with Shaved Sides and Swept Bangs

    The top is kept longer—sometimes several inches—with side-swept bangs that cover part of the shaved side. This softens the edgy look.

    Why it works: The long bangs create a curtain that hides and reveals the shave as you move. It is a great entry point for anyone nervous about a full side shave.

    How to style it: Blow-dry the long bangs using a round brush, sweeping them across your forehead. The rest of the top stays textured.

    Best face shapes: Oval, round, heart. The diagonal line of the bangs elongates round faces.

    Maintenance needs: Sides every 3 weeks. Bangs every 3–4 weeks. Top every 5–6 weeks.

    7. Spiky Pixie with Shaved Sides

    The top is cut into short, spiky pieces that stand up. Both sides are shaved clean.

    Why it works: The spikes add height and attitude. The shaved sides keep the overall silhouette clean and modern.

    How to style it: Work styling wax or gel through the top. Use your fingers to pull pieces upward into spikes. The shaved sides need nothing.

    Best face shapes: Oval, heart, square. The height balances rounder faces.

    Maintenance needs: Sides every 2–3 weeks. Top every 4 weeks. Spikes lose their structure quickly.

    8. Tapered Pixie with Faded Sides

    The shaved sides are faded—meaning they start very short at the bottom and gradually get longer as they go up toward the top.

    Why it works: The fade creates a smooth, professional transition between the shaved sides and the longer top. It looks more polished than a harsh disconnect.

    How to style it: Style the top as a classic pixie. The faded sides need no daily styling.

    Best face shapes: All face shapes. The fade is universally flattering.

    Maintenance needs: Fade every 2–3 weeks. Top every 5–6 weeks.

    9. Wispy Pixie with Shaved Sides for Fine Hair

    Fine hair often cannot hold a traditional pixie shape. This version keeps the top soft and wispy while shaving the sides to create the illusion of more density on top.

    Why it works: Removing hair from the sides makes the top look fuller by comparison. The wispy texture hides any sparse areas.

    How to style it: Apply volumizing mousse to damp top hair. Blow-dry using your fingers. Avoid heavy products. The shaved sides stay clean.

    Best face shapes: Oval, oblong, heart. The volume on top balances longer face shapes.

    Maintenance needs: Sides every 3 weeks. Top every 5–6 weeks.

    10. Asymmetrical Shaved Pixie

    One side is shaved completely. The other side is left longer, often reaching the ear or jawline. The top is cut at an angle.

    Why it works: The asymmetry is bold and architectural. It draws the eye diagonally across the face, creating a slimming effect.

    How to style it: Style the longer side to sweep across your forehead or tuck behind your ear. The shaved side stays clean.

    Best face shapes: Oval, heart, diamond. Avoid if you have a very round face, as asymmetry can emphasize width.

    Maintenance needs: Shaved side every 2–3 weeks. Longer side every 5–6 weeks.

    11. Shaved Pixie with Colored Top

    The shaved sides remain natural or shaved clean, while the longer top is dyed a bold color—platinum, rose gold, blue, purple, or red.

    Why it works: The contrast between the neutral shaved sides and the bright colored top is stunning. The color pops even more because there is no competing hair around it.

    How to style it: Style the colored top as usual. Use color-safe shampoo to maintain vibrancy. The shaved sides need no color maintenance.

    Best face shapes: All face shapes. The attention goes to the color, not bone structure.

    Maintenance needs: Sides every 2–3 weeks. Color touch-ups every 4–6 weeks. Top trim every 5–6 weeks.

    12. Short and Tight Shaved Pixie

    Everything is short—the top is cropped close to the head (1–2 inches), and the sides are shaved clean or faded.

    Why it works: This is the lowest maintenance option on the list. There is almost no styling required. It is cool, clean, and confident.

    How to style it: Rub a small amount of texturizing paste between your palms. Run your hands over the top. That is it.

    Best face shapes: Oval, heart, square. The short top keeps the focus on your facial features.

    Maintenance needs: Every 3–4 weeks for the entire cut. This style needs frequent trims to stay short.

    13. Shaved Pixie with Finger Waves

    The longer top is styled into vintage finger waves—a glamorous, sculpted S-shaped wave pattern. The sides remain shaved.

    Why it works: The contrast between old Hollywood glamour and modern edge is unexpected and chic. This is a special occasion or red carpet look.

    How to style it: Apply setting lotion to damp top hair. Use your fingers and a comb to create S-shaped waves. Pin in place and dry under a hooded dryer or air-dry completely. Remove pins and finger-comb gently.

    Best face shapes: Oval, heart, diamond. The waves soften angular features.

    Maintenance needs: Sides every 2–3 weeks. Top every 5–6 weeks.

    14. Textured Pixie with Hard Part and Shaved Sides

    A hard part (a shaved line) separates the longer top from the shaved sides. The top is heavily textured.

    Why it works: The hard part creates a graphic, almost architectural line. It adds structure and intentionality to the cut.

    How to style it: Style the textured top upward or to the side. The hard part line should remain visible—do not comb hair across it.

    Best face shapes: Oval, square, heart. The hard part adds structure to softer face shapes.

    Maintenance needs: Hard part and sides every 2–3 weeks. Top every 5 weeks.

    15. Long Shaggy Pixie with Shaved Sides

    The top is cut in a shag style—choppy, disconnected layers that fall loosely. The sides are shaved clean.

    Why it works: The shaggy top adds volume and movement, while the shaved sides keep the overall look from feeling too bulky or heavy.

    How to style it: Apply texturizing spray to damp top hair. Scrunch and air-dry or diffuse. The shaggy texture looks best slightly messy.

    Best face shapes: Oval, heart, round. The volume on top balances rounder faces.

    Maintenance needs: Sides every 2–3 weeks. Top every 6–8 weeks.

    16. Shaved Pixie with Baby Bangs

    The top includes micro bangs (baby bangs) that sit 1–2 inches above the eyebrows. The sides are shaved.

    Why it works: Baby bangs are daring on their own. Paired with shaved sides, the look becomes high fashion and editorial.

    How to style it: Keep baby bangs pin-straight or slightly piece-y with a dab of texturizing paste. The shaved sides stay clean. Do not curl baby bangs.

    Best face shapes: Oval, heart, diamond. Avoid if you have a round or very square face, as micro bangs can exaggerate width.

    Maintenance needs: Baby bangs every 2 weeks. Sides every 2–3 weeks. Top every 5 weeks.

    17. Curly Top with Shaved Sides and Line Design

    The curly top is left full and voluminous. One or both shaved sides include a shaved line or geometric design.

    Why it works: The softness of the curls contrasts with the sharp, graphic lines of the shaved design. It is artistic and bold.

    How to style it: Style the curly top with curl cream and diffuser. The shaved design needs no daily styling.

    Best face shapes: Oval, heart, square. The curls soften the overall look.

    Maintenance needs: Shaved design every 1–2 weeks. Curly top every 6–8 weeks.

    18. Sleek Pixie with Shaved Sides for Straight Hair

    The top is cut blunt and styled sleek and smooth. The sides are shaved. No texture, no spikes—just clean lines.

    Why it works: The sleek top is professional and polished. The shaved sides add edge without looking messy. It works beautifully in corporate environments.

    How to style it: Blow-dry the top smooth using a paddle brush. Flat-iron if needed. Apply shine serum. The shaved sides stay clean.

    Best face shapes: Oval, square, oblong. The sleekness elongates rounder faces.

    Maintenance needs: Sides every 2–3 weeks. Top every 5–6 weeks.

    19. Shaved Pixie with Grown-Out Top

    The top is intentionally grown out—several inches long—while the sides remain shaved. The top can be swept back, to the side, or left loose.

    Why it works: The contrast between the long, flowing top and the shaved sides is dramatic and romantic. It offers the versatility of longer hair with the edge of a shave.

    How to style it: The long top can be curled, straightened, braided, or pulled into a tiny ponytail. The shaved sides stay clean.

    Best face shapes: Oval, heart, diamond. The length on top elongates round faces.

    Maintenance needs: Sides every 2–3 weeks. Top every 8–10 weeks.

    20. Minimalist Shaved Pixie with Natural Texture

    The top is cut just long enough to show your natural texture—whether straight, wavy, or slightly curly. No heavy styling products. No dramatic spikes. Just clean, simple, confident hair.

    Why it works: This is the “I woke up like this” version of the shaved pixie. It proves that you do not need elaborate styling to look cool.

    How to style it: Wash. Towel dry. Run a small amount of lightweight cream or paste through the top. Go. The shaved sides stay clean.

    Best face shapes: Oval, heart, square. The simplicity puts the focus on your face.

    Maintenance needs: Sides every 2–3 weeks. Top every 5–6 weeks.


    How to Style a Pixie with Shaved Sides

    The shaved sides require almost no daily work. Focus your energy on the top:

    1. Damp top hair: Apply mousse, texturizing spray, or styling paste depending on your desired finish.
    2. Blow-dry using your fingers or a small round brush.
    3. Piece out the top using your fingers for texture.
    4. Optional: Add wax or pomade for spikes or definition.

    The shaved sides should be kept clean and moisturized. Use a gentle scrub when washing to prevent ingrown hairs.


    Quick Maintenance Cheat Sheet

    Cut TypeShaved Sides FrequencyTop Trim Frequency
    Classic side shave2–3 weeks4–6 weeks
    Double side shave (mohawk)2–3 weeks4–5 weeks
    Undercut (nape only)3–4 weeks5–6 weeks
    Curly with shaved sides2–3 weeks6–8 weeks
    Shaved design1–2 weeks5–6 weeks
    Long pixie with swept bangs3 weeks5–6 weeks
    Spiky pixie2–3 weeks4 weeks
    Faded sides2–3 weeks5–6 weeks
    Fine hair wispy3 weeks5–6 weeks
    Asymmetrical2–3 weeks5–6 weeks
    Colored top2–3 weeks5–6 weeks
    Short and tight3–4 weeks (whole cut)3–4 weeks
    Shaggy top2–3 weeks6–8 weeks
    Sleek pixie2–3 weeks5–6 weeks
    Grown-out top2–3 weeks8–10 weeks

    Final Thoughts

    A pixie cut with shaved sides is not for the faint of heart—but if you are ready, it will change how you see yourself. The confidence that comes with this cut is real. You will touch your shaved side constantly (everyone does). You will feel the breeze on your neck. And you will wonder why you waited so long.

    Work with a barber or stylist who has experience with clippers and shaved designs. Bring photos from this guide. And remember: hair grows back. The shaved sides will need constant maintenance, but the freedom is worth every trip to the salon.