Category: Mom hairstyles

  • Stop Air Drying Your Hair – Yes, It’s Actually Damaging It

    Stop Air Drying Your Hair – Yes, It’s Actually Damaging It

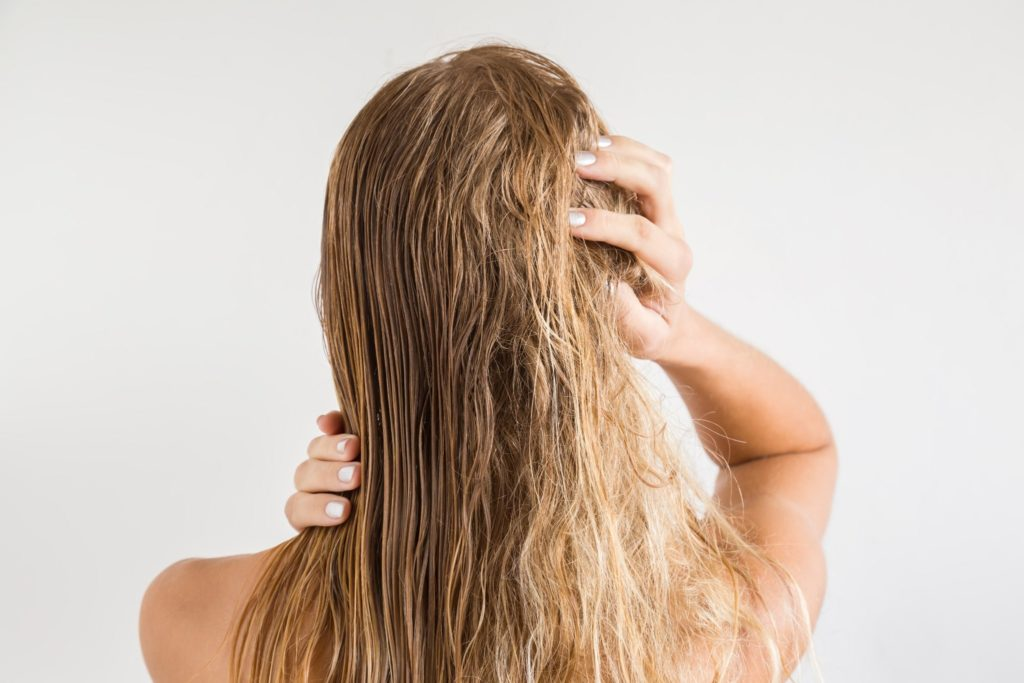
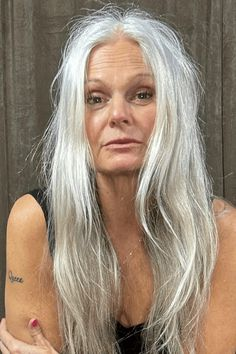
    For years, I believed I was doing my hair a massive favor by tossing my blow-dryer in the back of the closet. I followed the common “expert” advice that heat is the enemy, especially for aging, fragile hair. I thought that by letting my silver strands dry naturally while I moved about my new apartment, I was preserving its integrity. However, recent trichological research has flipped this narrative on its head. I was shocked to discover that you should stop air drying your hair – yes, it’s actually damaging it. That is the new directive for anyone concerned with hair health. At 65, realizing that my “gentle” air-drying habit was actually causing internal structural damage was a wake-up call that changed my entire post-wash routine.

    The Science of the “Hygral Fatigue”

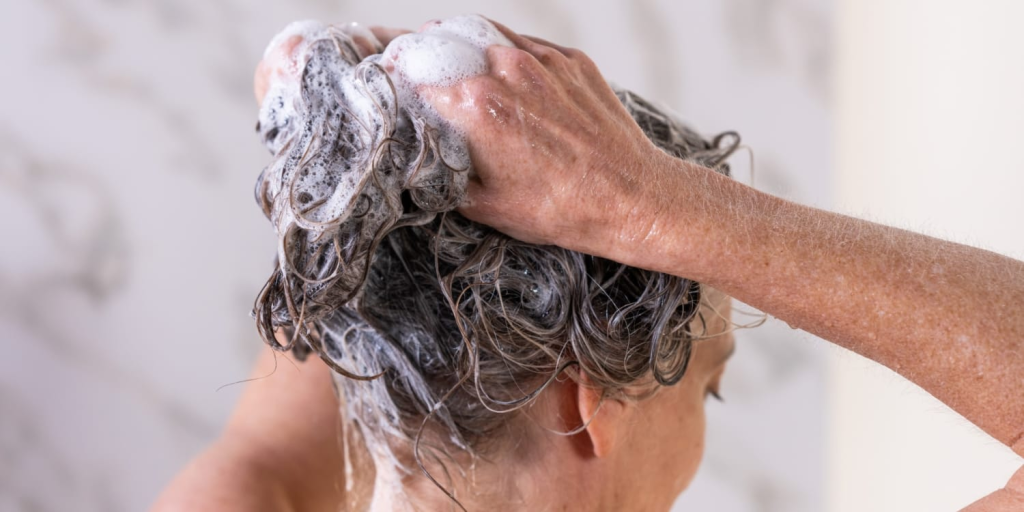
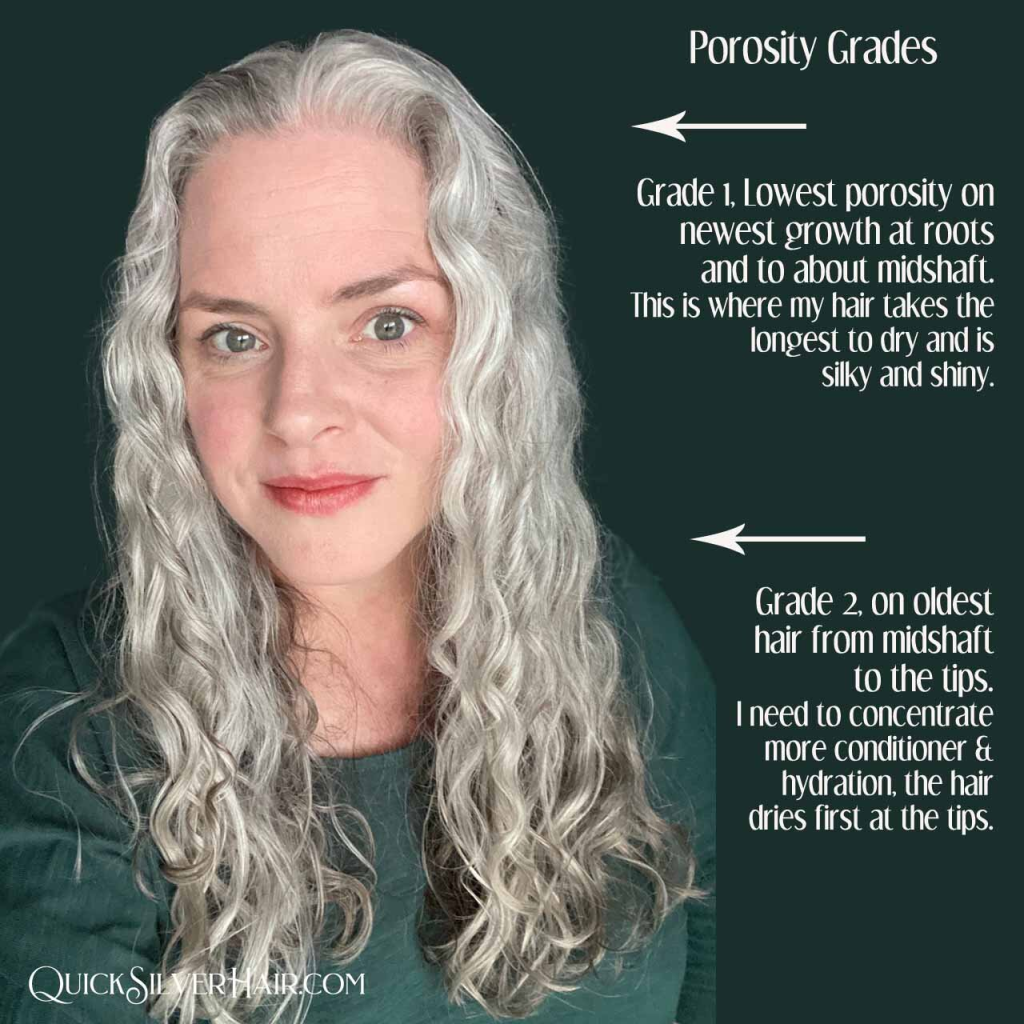
    To understand why air drying is problematic, we have to look at what happens inside the hair shaft when it stays wet for an extended period. Hair is incredibly porous, and when it is submerged in water, it can absorb up to 30% of its own weight.

    The Swelling Mechanism

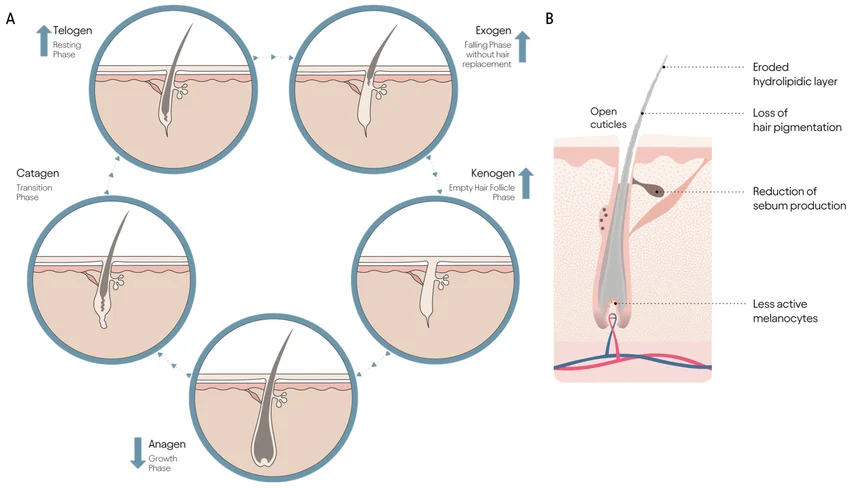
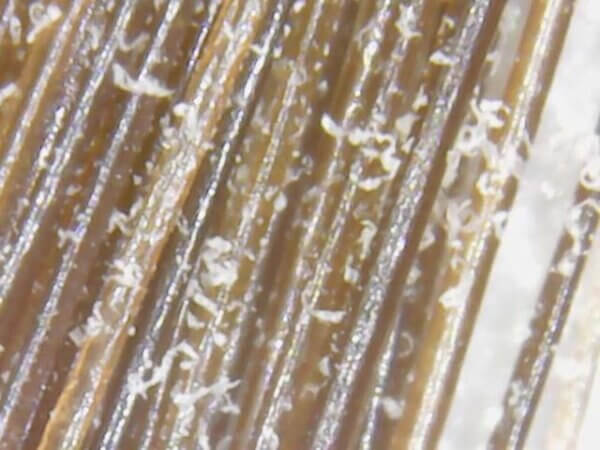
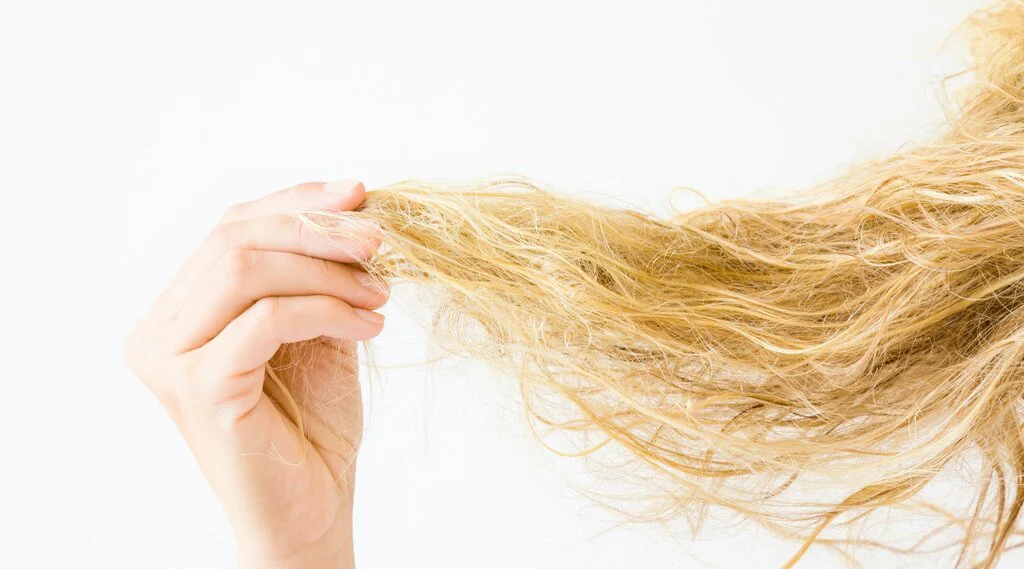
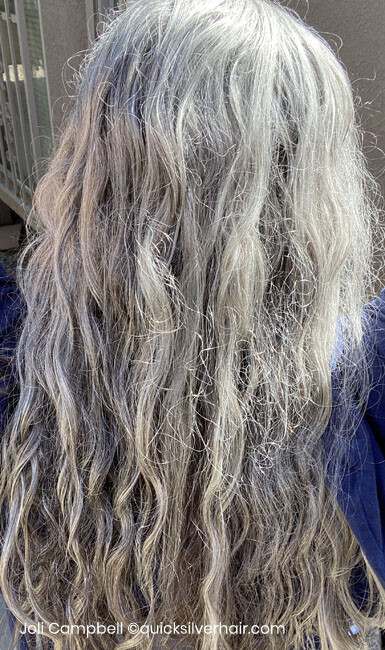
    When hair is wet, the inner part of the hair (the cortex) swells. This swelling puts immense pressure on the outer layer (the cuticle). Think of it like a sponge inside a delicate silk sleeve; as the sponge expands, it stretches the silk to its absolute limit. When you air dry, your hair stays in this “swollen” and vulnerable state for hours. This repeated swelling and deswelling is known as “hygral fatigue.” For those of us with thinning hair, this constant internal pressure causes the cuticle to lift and eventually crack, leading to the very frizz and breakage we were trying to avoid.

    The Weight of Water on Aging Follicles

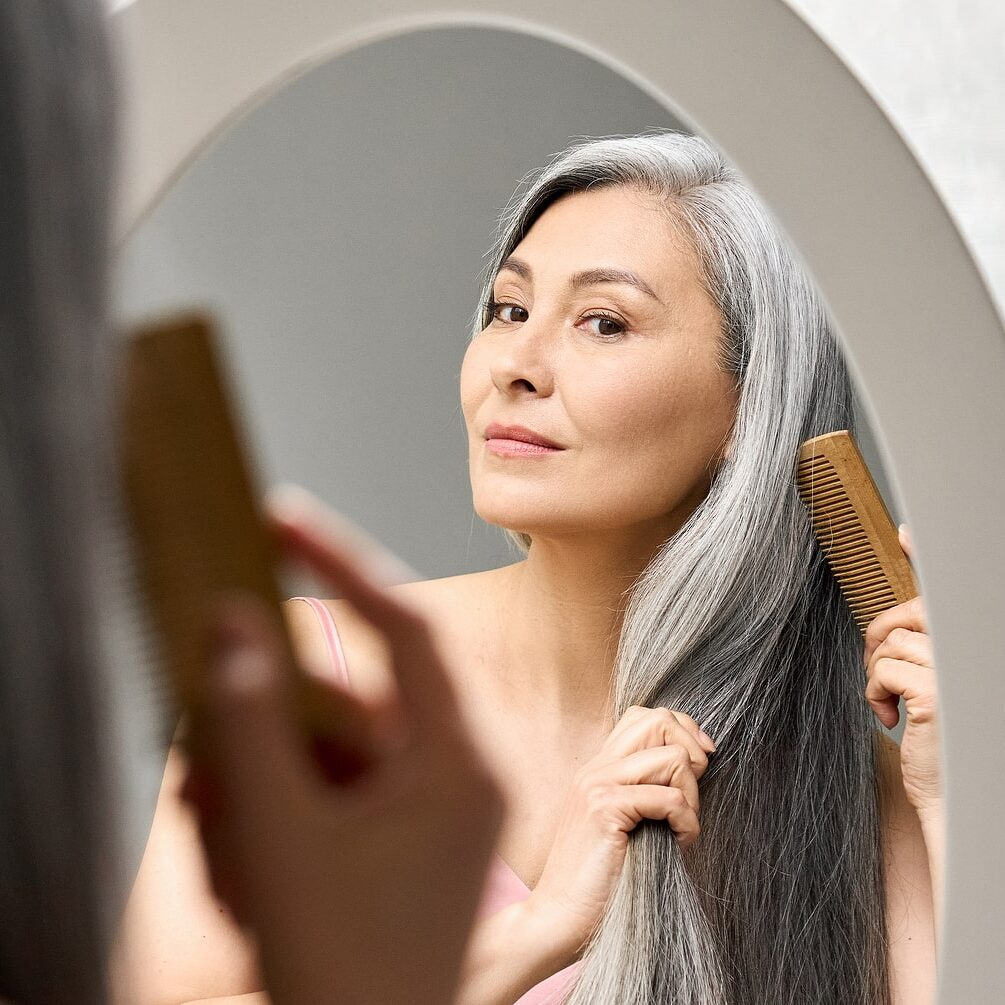
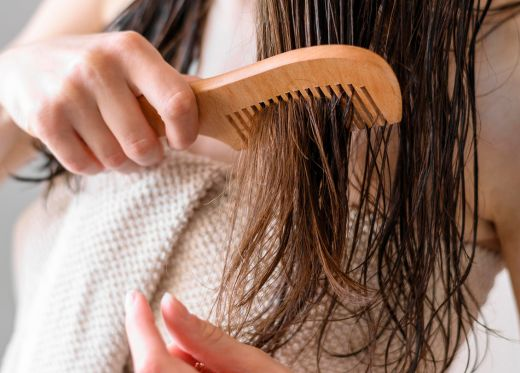
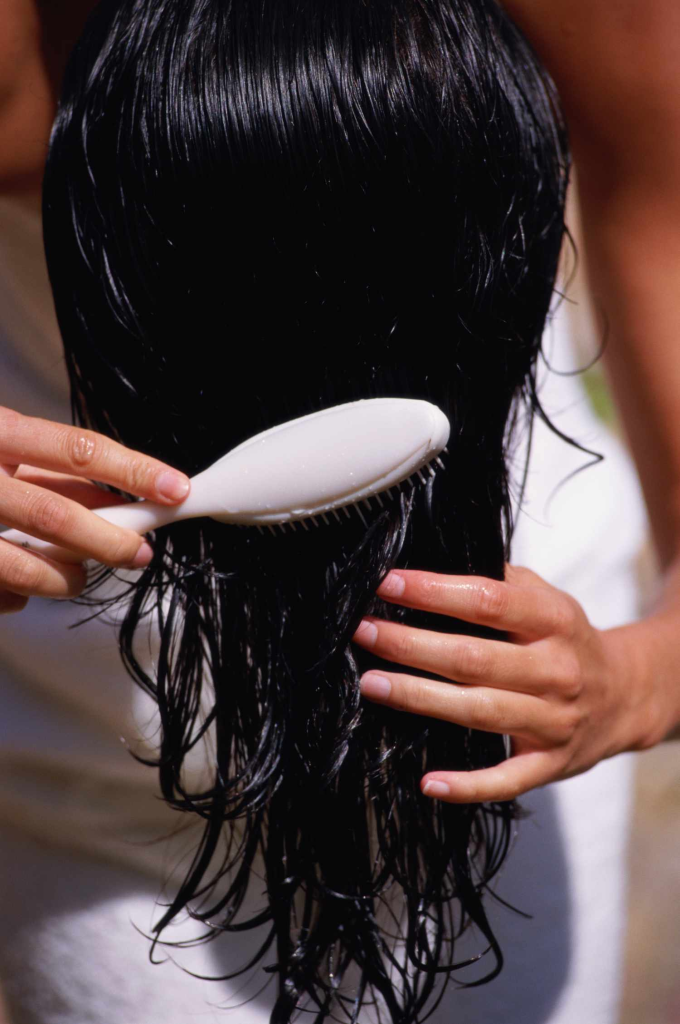
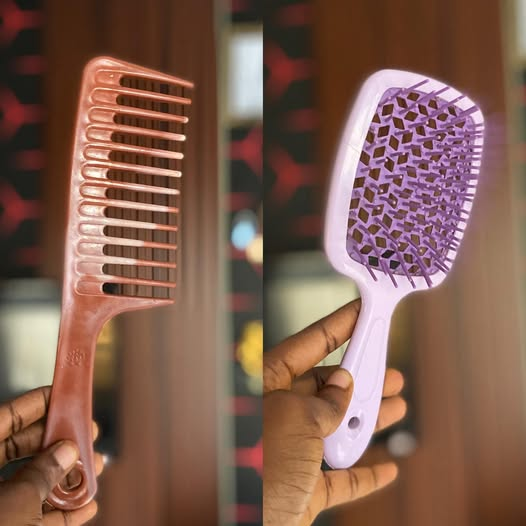
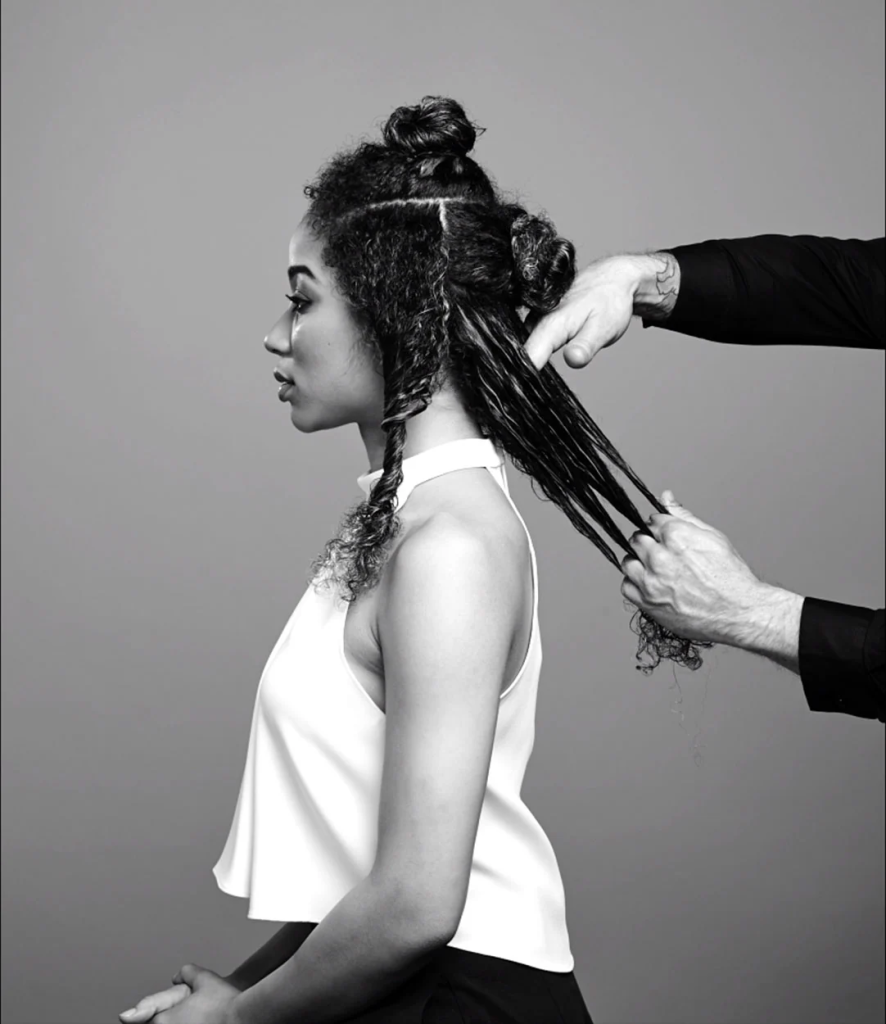
    At 65, our hair is often thinner at the root. When you let your hair air dry, the weight of the water pulls on the follicles for a much longer duration. This “heavy water” state can actually cause hair to snap at the base or contribute to a flat, lifeless look. The longer the hair stays wet, the longer the hydrogen bonds remain broken, making the hair significantly more susceptible to mechanical damage from simply brushing it or resting it against your shoulders.

    Why Blow-Drying (Done Correcty) is Safer

    The landmark study that changed my perspective was published in the Annals of Dermatology. Researchers found that while high heat causes surface damage, the internal structure of the hair—the cell membrane complex—actually remains more intact when hair is dried quickly with a blow-dryer at a safe distance.

    Protecting the Cell Membrane Complex

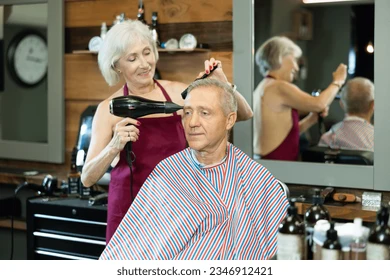
    By using a blow-dryer on a low-to-medium setting, you remove the water quickly, allowing the hair cortex to return to its normal, “dry” size before the cuticle can be permanently overstretched. The key is the “safe distance.” The study noted that holding the dryer 15cm (about 6 inches) away from the hair and keeping it in constant motion prevents the surface from overheating while protecting the interior. For my silver hair, which is already naturally drier, this “quick dry” method has actually resulted in less mid-shaft breakage than my old air-drying method ever did.

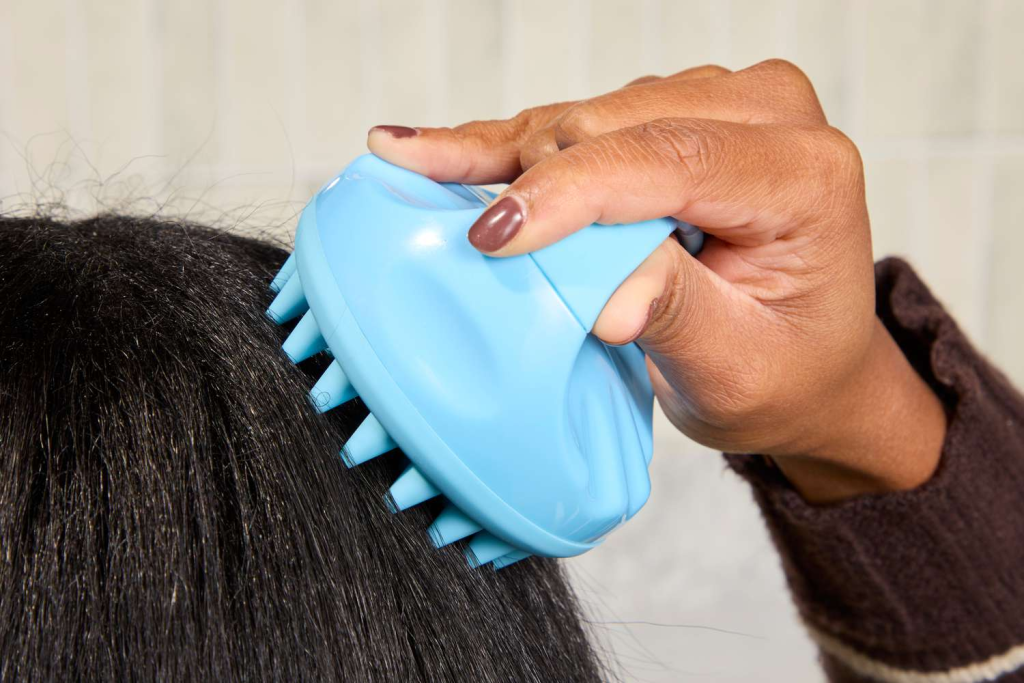
    The Scalp Health Factor: Dampness and Microbes

    Beyond the hair shaft itself, air drying can wreak havoc on your scalp health. A damp scalp is a breeding ground for problems that can eventually lead to further hair thinning.

    • Malassezia Growth: This is a fungus-like yeast that lives on everyone’s scalp. It thrives in warm, damp environments. When you air dry for four hours, you are essentially creating a greenhouse effect on your head. This can lead to dandruff, itching, and “seborrheic dermatitis,” all of which can interfere with healthy hair growth.
    • The “Cold Scalp” Effect: For seniors, keeping the scalp damp for long periods can also be uncomfortable and contribute to a feeling of being chilled, which is reason enough to speed up the process.

    How to Dry Your Hair Without the Heat Damage

    If we are going to stop air drying your hair, we have to do it in a way that doesn’t replace hygral fatigue with heat-induced “bubble hair.” Here is the 65-year-old’s guide to the perfect, healthy dry:

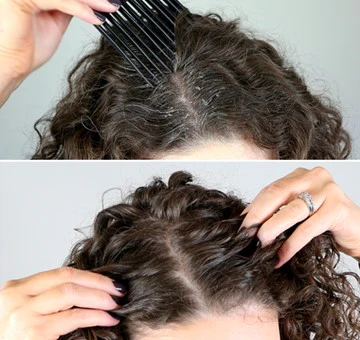
    1. Microfiber First: Never rub your hair with a traditional terry cloth towel. Instead, use a microfiber towel or an old cotton T-shirt to gently “squeeze” out 70% of the moisture. This reduces the time you’ll need to use the dryer.
    2. Heat Protectant is Non-Negotiable: Even on a low setting, aging hair needs a barrier. Use a lightweight spray that doesn’t contain heavy silicones to avoid weighing down thin strands.
    3. The “Cool” Start: Start your blow-dry on the cool or lowest heat setting. Focus on the roots first to “set” the volume and dry the scalp, then move to the lengths.
    4. Keep it Moving: Never hold the dryer in one spot. Keep it oscillating to ensure no single area of the cuticle reaches a damaging temperature.

    The Aesthetic Benefit: Shine and Seal

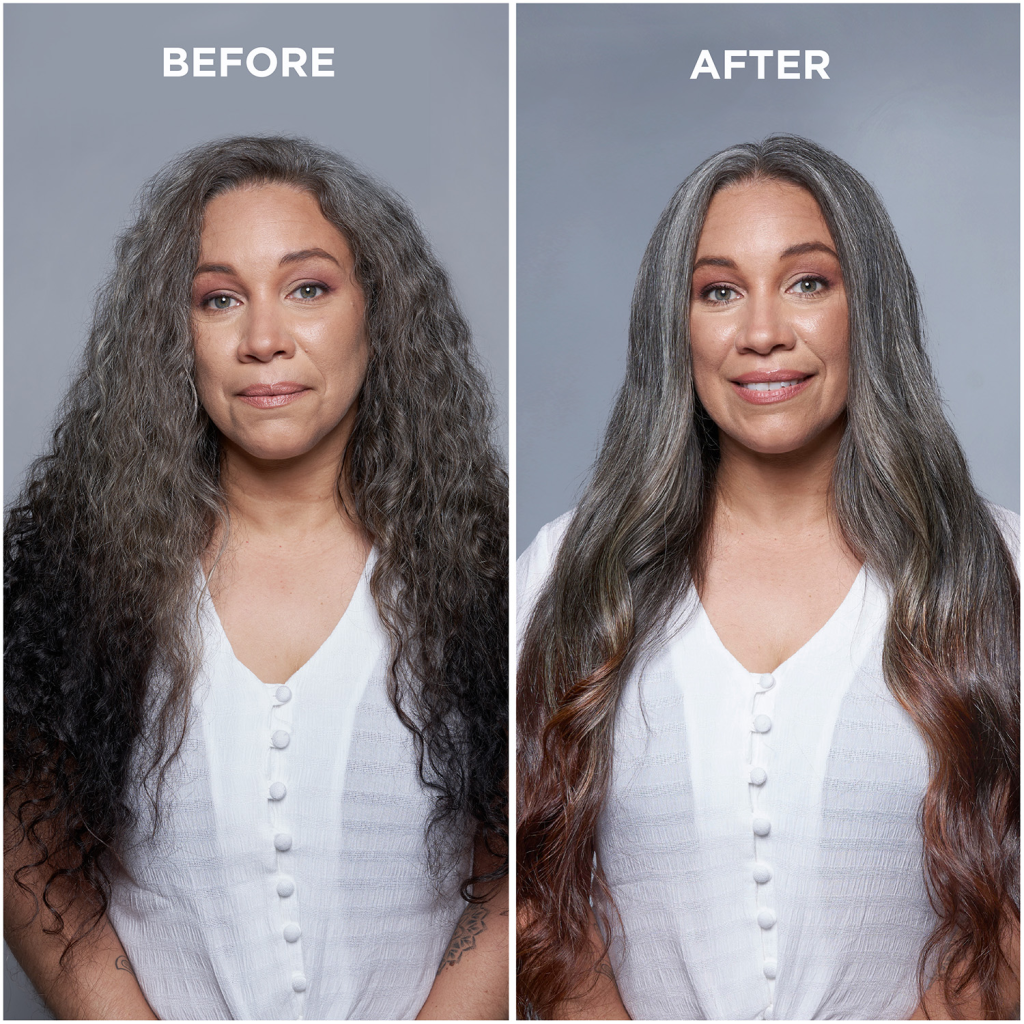
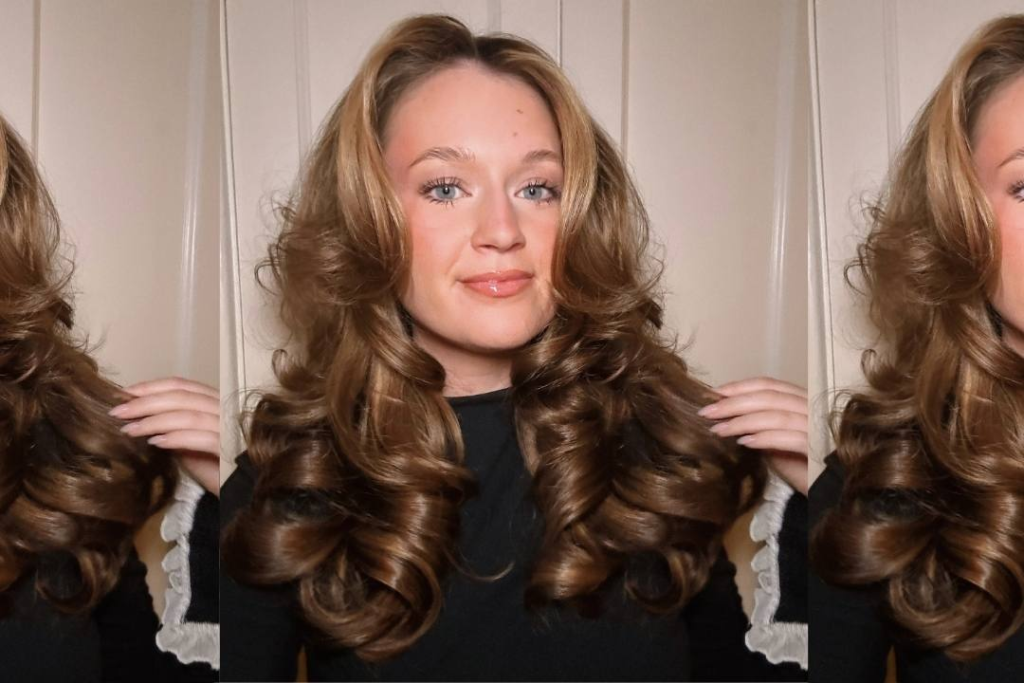
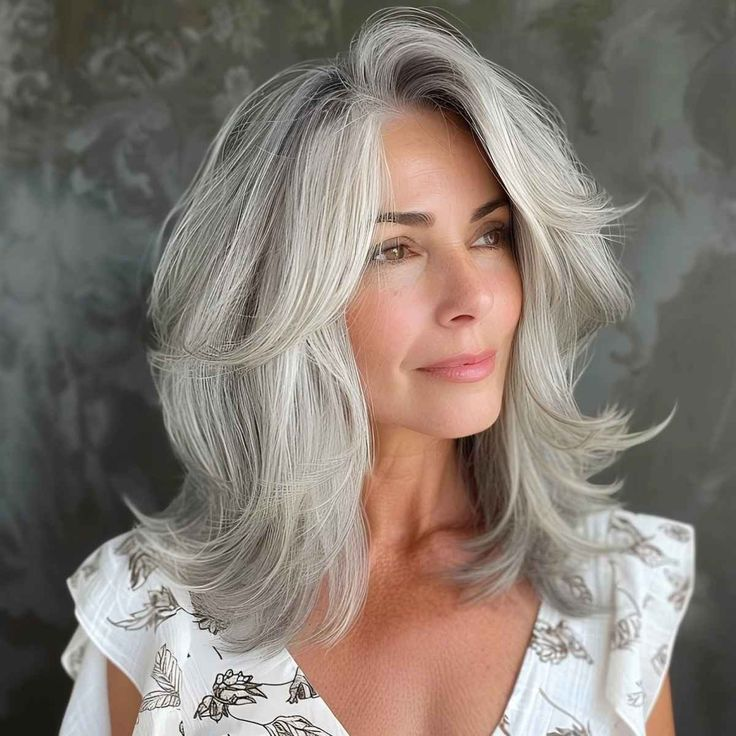
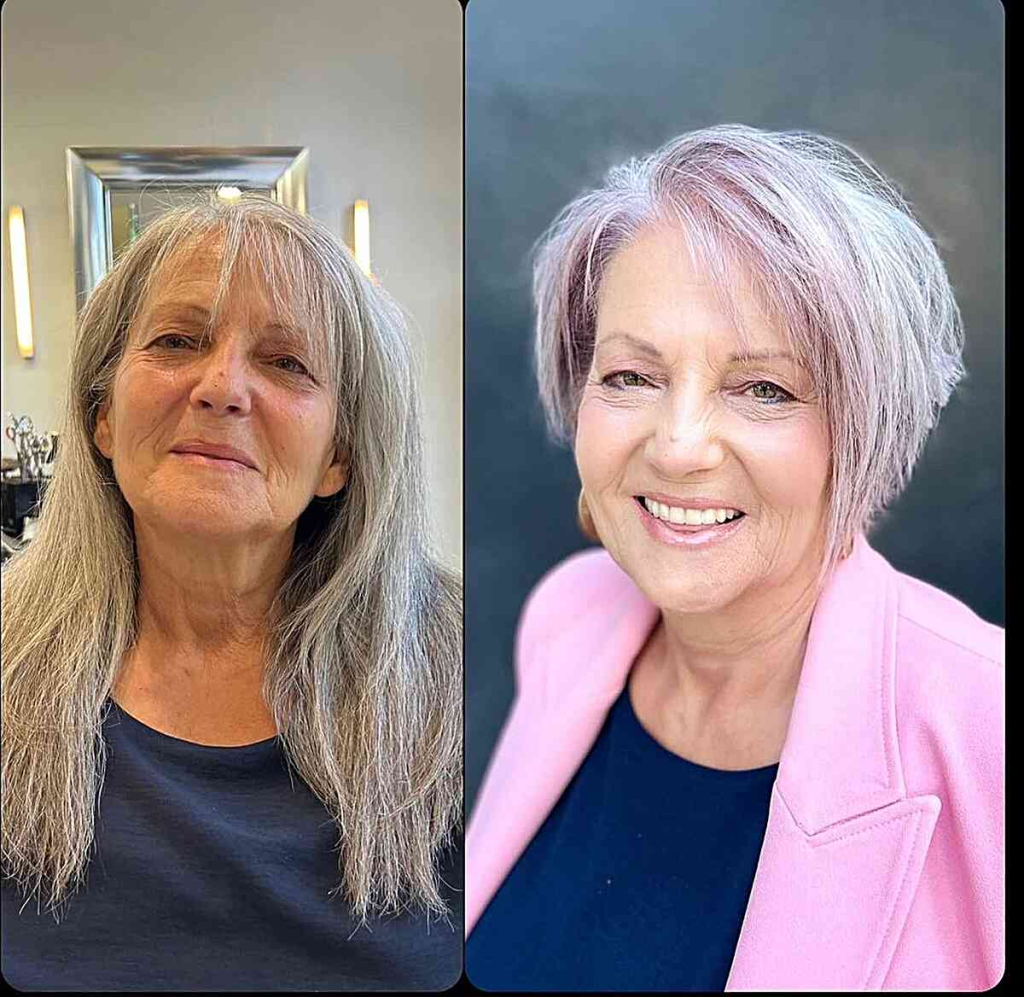
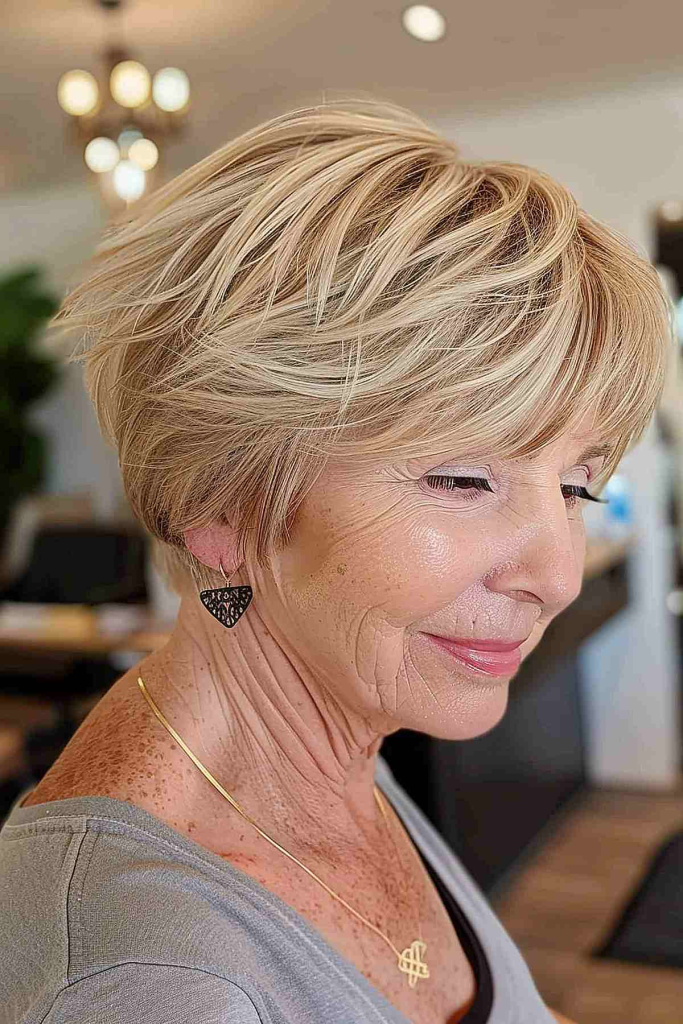
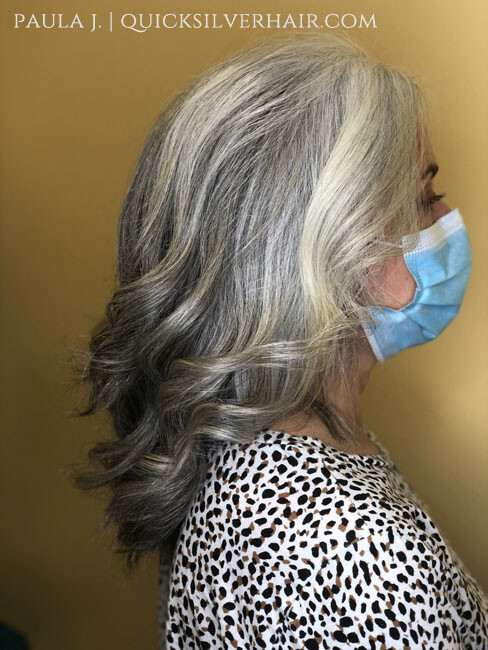
    One of the most immediate things I noticed when I stopped air drying was the change in shine. When hair air dries, the cuticle often dries in a “raised” or ruffled position, which makes the hair look dull and feel rough. When you use a blow-dryer with the nozzle pointed down the hair shaft, you are mechanically sealing the cuticle shut. This smooth surface reflects light, giving silver hair that coveted “glass” finish that makes it look healthy and intentional rather than neglected.

    Breaking the “Natural” Beauty Bias

    There is a pervasive idea in the “clean beauty” world that anything “natural” (like air) is inherently better than anything “artificial” (like a machine). But at 65, I’ve learned that nature isn’t always kind to fragile structures. Just as we use moisturizer to protect our skin from “natural” wind and sun, we should use modern tools to protect our hair from the “natural” stress of water.

    Changing my routine felt like a betrayal of my “low-maintenance” lifestyle at first. But once I saw the reduction in frizz and the increase in my hair’s overall strength, I realized that five minutes with a blow-dryer is a small price to pay for hair that actually stays on my head.

    Conclusion: A New Philosophy for Aging Hair

    The truth about air drying is a perfect example of why we must constantly update our beauty knowledge as we age. What worked for our thick, resilient hair at 20—when the cuticles were strong and the oils were plentiful—can be detrimental to our hair at 65.

    By choosing to stop air drying your hair, you are choosing to respect the structural limits of your silver strands. You are preventing hygral fatigue, protecting your scalp microbiome, and ensuring that your hair is as strong as it is beautiful. It’s time to bring the blow-dryer back out of the closet—not for the sake of vanity, but for the sake of science.

  • The Truth About Rosemary Oil for Hair Growth – What Studies Actually Say

    The Truth About Rosemary Oil for Hair Growth – What Studies Actually Say

    In the world of natural hair care, few trends have gained as much traction as the use of rosemary oil. If you spend any time on Pinterest or lifestyle blogs, you’ve likely seen the viral claims that this herb is a “miracle” cure for thinning hair. For a woman of 65 who has watched her once-thick ponytail dwindle, these claims are incredibly tempting. However, after years of being burned by “miracle” products, I’ve learned to look past the aesthetic bottles and into the science. The truth about rosemary oil for hair growth – what studies actually say is far more nuanced than a catchy social media headline. While there is genuine scientific promise here, there are also significant caveats regarding how we apply it and what we should realistically expect from a bottle of essential oil.

    The Study That Started It All

    Most of the hype surrounding rosemary oil stems from a single landmark study published in 2015. Researchers compared rosemary essential oil to Minoxidil (the active ingredient in Rogaine) over a six-month period in patients with androgenetic alopecia—the most common form of hair loss in both men and women.

    The Results of the 2015 Comparison

    The study found that after six months, both the rosemary oil group and the Minoxidil 2% group saw a significant increase in hair count. Remarkably, there was no statistical difference between the two groups’ results. This suggested that rosemary oil could be just as effective as a pharmaceutical intervention. Furthermore, the rosemary oil group reported less scalp itching compared to the Minoxidil group, making it an attractive alternative for those of us with sensitive, aging scalps.

    The “Fine Print” We Often Ignore

    While those results are exciting, it is vital to look at the specifics of the study. The participants used the oil daily for six months. In our “instant gratification” culture, many women try rosemary oil for three weeks, see no change, and give up. The science tells us that hair growth is a marathon, not a sprint. If you aren’t prepared to be consistent for at least half a year, you aren’t actually following the science.

    How Rosemary Oil Actually Works

    Rosemary oil isn’t a “magic” potion that creates hair follicles out of thin air. Instead, it works on the mechanics of the scalp environment.

    Improved Micro-Circulation

    The primary benefit of rosemary oil is its ability to act as a vasodilator. Like Minoxidil, it helps to dilate the tiny blood vessels in the scalp. For women over 60, blood flow to the extremities (including the scalp) naturally decreases. By increasing circulation, rosemary oil ensures that the hair follicles receive the oxygen and nutrients they need to stay in the growth phase longer.

    Anti-Inflammatory and Antioxidant Properties

    As we age, our scalps are prone to “inflammaging”—a low-grade, chronic inflammation that can stifle hair growth. Rosemary oil contains carnosic acid, a compound known for its potent antioxidant and anti-inflammatory effects. By soothing the scalp and neutralizing free radical damage from UV rays and pollution, it creates a “healthy soil” environment where hair can actually thrive.

    The Concentration Mistake: Why DIY Can Be Dangerous

    One of the biggest misconceptions in search of the “truth about rosemary oil” is that you can simply rub pure essential oil onto your scalp. This is a recipe for disaster, especially for the thinner skin of a senior.

    The Risk of Contact Dermatitis

    Essential oils are highly concentrated plant extracts. Applying undiluted rosemary oil can cause severe irritation, redness, and even chemical burns on a sensitive scalp. The 2015 study used a specific formulation, and when we attempt to “DIY” it at home without a carrier oil, we risk causing inflammation that actually triggers more hair shedding.

    The Importance of Carrier Oils

    To follow the studies correctly, rosemary oil must be diluted in a carrier oil like Jojoba, Grapeseed, or Argan oil. Jojoba is particularly effective for older women because its molecular structure closely mimics our scalp’s natural sebum, which we produce less of as we age. A safe ratio is typically 2 to 3 drops of rosemary essential oil per tablespoon of carrier oil.

    Rosemary Water vs. Rosemary Oil

    A recent trend has seen women boiling rosemary sprigs at home to create “rosemary water” or hair mists. While this is a lovely, refreshing rinse, it is important to note that there are no clinical studies proving that rosemary water has the same hair-growth effects as the concentrated essential oil. The volatile compounds that stimulate circulation are found in the oil, and they aren’t always water-soluble. If you find the water works for you, that’s wonderful, but it isn’t what the scientific data is based on.

    The DHT Factor: Can It Really Block Hormones?

    Some preliminary studies suggest that rosemary oil may inhibit the activity of 5-alpha-reductase, the enzyme that produces DHT (dihydrotestosterone). As discussed in my previous articles, DHT is the hormone responsible for shrinking follicles during menopause. While the evidence here is mostly from animal studies and lab cultures, it provides a fascinating glimpse into why rosemary might be particularly effective for post-menopausal thinning compared to other essential oils like lavender or peppermint.

    Managing Expectations at 65

    The most important “truth” I can share after researching the science and trying it myself is this: rosemary oil will not bring back hair follicles that have been dead for ten years. If you have areas of the scalp that are completely smooth and shiny, the follicles have likely miniaturized to the point of no return.

    However, if you are experiencing “diffuse thinning”—where the hair is still there but looks sparse and “wimpy”—rosemary oil can help revitalize those struggling follicles. It is about retention and thickening of what you have, rather than a total “fountain of youth” for the scalp.

    The Psychological Benefit of Natural Rituals

    Beyond the chemistry, there is something to be said for the ritual of self-care. When we are dealing with thinning hair, we often feel a sense of despair. Every time we wash our hair, we focus on what is in the drain.

    When I started my rosemary oil routine, the focus shifted. Instead of “managing a loss,” I was “nurturing a growth.” The scent of the rosemary is invigorating, and the act of massaging my scalp became a meditative practice. Even before I saw the physical results, I felt a sense of agency that I hadn’t felt in years. That psychological shift is just as important as the hair count.

    Conclusion: A Tool, Not a Miracle

    The truth about rosemary oil for hair growth is that it is a scientifically-backed tool that requires extreme patience and proper technique. It is not a miracle that works overnight, and it is not a replacement for a healthy diet or addressing underlying medical issues like thyroid dysfunction or iron deficiency.

    At 65, I’ve found that rosemary oil is a permanent part of my “healthy hair” toolkit. It isn’t about looking like I’m 20 again; it’s about giving my 65-year-old hair the best possible environment to be strong, shiny, and resilient. If you approach it with realistic expectations and scientific discipline, you may find that this ancient herb is exactly what your modern hair care routine has been missing.

  • The Truth About “Trim Every 6 Weeks” – Why That’s Bad Advice for Older Women

    The Truth About “Trim Every 6 Weeks” – Why That’s Bad Advice for Older Women

    For most of my adult life, I followed the “Golden Rule” of hair care as if it were carved in stone: visit the salon every six weeks for a trim. My stylists always insisted that this was the only way to prevent split ends and keep my hair growing strong. I was a loyal soldier to the schedule, even as I watched my hair get shorter and thinner with each passing year. However, once I reached my mid-sixties, I began to notice a frustrating trend. I wasn’t just maintaining my length; I was losing it. I finally realized that the truth about “trim every 6 weeks” – why that’s bad advice for older women is rooted in a fundamental misunderstanding of how aging hair actually grows. By blindly following an arbitrary calendar, I was essentially cutting away my hair faster than my body could replace it.

    The Math of Aging Hair: Why the 6-Week Rule Fails

    The advice to trim every six weeks is based on the average hair growth rate of a young adult—roughly half an inch per month. In that scenario, a quarter-inch trim every six weeks leaves you with a net gain of length. But for those of us over 60, the math changes significantly.

    Slower Growth Cycles

    As we age, the “anagen” (growth) phase of our hair cycle shortens. Not only does the hair grow more slowly—often far less than the standard half-inch—but it also stays on our head for a shorter duration before shedding. If your hair only grows a quarter-inch in six weeks, and your stylist trims a quarter-inch “just to keep it fresh,” you are effectively stuck in a zero-growth loop. For many older women, this results in a style that slowly recedes over time, leading to the “accidental pixie” look that many of us never actually wanted.

    The Density Dilemma

    It’s not just about length; it’s about volume. When you trim frequently, you are constantly removing the oldest, most “tapered” ends of the hair. While this sounds good in theory, in practice, it can make thinning hair look even more sparse. Frequent trimming creates blunt edges that can look stiff and “choppy” on silver hair, which lacks the natural elasticity of younger strands.

    The Fragility Factor: Silver Hair is Different

    The six-week rule was designed for hair with a robust, oily cuticle that can withstand frequent handling and mechanical stress. Silver and gray hair is structurally different and requires a different strategy.

    Cuticle Sensitivity

    Aging hair follicles produce less sebum, the natural oil that coats the hair shaft and protects it from splitting. This means that by the time our hair is six weeks old, it isn’t necessarily “damaged”—it’s just dry. Younger stylists often mistake this natural dryness for split ends that need to be cut. In reality, what that hair needs is a deep moisture treatment, not a pair of scissors. By cutting, you are removing hair that could have been “saved” with the right hydration.

    The “Mechanical Stress” of the Salon Visit

    We often forget that the trim itself involves high-tension combing, shampooing with harsh salon surfactants, and usually a high-heat blow-dry to “show off” the cut. For fragile, thinning hair, the physical stress of the salon ritual every six weeks can actually cause more breakage than the trim prevents. When I moved my appointments to every twelve weeks, I noticed significantly less shedding simply because I was “disturbing” the hair less often.

    Why “Dusting” is Better Than “Trimming”

    If the six-week rule is the enemy of length for older women, what is the alternative? The answer lies in a technique called “dusting.”

    • What is Dusting? Dusting is the practice of cutting only the literal tips of the hair—less than an eighth of an inch—only where visible split ends exist.
    • The Benefit: It preserves the maximum amount of length while removing the friction that causes tangles.
    • The Schedule: Instead of a calendar-based appointment, I now only seek a trim when my hair begins to tangle easily at the ends or when the shape of the cut has visibly collapsed. For me, this is usually every 10 to 14 weeks.

    The Industry Bias: Why Stylists Still Push the 6-Week Rule

    It is important to address the “elephant in the salon”: the six-week rule is a business model. Salons rely on “pre-booking” to ensure a steady stream of revenue. While most stylists have good intentions, their training is often focused on a “one size fits all” approach that prioritizes the maintenance of a specific shape over the long-term health and length of the client’s hair.

    When you are a woman of a certain age, you have to be your own advocate. You have to be willing to say, “I don’t need a trim today; I just want a deep condition and a gentle style.” Many women fear that skipping a trim will lead to “hair traveling up the shaft,” but as long as you are nourishing your ends with oils and avoiding high heat, your hair can easily go three months without a cut.

    Strategies for Extending the Life of Your Cut

    Once I broke the six-week habit, I had to learn how to manage my hair at home so it didn’t look “neglected” during the longer intervals.

    1. Seal the Ends: I use a light jojoba or marula oil on the last inch of my hair every single night. This prevents the ends from becoming brittle and splitting in the first place.
    2. Low-Heat Styling: I traded my round brush and blow-dryer for air-drying and silk rollers. This preserved the integrity of my ends, making the frequent “corrective” trims unnecessary.
    3. The “Search and Destroy” Method: Occasionally, under a bright light, I will use professional hair shears to snip a single split end if I see one. This keeps the hair healthy without sacrificing the overall length of the style.

    The Psychological Shift: Reclaiming Your Length

    There is a subtle, ageist narrative that suggests women over 60 should have “short, manageable” hair. The six-week trim rule often facilitates this by slowly whittling away a woman’s hair until she feels she has no choice but to go short.

    By reclaiming the right to wait, I reclaimed my right to have long, flowing, silver hair. It gave me a sense of agency that I didn’t realize I had lost. My hair is now the longest it has been since my thirties, and ironically, it looks thicker because the “bulk” of the hair hasn’t been thinned out by constant “layering” and “texturizing” at the salon.

    Conclusion: Listen to Your Hair, Not Your Calendar

    The truth about “trim every 6 weeks” is that it is a guideline, not a law—and for the older woman with slower-growing, more fragile hair, it is a guideline that often does more harm than good. Our hair has a different rhythm now. It requires more patience, more moisture, and significantly fewer “interventions.”

    When I stopped listening to the six-week rule, my hair finally had the chance to reach its full potential. It became healthy, it became long, and it became a reflection of my actual life—not a salon’s schedule. If you want to see your hair truly thrive in your sixties and beyond, put down the scissors and pick up the conditioner. Your hair knows when it needs a cut; you just have to learn to listen to it.

  • The Truth About Biotin – Why It’s Not Helping Your Thinning Hair

    The Truth About Biotin – Why It’s Not Helping Your Thinning Hair

    For years, I believed that the solution to my thinning hair could be found in a small, pearl-colored capsule. Like millions of other women navigating the changes of their sixties, I was told that Biotin was the “holy grail” of hair growth. I dutifully took my 5,000 mcg supplement every morning with my coffee, waiting for the miraculous transformation that the bottle promised. However, after eighteen months of religious adherence and zero change in the density of my ponytail, I had to face a frustrating reality: the truth about biotin – why it’s not helping your thinning hair is that for the vast majority of us, it is a nutritional red herring. While the supplement industry markets it as a cure-all, the science—and my own thinning part—suggests that we are often literally flushing our money down the drain.

    The Biotin Myth: Where the Marketing Came From

    Biotin, also known as Vitamin B7, is undeniably essential for the body. It helps convert food into energy and plays a role in the production of keratin, the protein that makes up our hair, skin, and nails. Because of this biological link, marketing departments made a leap: if a little biotin helps make hair, then a lot of biotin must make a lot of hair.

    The Deficiency Dilemma

    The only time biotin has been scientifically proven to significantly “fix” thinning hair is when a person has a clinical biotin deficiency. Here is the catch: biotin deficiency is incredibly rare. Biotin is found in a massive variety of foods, including eggs, nuts, whole grains, salmon, and even cauliflower. Furthermore, our gut bacteria actually produce biotin for us. Most healthy adults already have more than enough biotin in their systems to support hair growth. Adding a massive supplement on top of an already sufficient supply doesn’t create “super growth”; it just creates “expensive urine,” as the body simply excretes the excess water-soluble vitamin.

    Why Your Hair is Thinning (And Why Biotin Can’t Fix It)

    If you are over 60 and noticing more scalp than you used to, it is rarely because of a vitamin B7 shortage. For most women in this demographic, the cause is much more complex than a single nutrient deficiency can address.

    The Hormonal Shift

    The primary driver of thinning hair at age 65 is the decline of estrogen and progesterone during and after menopause. These hormones help keep hair in the “anagen” (growth) phase for longer. When they drop, testosterone can become more dominant, leading to “dihydrotestosterone” (DHT), which shrinks the hair follicles. Biotin has zero impact on your hormone levels. You can take all the B7 in the world, but if your follicles are being miniaturized by hormonal changes, the biotin has nowhere to go.

    Scalp Aging and Micro-Circulation

    As we age, the skin on our scalp loses its elasticity and thickness, just like the skin on our faces. Blood flow to the scalp decreases, meaning the follicles receive fewer nutrients and less oxygen. Biotin doesn’t improve blood circulation. If the “soil” of your scalp is dry and the “irrigation” (blood flow) is poor, the “fertilizer” (biotin) won’t make the “grass” grow.

    The Hidden Dangers of High-Dose Biotin

    Taking excessive amounts of biotin isn’t just ineffective; it can actually be problematic. The doses found in “Hair, Skin, and Nails” vitamins are often 100 to 500 times the daily recommended intake.

    Laboratory Interference

    This is perhaps the most dangerous truth about biotin – why it’s not helping your thinning hair. High levels of biotin in the blood can significantly interfere with important lab tests. Most notably, it can cause falsely low results for Troponin (a marker used to diagnose heart attacks) and can skew thyroid function tests. I learned this the hard way when a routine physical showed “abnormal” thyroid levels that vanished once I stopped the supplements. For seniors who frequently monitor their heart and thyroid health, this is a serious medical risk for a supplement that isn’t even providing the promised cosmetic benefit.

    The “B5” Breakout

    The body uses the same receptors to absorb Biotin (B7) and Vitamin B5 (Pantothenic acid). When you flood your system with B7, you can inadvertently block the absorption of B5, which is essential for regulating the skin barrier. This is why many women find themselves dealing with “adult acne” or skin irritation for the first time in decades after starting a high-dose hair supplement.

    What Actually Works: A Holistic Approach to Thinning

    Once I realized that biotin wasn’t the magic bullet, I shifted my focus toward strategies that actually address the mechanics of aging hair.

    1. Protein, Not Just Vitamins: Hair is made of protein. Instead of a pill, I focused on increasing my intake of lean proteins, collagen, and amino acids.
    2. Iron and Ferritin Levels: For women, low iron is a much more common cause of hair loss than biotin deficiency. Ensure your doctor checks your ferritin levels (your body’s iron stores).
    3. Scalp Stimulation: I traded my pills for a high-quality scalp massager. Manual stimulation helps bring blood flow back to the follicles, providing a natural delivery system for the nutrients already in my diet.
    4. Topical Treatments: Ingredients like Minoxidil or prescription-strength topical caffeine have much stronger clinical backing for fighting hair thinning than oral biotin.

    The Psychological Trap of the Supplement Aisle

    There is a specific kind of hope sold in the vitamin aisle. When we see our hair thinning, we feel a loss of control. Buying a supplement feels like taking action. It’s easier to swallow a pill than it is to navigate the complexities of hormone replacement therapy or the lifestyle changes required for better circulation.

    However, that “hope” has a cost. Not just the $30 a bottle, but the emotional cost of waiting for a result that never comes. When we don’t see improvement, we often blame ourselves—thinking we missed a dose or haven’t taken it long enough—rather than blaming the product that was never designed to solve our specific problem.

    Conclusion: Investing in Reality

    At 65, I have learned that my hair reflects my overall health, not just my vitamin intake. The truth about biotin is that it’s a tiny piece of a very large puzzle. If you have a balanced diet, you are likely already getting all the biotin your hair could ever use.

    Stopping the biotin supplements didn’t make my hair fall out; in fact, my hair has never looked better because I redirected that energy and money into scalp health, better nutrition, and a precision haircut that works with my natural density. It’s time we stop looking for miracles in a bottle and start looking at the real science of aging. Your hair—and your bank account—will thank you.

  • The Truth About “Volumizing” Shampoos – Why They Actually Make Thin Hair Worse

    The Truth About “Volumizing” Shampoos – Why They Actually Make Thin Hair Worse

    For decades, I followed a predictable morning ritual. I would reach for the bottle with the boldest lettering—the one promising “Mega Volume,” “Extreme Lift,” or “Thickening Power.” I believed that if I could just find the right formula, my fine, thinning hair would finally transform into the lush mane I saw in the commercials. However, I eventually had to face a harsh reality: the truth about “volumizing” shampoos – why they actually make thin hair worse is a secret the beauty industry isn’t eager to share. After years of struggling with increasing brittleness and a scalp that felt perpetually tight, I realized that the very products I was using to “save” my hair were actually the ones destroying its integrity.

    The Mechanical Illusion of Volume

    To understand why these products fail us, we have to look at the chemistry behind the “lift.” Most people assume that volumizing shampoo adds something beneficial to the hair to make it thicker. In reality, the process is often subtractive or abrasive.

    The Over-Cleansing Trap

    Most volumizing shampoos are formulated with harsh surfactants, such as Sodium Lauryl Sulfate (SLS). Their goal is to strip away every trace of oil. The logic is simple: oil weighs hair down, so no oil equals more “bounce.” While this works for about four hours, it creates a devastating long-term cycle. For those of us over 60, our scalps already produce less sebum. When you strip away those precious natural oils, the hair becomes “static-y” and flyaway. This isn’t volume; it’s dehydration masquerading as fullness.

    The Cuticle “Roughing” Technique

    Have you ever noticed that hair feels slightly “squeaky” or rough after using a thickening wash? That is intentional. Many volumizing formulas have a slightly higher pH level designed to swell the hair cuticle. When the cuticle—the outer protective shingles of the hair—is raised rather than lying flat, the strands don’t slide past each other. They snag and “prop” each other up. While this creates the temporary appearance of thickness, a raised cuticle allows moisture to escape and environmental pollutants to enter. Over time, this leads to chronic breakage, which makes thin hair look even thinner.

    The Polymer Build-Up Paradox

    If a volumizing shampoo isn’t stripping your hair, it’s likely coating it. Many modern formulas use “film-forming” polymers or resins (essentially diluted versions of hairspray).

    The Weight of “Weightless” Formulas

    These polymers attach to the hair shaft to create a microscopic coating that makes each strand feel thicker to the touch. The problem is that these resins are difficult to wash out. After three or four washes, the “build-up” becomes significant. For someone with thick, coarse hair, this isn’t an issue. But for those of us with fine, thinning hair, that microscopic weight eventually pulls the hair flat at the root. You end up washing more frequently to get rid of the “limp” feeling, adding more polymers in the process, and eventually suffocating the hair follicle.

    Scalp Suffocation and Follicle Health

    The most dangerous aspect of these coating agents is what they do to the scalp. A healthy hair follicle needs to be clear of debris to produce a strong strand. When polymers and “thickening resins” settle into the follicle openings, they can cause inflammation or “follicle miniaturization.” This means the hair that grows back is thinner and weaker than the hair before it. By trying to make our hair look thicker today, we are often ensuring it grows in thinner tomorrow.

    The Alcohol and Salt Secret

    If you look at the ingredient list of a standard drugstore volumizing shampoo, you might find hidden culprits like magnesium sulfate (Epsom salts) or certain types of denatured alcohols.

    • Salt: Salt is fantastic for creating that “beach wave” texture because it dehydrates the hair and causes it to shrink and crinkle. However, salt is a desiccant. It sucks the moisture out of the hair cortex. For aging hair that is already prone to brittleness, salt-based volumizing is a recipe for a “straw” texture.
    • Alcohol: Used to make the shampoo dry faster and feel lighter, alcohol further parches the hair. When thin hair loses its internal moisture, it loses its elasticity. Instead of bending, it snaps.

    Why “Moisturizing” Was the Real Volume All Along

    The biggest breakthrough in my hair care journey was realizing that healthy hair has its own natural “heft.” When hair is properly hydrated from the inside out, the hair shaft is supple and resilient. It has “swing.”

    When I stopped using harsh volumizing cleansers and switched to pH-balanced, moisture-focused formulas, my hair didn’t go flat. Instead, it stopped breaking. The “volume” I see now isn’t created by roughing up the cuticle or coating it in plastic; it’s the result of having more actual hair on my head because it isn’t snapping off mid-shaft.

    The Role of Silicones in “Thickening” Products

    We are often told to avoid silicones, but volumizing shampoos frequently use “heavy” silicones to add shine to the rough texture they’ve created. This is a “bandage” solution. The shampoo dries the hair out, and the silicone gives it a fake, plastic shine. For thin hair, silicone is the enemy of volume. It is heavy, it attracts dust and dirt, and it makes the hair look “greasy” by the end of the day, forcing you back into the over-washing cycle.

    How to Actually Get Volume Without the Damage

    If you’re ready to toss the “Volumizing” bottle, what should you use instead? The goal for thin, aging hair is Scalp Clarity + Internal Hydration.

    1. Use a Clarifying Wash (Sparsely): Once every two weeks, use a gentle clarifying shampoo to remove the build-up of past products. This “unweights” the hair naturally.
    2. Focus on the Roots: Apply shampoo only to the scalp. The suds that run down the length are enough to clean the ends. This prevents the tips from becoming brittle.
    3. Reverse Washing: Some women find success by conditioning before they shampoo. This ensures the hair is hydrated but leaves zero heavy residue behind to weigh down the roots.
    4. Massage for Blood Flow: Real volume comes from the root. Instead of chemicals, use a silicone scalp massager to stimulate blood flow to the follicles.

    The Psychological Impact of the “Fullness” Chase

    There is an emotional toll to using products that don’t work. Every time I washed my hair with a volumizing shampoo and saw more strands in the drain, I felt a sense of panic. I thought I was losing my hair because I was “old.” I didn’t realize I was losing my hair because I was treating it like a piece of heavy-duty fabric that needed “scrubbing” rather than a delicate fiber that needed “nourishing.”

    Once I embraced the truth and stopped chasing the “big hair” dream with cheap chemical shortcuts, my stress levels dropped along with my breakage rates. There is a quiet confidence that comes with having soft, healthy, shiny hair, even if it isn’t “mega-voluminous” by 1980s standards.

    Conclusion: Quality Over Quantity

    Thin hair isn’t a problem that needs to be “fixed” with aggressive chemistry. It is a hair type that requires respect and gentle handling. The truth about “volumizing” shampoos is that they prioritize the way your hair looks for the three hours after a blow-dry over the way your hair will look three years from now.

    By switching to a health-first approach, I’ve found that my hair has more natural life and “body” than it ever did when I was dousing it in salt, alcohol, and polymers. At 65, I’ve learned that the healthiest version of my hair is also the most beautiful version—no “extra lift” required.

  • I Stopped Listening to Hairstylists Who Didn’t Have Gray Hair – Then Everything Changed

    I Stopped Listening to Hairstylists Who Didn’t Have Gray Hair – Then Everything Changed

    For years, I followed a specific kind of logic: if I wanted to look young, I should listen to someone who was young. I spent decades sitting in salon chairs across from stylists in their twenties and thirties—talented artists, certainly, but people who viewed my graying hair as a problem to be solved rather than a texture to be understood. The turning point in my life arrived when I stopped listening to hairstylists who didn’t have gray hair, everything changed, and the “problems” I thought I had suddenly vanished. By seeking out a professional peer who actually lived with silver strands, I moved away from a culture of concealment and toward a philosophy of authentic beauty. It wasn’t just a change in my haircut; it was a total reclamation of my identity at 65.

    The Myth of the “Anti-Aging” Expert

    We are conditioned to believe that youth is the authority on beauty. When I entered my fifties and the silver started to win the battle against my brunette box dye, I naturally sought out the trendiest salons. I thought that by surrounding myself with young stylists who were up-to-date on the latest “anti-aging” techniques, I could somehow stay “current.”

    However, I soon realized that there is a massive gap between academic knowledge of hair color and the lived experience of aging hair. A stylist in her late twenties can follow a color wheel perfectly, but she doesn’t know how it feels to see your skin tone change alongside your hair color. She doesn’t understand the psychological weight of the “skunk line” appearing every three weeks. Most importantly, she often views gray hair as a defect to be masked rather than a premium fiber to be polished.

    The “Cover-Up” Agenda vs. Authentic Dimension

    When you go to a stylist who doesn’t have gray hair, their immediate instinct is often one of concealment. In the salon industry, “gray coverage” is a billion-dollar revenue stream. For years, I was told that silver was “drab” or that it would “wash me out.” I was funneled into a cycle of high-maintenance base colors and aggressive highlights designed to camouflage my roots.

    The Problem with Flat, Total Coverage

    Younger stylists are often taught that the goal of gray coverage is 100% opacity. They want to see zero silver. The result is often what I call “Lego Hair”—a solid, flat block of color that looks artificial. Because this hair is all one tone, it lacks the light-reflectivity of natural hair.

    My new stylist, who sports a stunning steel-gray bob, looked at my roots and saw dimension. She explained that natural silver hair actually has a beautiful, translucent quality that acts as a built-in highlight. She didn’t see a “flaw” to be hidden under a layer of expensive pigment; she saw a new palette. By moving to “gray blending” instead of “gray coverage,” she used my natural silver to create a multi-tonal look that actually made me look more vibrant than the solid brown ever did.

    Understanding the Physics of Silver Hair

    If you don’t have gray hair, you don’t truly understand the physics of it. It is a common misconception that gray hair is just hair that has lost its pigment. In reality, the follicle often undergoes a structural change. The sebaceous glands produce less oil as we age, and the cuticle of the gray hair is often tighter and less porous.

    The “Wiry” Texture Myth

    Gray hair is frequently described as “wiry” or “unruly.” My younger stylists always reached for heavy waxes, silicones, or high-heat tools to “tame” my hair into submission. They treated my hair as if it were simply “rebellious.”

    My silver-haired stylist, however, reached for hydration and pH-balancing treatments. Because she lived with the same texture every day, she knew that silver hair requires moisture-rich, violet-toned emollients rather than the heavy, protein-packed products meant for younger, damaged hair. She taught me that my hair wasn’t “unruly”—it was thirsty. By changing the type of moisture I was providing, my wiry strands transformed into soft, silky waves.

    Breaking the “Helmet” Habit

    There is a specific “older woman” haircut that younger stylists default to: the short, heavily layered, sprayed-into-place look. It’s a safe bet that provides “lift,” but it often feels architectural and stiff. Younger stylists often use these styles to compensate for what they perceive as a lack of volume in aging hair.

    Why Movement Equals Youth

    A stylist with gray hair understands that stiffness actually makes us look older. Think about a child’s hair—it moves, it catches the wind, it is fluid. My new stylist encouraged me to grow my hair into a longer, softer silhouette. She showed me how to use the natural “crunch” of gray hair to create volume without the need for backcombing or sticky sprays. By embracing the natural weight of my hair, I ended up with a style that moves when I walk—a hallmark of vitality that I had inadvertently been perming and spraying away for decades.

    The Power of Shared Experience and Empathy

    There is a profound psychological comfort in sitting with a peer. In my fifties and early sixties, when I expressed concerns about my hair thinning at the temples or my scalp feeling more sensitive, my younger stylists would offer a sympathetic but hollow “I’m sure it’s fine.” They couldn’t relate, so they couldn’t truly advise.

    Professional Peer Advice

    My current stylist offered strategy over platitudes. “I went through that three years ago,” she told me. “It’s a hormonal shift that changes the density. Here is the scalp serum that actually worked for me, and here is how we’re going to part your hair to give that area a break.” That lived experience is something you can’t learn in beauty school. It’s the difference between someone following a manual and someone who has lived the reality. She knew which products actually worked on “our” hair, and which ones were just clever marketing.

    The Financial and Emotional Freedom

    The most unexpected benefit of switching to a silver-haired stylist was the freedom. Younger stylists, perhaps unintentionally, keep you on a “dependency” loop. If you are doing total gray coverage, you must be back in that chair every 21 to 28 days. It becomes a second mortgage and a massive time commitment.

    Once I stopped fighting my gray hair and stopped listening to those who wanted me to hide it, that “touch-up tax” vanished. I stopped seeing my hair as a project that needed constant fixing and started seeing it as a part of my body that needed care. This shift in perspective allowed me to invest that money into high-quality treatments and precision cuts that lasted longer.

    Managing the “Yellowing” of Silver Hair

    One thing my younger stylists never mentioned was environmental oxidation. Silver hair is prone to turning yellow from sun exposure, hard water, and even heat styling. Younger stylists often suggested more color to “fix” the yellow.

    My silver-haired stylist knew better. She introduced me to the world of blue and purple toners—not to change my color, but to neutralize the yellow and make the silver pop. She taught me to use a “clear gloss” every few months to seal the cuticle and add a glass-like shine. These were simple, low-maintenance solutions that focused on health rather than hiding.

    The Social Stigma of “Letting Yourself Go”

    We live in a culture that often equates “youth” with “professionalism.” For a long time, I feared that if I let my hair go gray, I would be seen as “expired” in my career as a digital creator. Younger stylists often reinforced this fear by suggesting “youthful” tones.

    My silver-haired stylist challenged this stigma head-on. She pointed out that “letting yourself go” and “letting yourself be” are two very different things. A sharp, well-maintained silver cut is actually more professional and modern than a faded, over-processed dye job that doesn’t match your skin’s changing undertones. She helped me realize that authenticity is the ultimate form of power. When you stop hiding, you stop being afraid.

    Redefining Beauty for the Modern Senior

    At 65, I am more active than I was at 45. I am running websites, moving into new apartments, and exploring new hobbies. My hair should reflect that energy. Younger stylists often have a “retirement” mindset for their older clients—they want to give you a style that is easy for them to maintain, not a style that makes you feel bold.

    My silver-haired stylist sees me as a contemporary. She gives me cuts that are edgy and sophisticated. She understands that I want to look like a woman of the world, not a woman who is fading into the background. By choosing a stylist who understands the beauty of aging, I’ve finally stopped apologizing for the passage of time.

    Conclusion: The Best Version of Me

    Since I stopped listening to stylists who were afraid of gray, my hair has never looked better. It’s no longer a battlefield of chemicals and heat; it’s soft, it’s bright, and it’s finally healthy. I’ve traded the anxiety of the salon chair for the joy of natural movement.

    At 65, I’ve learned that the best beauty advice doesn’t always come from the person with the trendiest “current” look or the most followers on social media. Sometimes, it comes from the person who has the confidence to show you exactly where you’re headed—and proves that the destination is beautiful. My hair isn’t just a color anymore; it’s a statement of freedom.

  • Stop Using “Anti-Aging” Hair Products – Here’s What the Label Really Means

    Stop Using “Anti-Aging” Hair Products – Here’s What the Label Really Means

    For women over 50, it’s tempting to reach for products labeled “anti-aging” hoping they will restore your youthful hair. But here’s what the industry doesn’t tell you: stop using anti-aging hair products as if they contain miracle ingredients—because most of them are simply regular hair products with a marketing upgrade . The term “anti-aging” on a shampoo bottle is not regulated by the FDA the way drug claims are . It’s a marketing term designed to make you feel like you need something special for your aging hair. In this guide, you’ll discover what “anti-aging” labels really mean, why the claims are often exaggerated, and what actually works for mature hair.

    For women concerned about hair changes with age, these ingredients to avoid in hair products for women over 50 offer a complete guide to what’s actually in your bottles.


    What “Anti-Aging” Actually Means (Spoiler: Not Much)

    The term “anti-aging” is not intended to literally mean that a product prevents aging . Instead, it is understood by both the industry and consumers as describing a product that is designed to mitigate, mask, or soften certain cosmetic indicators that come with age—primarily graying, thinning, dullness, and brittleness .

    The Legal Reality

    Anti-aging claims have been challenged in court repeatedly. In fact, there have been at least 31 class action complaints filed alleging deceptive advertising of anti-aging products in the past five years . One notable case involved Alterna Caviar Anti-Aging Shampoo, which was sued for claiming to provide “anti-aging” benefits when, according to the complaint, the shampoo did not work as advertised .

    The key legal distinction: cosmetics are not drugs and cannot claim to cure or reverse any condition. They can only claim to improve appearance .

    For women with thinning hair, these haircuts for thinning hair men over 50 offer practical solutions that actually work.


    The Truth: Anti-Aging Products = Regular Products with Fancy Labels

    What the Science Says

    When researchers compared ingredient lists from anti-aging hair products to those without anti-aging claims, they found more similarities than differences . For example, if you compare the ingredients in Pantene Pro-V AgeDefy Shampoo to Pantene Pro-V Repair & Protect Shampoo (a non-anti-aging shampoo from the same line), the first several ingredients—which make up most of the product—are identical, and the rest are pretty similar .

    The Expert Opinion

    Dr. George Cotsarelis, chair of dermatology at the University of Pennsylvania, told the Wall Street Journal that he is skeptical of anti-aging hair product claims . “Topical products can change the hair’s appearance but not the follicle itself,” he cautions. “It’s like throwing gasoline on your car and expecting it to go” .

    The Scientific Review

    A 2025 comprehensive review of trichological (hair loss) shampoos found that out of 112 unique ingredients advertised as “active” against hair loss, a staggering 55.6% had no clinical trials whatsoever to support their claims . Only four ingredients—caffeine, adenosine, placental proteins, and melatonin—had any clinical evidence, and even that evidence was rated as low to moderate strength .

    For women with fine hair, these low maintenance haircuts for women over 50 with fine hair offer realistic solutions.


    What Your Hair Actually Needs After 50

    The truth is, aging hair doesn’t need “anti-aging” marketing. It needs specific, science-backed care.

    What Actually Works

    What Hair NeedsWhyWhat to Look For
    MoistureAging hair is drier; produces less natural oilGlycerin, aloe vera, hyaluronic acid, fatty alcohols
    Cuticle smoothingDamaged cuticle causes frizz and dullnessSilicones (look for -cone endings), amino acids, ceramides
    StrengthHair becomes more fragile, prone to breakageHydrolyzed proteins (keratin, silk, wheat), peptides
    Scalp healthHealthy follicle = healthy hairNiacinamide, caffeine, zinc pyrithione
    Gentle cleansingHarsh sulfates strip already-dry hairSulfate-free surfactants (coco glucoside, decyl glucoside)

    The Shift to “Hair Longevity”

    The beauty industry is moving away from vague “anti-aging” claims toward a more precise framework called “longevity” . Scientists have identified 12 distinct biological hallmarks of aging, and new ingredients are being developed to target specific hallmarks with clinical evidence .

    This shift means that instead of “anti-aging” (a vague, unregulated term), you’ll start seeing products that address specific biological processes like cellular senescence, mitochondrial function, and oxidative stress . These claims will be backed by actual clinical evidence.

    For women embracing their natural gray, these grey blending highlights in ash blonde offer color options that complement healthy hair care.


    The Marketing Tricks to Watch For

    “Anti-Aging” Doesn’t Mean What You Think

    The term “anti-aging” is not regulated by the FDA. Any company can slap it on a bottle without any evidence. In legal terms, it’s understood as a product designed to reduce the appearance of aging, not to reverse the aging process itself .

    “Clinically Proven” Is Often Vague

    “Clinically proven” can mean a study on 10 people for two weeks. Look for specifics: how many participants? How long? Was it peer-reviewed? Was it published in a reputable journal?

    “Active Ingredients” May Have No Evidence

    The 2025 review found that 20 out of 36 ingredients repeatedly advertised as “active” against hair loss had no clinical trials whatsoever to support their claims . These ingredients are marketed based on theory, not evidence.

    Natural ≠ Effective

    Many “anti-aging” products boast about natural ingredients. But “natural” doesn’t mean “proven.” Stinging nettle, rosemary, and ginseng appear in many anti-aging shampoos, but the scientific evidence for their efficacy is low or nonexistent .

    For women with heat-damaged hair, these stop flat ironing your gray hair insights help protect your strands.


    What to Look for Instead of “Anti-Aging”

    On the Label

    Instead of “Anti-Aging”Look for This
    Vague marketing claimsSpecific ingredient names
    “Clinically proven” without detailsStudy details (size, duration, publication)
    “Active ingredients”Ingredients with published evidence (caffeine, adenosine, minoxidil for hair loss)
    “Anti-aging”“Hydrating,” “strengthening,” “volumizing” (these are measurable claims)

    In the Ingredient List

    For moisture:

    • Glycerin
    • Aloe vera
    • Hyaluronic acid
    • Panthenol (pro-vitamin B5)

    For strength:

    • Hydrolyzed keratin
    • Hydrolyzed silk protein
    • Hydrolyzed wheat protein
    • Peptides

    For scalp health:

    • Caffeine (some evidence for hair growth)
    • Niacinamide
    • Zinc pyrithione (for dandruff)

    For smoothness:

    • Silicones (dimethicone, amodimethicone) – coat the hair to reduce frizz
    • Fatty alcohols (cetyl, stearyl, cetearyl) – moisturizing, not drying

    For women with frizzy hair, these how to get rid of frizzy hair over 50 solutions offer practical advice.


    The Bottom Line

    Anti-aging hair products are not inherently bad—they’re just not special. The same ingredients that hydrate, strengthen, and smooth your hair work regardless of whether the bottle says “anti-aging” or not .

    What your aging hair really needs is:

    1. Moisture (glycerin, aloe, fatty alcohols)
    2. Gentle cleansing (sulfate-free)
    3. Protection from heat (lower temperatures, heat protectant)
    4. Regular trims (every 6–8 weeks)

    Don’t pay extra for “anti-aging” marketing. Read the ingredient list instead. The truth is in the bottle, not the label.

    And remember: your hair is going to age with or without specialized products. The best thing you can do is handle it gently, keep it moisturized, and ignore the marketing hype .

    For women over 60 seeking simple, gentle hair care routines, these wash and wear haircuts for women over 60 minimize styling stress.

  • Stop Brushing Your Hair When It’s Wet – The Damage You’re Causing Without Knowing

    Stop Brushing Your Hair When It’s Wet – The Damage You’re Causing Without Knowing

    For women over 50, brushing your hair when it’s wet might feel like a harmless part of your post-shower routine. You step out of the shower, grab your brush, and run it through your damp strands to detangle. It seems logical—wet hair is easier to shape, and you want to prevent knots before they form. But this common habit is one of the most damaging things you can do to aging hair. Wet hair is at its most fragile state. The water weakens the hydrogen bonds that give hair its strength, and the weight of the water makes strands heavier and more vulnerable to stretching and snapping. In this guide, you’ll discover why brushing wet hair is so damaging, the hidden damage you’re causing without knowing, and safer ways to detangle your hair after washing. If you’re also dealing with dryness and breakage, these how to get rid of frizzy hair over 50 solutions offer complementary advice.

    For women with thinning hair, these short hairstyles for thin fine hair can reduce the need for aggressive detangling. stop brushing your hair when it’s wet


    Why Wet Hair Is So Vulnerable

    Understanding the science of wet hair helps explain why brushing it is dangerous.

    Hair StateWhat HappensStrength Level
    Dry hairHydrogen bonds are stable; hair holds its shape100% strength
    Damp hairWater temporarily breaks hydrogen bonds; hair becomes elastic50–70% strength
    Soaking wet hairHydrogen bonds are significantly disrupted; hair stretches easily30–50% strength
    Overly stretched wet hairHair reaches its breaking point; snaps or develops permanent damageBreaking point

    When hair is wet, it can stretch up to 30% longer than its dry length. But this elasticity comes at a cost. Once stretched beyond its limit, the hair cannot return to its original shape. This leads to permanent damage: split ends, breakage, and a rough, frizzy texture.

    For women with fine or fragile hair, these low maintenance haircuts for women over 50 with fine hair reduce styling stress.


    The Hidden Damage You’re Causing

    1. Mechanical Breakage

    What happens: When you pull a brush through wet hair, the bristles catch on tangles and knots. Instead of gliding through, the brush yanks and stretches the hair until the tangle releases or the hair snaps.

    The result: Broken strands of varying lengths, especially around the crown and nape where tangles are common.

    Why you don’t notice immediately: Breakage happens gradually. One day you just notice your hair looks thinner, or you have more “flyaways” than before.

    2. Cuticle Damage

    What happens: The hair cuticle is the outer protective layer. When wet, the cuticle is raised and vulnerable. A brush running over the surface scrapes and roughens the cuticle scales.

    The result: Hair that looks dull, feels rough, and tangles more easily—creating a vicious cycle where damaged hair tangles more, requiring more brushing, causing more damage.

    Visual sign: Hair that looks “frizzy” even when it’s not humid. The raised cuticle scatters light instead of reflecting it.

    3. Split Ends (That Travel Up the Shaft)

    What happens: When you brush wet hair, the tension can cause the hair shaft to split at the weakest point. These split ends don’t stay at the tips—they travel up the hair shaft, causing longer sections to become frayed and damaged.

    The result: You cut off the split ends, but new splits appear higher up because the damage was already done.

    Why it’s worse for gray hair: Gray hair is already more porous and fragile. The cuticle is often already raised, making it even more vulnerable to brush damage.

    For women with gray hair, these grey blending highlights in ash blonde offer color options that complement healthy hair care.


    Why This Is Worse After 50

    As we age, our hair becomes more vulnerable to this type of damage.

    Age-Related ChangeWhy It Increases Wet Brushing Damage
    Thinner hair shaftsLess material to withstand stretching
    Reduced elasticityHair is less able to stretch and return to shape
    Increased porosityWater penetrates faster; hair becomes weaker more quickly
    Gray hair textureAlready more fragile; cuticle is often already compromised
    Slower growth rateDamage takes longer to grow out

    What might have been harmless in your 30s causes significant damage in your 60s and beyond.

    For women with thinning hair, these best bob haircuts for women over 50 with thin hair offer volume-building styles that require less aggressive detangling.


    Signs You’re Damaging Your Hair by Brushing Wet

    SignWhat It Means
    Hair feels “mushy” or overly soft when wetThe hair shaft has lost its structure from repeated stretching
    You see short, broken hairs around your crownMechanical breakage from brushing tangles
    Your hair is frizzy even when air-dried without heatRaised cuticle from brush scraping
    You have split ends despite regular trimsDamage is traveling up the shaft faster than you cut it
    Hair tangles immediately after brushingDamaged cuticles catch on each other
    Your ponytail feels thinner than it used toCumulative breakage has reduced density

    For women with curly or wavy hair, these curly haircuts for thin hair offer styles that reduce tangling.


    The Right Way to Detangle Wet Hair

    You don’t need to stop detangling your hair after washing. You just need to do it correctly.

    Step 1: Detangle Before You Shampoo

    Why it works: Dry hair is stronger than wet hair. Removing knots before washing means you’re not fighting tangles when hair is at its most vulnerable.

    How: Before getting in the shower, gently detangle your dry hair with a wide-tooth comb or your fingers. Start from the ends and work up.

    Step 2: Apply Conditioner Generously

    Why it works: Conditioner adds slip, allowing tangles to slide apart without force.

    How: After shampooing, apply a generous amount of conditioner. Leave it on for 2–3 minutes. The conditioner lubricates the hair shaft, making detangling much easier.

    Step 3: Use a Wide-Tooth Comb, Not a Brush

    Why it works: A wide-tooth comb glides through hair without creating friction. Brush bristles (especially dense ones) scrape the cuticle and create tension.

    How: With conditioner still in your hair, use a wide-tooth comb to gently detangle. Start at the ends and work your way up to the roots. Never yank through a knot.

    Step 4: Rinse with Cool Water

    Why it works: Cool water helps close the cuticle, smoothing the hair shaft and reducing future tangles.

    How: After detangling, rinse with cool (not cold) water. Then gently squeeze excess water out—never rub with a towel.

    Step 5: Use a Microfiber Towel or T-Shirt

    Why it works: Regular cotton towels create friction that roughs up the cuticle.

    How: Gently squeeze or “plop” your hair with a microfiber towel or old cotton t-shirt. Do not rub.

    For women with fragile hair, these wash and wear haircuts for women over 60 minimize post-wash styling stress.


    The Right Tools for Detangling

    ToolBest ForAvoid For
    Wide-tooth combAll hair types, especially wet detanglingFine, thin hair (can still be used gently)
    Wet brush (brand name)Detangling wet hair without stretchingVery fragile or severely damaged hair
    Tangle teezerFine, thin hairThick, coarse hair (may not penetrate)
    FingersThe gentlest option for very fragile hairImpatient detangling

    What to NEVER Use on Wet Hair

    • Paddle brushes with dense bristles
    • Boar bristle brushes (designed for dry hair only)
    • Round brushes (for blow-drying only)
    • Fine-tooth combs

    For women with thinning edges, these short 4C natural hairstyles for women over 50 offer protective styling options.


    Alternatives to Brushing Wet Hair

    1. The “Finger Rake”

    After applying conditioner, use your fingers to gently separate strands. Your fingers are much gentler than any brush or comb.

    2. Conditioner Soak

    Leave conditioner on for 3–5 minutes. The longer it sits, the more slip it creates. Tangles will literally slide apart.

    3. Detangling Spray

    If you must detangle outside the shower, use a detangling spray or leave-in conditioner to add slip. Never brush dry, unconditioned wet hair.

    4. Sleep with a Protective Style

    Braiding or loosely twisting hair before bed prevents tangles from forming overnight, reducing the need for aggressive morning detangling.

    For women who love updo styles, these updos for women over 50 offer elegant, low-tangle options.


    How to Transition Away from Wet Brushing

    If you’ve been brushing wet hair for years, your hair may already have accumulated damage. Here’s how to transition.

    Week 1-2: Switch Tools

    Replace your brush with a wide-tooth comb. The adjustment period takes about a week.

    Week 3-4: Change Your Technique

    Start detangling before you get in the shower. Also detangle again in the shower with conditioner in your hair (never without).

    Week 5-6: Add a Silk Pillowcase

    silk or satin pillowcase reduces friction while you sleep, meaning fewer tangles to detangle in the morning.

    Week 7-8: Assess Your Hair

    After 2 months of gentle detangling, your hair should feel smoother, look shinier, and tangle less between washes.

    For women with heat-damaged hair, these ingredients to avoid in hair products for women over 50 help you choose gentler products.


    What About Curly Hair?

    Curly and coily hair is even more fragile when wet. The tight curl pattern creates natural tangles that are difficult to remove.

    For curly/coily hair:

    • Never brush dry curls
    • Only detangle when hair is soaking wet and saturated with conditioner
    • Use a wide-tooth comb or your fingers
    • Work in small sections, starting from the ends

    For curly-haired women, these curly haircuts for thin hair offer styles that minimize tangling.


    The Bottom Line

    Brushing your hair when it’s wet is one of the most damaging habits for aging hair. Wet hair is at its weakest—up to 70% weaker than dry hair. Running a brush through it causes breakage, cuticle damage, and split ends that travel up the shaft.

    The good news is that this damage is entirely preventable. Switch to a wide-tooth comb, detangle before and during conditioning, and be gentle. Your hair will be smoother, shinier, and healthier within weeks.

    Your hair doesn’t need aggressive brushing. It needs gentle care.

  • Stop Getting the Same Haircut You Had in Your 40s – Here’s Why It Ages You

    Stop Getting the Same Haircut You Had in Your 40s – Here’s Why It Ages You

    For many women over 60, stop getting the same haircut you had in your 40s is the single most important advice for looking younger. It’s not because the cut was unflattering then—it’s because your hair, face, and lifestyle have changed. The long layers that once added movement may now look limp and stringy. The blunt bob that felt chic may now accentuate jowls. The center part that suited your face may now emphasize asymmetry. Clinging to a style that no longer serves you is one of the fastest ways to look older than your years. In this guide, you’ll discover why your 40s haircut is aging you now, how to identify what’s no longer working, and how to update your look for a more youthful, modern appearance. If you’re ready for a change, these best bob haircuts for women over 50 with thin hair offer excellent starting points.


    How Your Face Has Changed (And Why Your Haircut Needs to Keep Up)

    Your face in your 60s is not the same as your face in your 40s. Here’s what’s changed:

    ChangeWhat HappenedWhy Your Old Haircut Doesn’t Work
    Loss of facial volumeCheeks flatten; skin loses elasticityHair that once framed fullness now frames hollows
    Jawline softeningJawline becomes less definedBlunt cuts that end at the jaw emphasize softness
    Forehead changesHairline may recede; forehead may appear largerHeavy bangs can look severe; center parts expose more forehead
    Neck changesSkin on the neck may loosenLonger hair draws attention to the neck
    Face shape shiftOval faces may become rounder; heart faces may become narrowerA cut that balanced your 40s face may now imbalance it

    For women noticing these changes, these best haircuts for round faces over 50 offer updated options.


    The #1 Sign Your Haircut Is Aging You

    Your haircut looks “dated” rather than “classic.”

    There’s a difference between a timeless style and a style that belongs to a specific decade. If someone can look at your hair and guess which decade you got it from, it’s aging you.

    Dated (Ages You)Classic (Timeless)
    Teased, high-volume helmet hairSoft, natural volume at the crown
    Overly layered “feathered” cutsGentle, blended layers
    Razor-cut, wispy endsClean, healthy ends
    Severe geometric shapesSoft, curved lines
    Heavy, blunt bangsSide-swept or curtain bangs

    For women with thinning hair, these short hairstyles for thin fine hair offer modern, volume-building options.


    5 Ways Your 40s Haircut Is Aging You Now

    1. It’s Too Long

    Why it ages you: Long hair drags the face down, emphasizing sagging and wrinkles. It also draws attention to the neck, which may have changed with age. Very long hair on older women can also read as “trying too hard” to look young, which backfires.

    What to do instead: Go shorter. A chin-length bob, a lob (long bob), or a pixie can lift your face and create a more youthful silhouette.

    The “Lip Line” Test: A flattering length hits between your chin and collarbone. Hair longer than that can drag your features down.

    Better options: These angled bob for women styles offer face-lifting angles.

    2. The Layers Are Too Long (or Too Short)

    Why it ages you: Long layers that were designed to add movement when your hair was thicker can now look stringy and sparse. Overly short choppy layers (popular in the 2000s) can look dated and can make thin hair look even thinner.

    What to do instead: Soft, subtle layers that remove weight but maintain density. The goal is volume at the crown, not separation through the ends.

    The “Crown Lift” Test: Run your fingers through your hair. Does it fall flat at the crown? Add shorter interior layers to create lift.

    Better options: These stacked bob for fine hair styles build volume at the crown.

    3. Your Part Is Wrong

    Why it ages you: A center part that worked with symmetrical features in your 40s can now emphasize asymmetry, a larger forehead, or thinning at the crown. Very deep side parts can also look dated.

    What to do instead: A soft side part (about 1 inch off center) creates asymmetry that slims the face. It also adds height at the crown, which is universally flattering.

    The “Part Test: Try a soft side part. Does your face look more lifted? Does your hair have more volume at the crown? If yes, you’ve found your new part.

    Better options: These side-parted styles offer face-framing benefits.

    4. The Ends Are Wispy or See-Through

    Why it ages you: Wispy, transparent ends signal thinning or damage. They make your hair look sparse and unhealthy, regardless of how full it is at the roots.

    What to do instead: Blunt or softly textured ends create the illusion of density. A clean line at the perimeter makes hair look thicker and healthier.

    The “Ends Test: Look at your ends against a white background. Can you see through them? If yes, it’s time for a trim—and possibly a new shape.

    Better options: These blunt bob with soft ends styles maximize density.

    5. The Style Is “Stuck” in a Past Decade

    Why it ages you: Certain hairstyles are strongly associated with specific decades. Wearing them now causes people to mentally date you—and not in a good way.

    Dated StyleDecadeModern Alternative
    Big, teased curls1980sSoft, natural waves
    Razored, choppy layers1990s/2000sGentle, blended layers
    Severe geometric bob1960sSoft, angled bob
    Heavy, blunt bangs1970sCurtain or side-swept bangs
    Very long, one-length hair1970s/1990sLob with subtle layers

    What to do instead: Update your style with modern elements while keeping what works for your face shape.

    Better options: These 2026 trending short hairstyles offer modern, fresh alternatives.


    How to Update Your Haircut Without a Dramatic Chop

    You don’t need to go from waist-length to a pixie overnight. Here’s how to transition gradually.

    Step 1: Identify What’s Not Working

    Ask yourself honestly:

    • Does my hair make me feel confident, or do I hide it in ponytails?
    • Do people compliment my hair, or is it never mentioned?
    • Does my hair match how I feel inside (youthful, vibrant) or how I fear I look?

    Step 2: Start with a Few Inches

    Take off 2–3 inches first. You may be surprised how much fresher a few inches of length removal can look.

    Step 3: Update Your Part

    Try a soft side part instead of a center part. This simple change takes seconds and costs nothing.

    Step 4: Add Crown Layers

    Ask your stylist for interior layers that add lift at the crown without changing the perimeter length significantly.

    Step 5: Change Your Bangs

    If you have heavy blunt bangs, grow them into curtain bangs. If you have no bangs, try face-framing layers.

    For women hesitant about change, these low maintenance haircuts for women over 50 with fine hair offer subtle, flattering updates.


    Modern Alternatives to Dated Cuts

    If You Have…Instead of…Try…
    Very long hairOne-length, no layersLob with long layers and face-framing
    Heavy bangsBlunt, straight acrossCurtain bangs or side-swept bangs
    Severe bobBlunt, geometricSoft, angled bob with texture
    Teased volumeHigh-helmet hairNatural volume with texturizing powder
    Permed curlsTight, uniform curlsLoose waves (heat or roller set)

    For women with curly hair, these curly haircuts for thin hair offer modern, volume-enhancing options.


    The Role of Color in Aging (Or Youthful)

    Your haircut isn’t the only factor. The wrong color can also age you.

    Aging Color ChoiceYouthful Alternative
    Single-process, one-dimensional colorHighlights and lowlights for dimension
    Too dark (harsh contrast with skin)Softer, lighter base with face-framing highlights
    Too light (washes out skin)Warmer tones, richer base
    Solid gray without any variationSilver-enhancing gloss or strategic highlights

    For women embracing their gray, these grey blending highlights in ash blonde offer modern dimension.


    Real Talk: It’s Not About Age, It’s About Fit

    The problem isn’t that you’re over 60. The problem is that you’re wearing a haircut designed for a different version of you. Just as you wouldn’t wear your 40s jeans (one size too small, wrong rise), you shouldn’t wear your 40s haircut.

    A 65-year-old woman with a modern, flattering haircut looks younger than a 55-year-old woman stuck in a dated style. It’s not about the number—it’s about the fit.

    For women over 70, these hairstyles for women over 70 offer age-appropriate, modern options.


    What to Ask Your Stylist

    When you’re ready for an update, say this:

    “I’ve had the same haircut for years. I think it’s aging me. Can you help me update my look while keeping some length? I’m thinking [shorter bobs, soft layers, curtain bangs, etc.]. What would you recommend for my face shape and hair texture?”

    Bring reference photos of women over 50 with haircuts you admire. Not photos from your 30s, not photos of 20-year-olds—realistic, modern styles on women your age.

    For inspiration, these women’s haircuts 2026 offer contemporary, wearable options.


    The Bottom Line

    Your 40s haircut is aging you now. Your face has changed. Your hair has changed. The cultural moment has changed. What worked then doesn’t work now. That’s not a failure—it’s just time for an update.

    The good news is that the right haircut can take years off your appearance instantly. It can lift your face, add volume, and make you feel more confident. You don’t need to chase youth—you just need to chase fit.

    The right haircut for your 60s and beyond is waiting for you. It’s time to let go of the past and step into a more beautiful present.

  • Stop Flat Ironing Your Gray Hair – 3 Reasons You’re Making It Worse

    Stop Flat Ironing Your Gray Hair – 3 Reasons You’re Making It Worse

    If you want to stop flat ironing your gray hair, you’re not alone. Many women over 50 rely on heat to smooth their silver strands after every wash. But this common habit is actually making your gray hair look worse over time. In this guide, you’ll discover 3 reasons why flat ironing damages fragile silver strands—plus healthier, heat-free alternatives that actually work.

    Gray hair is fundamentally different from pigmented hair. It’s coarser, more porous, and far more fragile. Applying intense, direct heat to delicate silver strands often backfires, creating more frizz, more damage, and a duller appearance than if you had left your hair alone. In this guide, you’ll discover 3 reasons why flat ironing makes your gray hair worse, plus healthier, heat-free alternatives for achieving smooth, beautiful silver hair. If you’re also dealing with frizz and dryness, these how to get rid of frizzy hair over 50 solutions offer complementary advice.


    Why Gray Hair Is Different

    Before understanding why flat irons are problematic, it’s essential to understand how gray hair differs from pigmented hair.

    CharacteristicGray/Silver HairPigmented Hair
    TextureOften coarser, wiry, more resistantSofter, more uniform
    PorosityMore porous (absorbs and loses moisture quickly)Less porous
    MelaninAbsent (no natural protection from UV or heat)Present (provides some natural protection)
    Oil productionScalp produces less oil; hair is drierScalp produces more oil
    CuticleOften raised, rough, or damagedSmoother, lies flatter
    ElasticityLower (stretches less before breaking)Higher

    These differences mean that gray hair cannot tolerate the same heat levels as pigmented hair. What worked in your 30s or 40s can cause significant damage in your 60s and beyond.

    For women with thinning hair alongside graying, these short hairstyles for thin fine hair offer volume-building alternatives to heat styling.


    Reason 1: Gray Hair Is Already Dry – Flat Irons Make It Worse

    The Moisture Problem

    Gray hair lacks melanin, which not only provides color but also helps retain moisture. Without melanin, the hair shaft is more porous, meaning it absorbs water quickly but also loses it just as fast.

    IssueHow Flat Irons Worsen It
    Low natural moistureHeat evaporates what little moisture remains
    High porosityHeat opens the cuticle further, accelerating moisture loss
    Decreased oil productionNo natural oils to replenish what heat strips away

    The Result: Straw-Like Texture

    Repeated flat ironing on already-dry gray hair creates a brittle, straw-like texture that no amount of conditioner can fully repair. The hair becomes stiff, rough to the touch, and prone to snapping.

    The Vicious Cycle

    Dry gray hair → Flat iron to smooth it → Heat makes it drier → More frizz → Flat iron again at higher heat → More damage

    This cycle is difficult to break but essential for hair health.

    For women with dry, brittle hair, these wash and wear haircuts for women over 60 minimize the need for heat styling altogether.


    Reason 2: High Heat Damages the Cuticle Beyond Repair

    The Cuticle on Gray Hair

    The hair cuticle is the outer protective layer. On healthy hair, the cuticle lies flat, reflecting light and creating shine. On gray hair, the cuticle is often already raised, rough, or damaged from years of environmental exposure.

    What Flat Irons Do

    Flat irons typically operate at 300°F to 450°F (150°C to 230°C) . At these temperatures:

    TemperatureEffect on Gray Hair
    300–350°FCan temporarily smooth; risk of damage with repeated use
    350–400°FDamages the cuticle; causes protein breakdown
    400–450°FSevere damage; can melt or burn fragile strands

    The “Frying” Effect

    When you apply high heat to already-porous gray hair, you’re essentially frying the cuticle. The scales of the cuticle lift, crack, or completely break off. Without a smooth cuticle:

    • Light scatters instead of reflecting → hair looks dull
    • Moisture escapes rapidly → hair becomes drier
    • Strands catch on each other → more tangles and breakage

    Once the Cuticle Is Gone, It’s Gone

    Damaged cuticles cannot be repaired. Products can temporarily coat and smooth them, but the structural damage is permanent. The only solution is to cut off the damaged ends and start fresh.

    For women with damaged hair, these best bob haircuts for women over 50 with thin hair can help you cut away damage while maintaining style.


    Reason 3: Flat Irons Create More Frizz in the Long Run

    The Frizz Paradox

    Ironically, the very tool you’re using to remove frizz is creating more frizz over time.

    Short-Term EffectLong-Term Effect
    Smooth, straight strandsDamaged cuticle
    Temporary shinePermanent dullness
    Frizz-free for a dayIncreased frizz between styling

    Why This Happens

    A smooth cuticle reflects light and resists humidity. A damaged cuticle:

    • Absorbs humidity from the air → swells → frizzes
    • Catches on itself → creates tangles and rough texture

    The more you flat iron, the more you damage the cuticle. The more damaged the cuticle, the more frizz you’ll have—even when you don’t use heat.

    The “Heat Training” Myth

    Some believe that regularly flat ironing “trains” curly or wavy hair to be straighter. This is a myth. You’re not training your hair; you’re breaking it down. The temporary smoothness comes at the cost of long-term health.

    For women with wavy or curly gray hair, these curly haircuts for thin hair offer styling options that work with your natural texture, not against it.


    How to Tell If Your Gray Hair Is Heat-Damaged

    SignWhat It Means
    White dots or split ends at the tipsHeat has melted or fractured the hair shaft
    Hair feels “mushy” when wetProtein breakdown; the hair has lost its structure
    Hair snaps when gently pulledLoss of elasticity
    Frizz appears immediately after flat ironingThe cuticle is so damaged it won’t lie flat even with heat
    Dull, lackluster appearanceCuticle damage scatters light instead of reflecting it

    For women with heat-damaged hair, these low maintenance haircuts for women over 50 with fine hair can help you trim away damage while maintaining style.


    Safer, Heat-Free Alternatives for Smooth Gray Hair

    You don’t need a flat iron to achieve smooth, beautiful silver hair. Here are healthier alternatives.

    1. Air-Dry with Smoothing Products

    How: Apply a smoothing cream or anti-frizz serum to damp hair. Comb through. Allow hair to air-dry completely. For straighter results, gently pull hair taut with your fingers while it dries or use a wide-tooth comb periodically.

    Best for: Wavy or slightly curly gray hair

    Products to look for: Silicone-free smoothing creams, argan oil, marula oil

    2. The “Wrap” Method for Straight Hair

    How: On damp hair, apply smoothing product. Use a boar bristle brush to brush hair flat against your head in a circular “wrap” pattern. Secure with duckbill clips. Allow to air-dry completely (2–4 hours or overnight). Unwrap to reveal smooth, straight hair.

    Best for: Naturally straight or lightly wavy gray hair

    Time investment: Longer than flat ironing, but zero heat damage

    3. Roller Setting

    How: On damp hair, apply setting lotion or mousse. Use large Velcro rollers (2 inches or larger) to set hair. Allow to dry completely (under a hooded dryer or air-dry for several hours). Remove rollers and gently brush.

    Result: Smooth, voluminous, bouncy hair without heat damage

    Best for: Gray hair that needs volume and smoothness

    4. Overnight Blowout (Heat-Free)

    How: On damp hair, apply smoothing product. Divide hair into 2–4 sections. Wrap each section around a soft foam roller or flexi rod. Secure and sleep on them. In the morning, remove rollers and gently separate with fingers.

    Result: Smooth, straight, or wavy depending on roller size

    Best for: Women who want to style hair while they sleep

    5. Professional Keratin Smoothing Treatment (Low-Heat Options)

    How: A salon treatment that smooths the cuticle and reduces frizz for months. Formaldehyde-free options (like Cezanne or Saphira) use lower heat and gentler ingredients.

    Note: Even these treatments involve some heat and chemicals. Discuss your hair’s condition with a stylist first.

    For women considering professional treatments, these ingredients to avoid in hair products for women over 50 help you make informed choices.


    If You Must Flat Iron: Damage-Reduction Tips

    If you’re not ready to give up your flat iron entirely, follow these rules:

    DoDon’t
    Use the lowest effective heat (start at 250°F, increase only if needed)Exceed 300°F on fine or fragile gray hair
    Always use a heat protectant sprayFlat iron dry, unprotected hair
    Flat iron once a week or lessFlat iron daily
    Take breaks between heat styling sessionsUse multiple heat tools (blow-dryer + flat iron) in one session
    Deep condition weeklySkip conditioning treatments
    Flat iron on completely dry hairFlat iron damp hair (causes steam burns)

    The “Cool Shot” Alternative

    After blow-drying, use the cool shot button on your blow-dryer to set your style. Cool air closes the cuticle without heat damage, creating smoothness and shine.

    For women with colored hair, these stop using box dye after 60 insights help protect your color investment.


    How to Transition Away from the Flat Iron

    Giving up your flat iron can feel scary, especially if you’ve relied on it for years. Here’s how to transition gradually.

    Week 1-2: Reduce Frequency

    Start by flat ironing every other day instead of daily. On off days, try air-drying with smoothing products or a loose braid.

    Week 3-4: Lower the Heat

    Reduce your flat iron temperature by 25–50°F. You may need to go over sections an extra time, but the lower heat is worth it.

    Week 5-6: Try Heat-Free Alternatives

    Experiment with roller setting or the wrap method on a day when you have time. The results may surprise you.

    Week 7-8: Embrace Your Natural Texture

    By now, your hair will be healthier and more moisturized. You may find you prefer your natural silver waves to the flat-ironed look.

    For women embracing their natural texture, these grey blending highlights in ash blonde offer color options that complement your silver.


    The Bottom Line

    Flat ironing gray hair is a losing battle. The tool that promises smoothness actually damages the cuticle, increases dryness, and creates more frizz in the long run. Gray hair is already more fragile and porous than pigmented hair. Applying intense heat only accelerates its decline.

    The good news is that you don’t have to choose between smooth hair and healthy hair. Heat-free alternatives—air-drying with smoothing products, roller setting, and the wrap method—can give you beautiful results without the damage.

    Your silver hair deserves better. Put down the flat iron and let your natural beauty shine through.